Friday, 8 September 2023

Free Pattern Friday: Hat and Leggings for Babies


Welcome to my monthly 'Free Pattern Friday' feature, where I road test a free sewing pattern or tutorial: sometimes a children's one, sometimes an adult's one. I publish these posts every first Friday of the month, timed to provide inspiration for those who plan to get their sew on over the weekend. I firmly believe that, if you pick your projects carefully, sewing doesn't have to be a crazy-expensive way to clothe yourself and your family. Thanks to all the amazing pattern designers who have offered up their hard work for us to enjoy for free.


Today you've got a two free pattern reviews for the price of one! The reason why I'm posting both of these today is because they make such a sweet pairing: they can be worn together AND make a lovely set to give as a gift. If you don't have any babies in your life at this time, and no one you know is currently expecting a child or grandchild, I recommend you bookmark this post for the future. And if you're in that phase of life when it feels like everyone around you is having babies, you could make a few in advance to have on hand as gifts.

Big thanks to Sweet Red Poppy for creating the Double Top Knot Baby hat pattern for free, and to Patterns for Pirates for creating the Petite Pegs pattern for free. I really wish both of these patterns had been around when I was pregnant with my babies!


(image source: Sweet Red Poppy)


Pattern type: 

The Double Knot Baby hat pattern is ridiculously cute and consists of just two pattern pieces: the hat and the band. The Petite Pegs are a casual leggings style with knit waistband (no elastic), with a rise designed to easily cover a nappy. There are four leg lengths included: shorties, bike, capri and ankle. They also consist of two pieces: the legs and the waistband. 


(image source: Patterns For Pirates)


Sizing info:

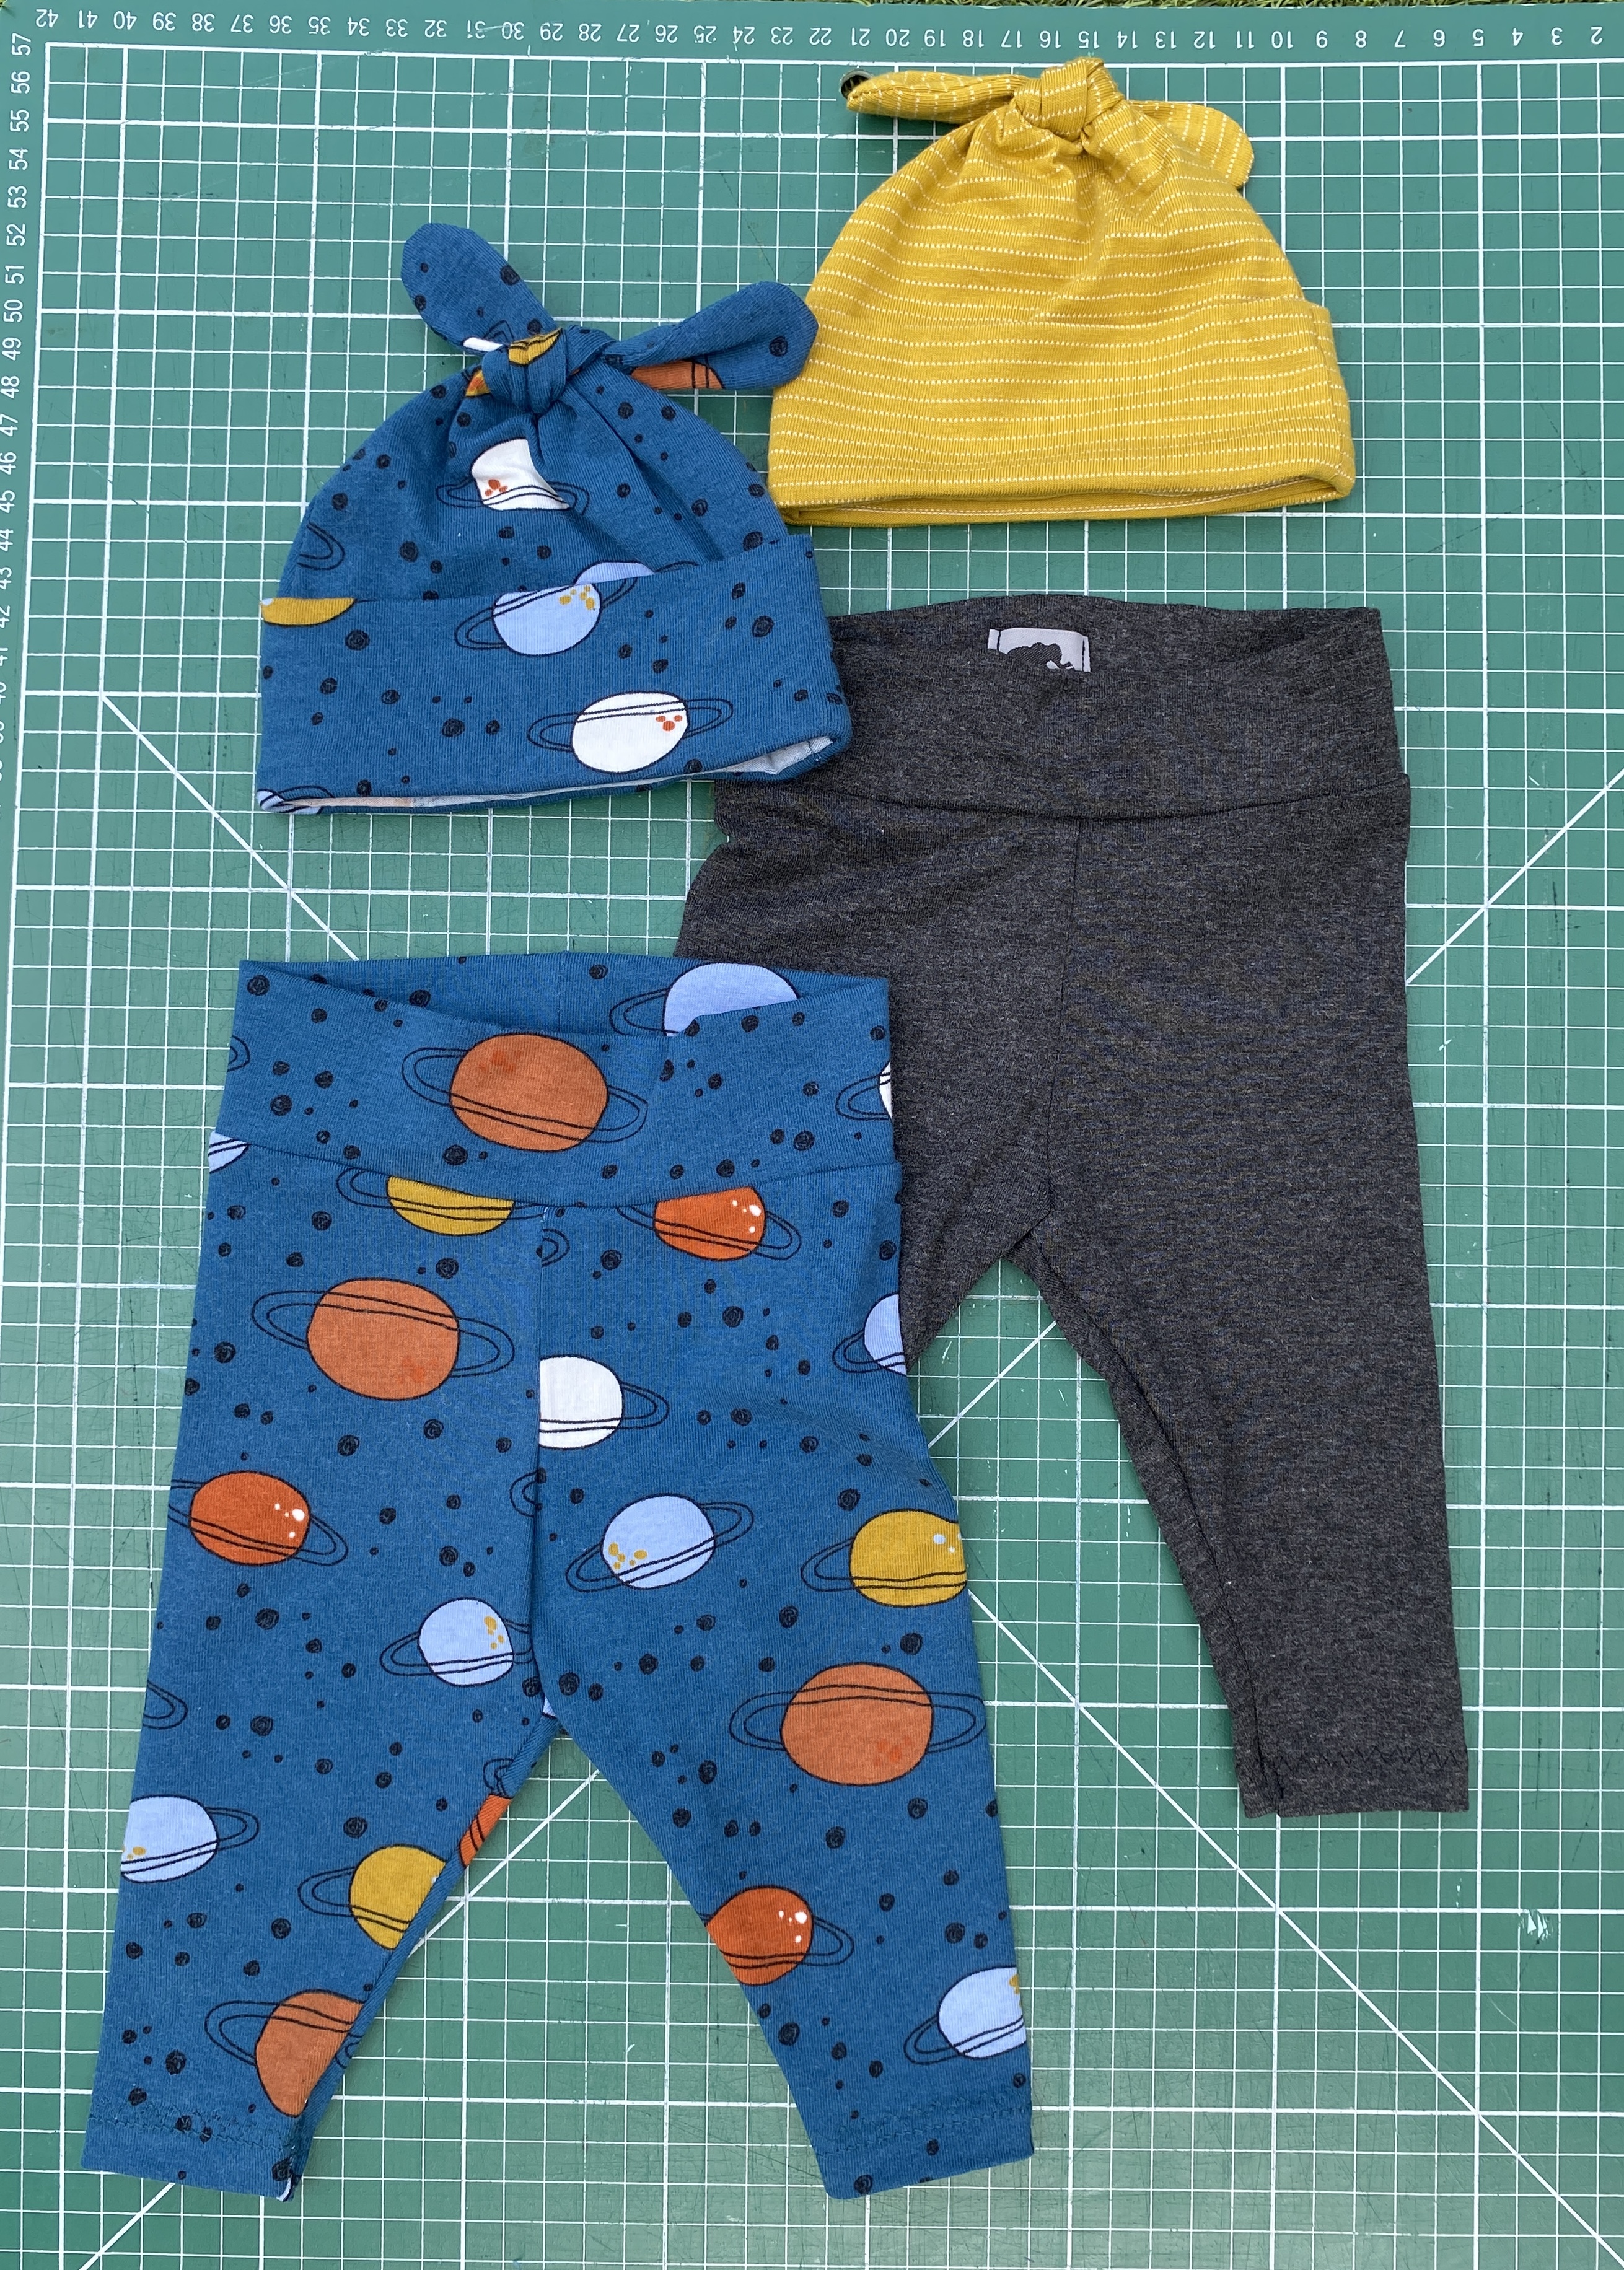
The hat pattern includes six sizes ranging from Newborn to 2Y, and the leggings from Premie to 12 months. After much debate, I created these two sets both using the 3-6 months size for the hat and Newborn for the leggings. I was scared of making the hat too small and them being useless, so I erred on the side of caution with that. I felt more confident going with the Newborn size for the leggings. As you might be able to tell from the tiny feet in the pic below, my friend's child was just a couple of weeks old, to give you a sense of the fit. 

As well as the age of the baby, you should also pick your pattern sizing in relation to the amount of stretch in your fabric: going for a smaller size for super stretch knits, or a larger size if the stretch percentage is much lower. 


Fabric info:

For the hat pattern, it is recommend that you use a medium-weight knit fabric with a content of 95% Cotton, 5% Lycra/Spandex. But then a couple of paragraphs down includes a greater list of other types of knit that could be suitable. I'd probably stick to the cotton/spandex (AKA Lycra or elastane) jerseys because I would be concerned that the other suggestions might be a touch too thick for that tight curve at the top of the knots, or quite slippery and therefore a challenge to work with. 

For the Petite Pegs pattern, they recommend a four-way stretch fabric with at least 50% stretch and good recovery. They also emphasise Lycra or spandex in the content, which is particularly important for this pattern so they stay in place and don't fall down, seeing as the pattern doesn't use elastic at the waist. 


The space print fabric (leftover from these men's PJs - another free sewing pattern!) I used here is exactly on spec for these patterns: cotton/elastane with a good four-way stretch. The mustard fabric for the second hat wasn't quite as stretchy, and more of a two-way stretch, than a true four-way. But I've also used this fabric for making undies and they hold up fine so I was confident in my choice, particularly because I wasn't making the smallest size of hat. The grey jersey I used for the second pair of leggings was probably more like a viscose/elastane jersey. I got this from a charity shop many years ago and it was unlabelled so I can't be sure. It's quite drapey and lighter in weight than the other two but it's really soft, so I knew it would feel particularly nice against the skin. 

Of course, with both of these patterns, I'm going to emphasise what excellent potential scrap busters they are! They take so little fabric, and you can play around using different constrasting fabrics for the bands and the main parts. For the leggings, you could even use two different fabrics for the two legs. And with the hat, you could use different fabrics for the front and back hat pieces. But as always with combining different fabrics, just make sure they have the same amount of stretch and a similar weight. 


Findings:

Downloading the print-at-home pattern for the hat was easy enough. The instructions are in the form of a blog post that you read directly on their site. There's also a YouTube video to support you if you'd like, but I didn't watch it. The instructions on the blog post are good, however it's one of those sites that is dripping with distracting ads. Which I accept because that how this person's business models works in order for them to offer free patterns, including this one. 

Generally speaking, I think the instructions (when you can find them between the adverts) are great. However, there's one step of the process that I did differently and I'm glad I did. The last step gets you to attach the band to the hat with the band on the right side of the hat. You then press the seam allowance up into the hat. My feeling is that the seam allowance would not stay put and probably poke out the bottom because it's not stitched in place. To prevent that, I stitched the band to the WRONG side of the hat, so when you flip the band out to the right side, the seam allowance will always be hidden. I would also recommend tacking the band in place with a few invisible stitches. 


The leggings pattern, by contrast, is accessible via the shop and cart on the Patterns for Pirates website. You have to create an account and go through more steps (you don't need to input any payment details). However, you then have a downloaded file that includes the pattern AND instructions - no ads. 

The construction process was a breeze. The only thing, and this is very minor and personal, is that I dislike a 1/2" seam allowance! It's not one I have to use very often, so I can't visually easily where to position a project on my overlocker so I'm trimming off the correct amount. Oh, and one point I'd make that I think they missed is to add some kind of tag or label so the back is easily identifiable. When parents are trying to change a wriggly baby whilst sleep deprived, they need all the help they can get! But honestly, that's it. I could make these leggings all day.


Would I make them again?

Hell yes! I've really whittled down my stash of jersey fabrics over the last couple of years, but if some more suitable fabric came my way, I'd definitely be making more of the leggings in particular. I do really like the two of these patterns together as a set, so if there are any new babies on the horizon, I'd love to do this again. 

Wednesday, 30 August 2023

Viscose Scraps Patchwork Trousers


Hello! First up, apologies for these terrible, dark photos. We tried to take some pics just before we went on holiday but clearly the light levels were too gloomy. So even after some editing you still can't see what's going on too well. Anyway! 

I tend to find my projects largely fall into one of two camps: 
  1. A garment or accessory I really want to wear or use
  2. An idea or thought experiment or that I want to see come to fruition 
This project was definitely from the second camp. In my experience, when it comes to working with scraps, slinky woven fabrics such as viscose and Tencel are the hardest to find uses for. I've tried piecing them together to make a garment from previously, but it didn't hold up very well because of my choice of seam finishing, plus I wasn't in love with the outcome stylistically. So I wanted to see if I would have more success by using a similar piecing technique to the one I adopted for my patchwork quilted denim jacket project. 


Piecing:

I started by getting all my slinky woven scraps out and selecting some that formed a nice colour palette. As you can tell, I'm really into autumnal shades such as mustard, rust, teal and forest green. It's fun seeing my previous garment projects represented in this selection! There's leftovers here from a dress that I still wear a fair bit, a Vali top that I love, a rust coloured tank that didn't work for me that I gave to a friend, my slinky Luna pants, plus a couple of bits from the scraps bin at work. 


The next step was to dissect larger scraps and trim everything up into rectangles. I find my rotary cutter, cutting mat and set square make this part of the process pretty quick. Then with the rectangles laid out, I started to find a pair that each have an edge about the same length. I pined, stitched and overlocked them together, then pressed the seam allowances to one side (I do this in batches to save time and energy). 

I would then add another shape to that joined pair, or another pair of shapes, with an edge a similar length and so on. The shapes then started to come together to make larger 'islands' of fabric. You'll often get to a point where you need to cut some 'custom' shapes to make the design work, so I kept some of the original scraps back for that. The main piece of advice is to not overthink the piecing process. It's super easy to spend too long questioning the position of each rectangle in relation to the rest and drive yourself insane!


Pattern:

It took quite a long time to eventually land on what I was actually going to make from these pieced together scraps. At first I thought a top, then I realised that I'm in far shorter supply of bottoms and I thought a wide-legged pair of culottes might look good. Then I realised I had enough scraps to make full-length, palazzo-style trousers, so I went with that plan. The pattern I created for this project is a hybrid of two other patterns. I used the top part of the trouser section from the Peppermint magazine/Ready to Sew Valley jumpsuit (then lengthened the rise in both the front and back). Plus I used the leg width and shape of the Wide-leg jumpsuit pattern by The Assembly Line, but eliminated the side seam as per the Valley jumpsuit. Having no side seam was going to result in less waste and fewer awkward shapes of pieced fabric at the side seams. 


Construction:

The 'fabric' I was creating by piecing scraps together slowly continued to grow until I could see that it had become big enough to fit the pattern piece on top. Obviously, I needed two of these large shapes of fabric. Then I cut out a pair of the pattern piece and constructed then garment as if I had cut it out of a flat piece of virgin fabric. The waist is elasticated, the channel constructed by simply turning down the top edge twice and edge stitching. 


Thoughts:

I LOVE that I managed to make an entire garment from leftovers from other projects, the scraps that would so often just go into the bin. I'm not sure if I'm super into the finished look, but I'm certainly into how they feel! Tencel and viscose fabrics usually have a wonderful drape to them anyhow, but all the additional seaming on this project has given the fabric some extra weight and made them somehow feel extra luxe. I do notice the seams on the reverse side a little against my skin, but I wouldn't describe it as unpleasant or annoying. 

I really hope that more sewers/sewists develop the habit of saving their scraps and leftovers where possible to use for other things. It's a good way to extract more value from the natural resources and the financial costs that went into the fabric in the first place, and it can keep textiles out of landfill for a bit longer. 


Friday, 4 August 2023

Free Pattern Friday: Siem Shorts for Kids


Welcome to my monthly 'Free Pattern Friday' feature, where I road test a free sewing pattern or tutorial: sometimes a children's one, sometimes an adult's one. I publish these posts every first Friday of the month, timed to provide inspiration for those who plan to get their sew on over the weekend. I firmly believe that, if you pick your projects carefully, sewing doesn't have to be a crazy-expensive way to clothe yourself and your family. Thanks to all the amazing pattern designers who have offered up their hard work for us to enjoy for free.

This month I'm returning to a pattern that I have made and loved previously. It's a unisex shorts pattern designed for knit fabrics called the Siem shorts pattern (pronounced 'seam') by Bel'Etoile patterns. I reviewed it two years ago, and I have been wanting to make it again ever since. I really love the retro stylings, plus it's a fantastic way to use up smaller amounts of knit fabrics that aren't suitable for undies making. Let's get into my experience this time round....
 

Pattern type: 

The Siem shorts pattern is a retro style designed for knit fabrics. The pattern consists of three pieces: front, back and waistband. Plus you need binding (preferably stretchy) to finish the edges. 

Sizing info:

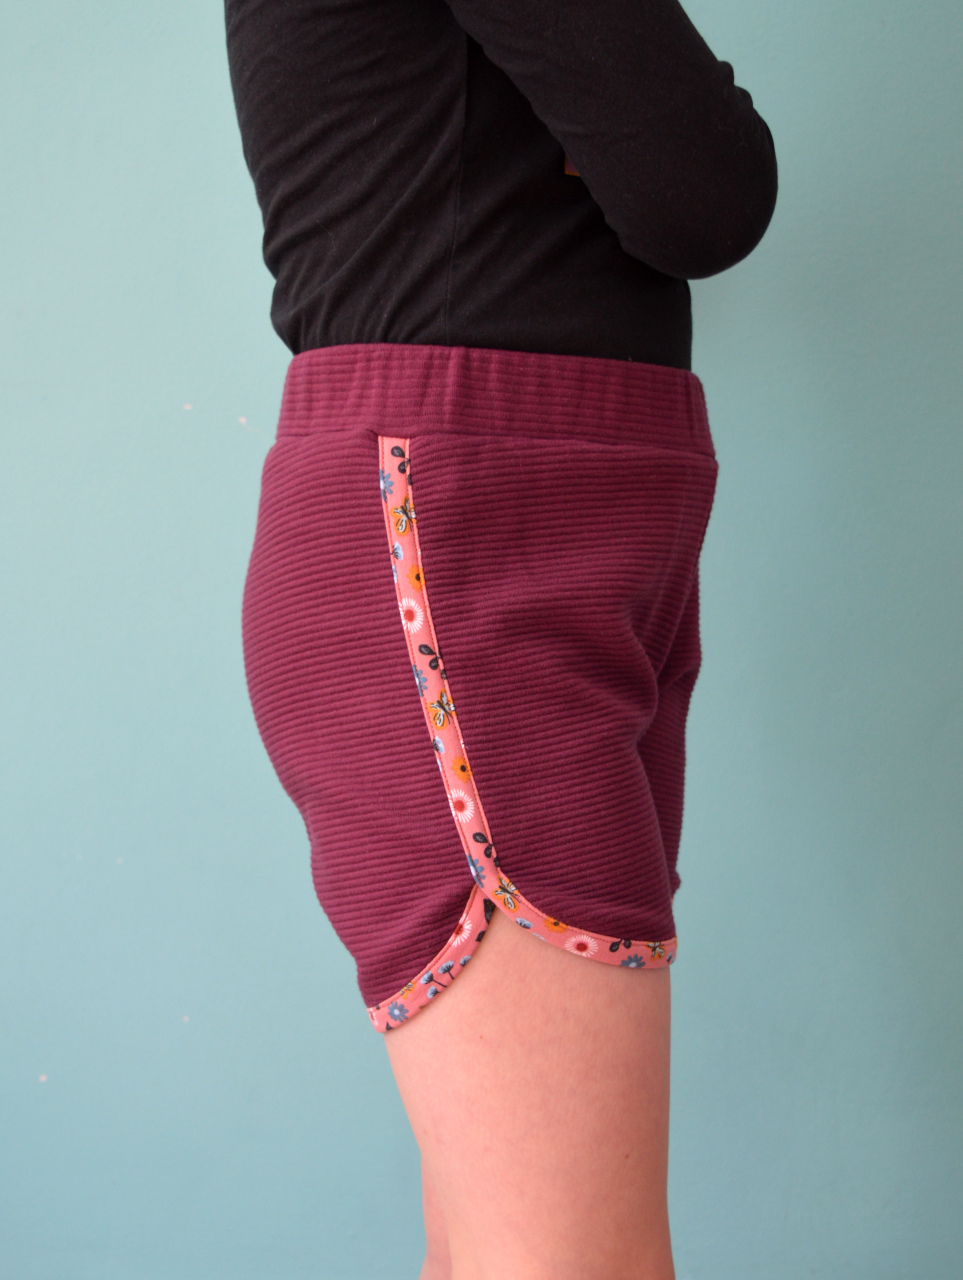
This pattern is graded between a generous 98cm (approx. 3 years) and 164cm (approx. 14 years) which I really appreciate it. I made the size 152 this time, going by my daughter's hip measurement as opposed to her height, and the sizing is pretty perfect. 


Fabric info:

Fabric types that are listed as suitable for this pattern include jersey, ponte roma, french terry and sweatshirt knits. This is such a fantastic pattern for using up scraps and leftovers from other projects, so as long as the knit is pretty stable and isn't too light-weight it's probably worth a try. Last time I made and reviewed this pattern, I declared that I'd love to make these in a classic retro towelling or velour knit. My wish was granted when I found this discarded small remnant of pink velour at work. The burgundy pair are made using scraps of ponte roma that have been hanging around in my stash for a couple of years. 

The pattern calls for 'stretch bias binding' for finishing the edges. That's not a super common item to find in fabric shops or haberdashers, plus I'm still participating in the Last Sewist Standing challenge so I can't buy new sewing supplies at the moment anyway. So for the pink pair I used strips of white cotton ribbing (the kind that's sold for cuffs and neckbands). For the burgundy pair, I chanced my arm with something a bit thicker, and used a strips of printed french terry. I cut the strips along the DOGS (direction of greatest stretch) rather than on the bias.


Findings:

The pattern and the instructions come in separate PDF files. The pattern is easily obtained via the Bel-Etoile website, with no sign-ups to anything required. I was super happy to find that the pattern file includes the layers function which is great for saving ink, particularly when the pattern is graded to such a generous number of sizes. 

The instructions document was equally user-friendly. The only thing I felt was missing was some advice on making your own binding. It is an easy enough process to do, but the lack of that step in the instructions may cause a beginner sewer/sewist to have a bit of a head-scratch. This time I did remember that SEAM ALLOWANCE IS NOT INCLUDED IN THIS PATTERN. However, it did take me a while to work out that it's not necessary to add allowance to the curved edges. 


So I kind of messed the fit up a bit on these. When I made this pattern for my daughter two years ago, she found them to sit too high on her waist for her liking. This time, I made the burgundy pair as per the pattern and she experienced the same problem again. As before, she kept pulling them down to sit on her hips which resulted in a bunching of excess fabric at the front. So I unpicked the waistband and lowered the waist, particularly at the front. I made the same change to the pattern before cutting out the pink pair (see above for the pattern pieces with the new cutting line drawn in). Except now, as you can see from the picture below, that has resulted in the front rise being too short and a whole world of ugly tightness (*major eye roll*!). 
I think I've also stitched the side seam down too far on the burgundy pair as there's some tightness where the curve begins. I'll probably unpick it a bit at some point. 

But these things are my mistake! Don't let that put you off this super cute pattern. 


Customisation ideas:

Stealing my own ideas from last time:

  • Adding patch pockets to the back
  • Adding front pockets with curved pocket openings and matching bound edges like these 
  • Lengthening or shortening the legs if the wearer has a different preference
  • Applying a cute patch or decal for extra vintage coolness

Would I make it again?

YES! I have to work out how to alter where the waist of these shorts sit on her body without messing up the rise length. But I'd love to make these again in the future if she still likes the style in a year or so. 


Friday, 7 July 2023

Free Pattern Friday: Laminated Toiletry Bag Tutorial


Welcome to my monthly 'Free Pattern Friday' feature, where I road test a free sewing pattern or tutorial: sometimes a children's one, sometimes an adult's one . I publish these posts every first Friday of the month, timed to provide inspiration for those who plan to get their sew on over the weekend. I firmly believe that, if you pick your projects carefully, sewing doesn't have to be a crazy-expensive way to clothe yourself and your family. I also firmly believe that pattern designers deserve to be properly paid for their work, so if you enjoy using a pattern and can afford to do so, make sure you support that designer. Some designers' websites offer the option to make a donation, alternatively you can buy one of their paid-for products. If you can't afford to do so, you can support the designer by sharing your project via social media to help draw more attention to their work. Thanks to all the amazing pattern designers who have offered up their hard work for us to enjoy for free.

Yes!!! I promised that the Free Pattern Friday series would be back around the summer, time and today I'm making good on that promise. Since the last post in the series that I published back in January, I've found a number of free patterns and tutorials that I genuinely wanted to try, to make things that I genuinely think will be useful for my family. Starting with this one! 

Whilst prepping for the Travel, Sustainability and Sewing episode that I made for my podcast with return guest Shams el Din Rogers, I decided to wanted to make a couple of toiletry bags for my family to use for upcoming trips. I was inspired by some awesome bags and pouches that another podcast guest, Rachel Kirby, made earlier this year for her trip to the US. Now, I probably could have figured this out myself. But you know, sometimes you just want to be told what to do! So after some sniffing around, I found this post featuring 40+ Zip Pouch Tutorials on Polkadot Chair, which led me to the Laminated Toiletry Bag Tutorial, also by Dolkadot Chair. Big thanks to them for putting this together for free. If you've got some trips coming up and your wash bag, makeup bag, medicine pouch, or anything-else bag situation isn't looking very strong, you could quickly and easily whip yourself up a new one using fabric from your stash. 


(image source: Polkadot Chair)


Pattern type:

The tutorial is for making a simple, lined, water-resistant wash bag that closes with a zip.

Sizing info:

If you follow the measurements in the tutorial (which are in inches), the resultant bag will be about 24cm wide X 17cm tall (9 1/2" X 7"). A 12" - 14" zip is also required. This makes a small-to-medium sized wash bag, perfect for one person going away for a few nights to a week if they don't use too many products. If you're going for longer, or you want to fit a couple or a family's supplies in it, you'll want to make it bigger. It'd be super easy to change the size and dimensions by cutting the rectangles to your own specification. You can also make a subtle alteration to the dimensions when it comes to stitching the corners by altering the depth.

Fabric info:

The fabrics used in the tutorial are matte laminated cottons, which are probably A LOT softer and easier to sew than the vinyl scraps I had to hand. But sometimes scrap busters can't be choosers. I'm pretty sure mine will be more robust in the long term anyhow. I used some coated vinyl stuff, the kind that's sometimes used to cover tables when kids are around, that was leftover from my rain coat. (BTW, that raincoat was made nearly eight years ago and is still going strong.) Whilst I was hunting through my stash to find the sailboat vinyl leftovers, I unearthed this kitsch, blossom print vinyl that I bought close to twenty years ago! Which meant I was able to make two that could be easily distinguished from each other. I'm wondering if PUL might also work for the lining of these type of bags.


Findings:

If you're looking for a quick and simple tutorial to hold your hand through making a zip pouch, then this one is for you. However, if you'd like to make something a little more refined, with a more pleasing zip finish such as this, then it probably isn't. I'm not sure how viable that alternative, neater kind of zip finish is for this kind of laminated or vinyl fabric anyway, but I might trial that with some 'regular' fabric. Other options include a washbag with an extended zip tape like a lot of shop bought ones have such as this. Or if you'd like a different shape, then something like this or this might be more up your street. 

Generally speaking, the tutorial was easy and pleasant to follow. There was little-to-nothing about this tutorial that made it specific to water-resistant fabrics, other than a link to another post about sewing laminate fabrics, and a link to where you can buy laminate fabrics on Etsy. The one thing I really didn't enjoy about this tutorial, is that it's one of those websites that is dripping in distracting ads. I understand that that is the business model that allows them to offer this content for free, but it still annoys me. 

Customisation ideas:

Off the top of my head, you could:

  • add internal or external pockets to keep ear plugs or something else that's small
  • alter the size, shape and depth
  • use a non waterproof fabric on the outside, and a vinyl, laminate or PUL fabric on the inside only, particularly for a makeup case or other pouch that's less likely to sit in a pool of water!
  • add a label, name tag, decal or embroidery to personalise it or make it easier to return to its owner lost (you may have guessed that I'm thinking of my kids here)

Would I use this tutorial again?

Yes! And I have. I had some seeds that I wanted to send to a friend, so I made her a smaller version of this to put them in. For that, I used the same kitsch vinyl on the outside to keep the seeds away from moisture, but I used a scrap of gingham cotton for the lining. 

Thursday, 22 June 2023

Fabric Godmother's Peony Dress Pattern


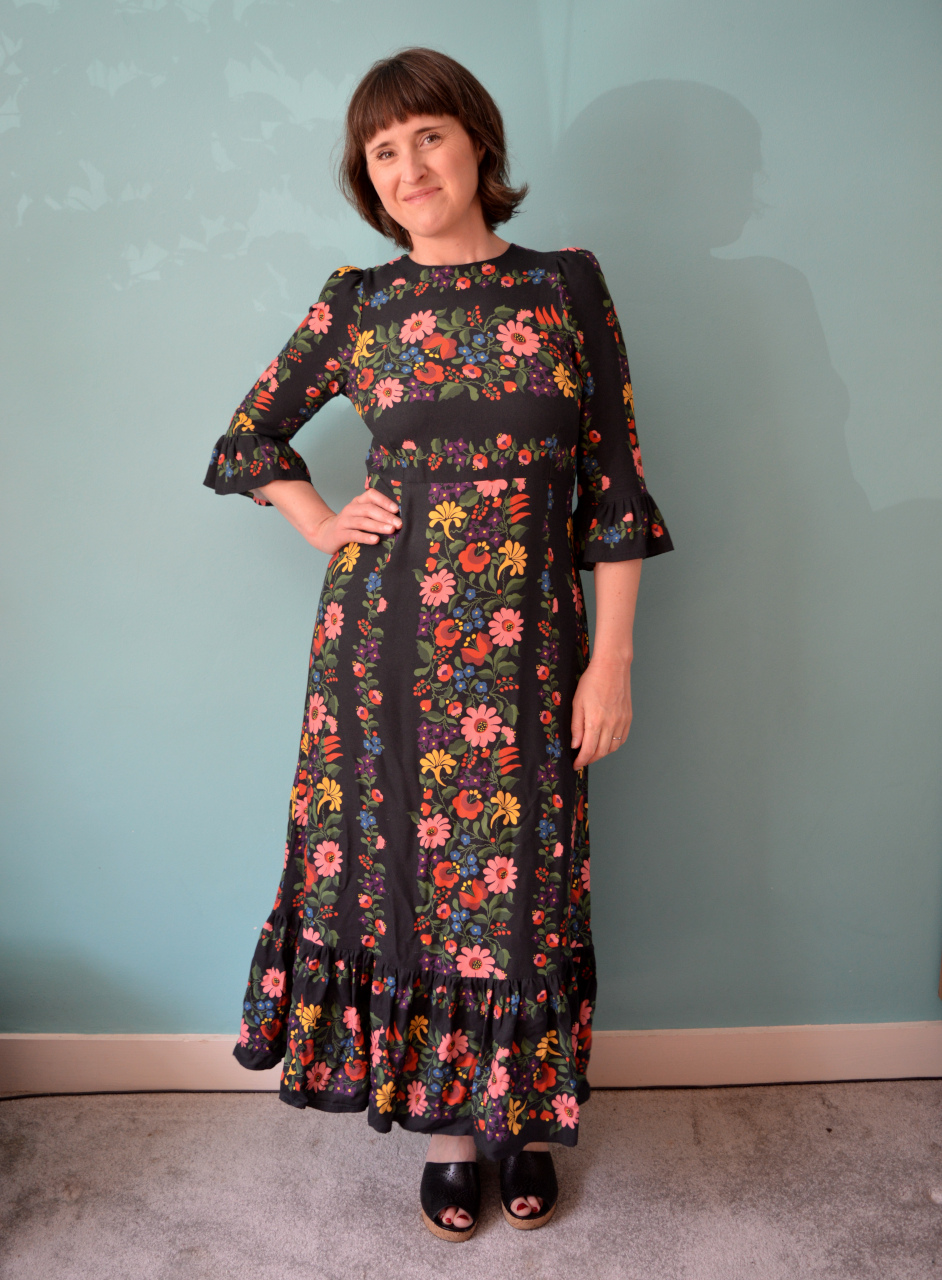
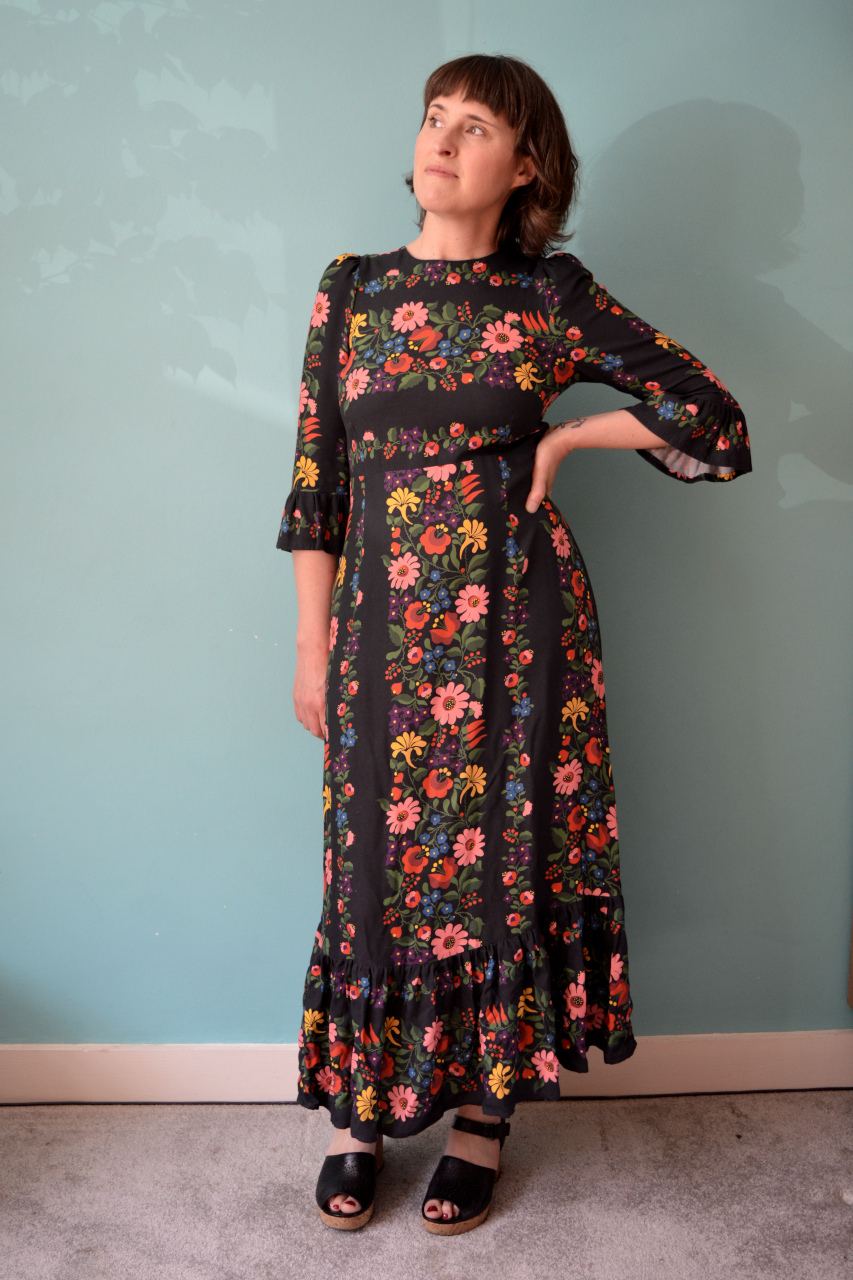
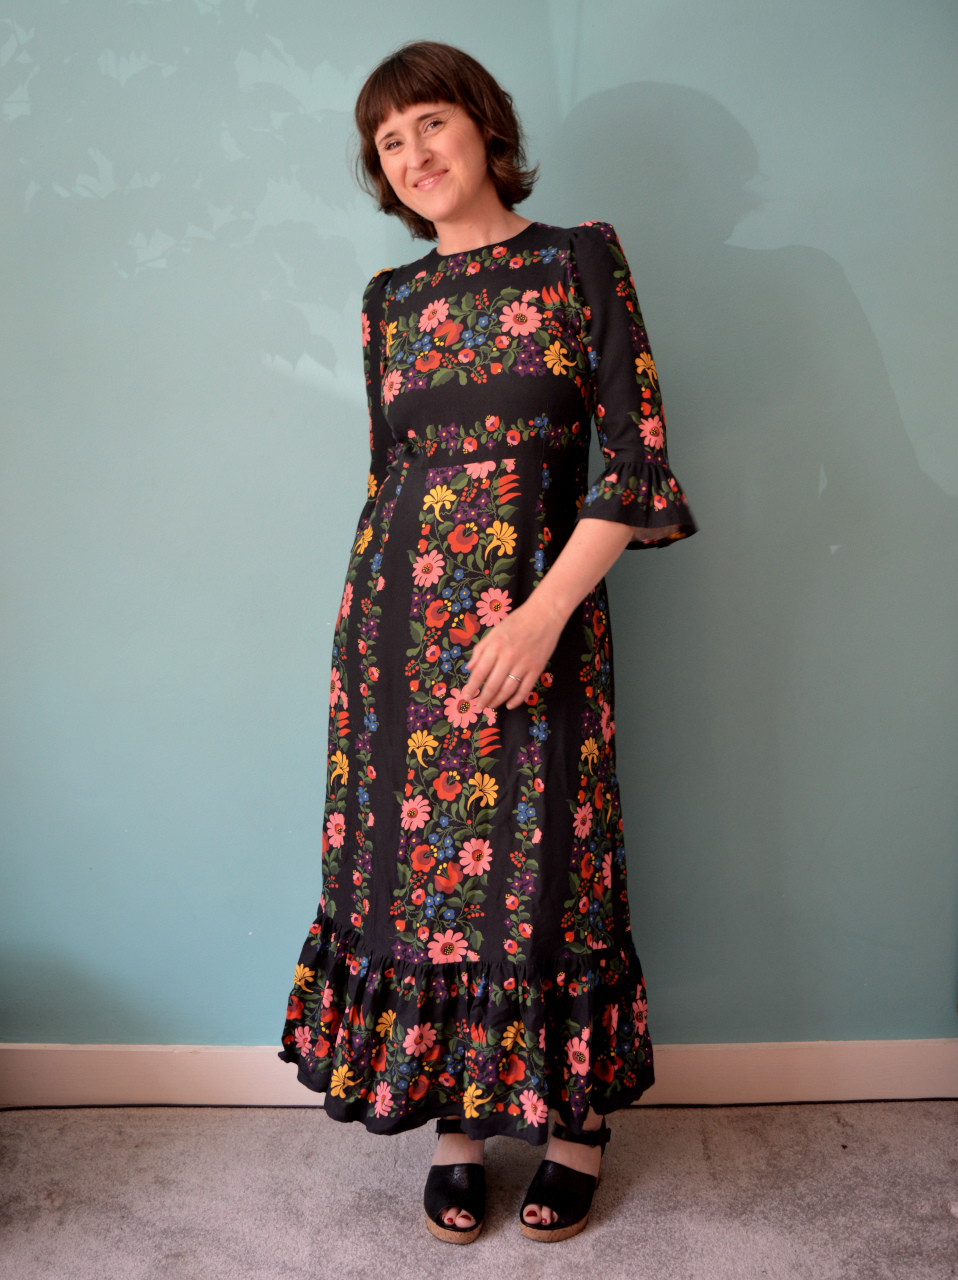
Try to suppress your surprise at the fact that I've made a dress! This is my version of a brand new sewing pattern that isn't even available just yet. Fabric Godmother, where I've been working part time for nearly five years, has had this pattern in the works for yonks. It's named the Peony dress pattern and it'll be available to buy on 29th June. I have been only lightly involved in its production, however it's been super interesting watching its development behind the scenes. 


Pattern testing:

The point at which I got involved was when FG invited us members of staff to have a sewing day to test the pattern out. This was a very clever move on their part, because it gave them an opportunity to see how sewers with different levels of experience found the instructions, and how the pattern worked on a variety of bodies. We got to choose our fabric in advance, then we picked which view of the pattern we wanted to make and got cracking. We were asked to make notes on anything we found tricky or confusing with the instructions and pattern itself. About a week later, once we'd had a chance to finish up our garments, we each had a lengthy debrief to share our findings. 


Fabric:

Very generously, we were able to choose any fabrics we liked to make up our versions. However, because I didn't want to feel I was cheating my Last Sewist Standing challenge pledge, I chose a fabric that had a flaw in that wasn't actually on sale to the public. This is the Joni ECOVERO crepe, which looks and behaves a lot like viscose. The particular roll I cut mine from has a problem with the selvedge, which was totally fine to use for this project, but couldn't be sold as is. 

Despite florals really not being my thing, I have used a Joni print fabric previously to make this well-used Vali top. Therefore, I knew I was going to have to allot extra time and fabric to making a well considered print placement. I'm really pleased with how the print sits on this dress. I actually had to make the sleeve ruffles slightly narrower than the pattern, and the hem ruffle slightly deeper to fit with the dimensions of the print design.


Thoughts:

It was a really interesting experience to be part of the production of this pattern. Despite it not being particularly 'me', I do love my finished dress. I have even managed to wear it already, to a talk I gave at the social sewing event at Fabric Godmother earlier this month about sewing more sustainably


Thursday, 25 May 2023

Patchwork Denim Quilted Jacket


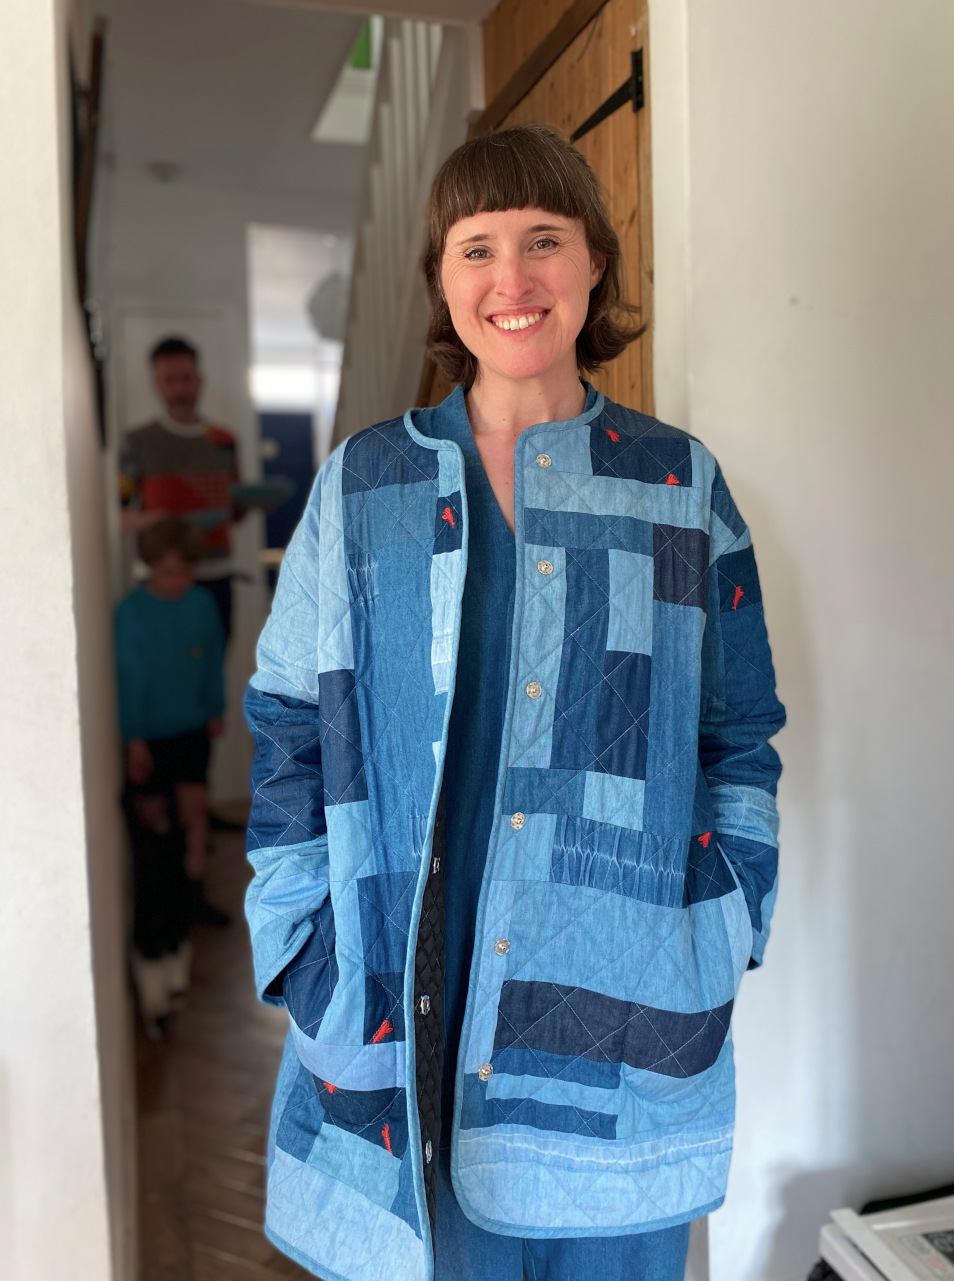
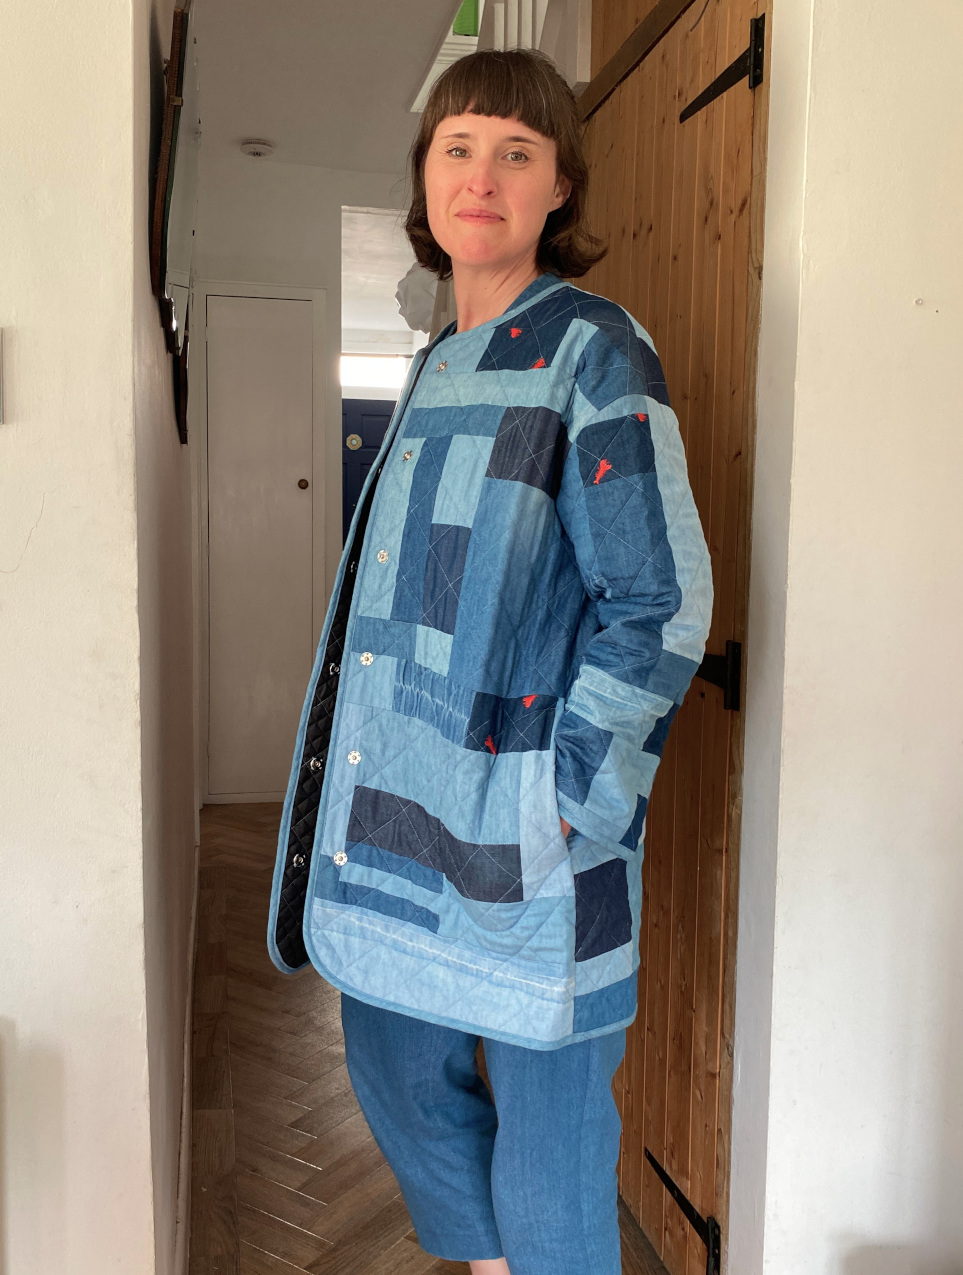
She's done! The jacket with the ridiculously long (but descriptive!) name is complete. This project has been in the works, to some degree, for about two years. That is about how long I've been consciously collecting scraps of this lightweight denim with a view to combining them somehow. 

As I've mentioned all over the place many times, I'm currently obsessed with the possibilities of combining scraps and leftovers to make clothes. Fabric scraps and leftovers from sewing projects are a fantastic resource, but they can build up so quickly. Before you know it, they are spilling out of the box you assigned them, and threaten to take over whatever sewing space you have. But pausing your garment-making activities (if, like me, that's the main thing you're into) just to bust out some little projects to use some of them up, seems like a waste of time and energy. I'm far more interested in applying creativity and resourcefulness to work them into garment projects. 


Fabric:

So I can't exactly pin-point when the idea for this specific garment was born, but when I realised that I had everything I needed to make it happen, I got started on it almost immediately. This jacket has hoovered up a large carrier bag of scraps of 4oz washed denim. Some of that 4oz denim was in the form of scraps from my previous sewing endeavours, some came from the scrap bin at work (including the washed denim with embroidered lobsters!), there were two unworn tunic-y garments, plus the legs from my daughter's woven joggers (which had, in fact, been made from another previously attempted garment projects), also all made from the same type of fabric. I just really love this soft, lightweight washed denim from Fabric Godmother (it comes in three colour ways but this is my fave), which is clear by how many previous garment projects I've made from it over the years. I'm so happy that the finished jacket includes my Tova top, which I wore A LOT during my second pregnancy (proof!). This project also sits very neatly, both in terms of  practicalities and in spirit into the Last Sewist Standing challenge. The only thing I needed to buy to make this happen was thread. 


Pattern:

I settled on the Fibre Mood Molly jacket pattern to use as the basis for this project, not least because I already own it! I chose to lengthen it so the garment would A) use up more of the denim, and B) so it would perform a slightly different function in my wardrobe than my other quilted jacket. I traced out the jacket pieces in my size, then laid them out on the remnant of pre-quilted lining that I was planning to use, and moved the pieces around to work out how much longer I could make them so they still fit. I made sure each piece would have 5cm additional space all the way round to accommodate any shrinking or distortion from the quilting process. 


Patchwork:

To create the actual patchwork, I took my scraps and leftovers and cut them into random rectangles. I took two rectangles that both had an edge a similar length, and stitched them together. Once I had a bunch of pairs, I then found another shape, or pair of shapes, to add to each pair. I kept building it up like that, until I had 'clusters' of rectangles that could be added to each other to make overall shapes that were big enough to fit the pattern pieces on. You can see some of these clusters forming in this Instagram post. At many points, I had to cut some 'custom' shapes to fill in gaps. This was where the actual garments came in particularly handy. I also made an enormous amount of bias binding from the larger of the tunic garments. I planned to bind all the seams inside, as well as round the outside edges, so I knew I'd need A LOT. Obviously I still didn't make enough initially, and had to go back and make more. 

When stitching the patchwork, I used the edge of the machine foot as the seam allowance guide, so it was probably about 7mm. I pressed all the seam allowances open so they'd sit nice and flat, but didn't bother the finish the raw edges because the were going to be hidden by the lining. 


Quilting:

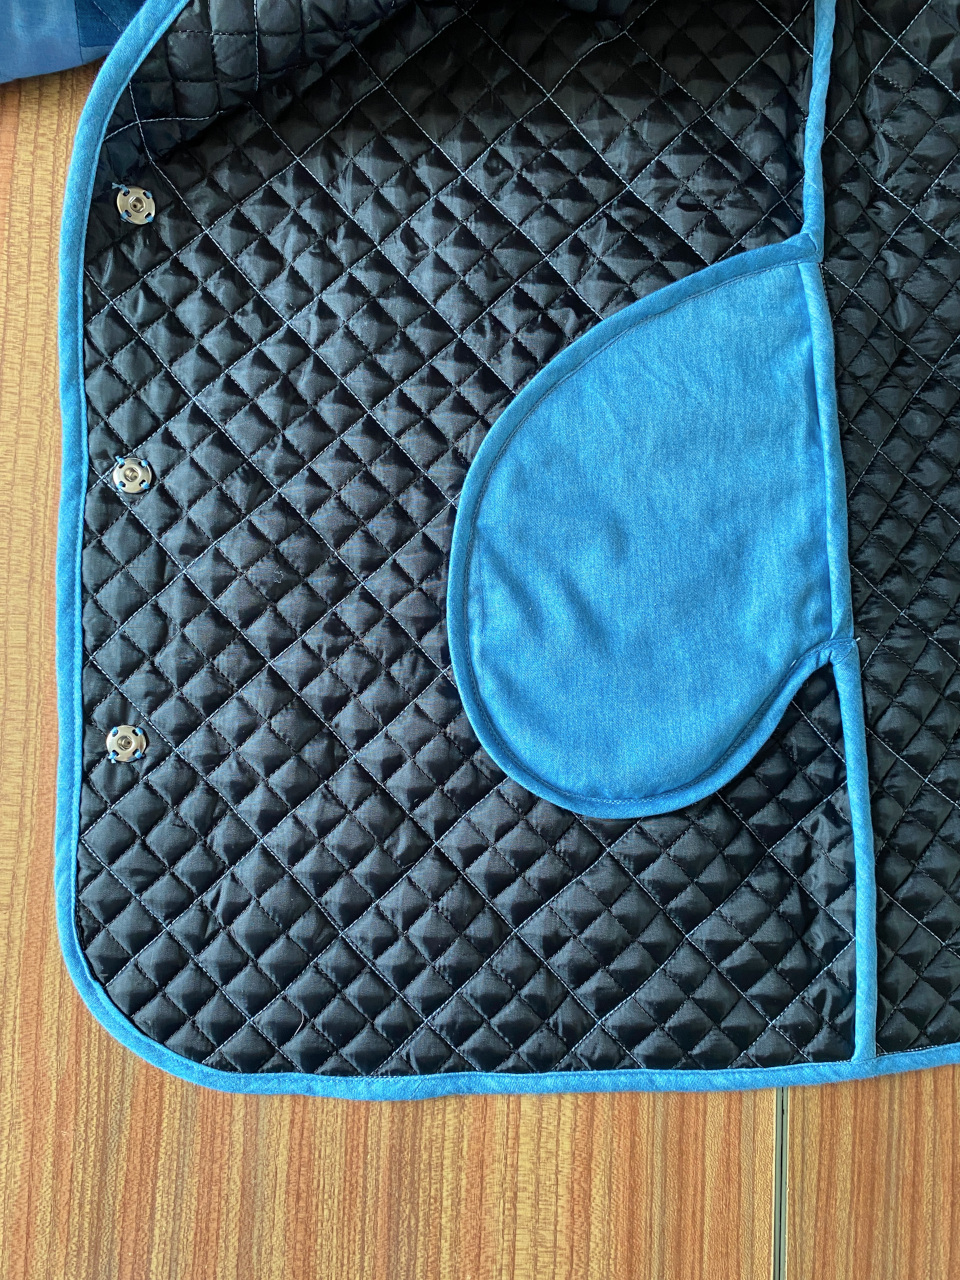
As I say, the lining from my stash that I planned to use was already quilted. With the patchwork panels pinned to the roughly-cut out lining pieces, I stitched along every third row of the quilted lining, so the lining was my guide. I used a walking foot on my machine and really took my time to re-pin after every row to avoid any weirdness in the quilting. I used Gutermann rPET recycled thread for all the quilting and binding, and this project took an embarrassing number of reels to complete! I'm not super happy about that aspect of my 'more sustainable' garment project. 


Construction:

With the pieces quilted and properly cut out, I began construction of the actual garment. All seams were first stitched, then bound with my self-made binding. I also added a cute KATM label that I've been hanging onto for yonks for a special project such as this. 


Towards the end of the jacket construction I had to make a call on pockets. The original Molly pattern has simple patch pockets, although not a particularly good-looking shape, IMO. I considered drafting and applying my own patch pockets, but I thought that might disrupt the patchwork on the front panels. Instead, I drafted in-seam pocket bags to make pockets inserted into the side seams. This was a real head-scratcher because I've never made in-seam pockets with completely bound edges before. In the end, I just went for it and it worked out pretty well. I then decided to stitch the pocket bags to the front jacket panels around the edges to keep them in place and give them more stability when in use. I really like the way their shape is visible from the outside if you know where to look. 


The last decision was about fastenings. I considered both traditional sew-on press studs and the set-in type of press studs that I used for my Tamarack jacket. An Instagram poll revealed that the majority of my followers thought the latter was the best option. However, when I went to get them out, I discovered I didn't have quite enough of the back pieces. Because I can't buy haberdashery and still remain in the heavy weight category the Last Sewist Standing challenge, I went with the traditional press studs from my stash, and I actually really like the look of the hand sewn element. 


Thoughts:

I feel triumphant having finished this project! I'm surprised by how similar the outcome is to my original vision, despite winging it the whole time. I love the look of the patchwork. It's got a real abstract, arty vibe, rather than looking like I cut up a quilt, so hopefully it won't look really dated in a year or two. The weight of the garment is also really nice: perfect for late spring and early autumn (plus any rubbish days that summer may throw at us). I also feel great about this project because it's made good use of pieces of fabric that an earlier version of me might have just chucked out. And of course I love that I didn't have to buy anything, other than thread. So. Much. Thread. 

I hope this project inspires others to have a rummage and see what scraps and leftovers they can use for garment making. Using as much of the fabric we purchase is the best way to honour the time, energy, resources and labour that went into its production. 
 

Related Posts Plugin for WordPress, Blogger...