Showing posts with label hat. Show all posts

Thursday, 2 January 2025

Free Pattern Friday: Marly Trapper Hat for Adults


Welcome to my monthly 'Free Pattern Friday' feature, where I road test a free sewing pattern or tutorial: sometimes a children's one, sometimes an adult's one. I try to publish these posts every first Friday of the month, timed to provide inspiration for those who plan to get their sew on over the weekend. I firmly believe that, if you pick your projects carefully, sewing doesn't have to be a crazy-expensive way to clothe yourself and your family. Thanks to all the amazing pattern designers who have offered up their hard work for us to enjoy for free.

Free Pattern Friday is BACK!!!!! This blog post series has been on a break since last September because I'd kind of run out of free sewing patterns I wanted to try. But in the mean time I've found some more and am challenging myself see how far into 2025 I can get with monthly pattern reviews. The pattern I'm posting about today is one I made as part of a charity sewing day in November hosted at my part-time work (Fabric Godmother). A number of staff members spent time sewing items as part of the Big Sew Off, and the items were then donated to the Give Your Best charity/platform. GYB support people living in clothing poverty, often refugees, by aiding the redistribution of clothing to those who request it. It's very cool. 

I only had a couple of hours to sew something during the Big Sew Off, so I picked a project that I hoped would be both useful for someone facing a chilly winter, and a bit of a challenge for myself. The Marly hat pattern by Belgium-based sewing company, Atelier Jupe, was the perfect project. It's relatively quick and simple, whilst also being potentially really useful. You can access the pattern by signing up to their newsletter. Thanks so much to Atelier Jupe for providing this pattern for free. 


(image source: Atelier Jupe)

Pattern type:

The Marly hat pattern is a simple, classic, trapper hat style comprised of six pattern pieces. The instructions come in English, Dutch and French. The pattern is a tiled PDF that you need to print out on a home printer and stick together.


Sizing info:

This pattern comes in three adult sizes: Small, Medium and Large which span head circumferences 53cm - 62cm. WARNING!!! I made the Medium, thinking that would be the most useful size considering the recipient was unknown, and it came out HUGE. As you can see, despite my head measurement being suited to the Medium, it's super big on me, and in fact fits my boss (below), a large dude, very well. It's possible that my fabrics had some 'give' in them, thus making the hat stretch out a bit. However, my recommendation would be to size down, or at least make a wearable toile version to test the fit before cutting into any precious fabrics. 


Fabric info:

The pattern recommends the following: For the exterior fabric, use a medium weight fabric without elastane, like cotton, gabardine, denim, corduroy... and a thicker fabric for the lining, like teddy, wool, bouclé, fake fur...

For my version, I used a loosely woven wool for the exterior and some synthetic sherpa fleece for the lining. I think this pattern is an excellent project to use up any scraps of fleece-type fabrics, or even for upcycling a fleece garment that has got a bit ratty. 


Findings:

This was definitely a fun but gently challenging project. At one point I forged ahead without reading the instructions properly, then had to do some unpicking because I'd made a mistake. The pattern was easy to use, and the instructions had clear photographs showing the construction steps. 

As for the finished item, it's kind of cute and fun, but as I mentioned previously, it came out way bigger than expected. The really good news, however, is that my hat was requested by someone via the Give Your Best platform. So hopefully it's out there somewhere keeping someone's head warm!


Will I make this pattern again?

A trapper hat definitely has a particular lewk, and it's not one that myself or Mr SoZo have really acquired so I'm not sure I'd make another. That said, Waves and Wild do a version that include kids' sizes that I might make for my son. 

Friday, 8 September 2023

Free Pattern Friday: Hat and Leggings for Babies


Welcome to my monthly 'Free Pattern Friday' feature, where I road test a free sewing pattern or tutorial: sometimes a children's one, sometimes an adult's one. I publish these posts every first Friday of the month, timed to provide inspiration for those who plan to get their sew on over the weekend. I firmly believe that, if you pick your projects carefully, sewing doesn't have to be a crazy-expensive way to clothe yourself and your family. Thanks to all the amazing pattern designers who have offered up their hard work for us to enjoy for free.


Today you've got a two free pattern reviews for the price of one! The reason why I'm posting both of these today is because they make such a sweet pairing: they can be worn together AND make a lovely set to give as a gift. If you don't have any babies in your life at this time, and no one you know is currently expecting a child or grandchild, I recommend you bookmark this post for the future. And if you're in that phase of life when it feels like everyone around you is having babies, you could make a few in advance to have on hand as gifts.

Big thanks to Sweet Red Poppy for creating the Double Top Knot Baby hat pattern for free, and to Patterns for Pirates for creating the Petite Pegs pattern for free. I really wish both of these patterns had been around when I was pregnant with my babies!


(image source: Sweet Red Poppy)


Pattern type: 

The Double Knot Baby hat pattern is ridiculously cute and consists of just two pattern pieces: the hat and the band. The Petite Pegs are a casual leggings style with knit waistband (no elastic), with a rise designed to easily cover a nappy. There are four leg lengths included: shorties, bike, capri and ankle. They also consist of two pieces: the legs and the waistband. 


(image source: Patterns For Pirates)


Sizing info:

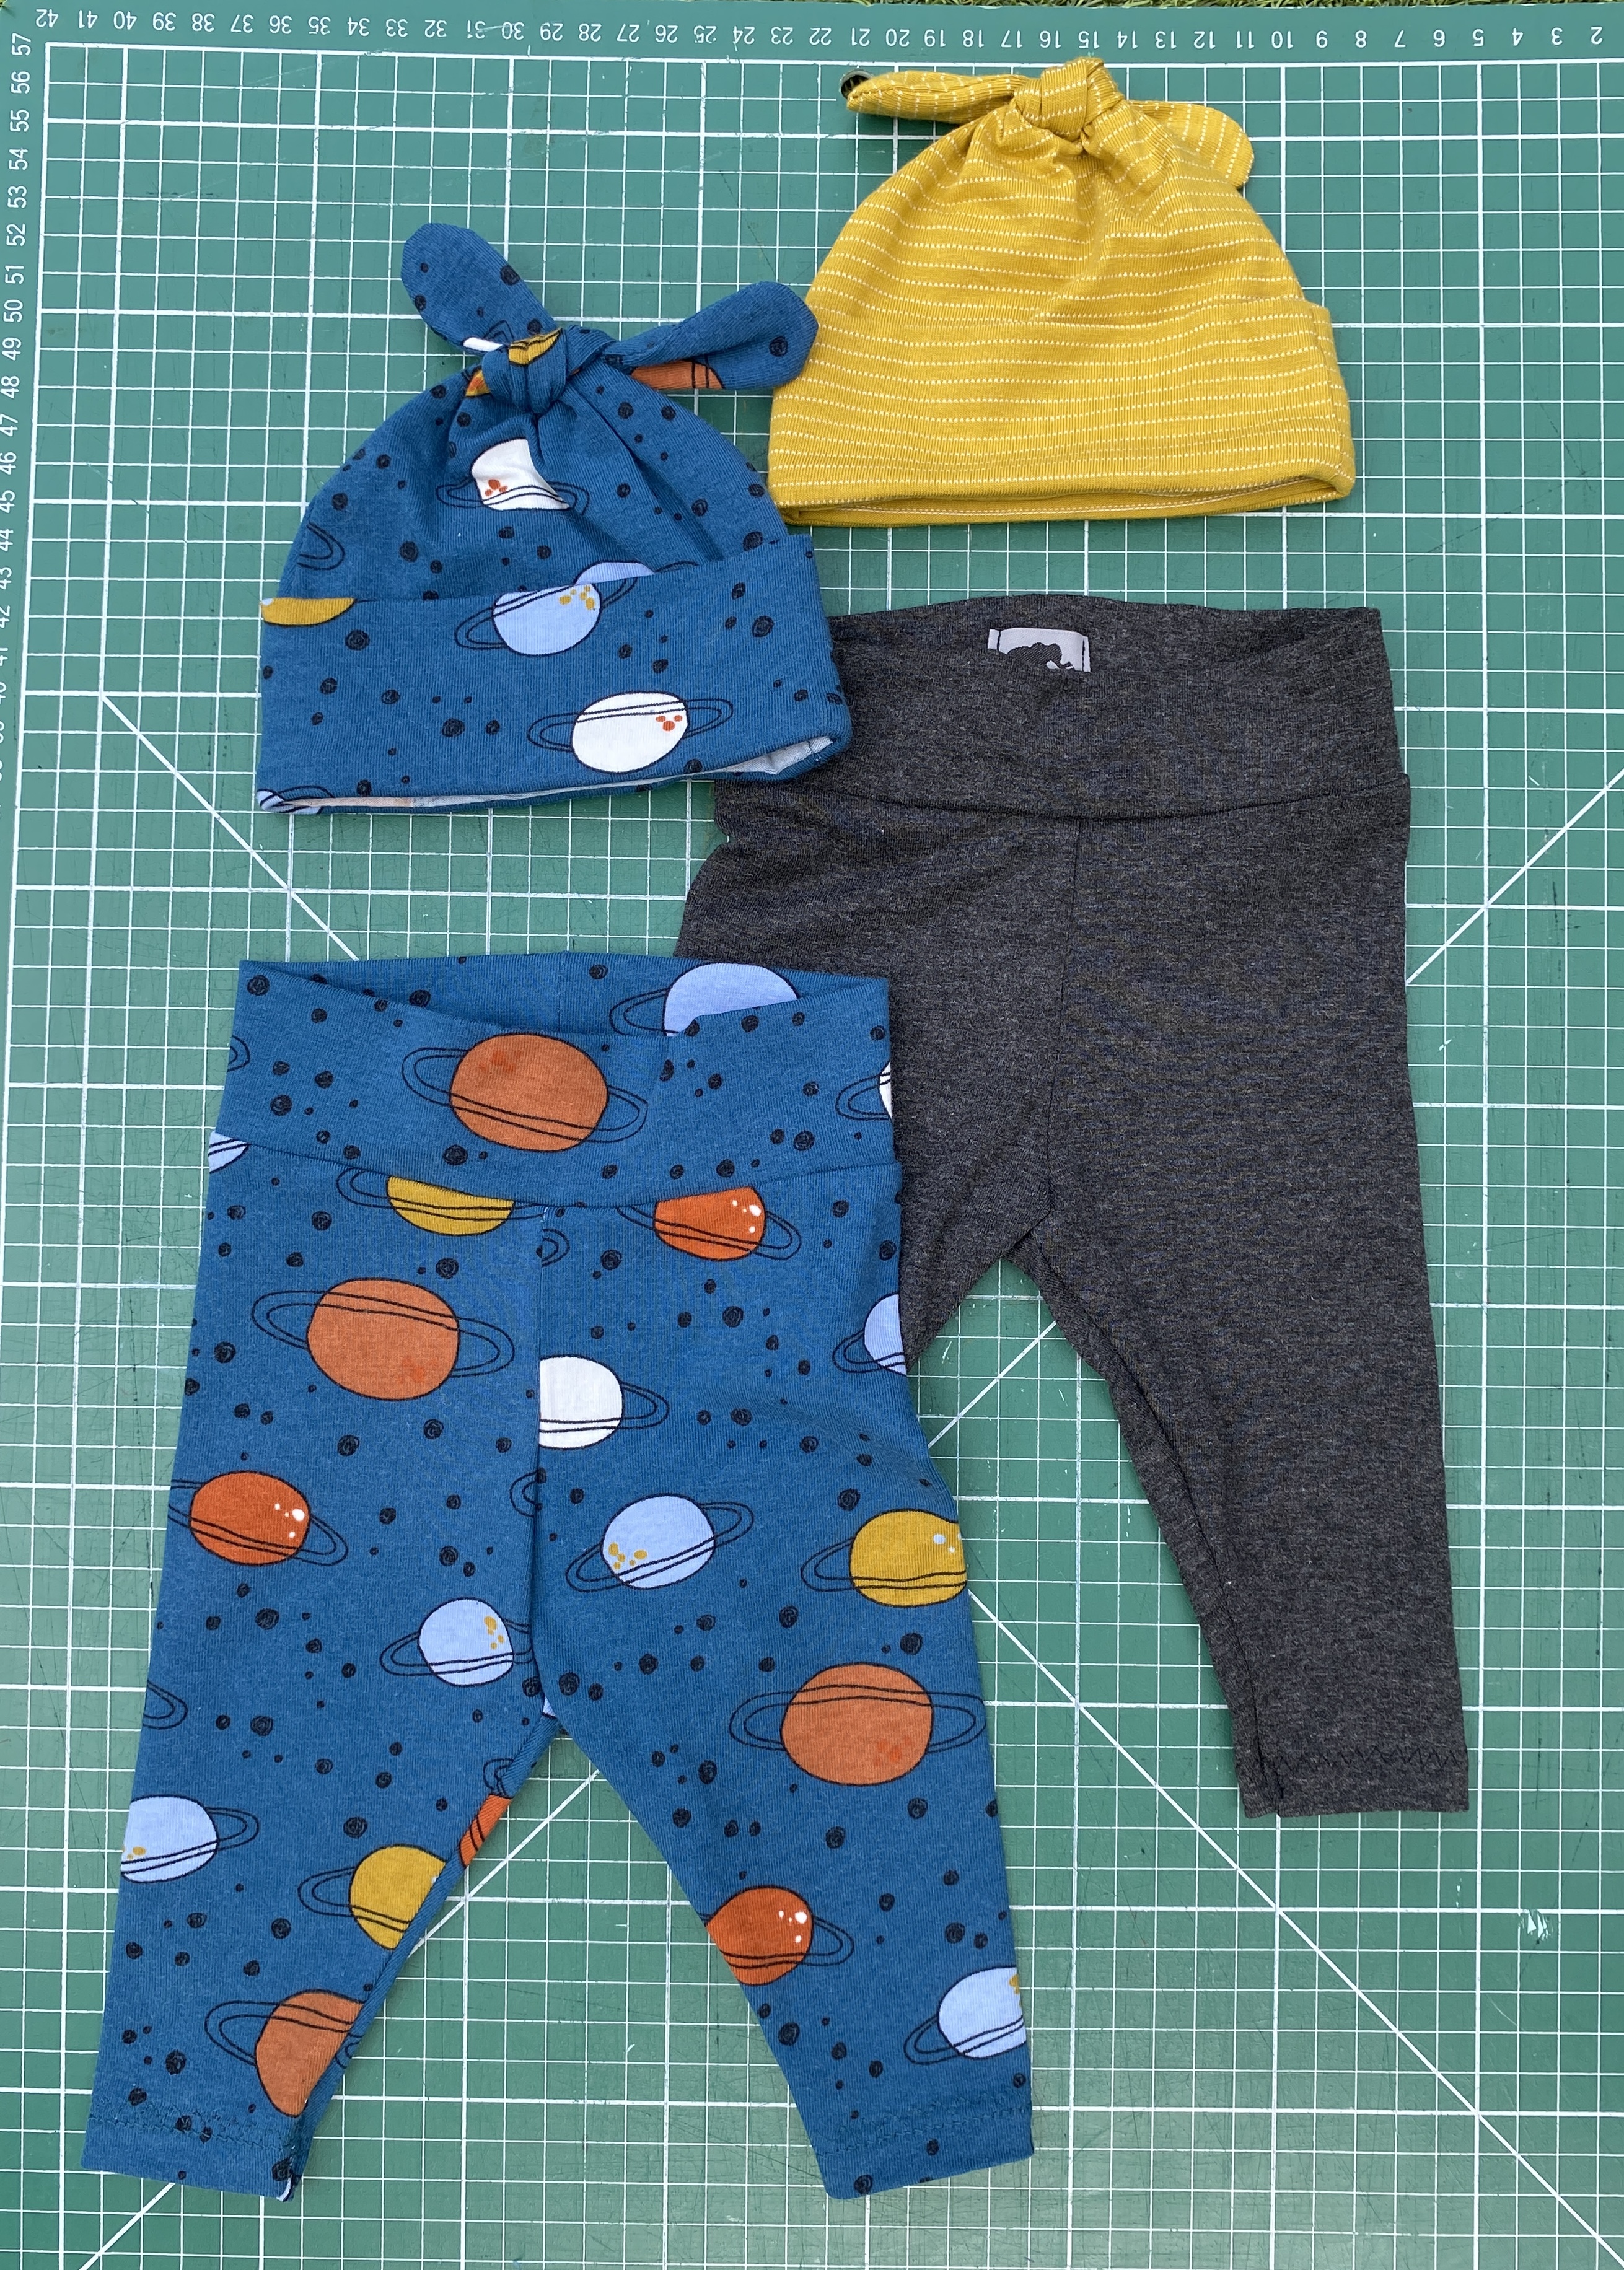
The hat pattern includes six sizes ranging from Newborn to 2Y, and the leggings from Premie to 12 months. After much debate, I created these two sets both using the 3-6 months size for the hat and Newborn for the leggings. I was scared of making the hat too small and them being useless, so I erred on the side of caution with that. I felt more confident going with the Newborn size for the leggings. As you might be able to tell from the tiny feet in the pic below, my friend's child was just a couple of weeks old, to give you a sense of the fit. 

As well as the age of the baby, you should also pick your pattern sizing in relation to the amount of stretch in your fabric: going for a smaller size for super stretch knits, or a larger size if the stretch percentage is much lower. 


Fabric info:

For the hat pattern, it is recommend that you use a medium-weight knit fabric with a content of 95% Cotton, 5% Lycra/Spandex. But then a couple of paragraphs down includes a greater list of other types of knit that could be suitable. I'd probably stick to the cotton/spandex (AKA Lycra or elastane) jerseys because I would be concerned that the other suggestions might be a touch too thick for that tight curve at the top of the knots, or quite slippery and therefore a challenge to work with. 

For the Petite Pegs pattern, they recommend a four-way stretch fabric with at least 50% stretch and good recovery. They also emphasise Lycra or spandex in the content, which is particularly important for this pattern so they stay in place and don't fall down, seeing as the pattern doesn't use elastic at the waist. 


The space print fabric (leftover from these men's PJs - another free sewing pattern!) I used here is exactly on spec for these patterns: cotton/elastane with a good four-way stretch. The mustard fabric for the second hat wasn't quite as stretchy, and more of a two-way stretch, than a true four-way. But I've also used this fabric for making undies and they hold up fine so I was confident in my choice, particularly because I wasn't making the smallest size of hat. The grey jersey I used for the second pair of leggings was probably more like a viscose/elastane jersey. I got this from a charity shop many years ago and it was unlabelled so I can't be sure. It's quite drapey and lighter in weight than the other two but it's really soft, so I knew it would feel particularly nice against the skin. 

Of course, with both of these patterns, I'm going to emphasise what excellent potential scrap busters they are! They take so little fabric, and you can play around using different constrasting fabrics for the bands and the main parts. For the leggings, you could even use two different fabrics for the two legs. And with the hat, you could use different fabrics for the front and back hat pieces. But as always with combining different fabrics, just make sure they have the same amount of stretch and a similar weight. 


Findings:

Downloading the print-at-home pattern for the hat was easy enough. The instructions are in the form of a blog post that you read directly on their site. There's also a YouTube video to support you if you'd like, but I didn't watch it. The instructions on the blog post are good, however it's one of those sites that is dripping with distracting ads. Which I accept because that how this person's business models works in order for them to offer free patterns, including this one. 

Generally speaking, I think the instructions (when you can find them between the adverts) are great. However, there's one step of the process that I did differently and I'm glad I did. The last step gets you to attach the band to the hat with the band on the right side of the hat. You then press the seam allowance up into the hat. My feeling is that the seam allowance would not stay put and probably poke out the bottom because it's not stitched in place. To prevent that, I stitched the band to the WRONG side of the hat, so when you flip the band out to the right side, the seam allowance will always be hidden. I would also recommend tacking the band in place with a few invisible stitches. 


The leggings pattern, by contrast, is accessible via the shop and cart on the Patterns for Pirates website. You have to create an account and go through more steps (you don't need to input any payment details). However, you then have a downloaded file that includes the pattern AND instructions - no ads. 

The construction process was a breeze. The only thing, and this is very minor and personal, is that I dislike a 1/2" seam allowance! It's not one I have to use very often, so I can't visually easily where to position a project on my overlocker so I'm trimming off the correct amount. Oh, and one point I'd make that I think they missed is to add some kind of tag or label so the back is easily identifiable. When parents are trying to change a wriggly baby whilst sleep deprived, they need all the help they can get! But honestly, that's it. I could make these leggings all day.


Would I make them again?

Hell yes! I've really whittled down my stash of jersey fabrics over the last couple of years, but if some more suitable fabric came my way, I'd definitely be making more of the leggings in particular. I do really like the two of these patterns together as a set, so if there are any new babies on the horizon, I'd love to do this again. 

Friday, 5 June 2020

Free Pattern Friday: Adult's Sorrento Bucket Hat


Welcome to my monthly 'Free Pattern Friday' feature, where I road test a free sewing pattern or tutorial: sometimes a children's one, sometimes an adult's one. I publish these posts every first Friday of the month, timed to provide inspiration for those who plan to get their sew on over the weekend. I firmly believe that, if you pick your projects carefully, sewing doesn't have to be a crazy-expensive way to clothe yourself and your family. Thanks to all the amazing pattern designers who have offered up their hard work for us to enjoy for free.

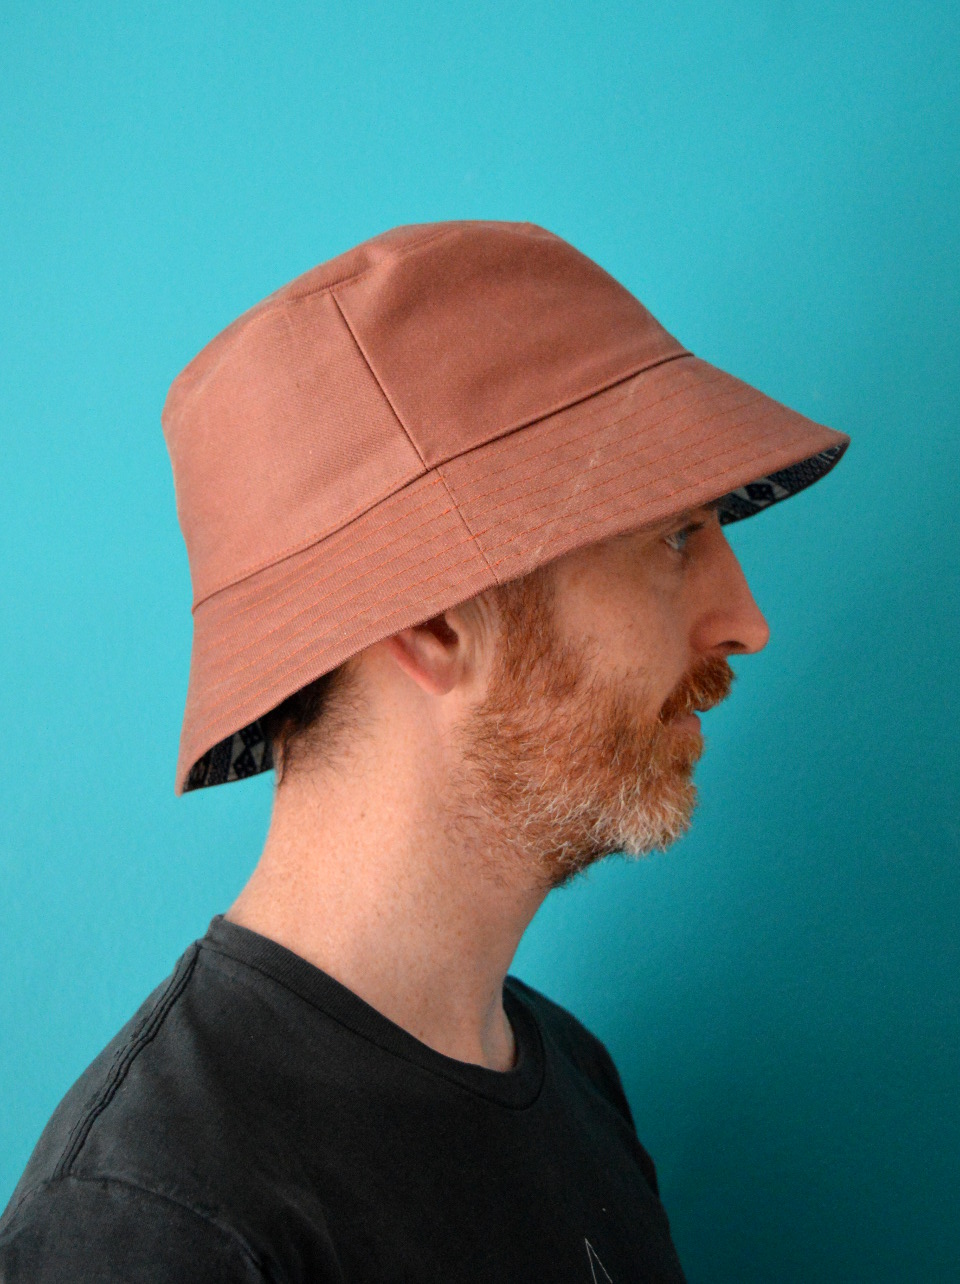
Well, I've done it. I've finally made good on my threat to make Pat (AKA Mr SoZo) a sunhat. He's long been convinced that neither hat nor shorts are for him. However, it can get pretty hot here in the south of England at times, so I personally believe that he needs both. Every summer he regularly suffers from sunburn, and this year I decided that enough was enough and made him a sunhat anyway. Now all four of us can go to the allotment or the beach in our me-made hats! Even though someone will undoubtedly take theirs off within two seconds.... Massive thanks to Lauren from Elbe Textiles for her hard work and sharing the Sorrento bucket hat pattern for free. It is easily accessible through the shop and check out on her site, no sign ups required.  

(image source: Elbe Textiles)

Pattern type:

The website says it best: 'The Sorrento Bucket Hat is a unisex design featuring a downwards sloping brim with optional top stitching detail. This hat is fully lined, with the ability to be reversible.'

Sizing info:

The hat pattern is graded to four sizes, 21"-24" head circumference. Based on his measurements, I made the largest size for Pat, although I never considered him to have a particularly big head. My 6.5yo daughter's head measures 20", so I think this pattern might work for kids from approx. 8 years and up also. If you required sizes larger or smaller, you could try adjusting the scale on your printer settings. I did this with success when making Elbe Textile's other hat pattern, the Serpentine hat pattern, for my daughter last year


Fabric info:

It is suggested that medium to heavy weight woven fabric like drill, canvas and denim work best for this pattern, as they hold their structure. I completely agree, however, I would stretch that to include linen and linen-blends, which might not hold their shape so well, but might be more pleasant to wear in the heat. 

I'm also very interested in making an adult hat pattern such as this in some waterproof fabric, like this child's bucket hat I made a few years ago. I think that having a waterproof hat stuffed into my bag would be preferable to having to carry a brolly around. These days are nearly over for me, but brolly carrying and pushing pushchairs don't mix, so a waterproof hat for those occasions could also be a game changer when it's raining. 

One of the things I really love about making hats is that you can use up leftovers and smaller pieces of fabric that might be tricky to use up otherwise. For Pat's, I used some brick-coloured denim, leftover from his Quadra jeans, which definitely has the body required for this hat. I chose some fun African wax print cotton scraps leftover from my Zadie jumpsuit for the lining. I love the contrast the print brings to an otherwise pretty utilitarian item. 


Findings:

Working with this pattern was a real pleasure. I've made a lot of bucket hats in the past, so I must admit that I didn't refer to the instructions constantly, but when I did, they were clear and easy to follow. This would make a great, confidence boasting project for a beginner, and a satisfying make for those more experienced with a scrap stash to burn. 

I chose to up the ante slightly and add the optional rows of top stitching around the brim. I really like both the look and stability that extra step brings to the party.

Despite his general misgivings about hats, Pat has really embraced this one. He's happy with the fit, and it must be comfortable as he has worn it numerous times in the month since I made it. Much of the back of his neck still remains exposed, but it does a great job of protecting his forehead and face.  


Customisation ideas:

  • Extend the brim for extra sun protection
  • Test the accurracy of your stitching by using contrast thread
  • Make a decorative strip for the band, either with contrasting fabric, grosgrain ribbon or some other trim
  • Insert eyelets to the band for some ventilation
  • Add straps to tie under the chin if it gets windy where you live/holiday!


Would I make it again?

Yes, for sure. If Pat needs another, or a gift is required, then I'd be very happy to whip up another. Plus I'll most likely to turn to this pattern in future years for Frankie, as the sizing of the Sorrento seems to start roughly where the Oliver + S bucket hat pattern leaves off. 

Friday, 23 August 2019

Summer Hat-aganza!


Where we live, it felt like summer 2018 consisted of three months of back-to-back, warm, sunny days. No doubt due to climate change, the consistency of the sunshine and warmth was unlike any summer that I can remember. If this alarming trend is here to stay, then I'm going to have to up my skin-protection game. I'm very good at putting sun hats and sunscreen on my fair-skinned kids, but I'm pretty rubbish about protecting myself, and last summer I frequently came home from a park or beach session with a sunburnt scalp and hairline. So at the beginning of this summer, I set out to make sun hats for one and all. 


Frankie's bucket hat:

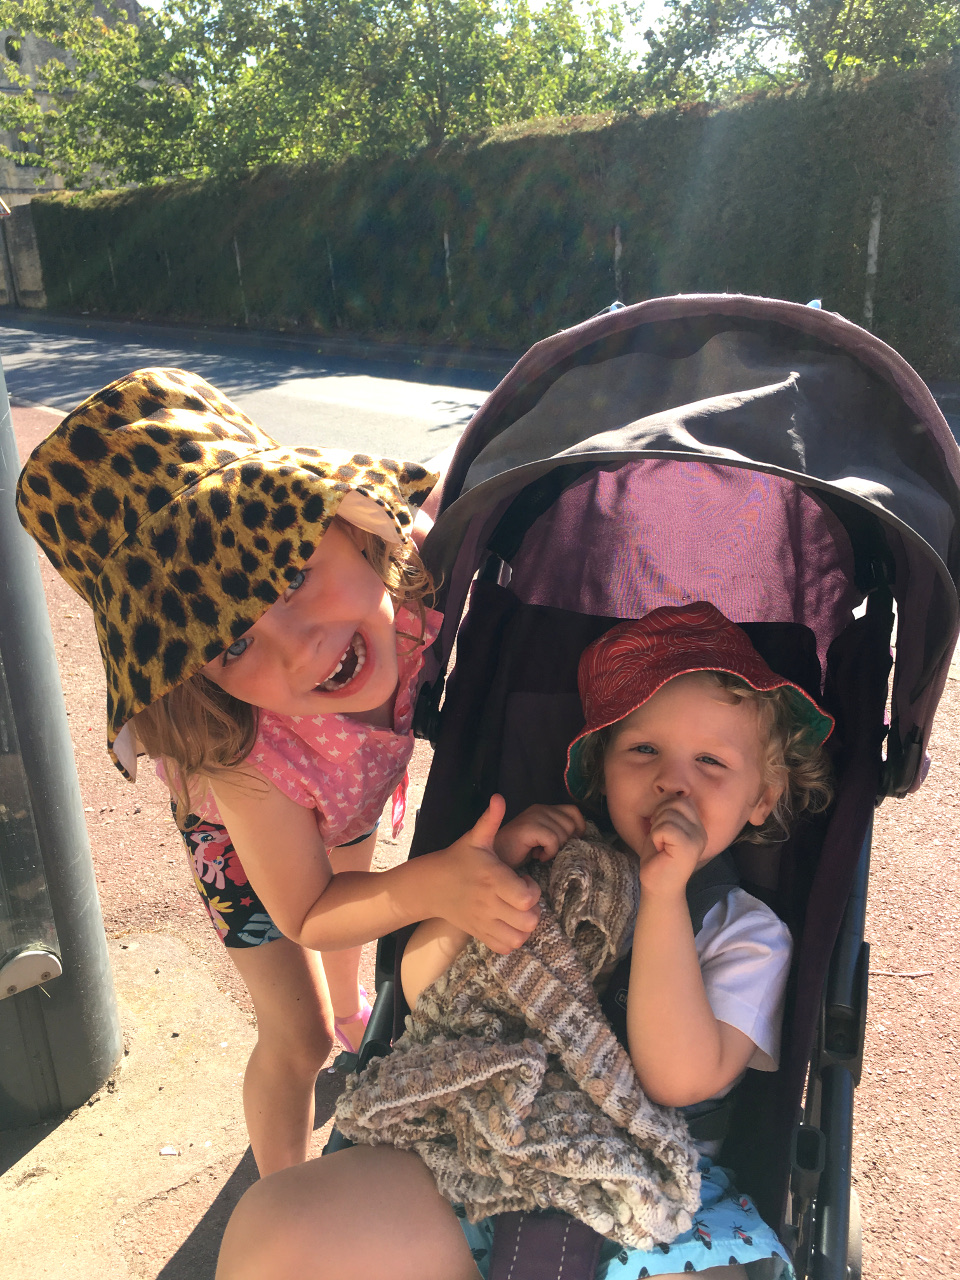
Frankie still fit in Dolores's old sun hats but most of them are looking a bit ropey, so I decided to make him a fresh one. I reached for my TNT bucket hat pattern, the excellent and FREE Oliver + S Reversible bucket hat pattern (that I have previous used here, here, here and here). I made him the size Medium with no changes. I was determined to use fabric from my stash of woven scraps and small pieces for all the hats I planned to make. I had a sizeable piece of this tomato-red and white canvas-y stuff that I bought for one of the samples of my Anya shoulder bag pattern, and after an extended session of pattern piece Tetris, I was able to squeeze both Frankie and Dolores's outer hat pieces from this one small piece of stash. I used another scrap for the lining, this time some solid teal/turquoise/green quilting cotton that had been leftover from a commissioned sewing project from a few years ago. 


Dolores's Serpentine hats:

Although Dolores still fit into the crown of her bucket hats, the brim was no longer actually protecting her face from the sun. I could have extended the bucket hat's brim piece of course, but having tried that approach here, I wasn't sure that the proportions would look very good. I'd already had my eye on the Elbe Textiles Serpentine hat pattern for myself, but I had a minor revelation and realised that it might work well for Dolores also. Her face would be suitably protected from the sun, plus I felt that she would enjoy the drama of a wide-brimmed hat! 


Unsurprisingly, her 5yo head was too small for this adult's pattern. I did some measuring and calculated that printing out the pattern at 95% scale and cutting the smallest size should fit, which it did very well. The first version (red with white print) fit her well around the crown, but the brim, which I had interfaced with two layers of medium-weight fusible interfacing, was too wide and floppy. The lining was a scrap of awesome quilting cotton that I scored long ago at a fabric swap. It had a repro print of 1950s children playing, and although it had been initially okay-d, she later claimed to dislike it. She tended to wear this hat with the brim folded back, 1990s Blossom Russo style, and actually got a fair bit of use from it until she left it at school on the last day of the school summer term (sigh).


With version 1 locked up in a classroom for the duration of the summer holidays, I quickly had to make another before we left on our trip to France, a few days later. I was running out of suitable scraps of fabric that she approved of, but thankfully she gave the thumbs up to this leopard print fabric that was left over from this coat that I made several years before she was born. I used some solid cream cotton twill for the lining, reduced the depth of the brim a bit, and interfaced with fairly thick, sew-in interfacing instead of the fusible, which keeps the shape far better. 


Mum's Serpentine hat:

Full disclosure before you marvel at all this selfless sewing: the Serpentine hat that became my mum's was actually intended for me. My head measurement corresponded with the size Small, so that's what I made, despite being skeptical as my head has never been described as small! Using scraps from this pinafore and this dress, and using the thick-ish sew-in interfacing, annoyingly for me, it came out too small. But my loss became my mum's gain when she declared that she could make some use from it. Hurrah!


My Serpentine hat:

My second version was made from red canvas fabric that I'm guessing is a cotton/something-synthetic blend that I have no recollection of entering my stash. I used the same fabric for the outer and lining because by this point I just wanted to get the damn thing finished. The fit is much better, but I dislike the look of the fabric, especially now it's spent time crumpled up in my bag. 


Thoughts:

This summer hasn't proved as sunny as last year's, and none of these hats became as indispensible as I thought that they would be. They did get some moderate use, plus who knows what future summers hold, so I don't feel that making them was a waste of time or fabric. I'm a big fan of the Serpentine hat pattern though, and I'm pleased that I bought it. Before next summer, I'd like to make myself another, probably in denim, perhaps with gold jeans-style topstitching. Then we should all be set for hot weather head wear, unless Frankie has a growth spurt and I need to bust out the bucket hat patten in a Large. 


Friday, 17 March 2017

Singin' in the Rain Hat


Well no one could accuse me of not trying to get my money's worth from the free Oliver + S children's bucket hat pattern! Rather than simply keeping the sun off, I figured it could also be used to keep the rain (or shower water!) off too. 


Pattern:

I used the size medium (approx. age 3-5) and made no alterations to the pattern. You can read more of my experience of and thoughts on this pattern here when I made using cotton, and also over here where I used it to refashion some unwanted jeans. I fully intend to use this pattern many more times; not only is it a satisfyingly quick make and a great scrap buster, it also produces a genuinely useful item. I can vouch for that, Dolores used her denim one almost every day for several months last summer.   


Fabric:

I'm a big fan of Rae Hoekstra of Made by Rae and all her designing output. Her fabric print designs for Cloud9 fabrics are amazing, especially for kid's wear IMO. I was lucky enough to be given a piece of needle cord from her Small World Cloud9 range which I used to make Dolores this dress. about 18 months ago. It remains one of my very favourite makes and never fails to elicit some compliments when she wears it. But as you may know by now, I try to use my stashed fabric and secondhand textiles in most of my sewing projects, however I love that all Cloud9 fabrics certified organic, and ensure ethical and ecological practices have been reached at every step of the fabric production, not just during the growth of the cotton plant, so didn't feel particularly guilty for buying this piece of Cloud9 laminate called 'Signin' in the Rain'. 


Although this fabric is laminated, it doesn't feel any thicker than a heavier-weight quilting cotton. Whilst using it I didn't treat it particularly differently than regular cotton, except for making sure all pins went through the seam allowance to avoid any pin pricks in the finished item, and using a pressing cloths and wool heat setting when pressing the seams. I didn't even bother getting out the walking foot for my sewing machine, but I did lower the foot pressure to help it go through evenly. 


Thoughts:

Such a fun project, both to make and to see in action as a finished item. My only gripe is that I didn't take a very holistic approach in regards to what bits of the print I used for what pattern pieces when I was cutting it out. Therefore the same bits of print are repeated a bit too closely than I would have preferred, but that's something to learn from for future projects I guess. It's great to have on hand, as I often find that the hoods on children's coats are designed more for appearance than practicality, and tend to blow off her head in any kind of wind. 

Cost:

Pattern: £0
Outer fabric: £5.50 for 0.25m from the Brighton Sewing Centre, enough for two hats
Lining: £0 a gift from a friend's de-stash
Total: £5.50, which will be halved when I use the rest to make Frankie one in a smaller size the autumn 

Tuesday, 14 June 2016

Scrap-busting Bucket Hats


Today I want to share with you another sewing project that I've found to be ideal for using up small pieces or scraps of nice fabric. What is particularly awesome with this one is that the pattern is a freebie, so if you're using up fabric rather than buying some new stuff, it's effectively free! 


Pattern:

A couple of months ago we went on a week-long holiday to Spain. Dolores only had one sun hat from last year that still fitted her, and knowing how her hats seem to always disappeared when you're in a rush to get out of the door, I thought that making another would be sewing-time well spent. I can't remember where I first saw the Oliver + S free children's multi-sized bucket hat pattern (let's be honest, it was probably Pinterest) but I downloaded it, printed it out and then had heaps of fun raiding my scraps box to find the perfect combination of fabrics for the project. This pattern has been graded into four sizes that should span the ages of six months to eight years. And the best thing? It's reversible!!! That means you can choose two different contrasting fabrics so one hat will match twice as many of your kid's outfits. 


So how did I find this pattern? Confession time: as if I'd never encountered a PDF pattern before, I somehow cods up the printing part and despite even measuring the test square like you're meant to, I didn't figure out that I'd printed the pattern out too small UNTIL I FINISHED SEWING THE HAT. I had attempted to make the Medium (approx. aged 3-5) but it came out much smaller and only just fitted her (she was two and a half at the time). Embarrassing!!! Can I blame that brain-fart on being pregnant please?! 


Aside from that, everything else was fantastic! As with every other Oliver + S pattern I've used, the instructions are great and very user-friendly. The second time I used the pattern (for the larger of the two hats pictured in this post) I altered the order of construction a bit to complete the processes quicker, and added 2cm to the outer edge of the brim for extra coverage from the sun. The only other change I made was to use fusible interfacing for the brims on to both my versions rather than sew-in interfacing as recommended by the pattern because that is what I already had in my stash, and it worked fine. 


Fabric:

Picking combinations of fabrics for these hats was very enjoyable. I wanted both pairings to be different enough that each side would work well with different outfits, but complementary so that the hats looked appealing as a unit. For Dolores's hat (the first one that came out too small), I chose an awesome piece of quilting-weight cotton with writing on a yellow background that was given to me yonks ago by the lovely Handmade Jane, and some scraps of navy double gauze with little white anchors on (I made this hat before Dolores developed her obsession with pink stuff). The double gauze was probably too thin for this project, but the quilting cotton literally has its back on this one! I really love how these two prints and colour schemes go together, and I'm glad that the outcome is very unisex now that I know I'm expecting a boy! 


The second hat was made for Dolores's slightly older friend Hazel. Hazel's mum runs a toddler sensory class that I take Dolores along to, but instead of paying to attend we have a bartering arrangement by where I sporadically make Hazel garments in exchange for the classes. Hazel is a girly little girl, so I picked this pastel-y piece of Liberty print cotton that was kindly given to me by Sewbox.co.uk (left over from this Geranium dress) for one side, and some floral quilting cotton scraps that were left over from a dress I made for The Village Haberdashery's spring window display. Unsurprisingly, Hazel always wears her hat pink-side-out. 


Thoughts:

This was such a fun project, and a really nice way to showcase some small pieces of lovely fabric that just couldn't be chucked into the textile recycling. I doubt I'll ever buy my children a sun hat from a shop. The optional topstitching round the brim gives the hats some substance, however I think thicker weight quilting cottons or similar would work better for this project than a thinner fabric. As a relatively quick and relatively cheap make, these would be fantastic gifts to make for other people's kids. 


Cost:

Pattern: £0 (available from Oliver + S here)
Fabric: £0 (all pieces were either originally given to me, left over from a commission or I found them in a scraps bin)
Total: £0

Kerching!!! Got to love that total. Have you tried this pattern or something similar? If so, what fabrics did you find worked the best? Have you used any other free children's (or adults for that matter) hat patterns?
Related Posts Plugin for WordPress, Blogger...