Thursday 25 November 2021

Denim Shirt Anthea Blouse


I'm so excited to finally share this project with you because more went into it than most of my projects. More time and more techniques, and a lot more thought. This was an idea-itch that I had to scratch, and I was more invested in manifesting my idea than the actual outcome. However, I do love the outcome also!


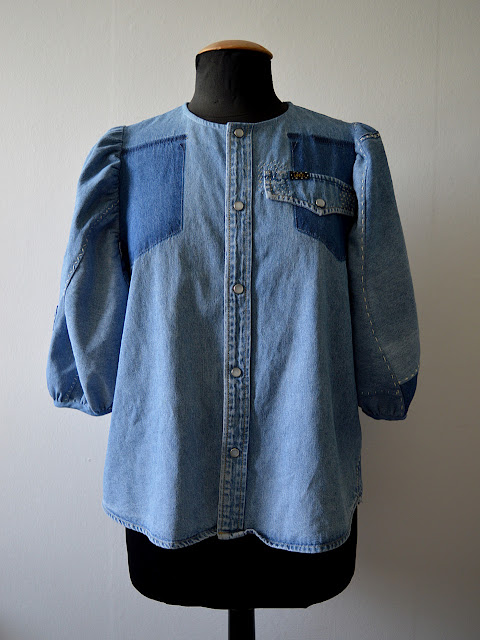
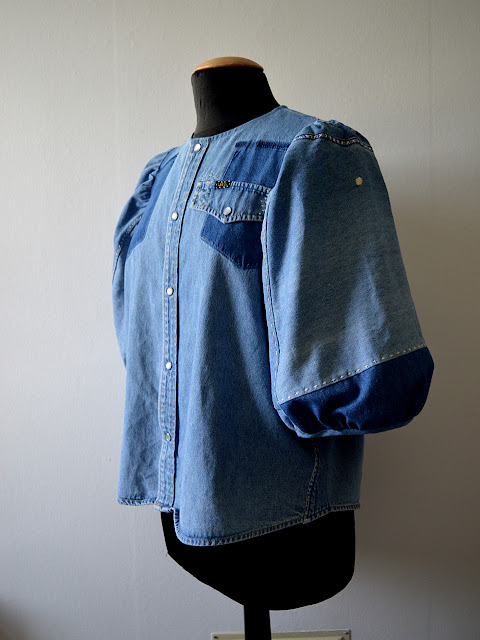
This secondhand denim shirt has been in my stash for a shameful ten years! I feel bad about that because it's possible that someone else could have been during that time. Anyhow, I was keeping it out of landfill at least! I've always loved those pearly snaps and knew that they had to be included in whatever it was to become.


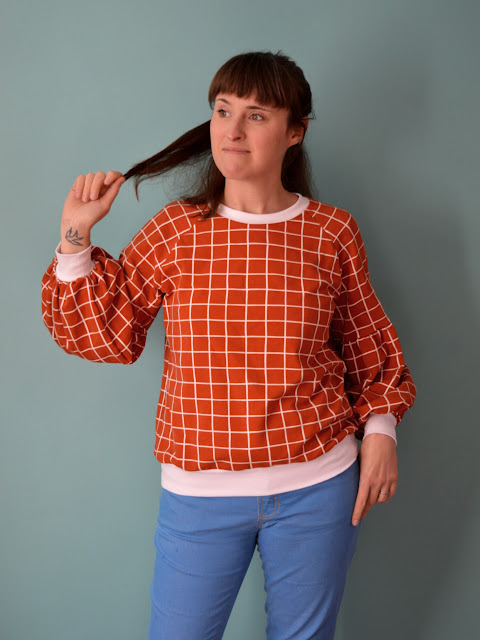
I'd had my eye on the Anthea blouse pattern by Anna Allen (pictured below) as soon as I clapped eyes on it. I have adored every single version I've seen on Instagram. And it's been a very popular pattern so there are a TON of versions to behold! 

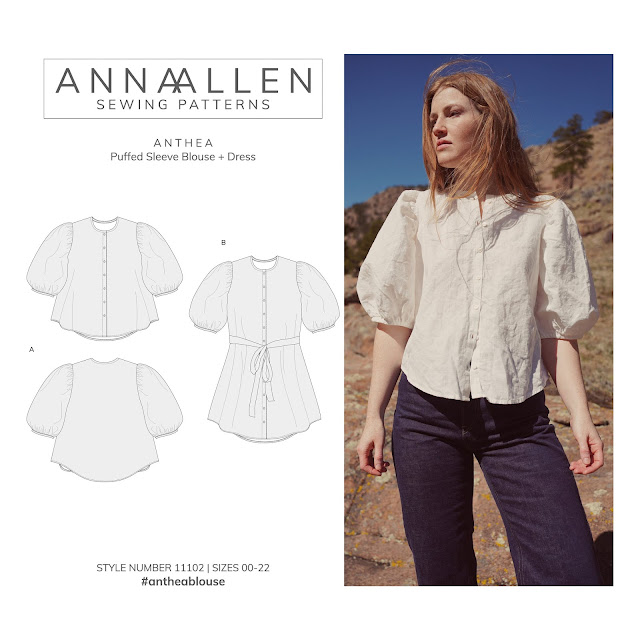
(image source: Anna Allen)

The problem was that I didn't have any pieces of fabric in my stash suitable for the pattern, and I couldn't justify buying a new pattern AND new fabric when I already own a lot of both. I'm not exactly sure where the idea came from to use the denim shirt, but I've been having so many inspiring conversations with interesting people lately for my podcast, Check Your Thread, that my mind is kind of permanently in this kind of zone these days. 


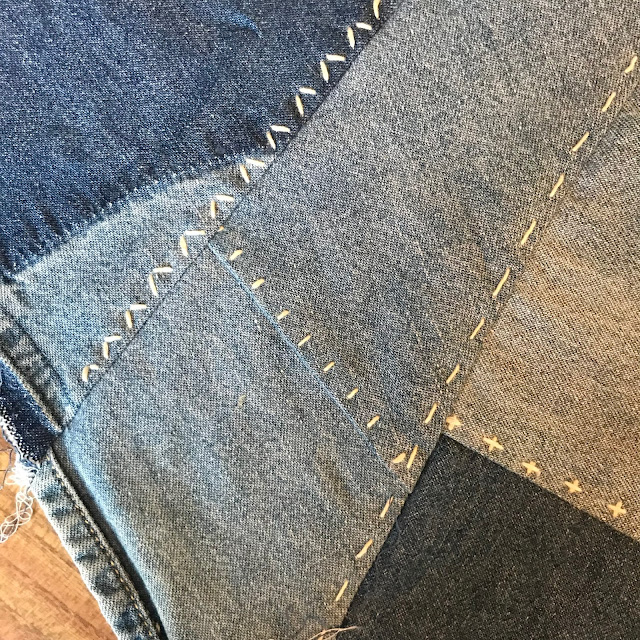
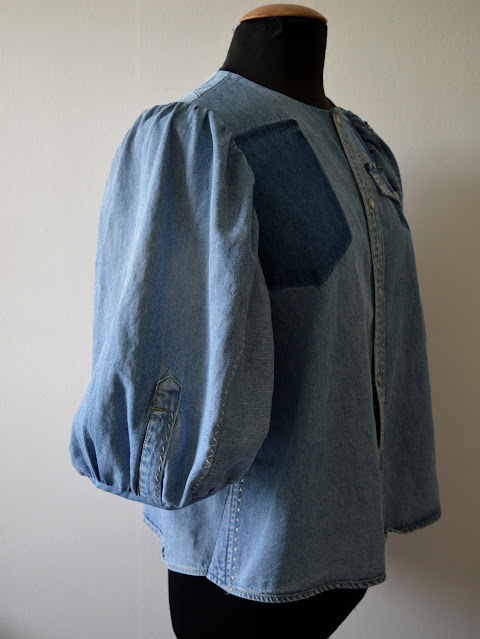
I removed the front pockets so I could fit the Anthea front pattern pieces on, and I love how a shadow of the pockets remain. I reapplied the pocket flap on one side to reference the removed pockets, and stitched it into position with random sashiko style stitching. For this I used some 'proper' sashiko thread that I bought on eBay a couple of years ago but had yet to try. That spot on the sleeve is a hole that I covered with satin stitch to stop it getting any bigger.


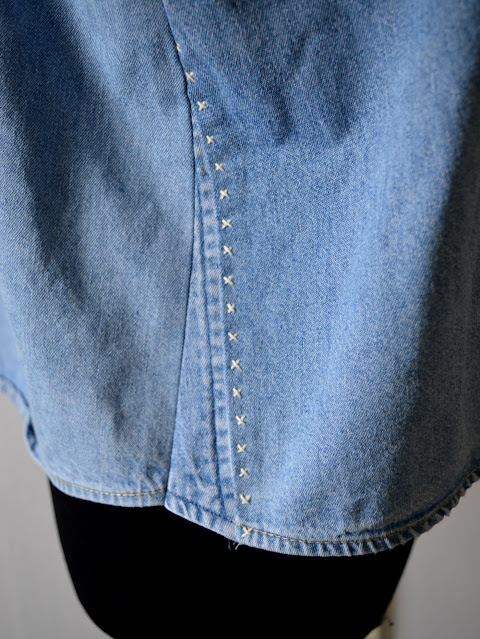
As you can probably imagine, this project was not without it's challenges, but I like how the challenges determined the aesthetic in some cases. For example, the pattern pieces for the body were wider at the hem than the original shirt. So I ended up piecing together the side seams with sections of the original collar (see above). I then decided to highlight the join with another row of sashiko-style stitching, which is a theme that I continued throughout the project.


The sleeve pattern pieces on the Anthea are pretty massive, far larger than the original shirt's sleeves. So to form a sufficient area of fabric, I had to piece together pieces of the original sleeves with lots of other pieces harvested from the original garments. I didn't think about it too much, just joined the edges with my overlocker, then 'topstitched' down the seam by hand using a mixtures of stitching styles that I was totally winging. 


I really like the hints of shading and differing colours that existing in the original shirt. However, I tried to play down the patchwork vibe a little, I'm not sure if I quite hit the right balance. 


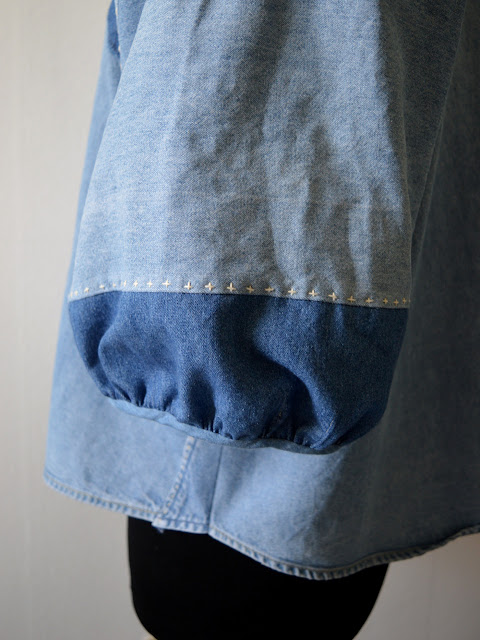
I made binding from some scraps of lightweight washed denim from my stash. That was used to finish the neckline and the sleeve hems. I don't really like the bias for the sleeve hems and I think the opening is a bit wide. I think I'll go back at some point and make cuff bands instead. 


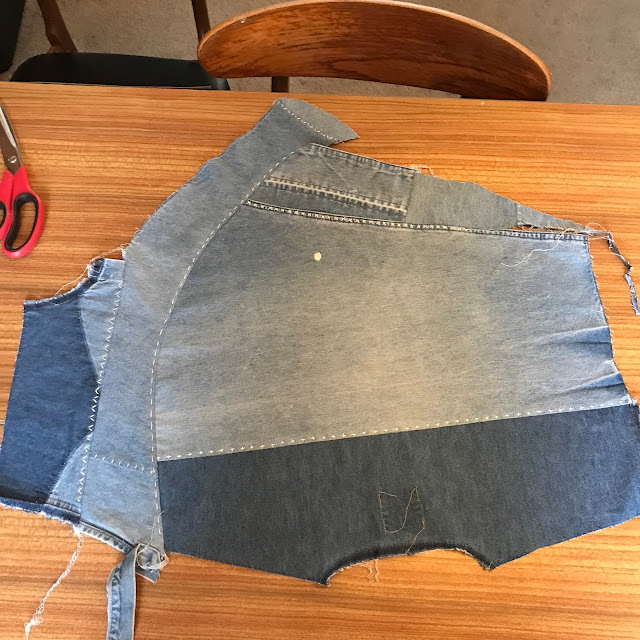
What is incredibly pleasing is the little pile of scraps that remain from this project. I really wish that I'd weighted the original shirt, and then weighed the scraps to see if I beat the industry average of 15% of fabric wasted during the cutting process.  


The lack of available fabric meant that I couldn't really overthink the placement of various elements in this garment. That felt pretty freeing actually, and I just have to accept the outcome and find elements to enjoy. 


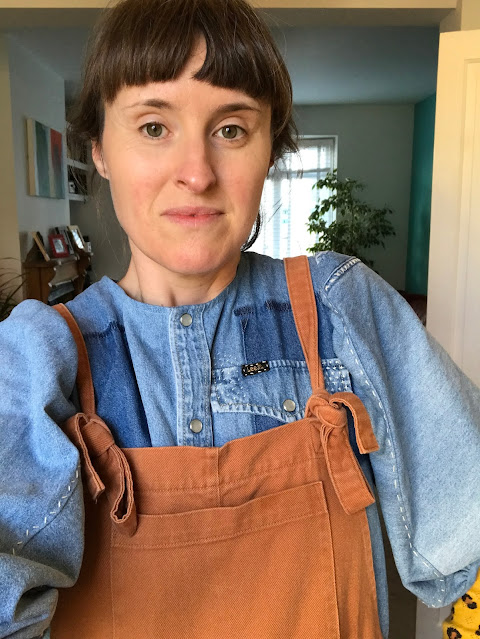
I haven't owned a proper denim shirt since I was a teenager, so I was very surprised by how warm it actually is. Pictured below is how I've enjoyed wearing it the most since I finished it: layered with a long sleeved thermal top underneath and dungarees on top.  

Thursday 11 November 2021

Claire Sweatshirt and The Sleeves-of-Dreams


No, I am not immune to the current big-sleeve trend. I'm digging the many voluminous-sleeved patterns as much as the next home sewer. And today I'm sharing a recent project that uses a pattern that has an interesting twist on the trend. BTW, I received this pattern for free from the designer who hoped that, if I liked it I would post about it. so AD:PR. 


Pattern:

The Claire sweatshirt pattern by Kate's Sewing Patterns is a relatively standard raglan sleeved style with one clever design detail: the balloony lower part of the sleeves.  I love how the this pattern wasn't over-designed, retaining a really wearable, casual shape overall. 


The pattern is graded between EU 34 - 54, which translates to 31" to 47" bust measurements. The pattern consists of A0 and A4/letter sized formats. I got the A0 printed out by Fabric Godmother because it looked like the file might be wider than standard A0 and I know FG's large format printer has a wider option, but I'm not sure it was required in the end. The instructions are pretty clear with photographs showing the construction steps. I actually prefer a different construction method for raglan tops so I kind of disregarded them to be honest. I've seen some criticism about the English translation with a different pattern in this range, and there were some confusing parts in the Claire pattern also. I made a number of suggestions to Ekaterina to improve the English which she has taken on board and implemented. 


Fabric:

To be honest, I can't remember if I bought this fabric with pattern in mind or not, but I know I'd had my eye on it for the best part of a year before making the leap. This grid print organic sweatshirt fleece was bought from Fabric Godmother in the early summer, but I waited until I felt some early autumnal chilly before actually using it. There wasn't a matching colour for the ribbing and I feared some weird visual effects if I used the self for the cuffs, neckband and waistband, so I went with plain white organic cotton ribbing for those. It gives it quite a bold contrast, but I like the overall look. Because the ribbing is quite stretchy, I reduced the length of all the bands and cuffs, particularly the waistband.


Thoughts:

I'm pretty damn thrilled with this sweatshirt. My hope was that it would provide a pop of fun into my chilly weather clothing options and it really has done that. The fabric is really soft and snuggly but not bulky (I can easily layer up underneath for extra warmth), and the sleeve shape adds drama and interest without getting in my way at all. I can definitely see myself using this pattern again at some point, probably in a solid colour. 

Friday 5 November 2021

Free Pattern Friday: Walk the Plank PJ Bottoms for Everyone


Welcome to my monthly 'Free Pattern Friday' feature, where I road test a free sewing pattern or tutorial: sometimes a children's one, sometimes an adult's one. I publish these posts every first Friday of the month, timed to provide inspiration for those who plan to get their sew on over the weekend. I firmly believe that, if you pick your projects carefully, sewing doesn't have to be a crazy-expensive way to clothe yourself and your family. Thanks to all the amazing pattern designers who have offered up their hard work for us to enjoy for free.

On the odd occasion for my Free Pattern Friday posts, I write about a pattern that I've road tested and reviewed in the past. I think it's useful because it shows which of the patterns are so good that they've been used multiple times. I previously wrote about the Walk the Plank PJ bottoms 18 months ago, and I've made five pairs using the kid's version of the pattern to date. My most recent version were a pair of summer sleeping shorts for my daughter (pictured above) made using some gingham leftover from a school dress I once made her. I just read through that previous post and I don't really have anything to add, other than to highlight the adult version a bit more than I did last time. 

The adult's version (pictured below) is graded between 33" to 58" hips. The largest size of the kids version, 14, fits a hip measurement of 34" so if you're sewing for teens, you can go straight from using the kid's version to the adult's with no gaps! The adult Walk the Plank PJ bottoms pattern also includes two rise heights and three length options, but of course you can make them however long you wish. The only reason why I haven't made the adult version yet is that I already have my own woven PJ bottoms pattern that I copied from a RTW pair years ago. 

I want to say a massive thanks to Patterns for Pirates for sharing their hard work and making these patterns available for  sewers to use for free.  


Tuesday 2 November 2021

Tadah! I Made Birthday Outfits!


My kids' birthdays are ridiculously close together. In fact, their special days are only one day apart. To date, our family more or less treats the situation like they're twins that are three years apart, and the celebrations kind of overlap and get all smooshed together.  I guess this will change as they get bigger when their friendship groups get more defined and separate, and perhaps as soon as next year the events will be more distinct. I also feel that the clock is ticking for how long I can get away with making them matching clothes! To make the most of this fleeting opportunity, I decided to make these coordinating garments for them to wear as they turned eight and five. 


Fabric:

When I first laid eyes on this fun emoji print viscose lawn from Fabric Godmother, I knew I had to get some for my kids. To be honest, I rarely buy fabric to make clothes for my kids. I mainly use leftovers from other projects and fabric harvested from existing garments when making things for them, with the occasional new purchase or gifted length that's more specifically 'kiddie'. I love how this print is more subtle than a fabric designed for kids though. In fact my colleague Kerry has also bought some to make a dress for herself. Full disclosure: this is not a paid ad or freebie, I bought this fabric myself but with a staff discount.


The fabric is lovely, but as with most viscose fabrics, it's light-weight, slippery and a big fan of developing creases. Having decided to make Frankie a shirt and Lola a dress, I knew I'd be pushing the limit of fabric suitability for the styles I had in mind with this fabric selection. I think I just about got away with it though!

(image source: Tadah! Patterns)

Dress Pattern:

I'll start with Lola's dress. Around the time that I was gearing up to buy the fabric, I was contacted via Instagram by Sewing Gem, a UK-based online sewing shop, asking if I'd like to try out a pattern by Tadah! Patterns, an Aussie brand that they stock and were hoping to promote. It was an obligation-free offer, and the timing was just right considering I was on the hunt for a pattern to make a part dress. When I looked through their selection of Tadah! Patterns, I clocked the Tea Party Dress pattern (pictured above) straight away as one that I've had on my Pinterest board for years. 

(image source: Tadah! Patterns)

In essence, it's a fairly traditional fitted bodice-and-full skirt dress style. However, it includes a crazy amount of style options (see above). It allows you to make a ton of different looking garments all from the one pattern. I let Lola choose her own style variations. She selected the V-neck, classic back (she was going to be wearing this in October after all!), regular arm height, gathered cap sleeve and circle skirt options. 


The pattern is graded between 6-12 months to 8 years. Lola is a touch larger than the measurements that correspond with the size 8, so I lengthened both the bodice and skirt by about 5cm each (also so she'll be able to get more use from it as she gets bigger still). I also made the bodice a tiny bit wider at the centre front and back. I wish I'd had this pattern from when she was much smaller so I could have made many more garments from it over the years!


The construction was pretty simple and suitable for someone who has made a few other garments previously, particularly if you choose to make it in a more stable fabric. The bodice is fully lined and back fastens with buttons, which makes this a slightly more time consuming project, so I wouldn't recommend making it the same day your child is due to attend a party! The only part of this project that gave me pause was trying to work out whether the top edge of the circle skirt should be gathered into the bottom of the bodice, or if it should be sewn flat. The instructions mention creating gathers, however the illustrations look like it should be sewn flat with no gathers (spoiler alert: it should have gathers). 


For future versions, I would also prefer to make the bodice and skirt separately and the join them at the waist seam, instead of attaching the skirt pieces to the front and back bodice pieces and THEN stitching the side seams in one. But that's just a preference of construction order and wouldn't change the look of the finish garment particularly. 

(image source: Fibre Mood)

Shirt Pattern:

I love making shirts for Frankie, and mercifully he enjoys wearing them also! I recently made him a shirt using my regular little-boy shirt pattern with a camp collar, so I was on the look out for something different this time. I found the Rupert shirt pattern (pictured above) in Edition 14 of the Fibre Mood magazine, but you can also buy it separately here. It's got a different silhouette and collar to the others I made for Frankie so decided it was worth the tracing out for some variety! 


I ended up combining sizes for this garment to prevent it being too wide. I used the size 4 for the width and size 5 for length. I altered the sleeve pattern so it wouldn't have the turn up because I didn't want to reverse of the viscose to be visible. I also made a regular hem instead of the facing around the bottom edge because I felt the latter wouldn't be suitable for the slinky viscose. I also added two pockets to the front rather than one upon Frankie's request.


With the bottom hem facing eliminated, this shirt was pretty quick to put together. I like the look of the collarless neckline, and the wider fit is a nice variation to Frankie's current clothing selection.


Thoughts:

My main conclusion is: viscose isn't the ideal fibre for making kids clothes, but it is do-able! Both kids seem to enjoy the slinkiness of the fabric in their respective garments, even if I don't enjoy the ironing! They both chose to wear these garments multiple times over their extended birthday celebrations, and I've put them aside for a month so they'll be in decent enough condition to wear to a wedding in December. 

Related Posts Plugin for WordPress, Blogger...