Tuesday 31 July 2012

Guest Post: The Water-Cost of Cotton


At the very beginning of the year, Grace, one of the writers of Bad Mom, Good Mom wrote a fascinating post about the planetary cost of cashmere and suggested I publish it on my blog also. After all, if you've uncovered some mighty important information that deserves to be proliferated, you'd want it to reach as many interested peops as possible too. Then recently she let me know she has another science-related clothing production post up for sleeve. Fortuitously, she'd chosen a topic I'd been planning on covering myself but was having trouble figuring out how to approach. So, let's here what our 'resident science expert' Grace can tell us about the water footprint of cotton...

I sew mainly with cotton, often from reclaimed/recycled materials.  Why sew with reclaimed materials when it takes so much more time and fabric is (relatively) cheaper than time? Because I think so much about things. For instance, I think about the energy, water and chemicals embedded into finished goods.  Are they used optimally?  Can their useful life be extended?  I honor the makers and the materials by putting them to their highest use over and over again before destruction. How did we lose touch with the wisdom of our grandmothers?  "Use it up, Wear it Out, Make it do...or Do without." Cotton is one of the most water and chemical-intensive crops, using up about 3% of the world's arable land and freshwater and consuming about 15% of the chemicals used in agriculture.  Each pound of "conventional" cotton (enough for a adult t-shirt) is embedded with about 700 gallons of water and a third of a pound of chemicals! The numbers change slightly, based on where and how the cotton is grown:
  • is it irrigated or watered by rain?
  • is it organic (more labor, water and land required) or conventionally-grown? (conventional = herbicide and insecticide inputs)
Is this the highest use of the land and the labor?  This is not an idle worry because children have been pulled out of school and sold into slavery in order to grow "fair trade" organic cotton at prices the first world is willing to pay.  Moreover, cotton destined for wealthy nations is often grown in countries where food is scarce; the water, land and labor diverted to growing cotton could have been used instead to grow food. To learn more, Waterfootprint and NRDC are good places to start.  If you follow the waterfootprint link (and I think it is worthwhile), it will save you much confusion if you know that they break down water use into three types:
  • Blue: surface (river, lake, etc) and well water
  • Green: rainwater (least energy-intensive)
  • Grey: amount of water needed to dilute pollutants generated by the crop to safe levels
Excerpts from other sources

From waterfootprint's cotton story:

The water use of cotton has often great local impacts. In Central Asia,  for example, excessive abstractions of water from the Amur Darya and Syr  Darya for cotton irrigation have resulted in the near-disappearance of  the Aral Sea.

NRDC's From Field to Store: Your T-Shirt's Life Story

Every cotton T-shirt starts life in a cotton field, most likely in China, India or the United States. It takes anywhere from 700 to 2,000 gallons of water to produce about a pound of conventional cotton – enough for a single T-shirt. Cotton grown in the United States uses comparatively less water; however, about a third of a pound of chemical pesticides and fertilizers go into each pound of conventionally-grown American cotton.


US EPA water trivia

Over 713 gallons of water go into the production of one cotton T-shirt.

Wall Street Journal

A new wave of research on "virtual," or embedded, water has given companies and governments new tools to track not just the water that they consume directly, but also the gallons that are embedded in everything from dishwashing detergent and Argentine beef to Spanish oranges and cotton grown in Pakistan. A cup of coffee takes roughly 35 gallons. A cotton T-shirt typically takes some 700 gallons of water to produce. A typical hamburger takes 630 gallons of water to produce -- more than three times the amount the average American uses every day for drinking, bathing, washing dishes and flushing toilets. The bulk is used to grow grain for cattle feed.

10 Things That Will Change How You Think About Water 

Access to water: 1.6 billion people in the world -- one  in four -- have to walk at least 1 km each day to get water and carry  it home, or depend on someone who does. Just to provide basic water for a  family of four -- 50 gallons -- that means carrying (on your head) 400  pounds of water, walking 1 km or more, for as many trips a day as  necessary.

Peak oil? Try peak water.

From the food and grocery industry (great charts!)

It is estimated that the average Briton drinks between 2 and 5 litres of  water per day and will use about 145 litres for cooking, cleaning,  washing and flushing. If the embedded water used in the production of  the goods people consume is also taken into account however the daily  use per person in the UK may be nearer 3400 litres (Source: Waterwise).

Guardian article about how UK relies on 'virtual' water from drought-prone countries

Britain and other rich countries depend heavily on importing hidden "virtual" water from places that regularly experience droughts and shortages, according a report published today by the Royal Academy of Engineering.

Although  the UK is notoriously wet, it is estimated that two-thirds of all the  water that its population of 60 million people needs comes embedded in imported food, clothes and industrial goods.  The result is that when people buy flowers from Kenya, beef from  Botswana, or fruit and vegetables from parts of Asia and Latin America,  they may be exacerbating droughts and undermining countries' efforts to  grow food for themselves, say the authors.


According  to the report, the average Briton uses nearly 3,000 litres of imported  water a year. One kilogram of beef needs 15,000 litres of water to  produce, more than 10 times the amount required to produce the same  weight of wheat. A T-shirt requires 2,700 litres.


It's not hopeless. 

Small changes from many people can have a big impact.  I drink one cup of coffee per day and then switch to tea and water.  I eat beef about once a month instead of weekly.  My husbands worn-out shirts are sewn into clothing for myself or for children.  Scraps can be turned into pieced quilts.  Scraps too small to use can be dampened and used for quick clean ups (instead of paper towels) before they are thrown into the trash.


I could send the dozens of promotional t-shirts from events that our family has attended over the last few years and never wear to Goodwill and turn them into someone else's problem.  They could languish in the store for months (everyone here has too many of these t-shirts) or they could be sent halfway around the world to cloth some other family , incurring shipping energy costs.  After visiting Tanzania and seeing how western t-shirts worn with locally made cloth wrap skirts free up arms needed for work, I feel OK about sending some of my shirts overseas.  But, mostly I try to put them to use in place as you can see in my photo tutorial here.


Massive thanks to Grace for providing us with links to so many useful and fascinating sources of information. Remember, you can find more ideas for reusing cotton fabric garments, including T-shirts, jeans and sweatshirts, on my Refashion Resource page.

Sunday 29 July 2012

Denim High Waist Bow Skirt. Plus: Me-Made-Outfit of the Week


Me-Mades:
Denim high waisted skirt 
Pants (knickers) 

Today's post is a double-bubble in the sense that I'm unveiling a new creation which was also part of my most successful me-made outfit worn this week.


Like many of her blog readers, I too was captivated by Gertie's Emma outfit, the orange bow skirt in particular. I'd squirrelled the inspirational image away in my brain for a couple of years until recently. I don't get on with skirts or trousers with a straight waistband, I find them too restricting and uncomfortable after a few hours, so that has precluded me from a lot of traditional pencil skirt patterns that have come across my radar. I'd begun to experiment with this 1990s McCall's M5590 pattern (pictured below) which has an awesome hourglass silhouette with a sexy vintage-y high waistline. This pattern finishes the waist edge with a facing instead of a waistband which I find to be much more accommodating.


I'd also been making lots of fabric bows at work to apply to various garments, so the elements kind of all came together to make this creation. I wanted a big substantial bow to emphasise this kitschy detail. The denim is fairly light-weight and should soften up even more after a couple of washes. I used a chunky metal-tooth zip and this combined with the denim fabric creates a nice juxtaposition with the feminine silhouette and bow detail of this garment. 


I chose the longest length of skirt included in this pattern which I think of as quite a 1940s length. I also omitted the back vent in favour of a time-saving back slit instead. I'm really excited to see how this garment fades after some wears and washes. 


Friday 27 July 2012

Refashion Friday Inspiration/Tutorial: Scallop Hem Denim Jeans Cut-offs/Shorts


This week's Refashion Friday garment inspiration deliberately moves away from the nautical look I  may be eternally associated with. Instead a present to you an idea for reworking a pair of jeans into shorts suitable for the coolest music festival! Instead of your standard cut-offs, these have an 'on-trend' scalloped edge that is super-simple to create.


First up, cut the legs off your old jeans. Either using a round object to draw round or first make yourself a scallop shape guide from cardboard (I did the latter because I was making multiple pairs of these so making the guide saved me time), draw the scallop shapes on the reverse side of the denim. I used a biro so the lines would be very visible but will wash away. Make sure you keep the scallop marking symmetrical. I did this by folding the shorts in half to compare the legs. It's unlikely that the scallops will meet up perfectly once you have marked all around the leg. You'll probably need to fudge it a bit so make sure that happens at the inside leg seam where it'll be less visible. 


Select a sewing thread that is as close in colour to the right side of the denim as possible. As carefully as possible, follow the biro line and stitch along it with a narrow straight stitch. When you get to the corner/angle, keep your sewing machine needle lowered piercing the fabric and take the sewing machine presser foot up, pivot your fabric and lower the presser foot again to begin stitching in the new direction. When you have stitched round both legs, cut closely but not too closely to the stitching line. 


The hem of your jeans will now have a raw edge. However, fraying that will naturally occur through wear and particularly during laundering, will be limited by the narrow stitching. In theory, the fraying should be stopped by the stitching, retaining the scallop shapes of the edge. 


To complete the whimsical music festival look I made a simple contrast tie-belt from ditsy floral print Liberty/Liberty-esque print cotton. A faded tan leather belt would also look awesome, IMO. 

Tuesday 24 July 2012

Batwing Crazy


I've been pretty obsessed with making jersey batwing tops recently. They are quick to make and so nice to wear, win-win! This is a pattern my boss initially developed and I've done a fair bit of tweaking to, it works best made in jersey fabric that has a lot of drape. 


The first up in this trio is a version that has already seen a fair amount of wear. It uses the amazing magpie fabric that I bought at the Walthamstow Blogger Meet-up. I was feeling very guilty about breaking my self-imposed 'no-new-fabric' rule but the sweet commenters on that post tried to make me feel better by suggesting it was entirely justifiable if I made something from it that would get lots of wear. I've kept that firmly in mind which is why I took my time deciding how to use it. The fact that I've already worn it three times in two weeks shows that I made the right choice in how to deploy this fabric's amazingness.    


I've been thinking for a while about how stripey fabric would work with this pattern. I think the answer is: very well. The stripes, like the magpie print in the first version to a lesser extent, really show up the elements of the top pattern. The direction of the stripes makes the separate lower sleeves and neck binding really stand out, and the way the main body gathers into the lower sleeve sections is more visible.


As you may remember, this top pattern was used for the leopard print version, the poker top and as the basis for the leopard collar batwing top. The leopard print version is still going strong, the poker top has died (as predicted) and I hate to admit it but the leopard collar version is starting to do that way too due to frequent wearing and laundering. It was for this reason that I thought a basic plain black version might be a useful wardrobe addition as well and take some of the heat off the other two!  


If Tilly hosts another OWOP! week I might use this pattern as the basis for my outfits. Maybes I'll get round to grading it and releasing it as a downloadable PDF if there is sufficient interest (though it might have a low price tag attached rather than being free). 

What patterns have you used that requires a drapey jersey? Happy jersey sewing peops! 

Sunday 22 July 2012

Me-Made-Outfit of the Week


Me-Mades:
Pants (knickers)
Leopard Coat (not shown)

First up, apologies for the late night poorly lit photography. This was taken at the end of 'Date Night' last night. Now, I'm not sure if effectively just a dress can be considered an 'outfit', but it is what I wore and it did feel the best out of all the things I wore this week (pyjamas excluded, of course). The dress is made from Simplicity 2444 which I created for the Simplicity 'Get a Vintage Look' Blog Social

I have only worn this dress once since its creation until last night, why? The sleeves. A few times I put the dress on in advance of going out, then tried to move my arms and promptly took it off again. Then yesterday I spent some time unpicking and removing the sleeves, overlocked and turned over the raw edges and made it into the sleeveless version. I would recommend to anyone thinking about making this pattern, do not use the sleeve pattern unless you plan to adapt it to make tiny cap sleeves. Now I love this dress, the fit at the top back still isn't ideal, but a lot of other special sewing to be getting on with, I can now live with this dress as it is!

Friday 20 July 2012

Refashion Friday Inspiration: Sailor Collar T-shirt


This week's Refashion Friday inspiration comes from a look that's close to my heart: nautical! This sailor collar top was created using two second-hand men's white T-shirts and one second-hand checked shirt. One of the white T-shirts was re-cut to form the front and back body pieces, and incorporated the original hem. The second T-shirt was used to cut out the sleeves, also using the existing hem. 


I took the collar pattern from this vintage 1960s Simplicity pattern. Stripey fabric would also have given a suitably sea-worthy effect. The front and back pieces of the vintage sewing pattern were used as a guide to determine the neckline shape required to fit the collar piece. I made a centre front seam in this T-shirt to make the application of the collar quick and easy.


A contrast ribbon adds an extra pop of colour. A few gold buttons would also have been cute. 


Tuesday 17 July 2012

Wedding Dress Update

An update on how I'm getting on with my wedding dress planning really is overdue. To clarify the situation: I'm getting married at the end of September and it's now firmly mid-July. No I don't haven't decided on a final design for myself or my bridesmaid. Don't worry about it, I work best under a little pressure!

Since my last wedding dress 'inspiration collation' blog post I've definitely narrowed all those ideas down. I'm going for what I would feel most special wearing: a sexy wiggle dress with a hemline finishing just below the knee and a decent helping of décolletage on show. I want the wiggle dress to be of the waist-seam variety, so effectively what we're looking at here is a bodice and skirt combo. Seeing it in those terms has actually made research somewhat easier. I've been analysing sewing patterns and dresses and pictured below are the most inspiration-filled. I think a few theewmes and details have bubbled to the surface. To work through the images, I've put them into categories 'Bodice Inspiration', 'Skirt Inspiration' and, wait for it 'Bodice and Skirt Inspiration' for the images that fall into both the previous catagories!

Bodice Inspiration

The images in this section had something about the top half that really appeals to me.


This Whirling Turban wedding dress, pictured above, has possibly the sweetest of sweetheart necklines and the most perfectly proportioned halter strap. 


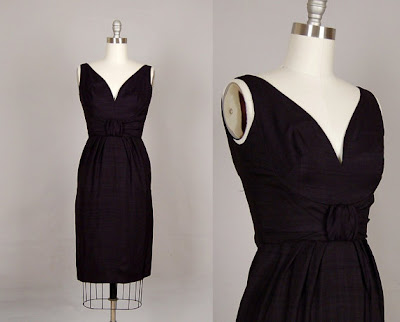
This vintage dress from Etsy has a very similar neckline and halter strap, but creates some of the bust shaping with little tucks at the centre. 


Another lovely sweetheart-ish neckline, this time with two straps. 


Brighton-based dress label 'Dig for Victory' created this lovely sweetheart neckline by making a kind of gathered bow effect. Could look fantastic with a big bow at the back of the dress like a kind of bustle. 


You'll see a theme in a lot of the pictures in this post, there's a lot of gathers/pleats/ruches to be seen. The pattern above, Simplicity 2250, combines the sweetheart neckline with some lovely gathering. It came to my attention when I saw that Crab from Crab & Bee used it as the basis of her stunning wedding dress.


The above dress from Modcloth, which looks uncannily similar to this red Trashy Diva dress, is currently the one I'm drawing the most inspiration from. That neckline and gathered bust detail is ticking my boxes. I'm going to try and toile something similar to see if I can create such a style and then to see if such a style suits me.  


Something like the one shoulder style on this vintage pattern is also an option. 


How nice is this sweetheart neckline with asymmetric strap? Too much food for thought. 


This was an image I found on the only wedding website/blog I'll allow myself to follow, Rock n Roll Bride. If I had the patience of a saint and a time scale running into decades, maybe I could bring myself to rig up something as extravagantly amazing as this bride's incredible red dress. At least I am able to glean satisfaction from this picture that I picked the best colour to work with.


Bodice and Skirt Inspiration

All the images in this section have so much going for them that the whole thing needs to be reviewed.


This picture came from ebay, I wonder who bought it and what it ended up like if they got round to making it. It's pretty damn elegant though, don't you think? I really like how the shoulder and hip gathers balance each other out. I don't think I'm up for the amount of draping that would be needed to recreate this, but I love looking at it.


Now this jaw dropping dress was created by the excessively talented seamstress, La Couturiere Dimanche. I love the combination of very fitted, possibly boned, bodice with the gathered style skirt. It really shows how a sarong style can be actually be very elegant and evening-y with a clever fabric choice.


This vintage dress really is the last word on gathering. I really don't think I'm up for this amount of work, nor do I fancy adding that amount of thickness to my body!


Vivienne of Holloway dresses are very popular with 'alternative brides' these days, if Rock n Roll Bride are any indication. Normally it's the 1950's circle skirt styles that get snapped up, but I'd totally head for this style above. The cascade skirt is a nice variation, and there's that sweetheart neckline again.


I believe I found this image on Gertie's Pinterest boards. Once again, it's a cocktail dress with some of my favourite design elements. 


Check out this amazing vintage dress! There is so much interesting stuff going on, it's like reading a book. I'm not sure how I'd go about recreating this bodice without a pattern, not with only two months to get it perfect! Maybe I'll give it bash one day, or at least keep my eyes peeled for a vintage sewing pattern with a similar bodice.


Skirt Inspiration

In this section, we need to keep our eyes fixed below the waist. It's the only time you'll ever be encouraged to do that...


This skirt looks to me to be the perfect length and width. I'm pretty sure the model is about 12 ft taller than me though!


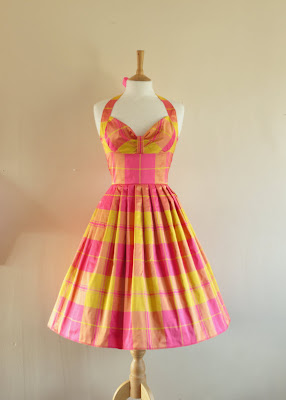
This dress pictured above from Whirling Turban shows me how a subtle and less extreme-gathered version of these gathered skirts could look and look really sleek.


You may have noticed some pretty rhinestone jewellery at the waist, particularly on the gathered styles. I think I could rock that, maybes an afternoon on Etsy and Ebay could uncover some lovely vintage brooches


Speaking of which, talented sewer Adriana posted her version of the popular Bombshell Dress on Sew Weekly. I'm not a massive fan of panelled cups on that pattern (for my wedding dress), but the fitted bodice and gather skirt has lead me to buy Gertie's Bombshell Dress tutorial and pattern and I'm been having a stab to see if it can provide a decent basis for my wedding frock.


Another delightful Dig For Victory creation. If I don't go for the gathered hip style skirt, a symmetrical with front pleats like this might work well.


The main reason I may go for a symmetrical, non-gathered skirt would be to do something elaborate at the back. I've been trying to find an image that conveys quite what I'm thinking, and failing somewhat, but I was kind of thinking maybe some sort of bustle or bow. Pimpinett on We Sew Retro has a rather amazing thing going on with the dress above.


This image from Ebay (.com not .co.uk) is the closest thing I could find to a big back bow. I'll have to have a play about with some fabric I think if I decide to go down this route.


Maybe this kind of back skirt panel could create a nice effect. So my question is: do I have to keep the front of the skirt plain and symmetrical if I want to add some sort of volume detail at the back? Or can I combine the gathered hip type look with the back detail without it looking weird? 

Sunday 15 July 2012

Me-Made-Outfit of the Week


Me-mades:
Stripey T-shirt
Pants (knickers)

This week there were three very strong contenders for my most successful 'me-made-outfit of the week'. In the end I chose this one to share because it was the most comfortable and I got the best photo of it! I can see in this photo that these trousers look a bit baggier than would be ideal, but the plus side of that is they are soooo comfy! I was expecting this red bolero to only work with nautical elements if I used the plain side, but I think the lace appliqué works fine with this look, and actually balances the darker shades and creates a focal point. I tried to keep the floral theme with the flower clip in my hair. Have you had a successful self-stitched outfit last week? What lessons, if any, did you learn from it?


Friday 13 July 2012

Refashion Friday Inspiration: Contrast Shoulder Panel Sweatshirt


Here's a few variations of a style of sweatshirt refashion/remake that I came up with a few months ago. In the way that most my sweatshirt make-overs tend to go, it takes a large men's sweatshirt and transforms it into a more feminine garment with a closer fit.  The sleeves are re-cut to have a slightly gathered sleeve head. The sleeves finish just above the elbow to make it a trans-season garment for when you need something warmer than a T-shirt, but not as warm as a full-length sleeved sweatshirt. This reworked garment can also work well with a long-sleeved T-shirt worn underneath. 


The garment pictured at the top of this post used the materials in the picture above: a lovely soft secondhand sweatshirt, some stripey jersey for the contrast shoulder panels, red satin bias binding and some gold buttons. I cut the front and back pieces to include the hem ribbing so that didn't require reapplying. The sleeve cuff ribbing came from a piece of hem ribbing I harvested from another stained sweatshirt. I cut the harvested ribbing in half and then folded it in half again before attaching to the sleeve hem to make it narrower than a typical sweatshirt cuff. The neck binding is made from the original sweatshirt's neck ribbing. Once the contrast shoulder panels had been formed, I stitched together one of the shoulder seams, then attached the neck ribbing along the raw neckline and finally stitched the second shoulder seam to complete the neck hole. Next the sleeves get set in, then the sleeve seams and side seams of the body get stitched closed in one long single seam. 


The red version pictured above has slightly shorter sleeves and silver ribbon folded in half instead of the satin bias binding to form the piping. I was aiming for a nautical look (if you can believe it) but I only had silver ribbon to hand rather than gold which I would have preferred, so I kind of feel the resultant look is more Wonder Woman than nautical!


The final version I made uses some zebra print double knit and neon pink bias binding to create the contrast and has 3/4 sleeves for a warmer alternative. The shoulder panels are made by cutting away the  sweatshirt fabric in the shape I wanted and using those cut-away sections as a template from which to cut the contrast fabric (remembering to add seam allowances). I pressed the bias binding open, folded it in half and re-pressed it with an iron to make flat piping. I basted the bias strips to the curved edge of the contrast shoulder pieces before attaching both to the front sweatshirt piece.


If you find a window in your weekend to do some sewing, may the gods of successful stitching be with you!
Related Posts Plugin for WordPress, Blogger...