Showing posts with label jeans. Show all posts

Sunday, 15 May 2022

Leopard Print Ginger Jeans and a Realisation

It's slowly been dawning on me that I can't really wear the style of jeans that I prefer, and also feel comfortable AND have them stay on my body properly. And honestly, I think this has always been the case. What I mean by this is that, the slim/skinny legged jeans with a low-rise, hipster waistline which I love the look of just don't work for my body. I've always had a bit of a tum, even when I was in my 20s and weighed the least in my adult life. I've always found the waistline of jeans cut in to my tum uncomfortably. I got so used to undoing the top button of my jeans each time I sat down after years of doing so, but I've grown tired of that now. 

Through the power of sewing my own clothes, I tried to solve the issue by grading between two different sizes for the waist and the hips-downwards. This has never worked well because they end up too loose at the waist and often slip down a bit. 

Having gone on a journey which resulted in my workwear denim Lander pants, I came to the realisation that I need extra space around my tum only, not all around the waist. The full-tummy adjustment I did on the Lander pants worked really well, and for the first time ever I have a pair of fly-front jeans that I can sit down in without needing to undo the button of. 
Naturally, I wondered if I could apply the same magic to a slim/skinny legged pattern, seeing as that is the type of jeans I wear most often. And what I then realised it that I don't think I can make that adjustment on a low- or even medium-rise style and expect them to stay up. 

So what I ended up doing for this project was to trace the high-rise version of the Closet Core Ginger jeans pattern (which I have previously made with low- and medium-rises) as my starting point. I already own a medium rise version which are still in action, so I was able to try those on with the button and fly undone which allowed me to assess how much addition width I'd need to properly accommodate my tum, AND where the additional width should land. As I've discovered through watching videos and reading posts about full-tummy adjustments, I knew I'd also need to add some additional height at the front. 

Because the Ginger jeans pattern calls for stretch denim, I decided not to add the entire additional width it would appear I required, because the stretch content might result in them becoming too accommodating and therefore not staying up!

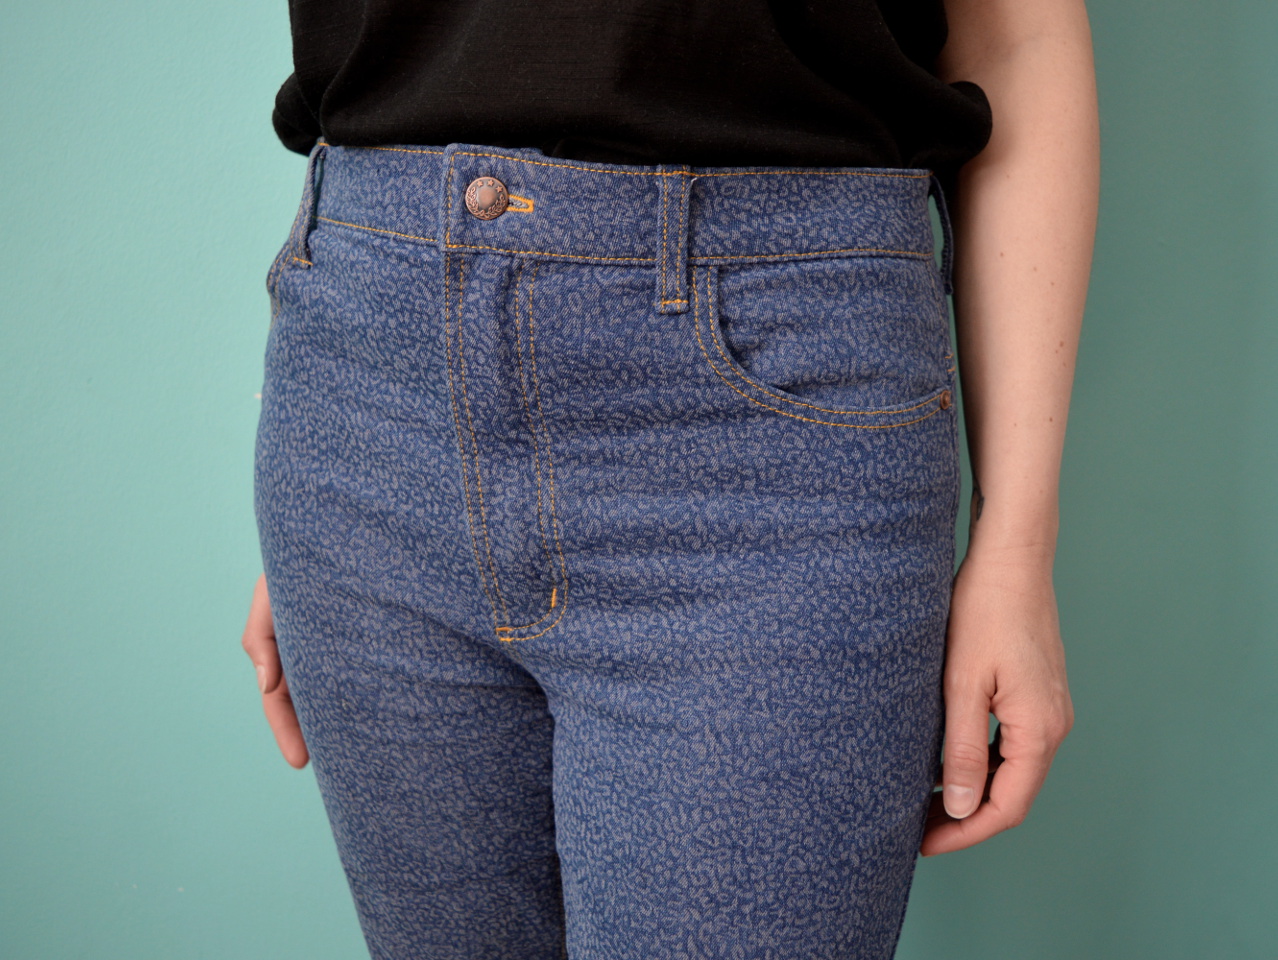
As you can see from the side view (pictured above), the side seam is pretty much in the correct position: perpendicular to the ground. That's one of the main clues that tells me this adjustment worked. The other is that I can sit down without having to undo the button!!! Woo hoo!!!!

The fabric I used was a seconds/remnant from Fabric Godmother. It's a very soft stretch denim with this super-cute leopard print pattern. I like how the jeans look like pretty standard blue jeans from afar, but the little leopard print becomes visible when you look closer. It was a remnant because a fade mark had occurred along the folded edge when the fabric was on the bolt. I was easily able to avoid the fade mark when cutting out these jeans, however. 

Although I still don't love the look or feel of high-rise jeans, I do love generally how comfortable these jeans are. I can wear them all day without wanting to take them off the second I get home. And honestly I never wear my garments tucked into my jeans as I am in the photos: I did that to show the fit of this garment around the tummy. I forgot to take a photo of these jeans shown seated, but I'm wondering if this adjustment might be of particular use to some wheelchair users who would like to wear skinny jeans but find them uncomfortable around the waist. I'm pretty evangelical about this adjustment because I don't think it's one that many sewers know about. 

Now that I have this adjusted pattern, I plan to make a couple more pairs in different colours to flesh out my wardrobe a bit. Currently I own a few tops and blouses that I love and would pair well with skinny jeans, but don't look good with the two blue pairs I know own.  

Friday, 12 July 2019

Turquoise Ginger Jeans: Lounge Camouflage


It wasn't until I came to resize these images, that I realised just how similar my new jeans are to the colour of our lounge wall! However, this is the only decent spot in our flat for taking photos, plus if you'd seen how many toys I had to clear out of the way to get these pics, you'd understand why I'm not going to re-shoot them. 

Pattern:

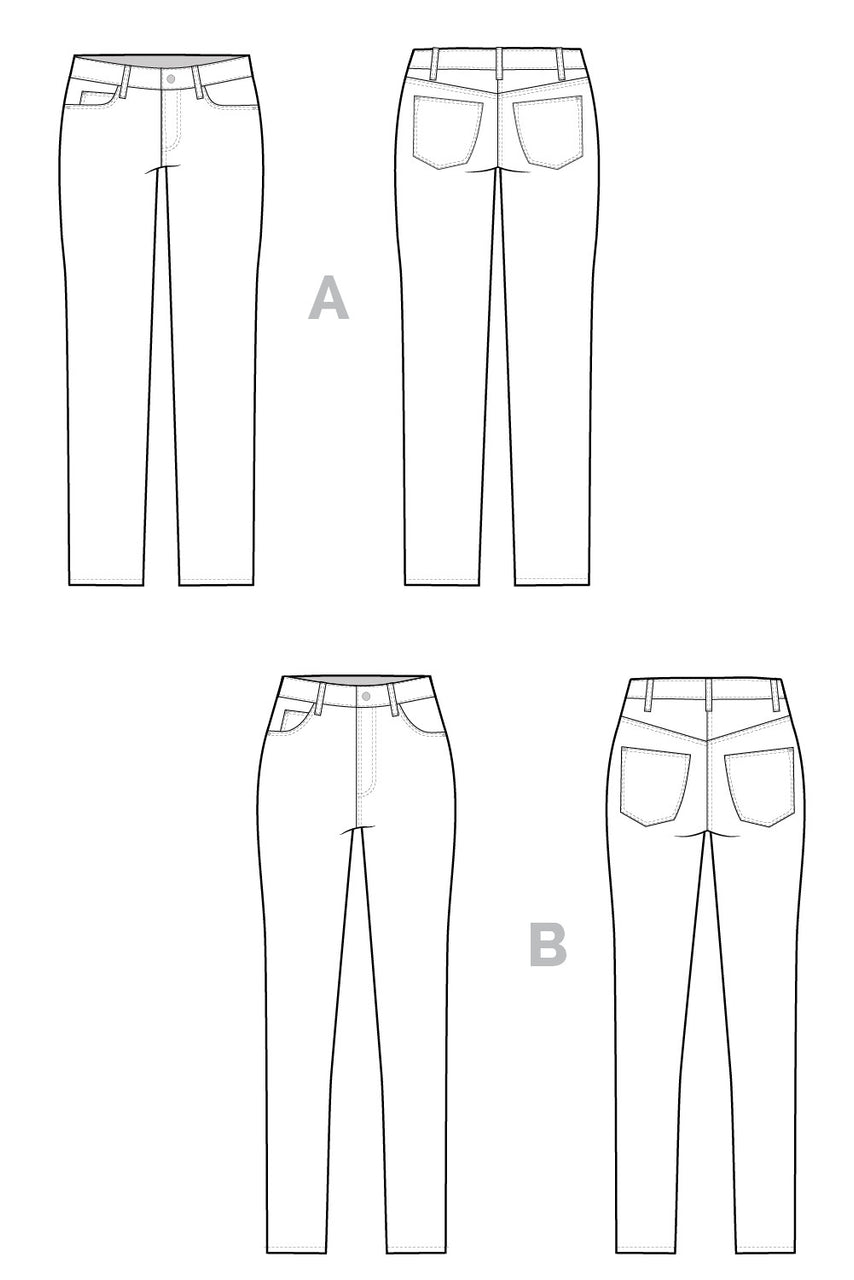
Maybes you remember my first crack at the Closet Case Patterns Ginger Skinny Jeans pattern? Well those have been worn sooooo often, that I knew another pair would be in the pipeline before long. What I have found with my first pair though, is that the low-rise option (view A) really is low. I wouldn't feel decent wearing them without a vest (AKA camisole/singlet) tucked in to them, especially if I planned to sit or bend down. That's fine for the three quarters of the year during which I wear vests, however I wanted my second pair to have year-round wearability. My feeling was that the high-rise option (view B) of the original Ginger jeans pattern would have been too high for me, and I considered buying the mid-rise version until my friend Paula told me that Closet Case had generously published a blog post with a tutorial for drafting your own mid-rise version. Let's do this!

Ginger Skinny Jeans pattern // Technical flats // Closet Case Patterns
(image source: Closet Case Patterns)

To draft a mid-rise pair, it is suggested that you start with the original high-rise option (view B), as the proportions of the pockets and such are more suitable. I chose to make the rise exactly in between the views A and B. I took some additional body measurements to find out what I measured around the waistband of my view A pair, and what I measured around where I intended my new waistband line would be. That different of measurements was very useful when following the steps in the post. I should point out that Closet Case's tutorial doesn't include shortening the fly piece, which does need to be done. 


I'm not the first to say that each time you make the Ginger jeans, or any pattern that uses a fabric with some stretch content, it's important to have a mid-way fitting sesh. Even if the fit on your last pair was perfect, each stretch denim will have slightly different properties so can't assume your next pair will also be spot on. I was relieved that, after all that pattern tweaking and the different denim, the fit of my second pair before I attached the waistband was great. After I tacked the waistband on, I tried them on again, but found them too tight at the waist, so I unpicked and reapplied the waistband,  easing in some extra length. 

One fitting note that I didn't discover until they were all finished and being worn, is that I think they are too wide around the ankle. You can see it pretty clearly in these pics. At the moment the weather is pretty warm, so I'm wearing them with the hems rolled up a bit. However, when it cools off and I want to cover my ankles up again, I'll unpick the hem and take some of that width out from the side seam. 


For the topstitching on the back pocket, I used one of the downloadable designs that you can access from the Closet Case Patterns site when you sign up for their newsletter. I transferred the design to the pocket pieces using white carbon paper and a tracing wheel, and I'm soooo happy with how they came out. I would definitely recommend the designs that use straight rather than curved lines for getting a clean result.  


Fabric and Interfacing: 

If you recognised that this turquoise denim was one of the nine pieces of stash fabric I pledged to use up in my #2019makenine plans, then you get a million points. This project is my fourth completed project for that challenge, although a lot more sewing has been happening that aren't part of those make nine plans. This fabric is some turquoise-y stretch denim that I bought from Fabric Godmother a few years ago. Since buying it, I'd fallen out of love with it, but now that it's made up into a garment that feels good to wear, I'm a fan again. The elastane/Lycra content must be pretty high, because it has a kind of synthetic-y sheen, but because of that content, it feels like I'm basically wearing leggings rather than jeans. 


I had a long debate with myself about what to use for the facing and interfacing for the waistband. Feeling comfortable, particularly round my waist is of MASSIVE importance to me, and can totally dictate whether or not a garment I've made ever gets worn. I can't remember if I used interfacing on the waistband of my first pair of Gingers, however I used a non-stretch woven cotton for the waistband facing, so that waistband basically has no give. However, due to the fact that that pair sits so low, I still find them comfortable to wear, as long as I have a belt to stop them heading south.   

But because this second pair were going to be sitting higher up, closer to my natural waistline, I wanted to ensure more give so that I wouldn't feel constricted. I decided to use the same stretch denim to face the waistband, plus I applied fusible interfacing for knits to the waistband piece itself. The result is a pleasingly stretchy waistband that definitely does not feel constricting. Howevs.... they do start to migrate down a bit whilst they are being worn. I'm wearing a belt with them to counteract this, which slightly nullifies the point of a stretchy waistband. Any thoughts?!


Oh but wait! Did you see my pocket bags?! I got to use up an awesome remnant of quilting cotton that I'd bought from Ditto in Brighton yonks ago. It's got a cute 1950s kitchen print which is kind of at odds with a pair of turquoise skinny jeans, but I think that makes me like the combo even more. 

Thoughts:

You've probably already gathered that I'm really into this me-made! I promise to dig deep and sort out the excess width around the ankles so that I'll like them even more. I find jeans making sooooo satisfying. This year's Me-Made-May challenge taught me that a pair of black skinny jeans would be a useful addition to my wardrobe. So when Autumn hits, I'll keep my eyes peeled for some great black stretch denim and use this pattern exactly as it is for those. 


Thursday, 23 May 2019

Quadra Jeans Ambassador Project for Fabric Godmother


For this, my second Fabric Godmother Ambassador project (you can see my first one here), I decided to take on the mother of all selfless sewing projects: jeans for Mr SoZo. You can read my post about this project on the Fabric Godmother website here, however, here's an abridged version with some extra details. 


For this Ambassador project, I chose the Thread Theory Quadra Jeans pattern which is part of the range of PDF patterns that you can purchase through Fabric Godmother's website. I paired the pattern with this unusual rust-coloured denim. I thought that it'll add an alternative to the sea of navy and grey that comprises his wardrobe, plus I thought the small stretch content would make these slim legged jeans more comfortable.  

If you're attempting to implement more of a 'slow fashion' approach to your sewing, as I am, making a dude a pair of jeans ticks a lot of the boxes. Firstly, making jeans is literally a comparatively slow sewing project. Secondly, Pat, like many guys, will wear his clothes until they are basically rags. So these jeans are likely to have a lonnngggggg life with many wears.

So, the instructions recommended sizing down if you are using a fabric with stretch, so I chose the size 28” even though his measurements put him as a size 30. In the end, I let them out again a bit at the waist (I waited until I fitted the side seams before cutting out the waistband), so I’d probably start with the size 30” next time and give him a bit more room throughout the whole leg.


I'd also like to mention something that an Instagram post featuring someone else's Quadra jeans project gave me a heads up about; if you're making one of the smaller sizes, you may find that the back pocket pattern piece is crazy-big. Unlike the Ginger jeans pattern, for example, the pocket piece is one size, rather than graded between the size range. After measuring the pockets on his current RTW jeans, I ended up reducing the pocket by about 1.5cm along the sides and bottom.


This final thing I'd like to mention about this project that I didn't write about in the FG post is the pocket bags. Although my woven fabric scraps selection is extensive, I really didn't have anything that worked well with the rust denim. But in the same week that I began this project, I also had to encourage Pat to decommission one of his well-loved and overly-worn out work shirts. The fabric was excellent quality, somehow both crisp and soft, and I was able to squeeze both pocket bag pieces out of the back section, thus giving his old faithful a kind of reincarnation.  


So would I use this pattern again? Very likely. The next time he needs a pair of jeans, if I can find the time and muster the selflessness, I'd definitely consider making him some more. This might be one of the rare sewing projects that might be cheaper to make yourself than to buy at a comparable level of quality in the shops. Is that some kind of unicorn of the sewing world?!

Thursday, 7 March 2019

Lander Pants: 70s Style


Agh! My photographer (Mr SoZo) and I experienced a host of technical difficulties which has resulted in the colours in these photos being really weird. But, you know, when it takes as much luck and effort as it does to get a rare sunny day during the winter, clear sufficient space in the lounge and then placate the children long enough to take some photos, there's no way I'm going to retake them! Hopefully I'll get some more accurate pictures of these trousers during Me-Made-May later this year. 


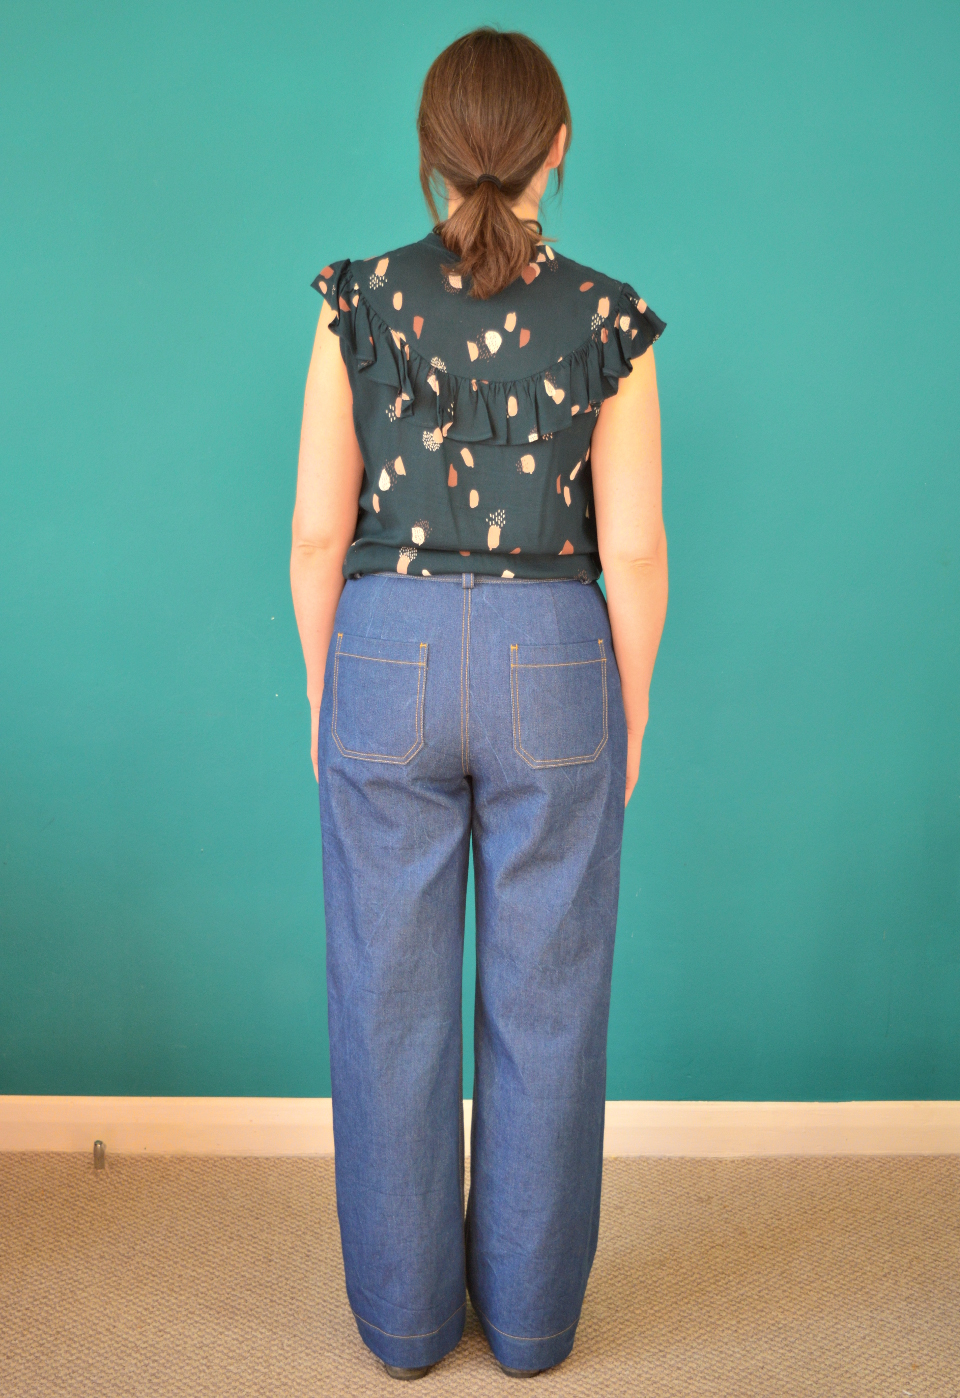
70s style denim flared trousers are a real dream sewing project of mine. Until last year, I had a thrifted pair somewhat similar to these that were originally from Topshop. I wore them fairly regularly (pregnancies and weight fluctuation sometimes getting in the way) for about six years. Then, one day, I looked at my back view in the mirror. Oh bejeezus did they fit me badly around the bum! Even though they still felt comfy and were fine from the front, I just couldn't un-see what I had seen; the bubble was burst. Off they went to the charity shop. Ever since then, I have been plotting and scheming to make myself some replacement 70s style denim flares. 

(image source: Fabric Godmother)

Fabric: 

So what was the impetus to finally get to making these now? Well, my dream fabric landed in my lap. Well, not literally. It actually landed on a shelf at my fave fabric purveyor, Fabric Godmother. I have a very soft spot for denim in general, but this, THIS, is my one true love: broken twill denim. Seriously, I considered abusing my savings and buying the whole bolt. If you're not sure what broken twill denim is, basically, it's this: instead of the distinctive diagonal twill weave of regular denim, broken twill weave looks like zigzags (see below). Wrangler used broken twill denim a lot in the 70s, and many moons ago I found an amazing pair of vintage Wrangler jeans in a charity shop that I made into a denim mini skirt. I wore the living shizzle out of that skirt, and now that I think about it, I was wearing that skirt when I met Mr SoZo nearly eleven years ago! I digress...

(image source: Indiamart)

This broken twill denim that Fabric Godmother is currently stocking is a lovely mid-blue (in reality a bit darker than the pics of my denim trousers). It's 100% cotton and a medium-to-heavy weight, so suitably sturdy for the Lander pants pattern I planned to use. 

Pattern:

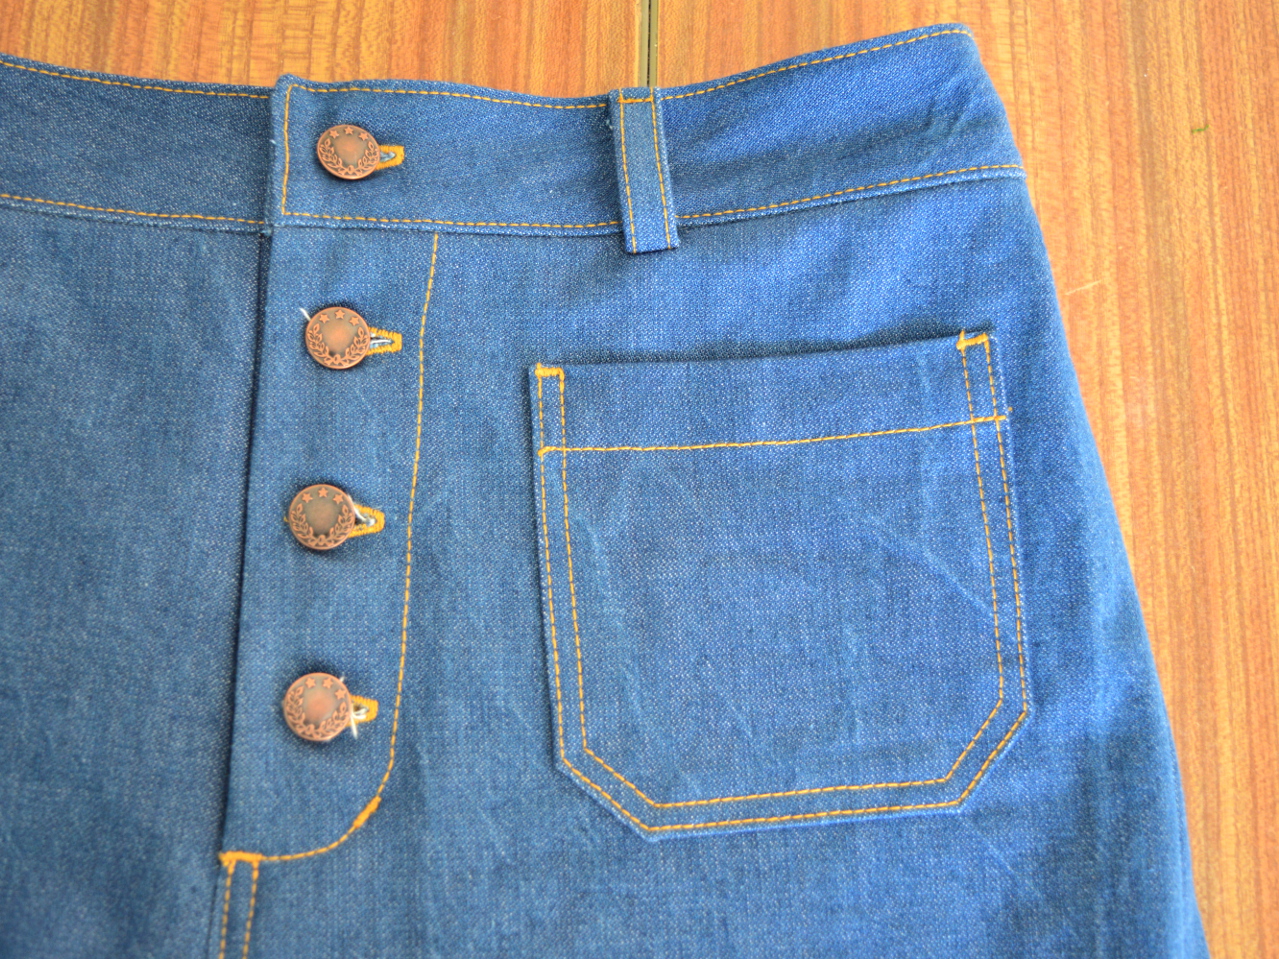
Of course, I am not the first to either make the True Bias Lander pants in denim, or to acknowledge this pattern's potential for realising your 70s denim flares fantasy. However, I did spend a sizeable amount of time researching 70s jeans pocket shapes and drafting what looked right to me (oh, and even longer positioning and repositioning them endlessly during construction!).  


This wasn't my first dalliance with the Lander pants pattern. Last year I made a very successful wearable toile of the shorts version. I spent a lot of time tweaking the pattern but used some random olive green twill in my stash that I wasn't mad about, so I really wasn't expecting to love or wear them as much as I did. 

What you won't have seen on any of my sosh medias is my second stab at this pattern. I had such high hopes for it, but the result was a massive pile of meh. I made the full length version in some navy suiting from my stash with metal buttons with little anchors on for the fly. I used the pattern's original front and back pockets, but rounded the corners for a slightly different take. Sounds alright, no? They weren't. The end result was so blah: disappointment levels were high. I forced myself to wear them a couple of times on the school run to see if I could warm to them, but no. I think the over arching problem lay with the fabric: they looked too office-wear, not cute naval officer as I'd hoped. And my doctoring of the pocket shapes hadn't been jazzy enough to elevate them. However, what they did teach me was that I could use a couple of additional tweaks to the pattern before embarking on another attempt.


The navy suiting pair taught me that I might have been a bit over zealous with my previous curving of the originally-straight waistband. I'd also been too heavy-handed by pinching out far too much from the back waist darts in my attempt to eliminate any sway back gaping. Somehow, the over-correction of these issues weren't really visible in my shorts version, but they became apparent in the full-length version. I sorted out those alterations before cutting into this beloved denim, and I feel that readdressing both was time well spent. 

Thoughts:

I love these trousers so much, and I'm so excited to see the denim age with wear and laundering. The fit is great and I've already worn them heaps. The higher waist of this pattern means that these work well with some of the garments, and in some outfit combos, that my low-rise Ginger jeans don't work so well with. And as the weather warms up, it'll be fun to discover new outfits to wear them in.   


If I were being hyper critical, I would point to two 'flaws'. You can't see the first here, but since these pics were taken, the buttons have shifted to the very edge of their buttonholes, resulting in a 1cm strip of the fly piece below now becoming visible. I thought I had positioned the buttons with due care, but I'm wondering if using a keyhole rather than regular buttonhole setting has contributed to this. Seriously though, I'm well aware that no one else in the world, aside from serious sewing nazis, would probably notice it.  

The second point that gives me slight pause is in regard to the fit through the leg. A lot of the vintage jeans I found images of were more fitted through the thigh, and flared out more from the knee. The Landers are fitted around the waist and hips and the leg shape is straight from the top of the thigh down to the ankle, which gives the illusion of a gradual flare starting at the top of the leg. This distinction is why I'd refer to these as denim trousers, rather than jeans. Someday I might scratch that itch with the Closet Case Patterns Ginger flared jeans expansion pack, but in the meantime, I'm sure I'll get much wear and joy from these. 

Thursday, 7 February 2019

Ginger Jeans Triumph


Hi guys. I know that exclamations of pride and amazement at having sewn 'proper' jeans are nothing new in the sewing community, however, I MADE JEANS!!!!!!! Before we dig in, I just want to mention that I had major technical difficulties getting decent pictures of these jeans. And now that I'm looking at these pics, I see that my photographer, Mr SoZo, didn't account for our height difference and my legs look weirdly foreshortened. But hopefully you get the idea of what's going on with them anyhow, I'm sure as hell not taking these pics again!!

Pattern:

After a lot of back and forth, I decided to go with the Ginger skinny jeans pattern from Closet Case Patterns for my first real pair of jeans (as opposed to the denim trousers or jeggings that I've made in the past). I'd heard great things from others about the fit and the instructions, plus I liked all the extra info and support that was included in the sewalong. 


I knew straight away that I'd be making View A: the low rise, stove pipe leg version. My measurements put me as a straight size 12, and although I had heard that this pattern can come up big (particularly with very stretchy denim like mine), I couldn't bring myself to size down for fear of them ending up too small. I did decide to go ahead and scoop a bit of the crotch out straight away as this has been a really successful adjustment for me in recent trouser-type projects. I decided to do the scoop-crotch adjustment to the pattern first, rather than scooping as required once they were basted together, because the topstitching on the CB seam meant I wouldn't be able to adjust them at the basted together stage without A LOT of unpicking. The other pattern alteration I made before cutting out my fabric was to increase the amount of curve around the back of the waistband. I have a slight sway back situation, and the waistband as it was originally drafted just didn't look sufficiently curved for my needs. 


As suggested in the instructions, once the front and back were both completed and joined at the crotch seams, I basted the inside leg seams and side seams to check the fit before proceeding further. Woah, they were big. They were about a size too large through the waist and hips, and the legs were wayyyyy looser than I was aiming for. It took a couple of sessions to wrangle the fit to a point I was happy with, and made the changes back on my pattern pieces for future reference (#payingmyselfforward). 


Fabric, thread and hardwear:

I bought this dark indigo stretch denim at a sewing meetup a couple of years ago from Ditto fabrics when Ditto was selling off some stock before vacating their storage space. This is the first garment I've made using some of the stash fabric I selected for my #2019makenine plans. I've decribed it as indigo, but there's a slight greyish tone in there as well. It's soft and very stretchy and I 
really love it. I used leftover corazones quilting cotton (a Henry Alexander print I believe) for my pocket bags and waistband facing. 

I'm lucky enough to own a cone of gold top stitching thread (that I found on the street in the middle of the night in Barcelona, but that's a story for another day), but I wanted to add a pop of red as well to make these jeans a bit fancier. I used the red topstitching thread in the back pocket design (that came from the free downloadable back pocket design sheets available by signing up to the Closet Case Patterns newsletter), for the buttonhole and for the bar tacks at the fly and side seams. 


I failed to get a decent shot of it, but the jeans button I used is a copper colour with a pair of scissors design on it. I got it about 10 years ago in a slightly sneaky manner: I found it on the floor of a Zara changing room in Spain. It was meant to be the spare for a garment on sale, but I took it home for a future sewing project. The rivets are by Prym in antique copper that I bought from Fabric Godmother. I wasn't sure if I was going to bother with rivets because I was kind of viewing this pair as a wearable toile, but I'm really pleased that I did because it really elevates their whole look.

Thoughts:

Wow, jeans-making is intensive, isn't it?! But also SOOOOO satisfying. I honestly haven't enjoyed a sewing project so much in months. As is usual these days, I had to make these in instalments in the small pockets of time I managed to carve out for myself. At each point I really couldn't wait to get back to them and do another step or two. Even though this is denim has a sizeable stretch content, it still behaved really well, I just had to be careful not to stretch the raw edges too much when handling it. Plus, I LOVED doing the visible topstitching, it's so pleasing to see the finished result.


But all that time and effort that went into these jeans gave the whole project somewhat higher stakes than your average sewing project. Thankfully, the final fit is pretty good (*massive exhale of relief*). All the faffing about with the fit through the leg was totally worth it because they are exactly what I was hoping for from the thighs down. I feel that they might still be a touch loose around the hips, particularly after a few wears (they are fresh from the wash in these pics), but I bought a vintage plaited leather belt for £1 in a charity shop which keeps them in place fairly well. I'd also say that the crotch-scooping was definitely necessary, without that I think there'd be a lot more wrinkles under the bum than there currently are. 


After finishing these, I wore them for the following six days straight before putting them in the wash, so I'd definitely class these as a success. And they are the only bottoms I currently own that I don't want/need to change out of as soon as I get home. However, I do find the low rise too low rise, especially at the back. They are fine whilst I'm wearing a vest/camisole tucked in, but I predict they will feel a bit exposing at the back when it's too warm to wear them as part of an outfit without a vest. I don't think I want to go for View B, the high waist option, but I am considering buying the mid-rise version and starting with a size smaller next time. And there will definitely be a next time.

Wednesday, 21 March 2018

Urban Farming (AKA Mila Dunagrees)


Cards on the table: I'm not feeling great about my body at the moment. Winter eating patterns (AKA eating EVERYTHING), having had two babies, as well as entering my late thirties all seem to have taken their toll recently and I'm not feeling at all comfortable. I'm hoping that improved eating habits and adapting my expectations will meet in the middle and I'll feel happier in the near future. But in the meantime, I thought it best to make myself a stretchy, tight fitting garment to wear and get photographed in, then share those pictures on the internet. Behold: my new Urban Farmer look. 


Pattern:

Like many I don't doubt, I was instantly drawn to the Mila dungarees pattern. I love wearing jeggings (despite all the hassle they've given me) and I hoped these would be a fun and interesting alternative. Tilly was kind enough to send me a copy of the pattern, so I made a special pilgrimage to Fabric Godmother (more on the fabric in a bit) and set to work. 

I cut the TATB-size 4, and made a couple of small changes. Firstly, I re-drafted the curved edge of the bib piece so that it finished a bit closer to the side seam. And secondly, I spent quite a bit of time making tiny tweaks to the fit of the legs to get them looking balanced all the way down. I could easily have lopped off a few centimetres from the leg length, but I've made too many pairs of jeans and trousers that have ended up annoyingly short after a few washes, so I'm keeping these a bit long as I expect they may do the same. 

The fit-tweaking aside, I found the process of making these sooooo much fun. Working with a well behaved denim and doing all that tidy topstitching was heaven. If I were to make them again, I might even add some extra topstitching to the waistbands or crotch seam, as the topstitching is currently largely concentrated on the bib area. 


Fabric:

Despite some stunning patterned versions popping up on IG, I knew I needed to keep my pair solid. And it had to be denim if they were to become the alternative jeans/jeggings that I hoped they would. I can't find this denim on the Fabric Godmother website right now, so you'll have to go with my title: fabulous-quality mid-blue stretch denim. I always associate this colour denim with the 1970's, and I adore how it looks contrasted with orangey-gold topstitching thread. I must admit, there is a part of me that is regretting not making these dungarees in black. But having made my Cleo pinafore in black, I felt my wardrobe would welcome a little variety. 

Let's talk hard wear. I was sent the buckle set that Tilly stocks with the pattern, and I ended up using the clips combined with these antique copper jeans buttons. Fabric Godmother also stocks the smaller 14mm antique copper jeans buttons, which I got for the side fastenings. I think these buttons suit the denim's colour and vintage-y vibe, whereas I feel it would be silver all the way if I made a black pair. 


Thoughts:

As I'm sure you can tell, I haven't landed on a final opinion on these yet. Perhaps I should have made them in black and saved this vintage-y denim for some epic Lander pants? It is, of course, impossible to say. 

This post is feeling a bit confessional somehow, but I must also admit that the fit around the bum area is not great. I did get Pat to take a pic, but I really didn't feel like sharing that one today. However, I may share that pic with the tutor of The Perfect Jeans craftsy class and get her opinion on what could be improved (as I wrote about in this post). It may be that a bit of scooping could get them looking and fitting better, but I'm not ready to jump down that rabbit hole right now.  

What I do know, is that these feel fairly comfortable. More comfortable than I was expecting them to feel, if truth be told. Stating the obvious, they are currently a bit too tight around my middle. But me  laying off the bread and choc a bit, and putting them through a few more wears and washes, and they should be sufficiently loosened up. Plus, if I can't get them looking better (either through sorting myself out a bit or working on the fit some more), I could always relegate them to use on my future allotment...


Friday, 15 December 2017

Jeggings Attempts #3 and #4


It's been a journey, guys. This post represents the large amount of time and mental energy that has been taken up by this quest for successful jeggings. Remember when I was talking about ways we can pursue making great, long-lasting garments, thus making sewing a more sustainable activity? Well this whole journey has definitely ticked a whole load of those boxes, although I certainly couldn't muster up the energy to attempt to perfect every project/pattern to this degree!

But let's back up. If you're interested in the details of where I'd got to with The Saga of the Jeggings, then please head to this post to read about my first and second attempts. The black pair (#2), despite their issues, have been worn HEAPS. Like, almost daily. The quality of the denim I used is amazing. The colour has faded quite a lot, as you'd expect with repeated wear and laundering, but they keep their shape so well, and by the end of the day they haven't sagged at all. But, if you already read that post then you know I was pretty stumped about where to go next with improving the fit.

A while ago I'd bought, but not fully watched, the Craftsy class called The Perfect Jeans with Jennifer Stern-Hasemann (my new favourite person). I returned to that class after a tipoff from TATB employee and general amazing lady Vanessa (who had read my Jeggings Attempts #3 and #4 post so knew of my troubles) that it may hold the key to my fit issues. I watched the relevant sections of the Craftsy class but still felt unsure of how to proceed. I then spent a number of evenings reading pretty much all the fit issue questions posted by viewers in the class notes and Jennifer's responses to them, partly because I was finding it fascinating, but mainly in the hope that someone would be having the same issues as me. Then it finally dawned on me: I could just bloody ask Jennifer myself! I was a little concerned that she'd tell me that her class was about fitting 'proper' jeans, not jeggings, but as a paying customer I was hoping that she'd throw me a bone and offer some advice anyway. She did.


Jennifer suggested I scoop out the crotch a bit (see the red line in the picture above that she helpfully drew on). The aim of this was to create more space for my bum so they didn't ride down so much at the back when I sat down, whilst also to picking up some of the excess length I had on my black (#2) pair. I also lowered the waistline by 2cm for comfort, shortened the leg length, tapered the leg at the ankle a bit and repositioned the pockets. The navy pair you see below are the result of making these changes.


Thoughts:

Better, no? I used some cheap stretch twill from Fabric Land in Brighton that has four-way stretch. I'm not sure I've knowingly encountered a woven with four-way stretch before, but it's made for very comfortable jeggings. They are basically the only pair of trousers/jeans/jeggings that I don't change out of as soon as I get home (I'm wearing them now, in fact). As for construction, I didn't bother with any real or faux felled leg seams this time, just closed ones on all seams. I also selected a very narrow lightning stretch stitch on my machine as a few stitches have popped around the waist seam on my black (#2) pair. I spent quite a bit of time creating some gently shaping around the calf so that they fit really nicely round there which I'm super pleased with. 

However, there's the following:
  • some excess fabric around the back thigh
  • they ride down at the back a fair bit when I sit down 
  • the pockets are still too low and too close to the side seam  
  • and now I've got some kind of knock-knee issue going on
Back to Jennifer...


She suggested I corrected the knock-knee by slashing both the front and back pattern pieces at the knee and shifting the bottom half towards the inseam about 1/2", then reshaping the leg seams (the adjustment in red labelled 1 in the picture above). (We decided against making the adjustment labelled 2 in the end.) I also extended the back crotch point, but only about 1/4", to help a bit more with the riding down at the back when I sit. Oh, and added some length back to the hem. The results (#4):


Thoughts:

Pretty good, I hope you'll agree. Well, that's what I thought when I first put them on. Then I wore them for a morning and they kept riding down at the back every time I bent down (which with a tiny toddling little guy around is OFTEN) and it was driving me crazy. I was so desperate to take them off as soon as I got home, that I must confess, I changed out of them before I even unclipped Frankie from his pushchair! 'AGH', I thought, 'They're a bust'!. I put it down to this cheap stretch twill (once again from Fabric Land, I'm not proud) that has only two-way stretch. 'Maybe I can only make this pattern in four-way stretch', I thought and prepared myself to chuck them in my textile recycling bag. Then I checked and found that the black denim that my #2 pair is made from only has two-way stretch (albeit much better quality), so I had a re-think. I went and bought some wider, sturdier and better quality elastic, then unpicked and remade the waistband with the new elastic inserted. It made the world of difference and these now stay in place as I move about, bend down etc. Phew! I think the lesson I need to take away from this pair, that I already mentioned in my sustainability post but clearly hadn't taken fully on board, it that quality fabric and notions can make a massive difference. 


Next step:

I don't think there's anything further I can do to this pattern. I've accepted the slight excess of fabric around the back thigh as necessary for being able to walk and sit down properly. This pattern is as close to perfection as I think I can get. Jennifer agrees. This week I went back to my black (#2) pair and re-hemmed them to make them a bit shorter, then unpicked and restitched the waistband having lowered the waistline by 2cm. Now I have three wearable pairs of jeggings: black (faded to grey), navy and red. I'm particularly thrilled to have red ones, despite it probably being the worst quality fabric of the three, but I've had my eye on owning some red trousers or jeans for years. That's probably a sufficient quantity of pairs of jeggings to own. It's great to know that I've got the pattern ready as and when any of these become unwearable. However, I've got a gorgeous piece of turquoise/blue stretch denim in my stash (this I think), and I fancy pushing myself a bit further. I'm talking 'proper' jeans. Like, with a yoke, belt loops, fly front, the whole nine yards. Jennifer thinks I can adapt this pattern a bit to become a proper jeans pattern, so watch this space for that.  
Related Posts Plugin for WordPress, Blogger...