Welcome to my monthly 'Free Pattern Friday' feature, where I road test a free sewing pattern or tutorial: sometimes a children's one, sometimes an adult's one . I publish these posts every first Friday of the month, timed to provide inspiration for those who plan to get their sew on over the weekend. I firmly believe that, if you pick your projects carefully, sewing doesn't have to be a crazy-expensive way to clothe yourself and your family. I also firmly believe that pattern designers deserve to be properly paid for their work, so if you enjoy using a pattern and can afford to do so, make sure you support that designer. Some designers' websites offer the option to make a donation, alternatively you can buy one of their paid-for products. If you can't afford to do so, you can support the designer by sharing your project via social media to help draw more attention to their work. Thanks to all the amazing pattern designers who have offered up their hard work for us to enjoy for free.

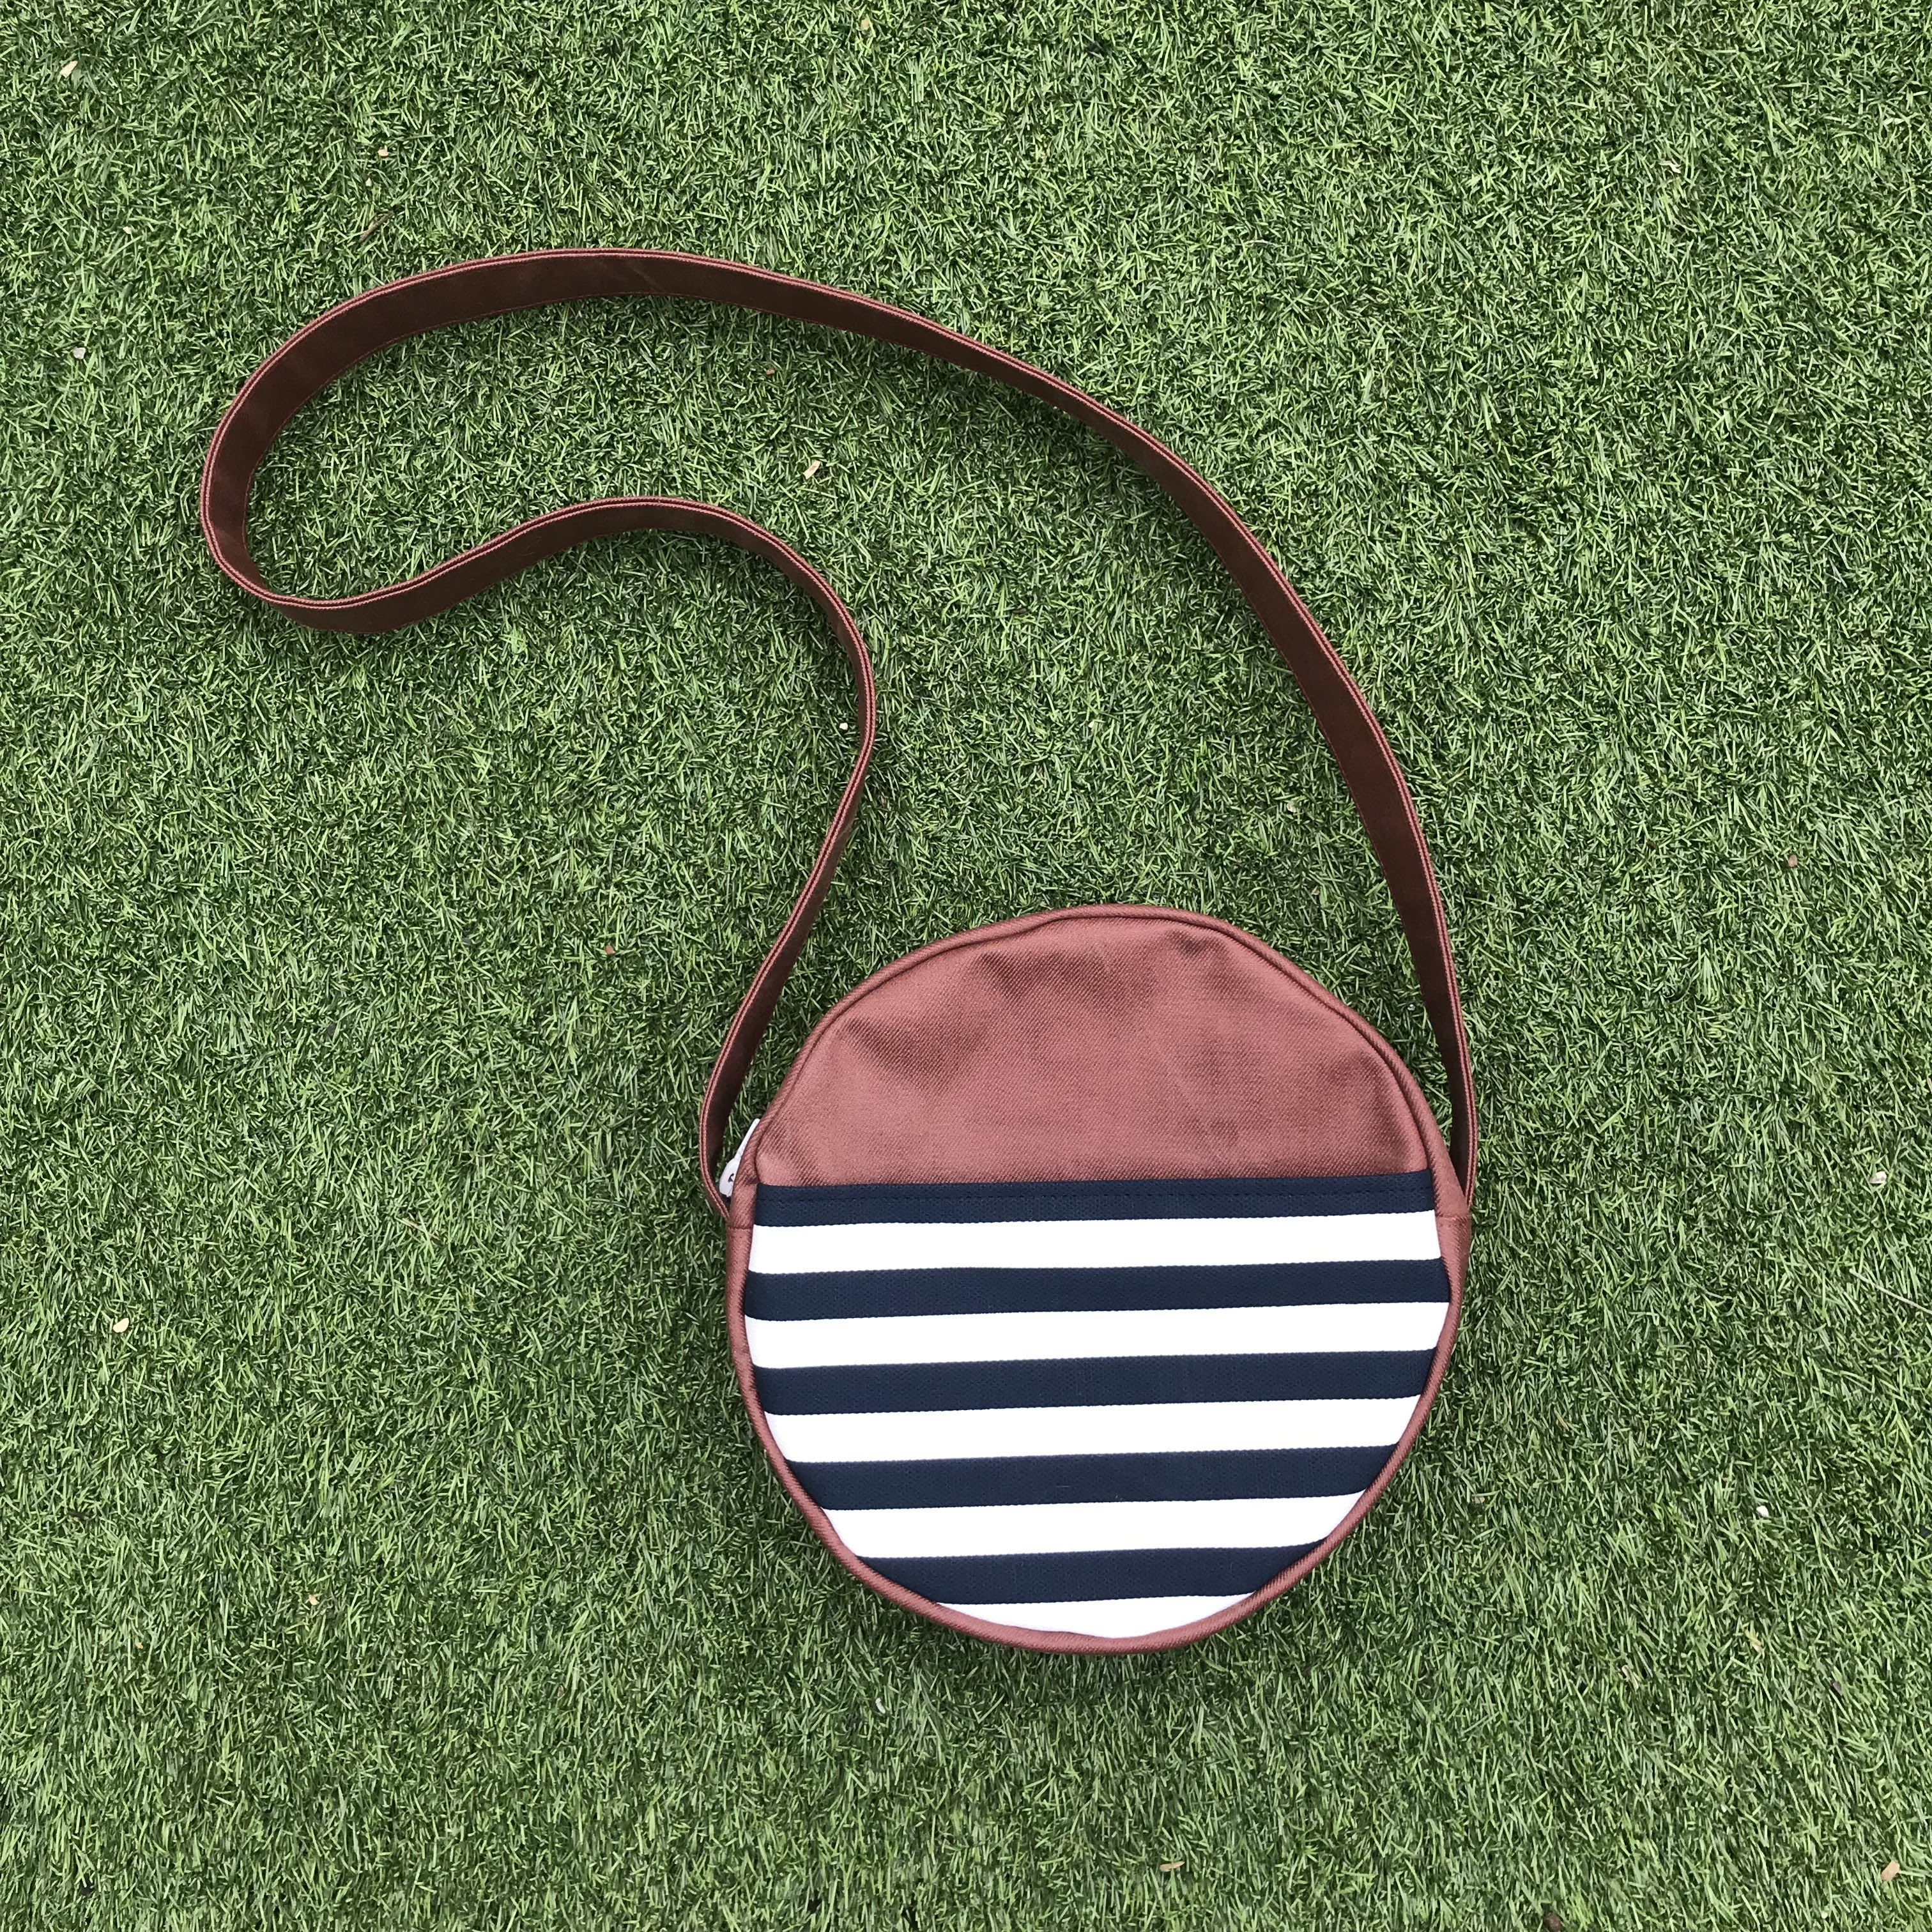
I first heard about the Full Moon bag pattern(s) by All Well Workshop through a conversation I was having on Instagram with someone about teaching kids to sew. Sadly I can't remember who it was with, but the person was saying that they used the pattern as the basis for a sewing party for their child's birthday. Impressively, they had borrowed a bunch of sewing machines and managed to get a group of kids through the steps to make their own versions. When I checked out the pattern for myself, I really loved it, and quickly convinced myself to make one as an alternative to my ropey ol' backpack. I felt it was the ideal basis for using up some scraps and I imagined that I'd use it for travels and days out when I didn't need to carry much. Unfortunately, I've got so used to carrying my water bottle everywhere that it hasn't proved quite as useful as I'd predicted. So it's become the bag I take with me when I go for a drink because that's basically the only time I don't bother to take my water bottle with me! Anyway, the lovely little bag pattern comes in two sizes, and can be accessed for free when you sign up to the All Well newsletter.

Pattern type:
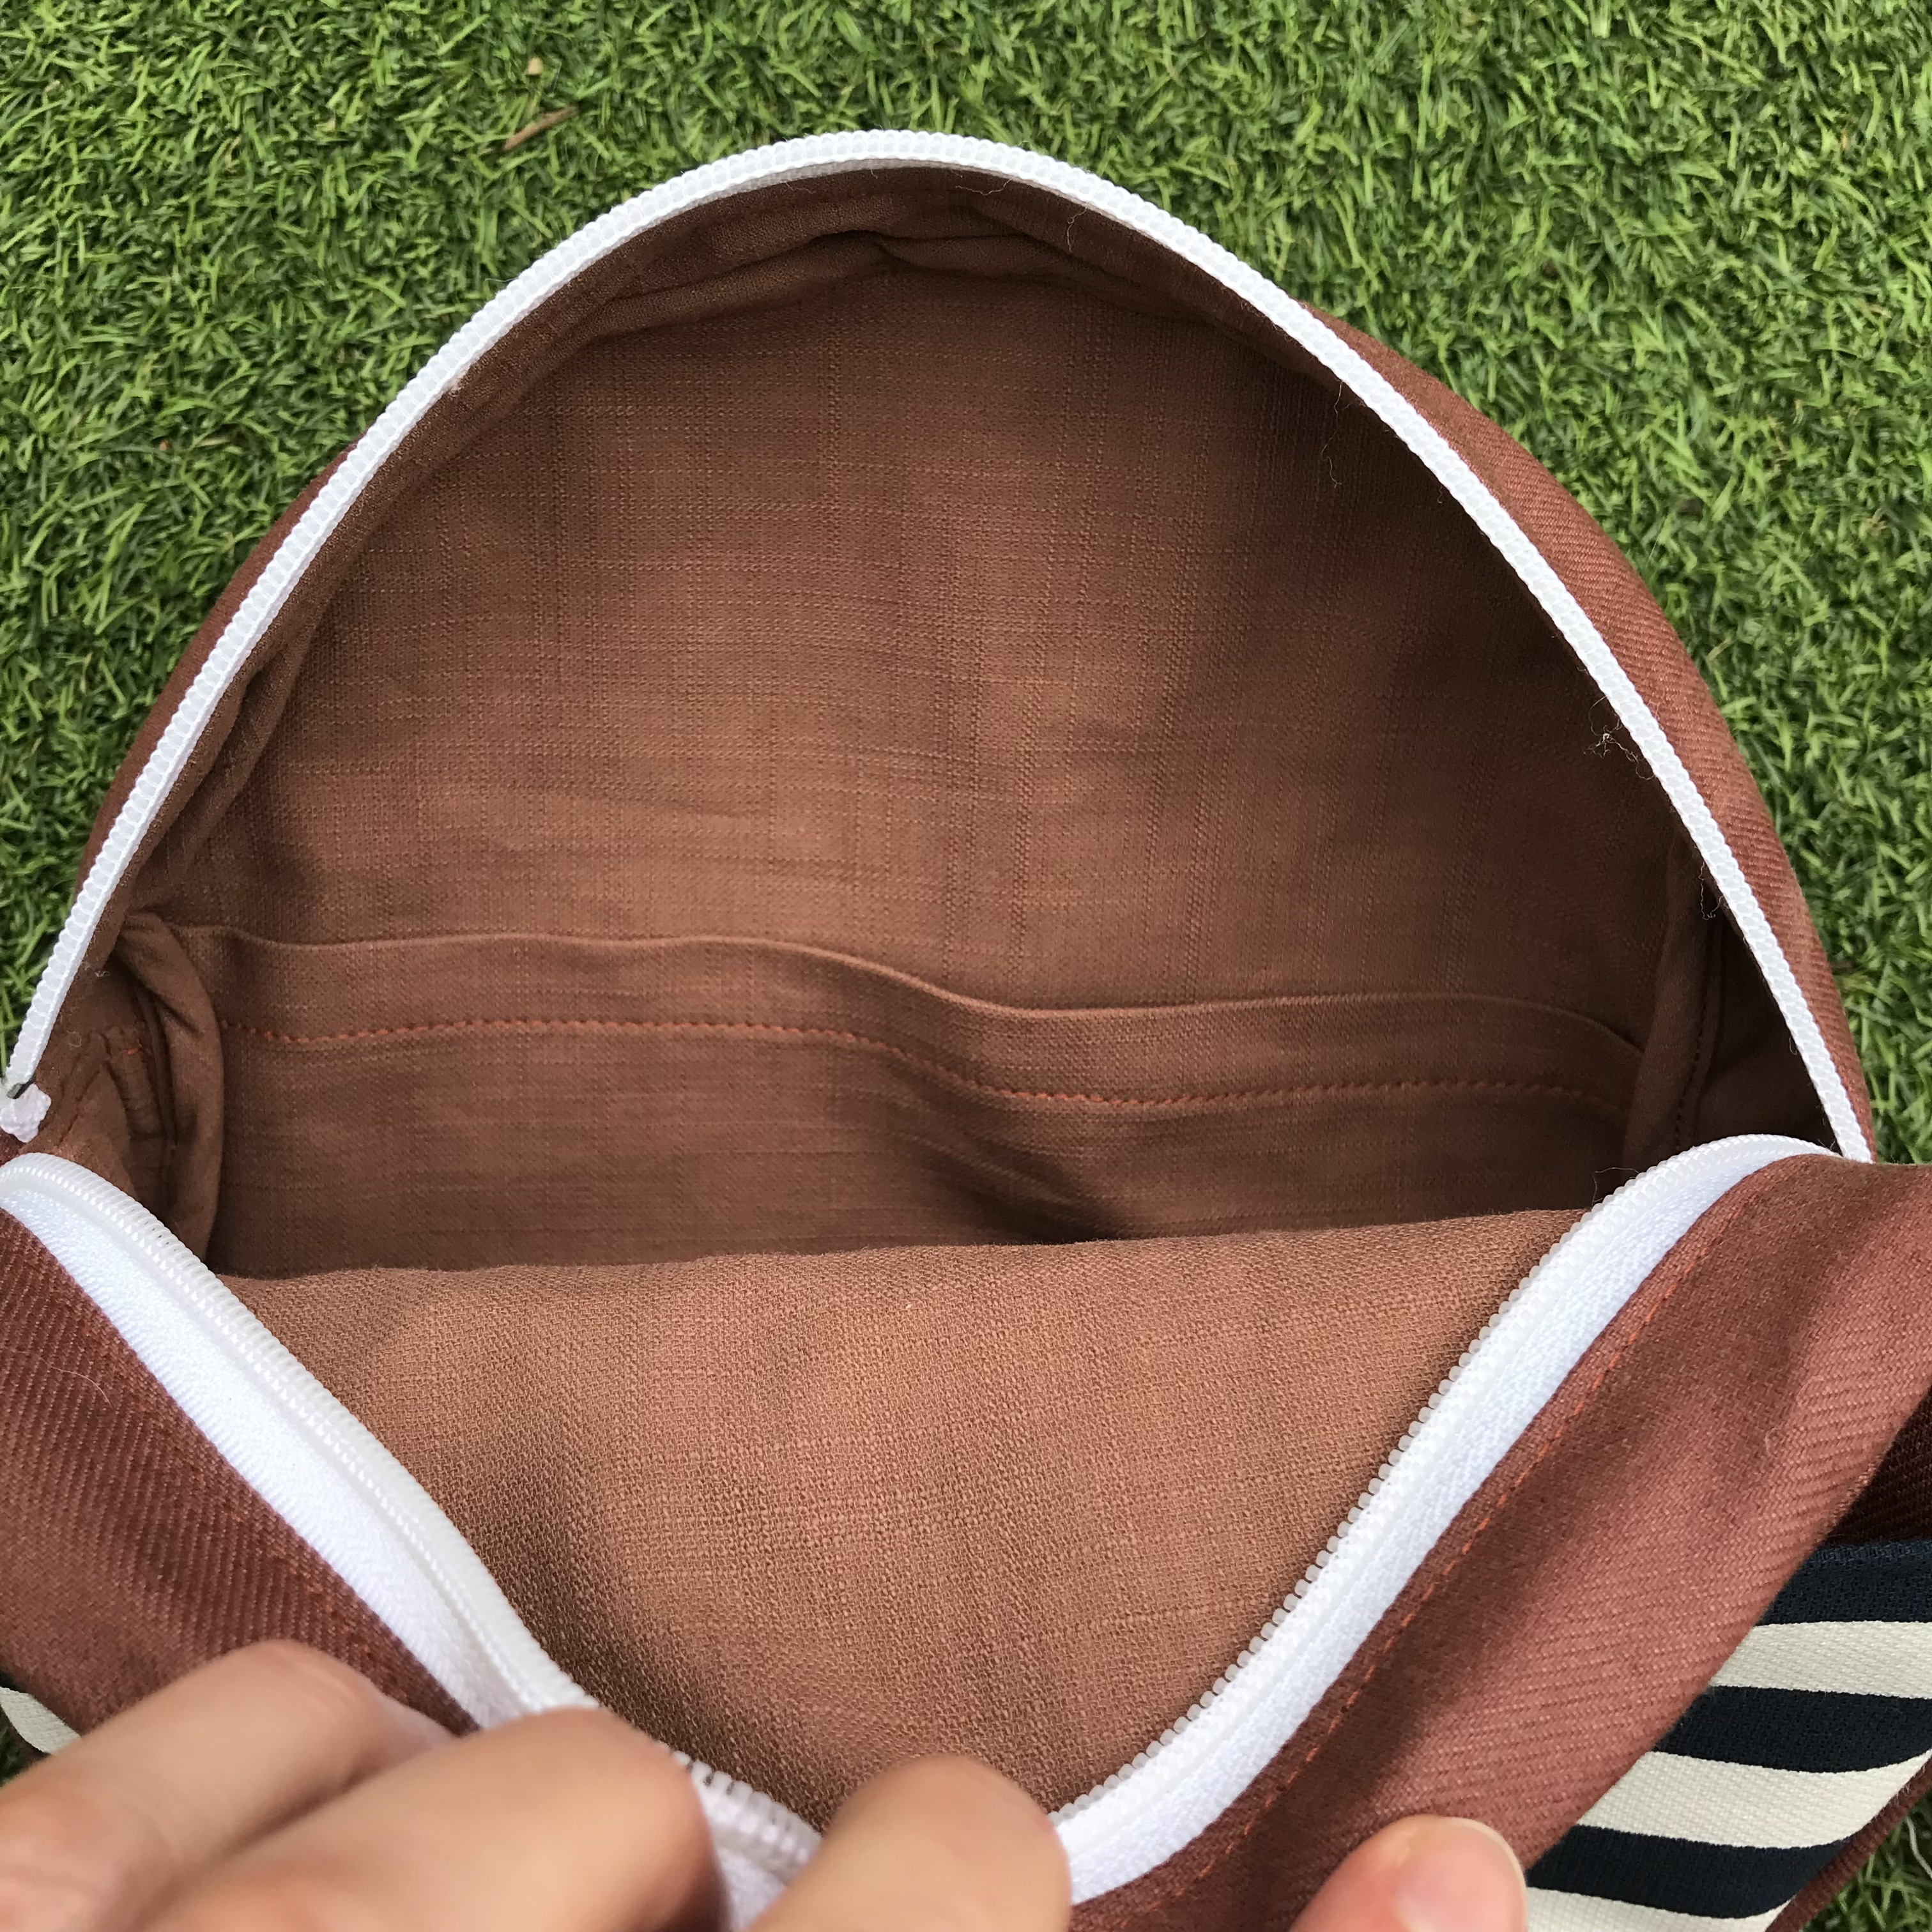
The Full Moon bag pattern is a simple, circular shoulder bag that comes in two sizes. Both feature zip closures and interior and exterior pockets. Instructions for applying a leather strap or making fabric ones are included.
Sizing info:
The smaller is 6.5" across, ideal for travelling (very) light and for kids. The larger is 9" across.
Fabric info:
The pattern advises using canvas type fabrics around 10oz-12oz in weight. I used scraps of rust denim and striped cotton twill, and I think interfaced the base and zip shield pieces to help them keep their shape better. Like a number of other people who shared their versions on Instagram, I also decided to adapt the construction to add a lining. For that I used some scraps of fawn coloured linen that worked tonally with the rust denim.
Findings:
This was a really fun little project and a great opportunity to use some fabric leftovers. The pattern is well drafted with both A4 home printing and A0 copy shop file options. The instructions are clear and easy to follow, making this very much a beginner-friendly option. The only real challenges are handling layers of thick fabrics and making/applying the binding to finish the raw edges inside. This would be a wonderful project for making speedy gifts for adults and kids.
Customisation ideas:
- Add a lining! This was very easy to do and gives body to the bag and a more finessed finish.
- Use zips to make the external or internal pocket more secure.
- Use sliders and rectangular D-rings to make the strap adjustable.
- Insert piping into the seam around the edge of the bag for a professional look and give more stability to the circle shape.
Would I make it again?
I'll most likely use this pattern to make one for my daughter, or as a gift for a friend. It's such a cute style and genuinely useful scrap buster.