Friday 23 August 2019

Summer Hat-aganza!


Where we live, it felt like summer 2018 consisted of three months of back-to-back, warm, sunny days. No doubt due to climate change, the consistency of the sunshine and warmth was unlike any summer that I can remember. If this alarming trend is here to stay, then I'm going to have to up my skin-protection game. I'm very good at putting sun hats and sunscreen on my fair-skinned kids, but I'm pretty rubbish about protecting myself, and last summer I frequently came home from a park or beach session with a sunburnt scalp and hairline. So at the beginning of this summer, I set out to make sun hats for one and all. 


Frankie's bucket hat:

Frankie still fit in Dolores's old sun hats but most of them are looking a bit ropey, so I decided to make him a fresh one. I reached for my TNT bucket hat pattern, the excellent and FREE Oliver + S Reversible bucket hat pattern (that I have previous used here, here, here and here). I made him the size Medium with no changes. I was determined to use fabric from my stash of woven scraps and small pieces for all the hats I planned to make. I had a sizeable piece of this tomato-red and white canvas-y stuff that I bought for one of the samples of my Anya shoulder bag pattern, and after an extended session of pattern piece Tetris, I was able to squeeze both Frankie and Dolores's outer hat pieces from this one small piece of stash. I used another scrap for the lining, this time some solid teal/turquoise/green quilting cotton that had been leftover from a commissioned sewing project from a few years ago. 


Dolores's Serpentine hats:

Although Dolores still fit into the crown of her bucket hats, the brim was no longer actually protecting her face from the sun. I could have extended the bucket hat's brim piece of course, but having tried that approach here, I wasn't sure that the proportions would look very good. I'd already had my eye on the Elbe Textiles Serpentine hat pattern for myself, but I had a minor revelation and realised that it might work well for Dolores also. Her face would be suitably protected from the sun, plus I felt that she would enjoy the drama of a wide-brimmed hat! 


Unsurprisingly, her 5yo head was too small for this adult's pattern. I did some measuring and calculated that printing out the pattern at 95% scale and cutting the smallest size should fit, which it did very well. The first version (red with white print) fit her well around the crown, but the brim, which I had interfaced with two layers of medium-weight fusible interfacing, was too wide and floppy. The lining was a scrap of awesome quilting cotton that I scored long ago at a fabric swap. It had a repro print of 1950s children playing, and although it had been initially okay-d, she later claimed to dislike it. She tended to wear this hat with the brim folded back, 1990s Blossom Russo style, and actually got a fair bit of use from it until she left it at school on the last day of the school summer term (sigh).


With version 1 locked up in a classroom for the duration of the summer holidays, I quickly had to make another before we left on our trip to France, a few days later. I was running out of suitable scraps of fabric that she approved of, but thankfully she gave the thumbs up to this leopard print fabric that was left over from this coat that I made several years before she was born. I used some solid cream cotton twill for the lining, reduced the depth of the brim a bit, and interfaced with fairly thick, sew-in interfacing instead of the fusible, which keeps the shape far better. 


Mum's Serpentine hat:

Full disclosure before you marvel at all this selfless sewing: the Serpentine hat that became my mum's was actually intended for me. My head measurement corresponded with the size Small, so that's what I made, despite being skeptical as my head has never been described as small! Using scraps from this pinafore and this dress, and using the thick-ish sew-in interfacing, annoyingly for me, it came out too small. But my loss became my mum's gain when she declared that she could make some use from it. Hurrah!


My Serpentine hat:

My second version was made from red canvas fabric that I'm guessing is a cotton/something-synthetic blend that I have no recollection of entering my stash. I used the same fabric for the outer and lining because by this point I just wanted to get the damn thing finished. The fit is much better, but I dislike the look of the fabric, especially now it's spent time crumpled up in my bag. 


Thoughts:

This summer hasn't proved as sunny as last year's, and none of these hats became as indispensible as I thought that they would be. They did get some moderate use, plus who knows what future summers hold, so I don't feel that making them was a waste of time or fabric. I'm a big fan of the Serpentine hat pattern though, and I'm pleased that I bought it. Before next summer, I'd like to make myself another, probably in denim, perhaps with gold jeans-style topstitching. Then we should all be set for hot weather head wear, unless Frankie has a growth spurt and I need to bust out the bucket hat patten in a Large. 


Friday 9 August 2019

Tricolour Yari Playsuit


I've still got a sizeable list of warm-weather garments that I hope to make before the summer is out. I decided to prioritise this playsuit because I really wanted to be able to wear it on the trip to France that we went on last week. In my attempt to save time, I decided to forgo making a toile/muslin (doh! How many times must I relearn this lesson?!), my thinking being that, with all those seams, any alterations would be a case of a simple pinching-out here or a small letting-out there. WRONG....


Pattern:

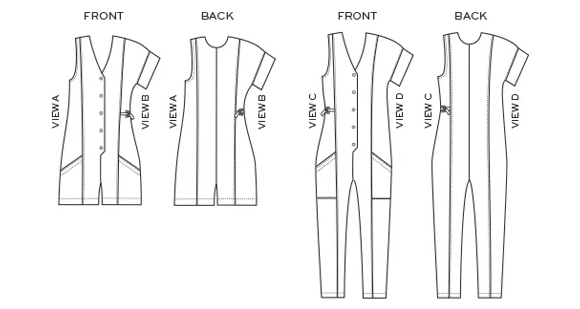
I snapped up the True Bias Yari Jumpsuit pattern using the discount code during the last week of Me-Made-May 2019. I've wanted a playsuit for years, so it was time that I FINALLY make myself one. I planned to make View B: the shorts-length with extended sleeves (although I didn't have enough fabric for the sleeve bands) with the waist ties (but no D-rings) to create some shape at the middle. The size chart put me at a size 8 for the top half, blending out to a size 10 at the hips, so that's initially what I did. Having looked at at the hashtag on IG, I saw that a lot of people's versions came up a bit long in the body, with the crotch a bit too low. However, when making trousers, I usually have to 'scoop out' the crotch, so I decided to proceed with the pattern as-is. 

(image source: True Bias)

I tacked/basted it all together and tried in on. Oh. Not good. I wish I'd taken a picture at that point for you to see, but basically the whole thing was too big, and the crotch was wayyyy too low. I went back to the pattern and graded between the size 6 and 8 (rather than the size 8 and 10), and pinched out 2cm from the length at the waist to bring the crotch curve up to nearer where it belonged. I unpicked the whole thing and recut each piece, and removed the 2cm excess length by folding it out and stitching at the waistline so, when all the panels were joined back together, it would just look like a waist seam. After making all those tweaks, the 'proper' construction was a breeze, and it all came together easily. 


At the tacked-together fitting stage, I decided the waist ties weren't going to be for me. I wasn't convinced that they would bring the waist in without creating some odd folds or tucks at the sides, so I decided to stitch some elastic in at the sides of the waist to bring in that fullness more evenly. 

Because I didn't have enough fabric for the sleeve bands, I finished the armholes with bias tape as per the instructions for the sleeveless version. 


Fabric:

As you can see in the photo above, this fabric has an awesome chevron-y print in red, white and blue. The base is a medium-weight woven fabric that I suspect to be a poly/cotton blend, and I it has lived in my stash for a million years. I have had so many plans for this fabric over the years, but I'm pleased to have finally turned it into a useful item, even if this project really made me work for that outcome! It's likely that this fabric is actually vintage, from the 1970's perhaps, as it was really narrow. The limited amount meant that, not only did I have to omit the sleeve bands, but I also had to use something else for the for the neck line facing. I used a scrap of 4oz washed denim instead, I really like contrasting facings though, so it's possible I would have used a different fabric for the facing anyhow. 

The gold-coloured metal buttons also came from my stash, having previously been used on this cardigan. I harvested the buttons from that Jenna cardigan before it was sent it to the textile-recycling bin due to pilling fabric and not having worn it in years. 


Thoughts:

Why oh why do I not ALWAYS make toiles when attempting new sewing patterns?! In the end, this garment has turned out pretty well and is definitely wearable. But it would have been so much better to have ironed out all the fit issues on a separate toile before snipping into my precious final fabric, rather than stressing myself out by trying hard to salvage my final fabric/only version.  

So, after all the faff, have I nailed the fit? I'm not sure. The Yari jumpsuit is a lovely design, and it I think it successfully walks a difficult line between loose and fitted. I do find though, when I wear it, that I have what feels like excess fabric around the front crotch/hip area. I think that could be reduced by making an adjustment to shorten the front rise, however I'd be fearful to over-fit this and make it too restrictive and therefore uncomfortable to wear. Although it doesn't look like it in these photos because my photographer is taller than me, this playsuit is really short! Wearing it whilst sitting down, I was repeated alarmed to be presented with so much of my own thighs! It kind of felt (and I fear, looked) like I was just wearing my pants!

All that said, it is a successful garment and I'm happy to have it in my wardrobe. I'm tempted to try the pattern again, probably the longer version in a solid black or navy linen. But I'm on a fabric buying ban until my stash has been substantially whittled down, so future Yaris are likely to occur next Spring at the earliest. 

Friday 2 August 2019

Free Pattern Friday: A Review

Welcome to my monthly 'Free Pattern Friday' feature, where I road test a free sewing pattern or tutorial: sometimes a children's one, sometimes a women's one. I publish these posts every first Friday of the month, timed to provide inspiration for those who plan to get their sew on over the weekend. I firmly believe that, if you pick your projects carefully, sewing doesn't have to be a crazy-expensive way to clothe yourself and your family. Thanks to all the amazing pattern designers who have offered up their hard work for us to enjoy for free.

When this post goes live, I will be on holiday in France (whoop whoop!). The weeks running up to my trip has been jam packed, and subsequently, I do not have a new pattern review to share with you this month. However, I have been publishing these posts for over a year and a half now, so rather than leaving my blog blank for a month, I thought it might be fun and/or useful to have a look at all the women's and kid's patterns and tutorials that I've previously road tested. So (if the html does what I hope it it will), click on any of the images below that take your interest, and you will be magically pinged to the original post. I'll be back with a fresh, new, free pattern review on the first Friday of September (and with other projects before then). 


Women's Durango Tank
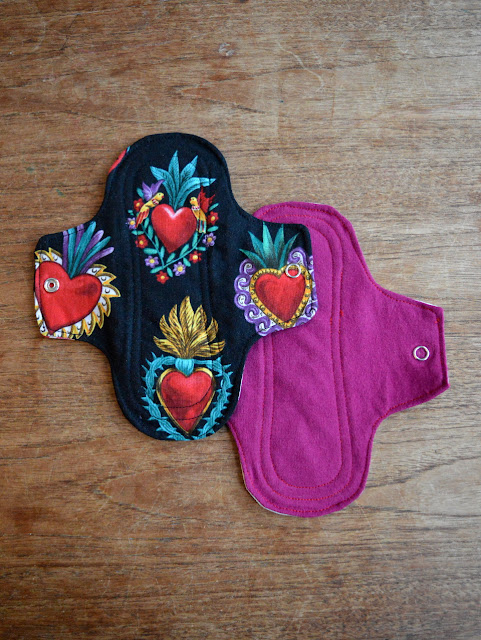
Washable menstrual Pads
Handkerchiefs
Handkerchiefs
Kid's Flora Capri Leggings
Kid's Tank
Kid's Tank

Women's and Kid's City Gym Shorts
Women's Matilda Leggings
SEO-Kid's Retro Sweatpants
Kid's Retro Sweatpants
Kid's Flutter Sleeve Top, Dress & Romper
Kid's Knit Skirt
Kid's Knit Skirt

Women's Lago Tank
Women's Lago Tank
Women's Knit Headband
SEO-Kid's Hoodie
Kid's Hoodie
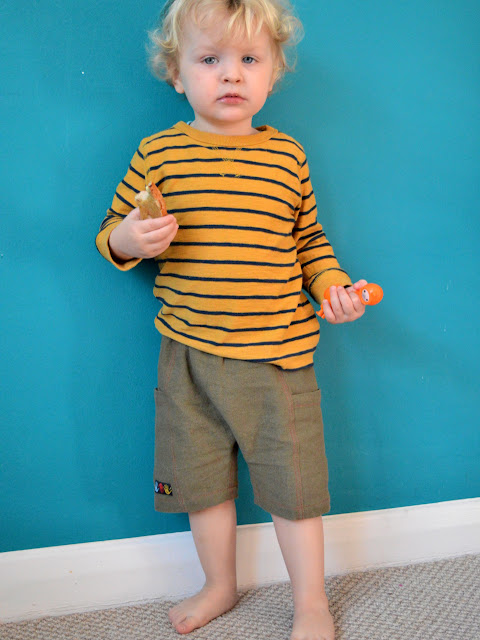
Kid's Olli Shorts
Kid's Olli Shorts
Kid's Rowan Tee
Kid's Rowan Tee

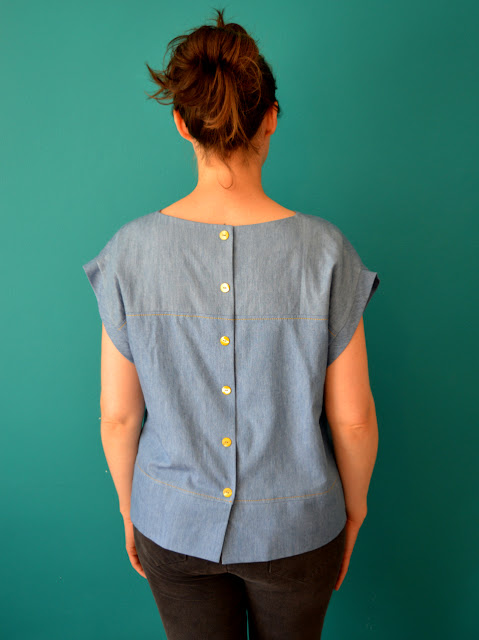
Women's Boxy Top
Women's Boxy Top
Women's Super Basic Tank Top
Kid's Sunny Day Shorts
Kid's Bummies
Kid's Bummies
Kid's Dulcie Dress
Kid's Dulcie Dress
Related Posts Plugin for WordPress, Blogger...