Showing posts with label refashion. Show all posts

Friday, 11 March 2022

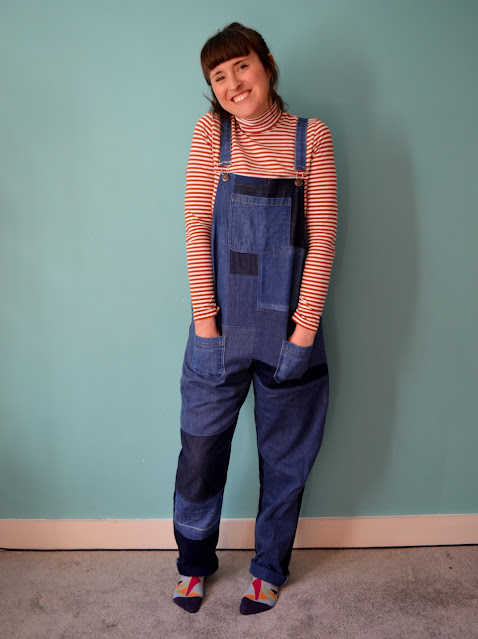
Denim Patchwork Dungarees


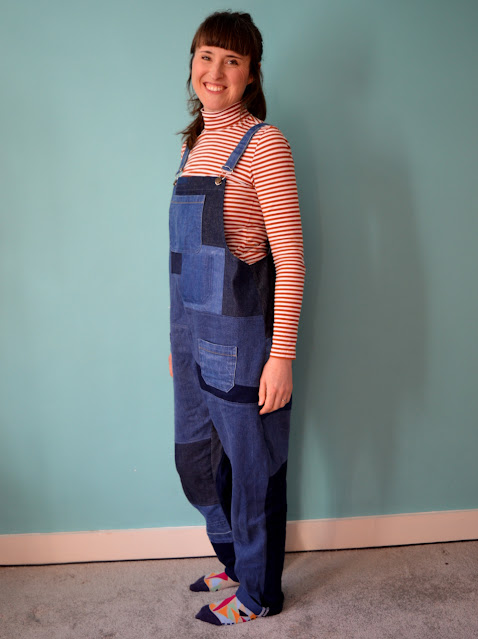
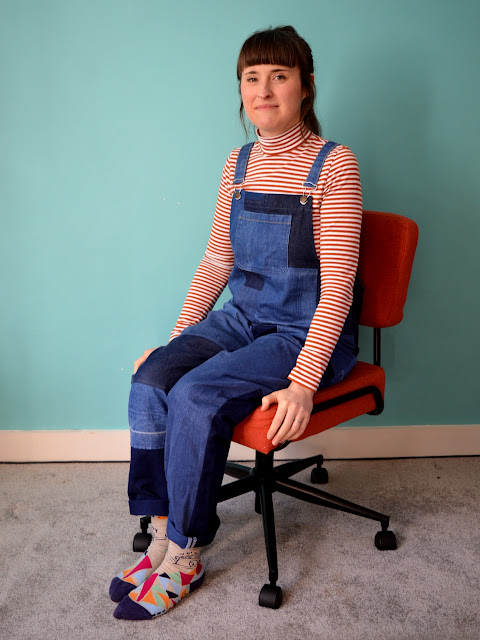
This project, as you can imagine, was not a speedy one. I've been obsessed with the idea of combining fabric scraps to make more 'fabric' for garment sewing projects for a while now. Previously, I've done this with viscose, cotton lawns and jersey fabrics. And having been left with some scraps from my son's reclaimed denim dungarees (see below), I decided to combine those with the rest of my other non-stretch denim scraps to see what could be made from them. 
 

Inspiration came from a number of conversations I'd had for my podcast Check Your Thread, and fortified by an online workshop on abstract piecing hosted by quilting legend Sherri Lynn Wood. I love how I can remember where almost every one of these pieces of denim came from. It's also allowed me to use the very last scraps of some of my absolute favourite fabrics. 


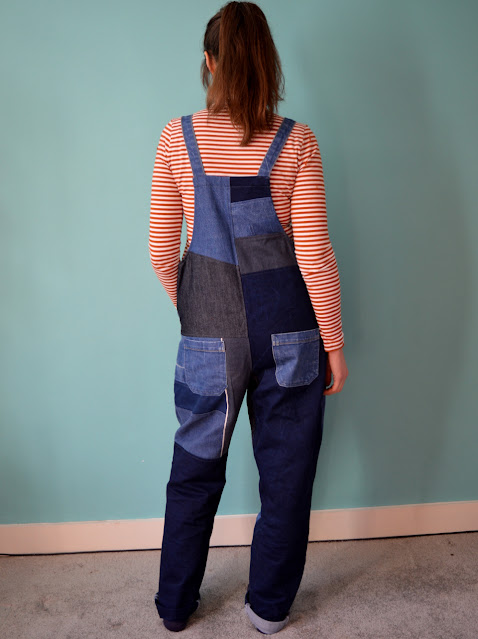
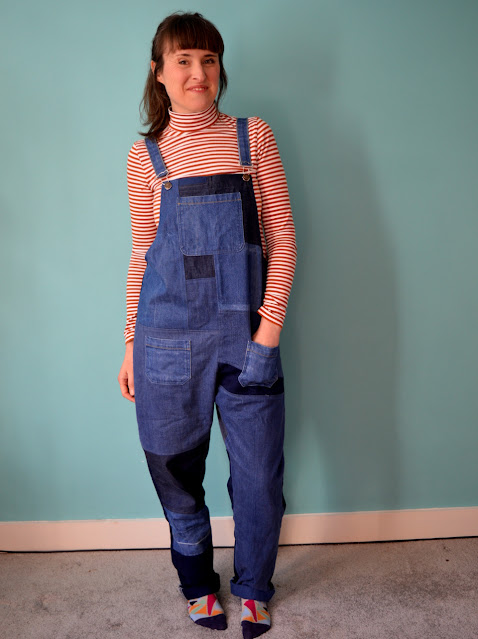
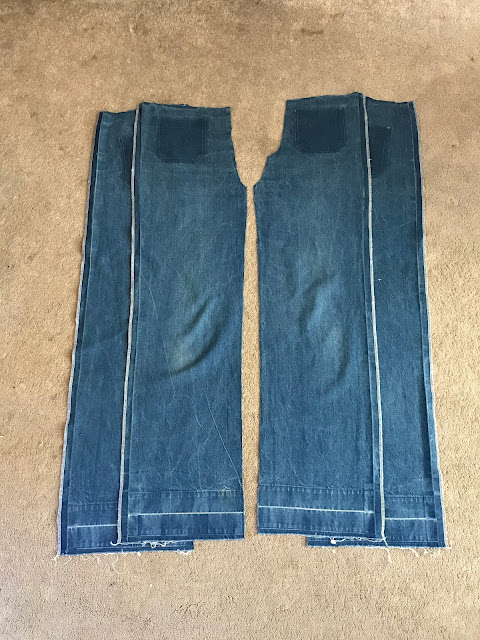
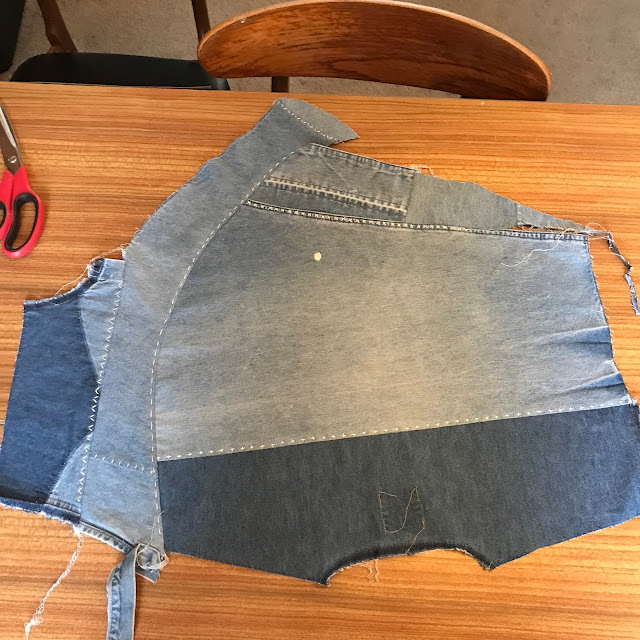
There are sections where you can see the darker denim exposed by removing pockets (#pocketshadow!). And there are fade lines that have been exploded by unpicking and letting down the hems. The dungaree straps and chest pocket were reclaimed from my Cleo pinafore, and the front and back pockets from my Lander pants, all of which were harvested when I 'decommissioned' those garments in preparation of making my son's dungarees.  


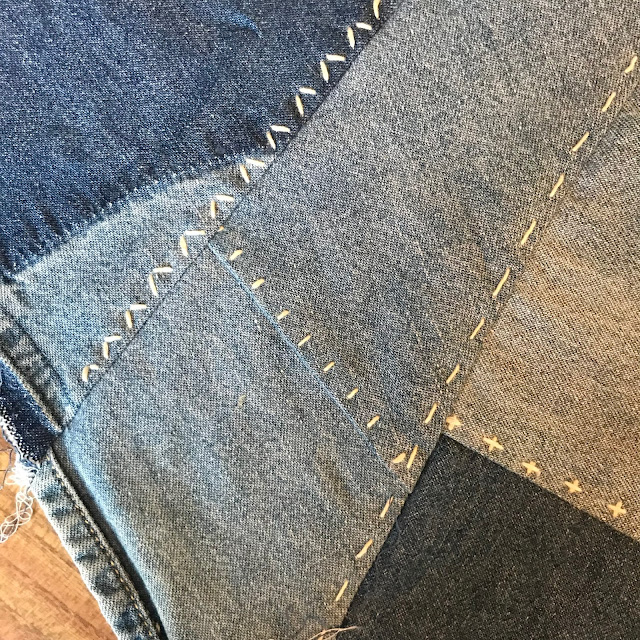
The denim pieces are combined with a 1cm seam allowance, which I then overlocked together, pressed to one side and top-stitched down. I wanted to give the denim 'fabric' as much strength as possible, but I didn't have the energy to make flat felled seams at all the joins. I also thought that flat felled seams might create too much bulk in some areas and make the eventual garment construction a bit tricky. I wanted to create sections where the pieces were quite small, and others that included larger panels for variety. 


Pattern:

Having combined the pieces into four large panels, I cut the pattern pieces from them and constructed the actual garment. I used my TNT Heyday Dungarees pattern (pattern by Waves and Wild) as the basis. This version obviously took way longer to create than my first and second version. However, reusing and applying existing pockets is soooo much easier and speedier than making new ones!


Thoughts:

How 90's do these look?! I didn't expect them to look quite so retro, but I'm ok with it! I had a lot of fun making these, and it scratched a creative itch that making something from a flat piece of virgin fabric can't always reach. 

I've worn these a lot and they've received a surprising amount of love. My friend Eve even said she wanted to lick them! I'm very excited to see how they change over time with wear and washing. I'm hoping that the seams joining the pieces will start to get some interesting fading, and that the pockets will start to blend in more. 

Thursday, 10 February 2022

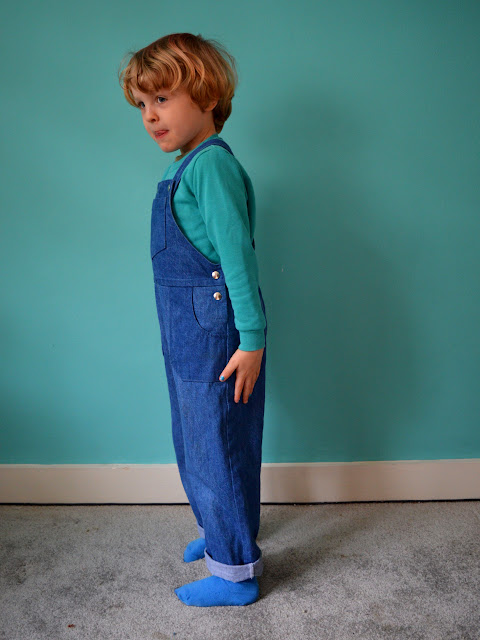
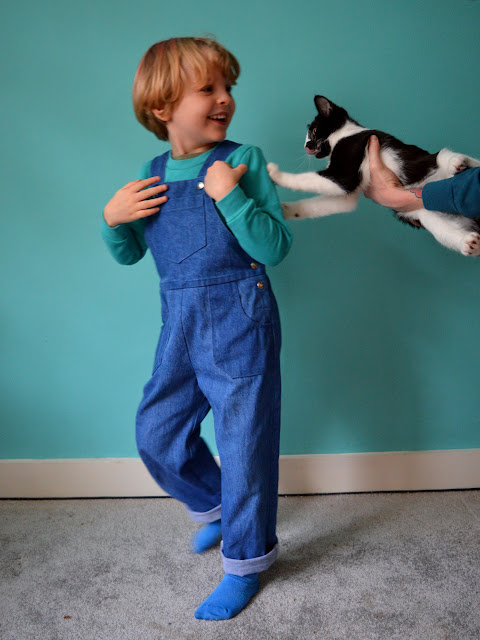
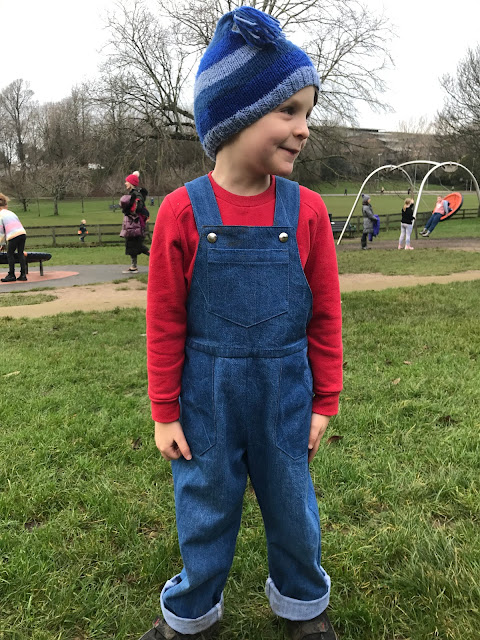
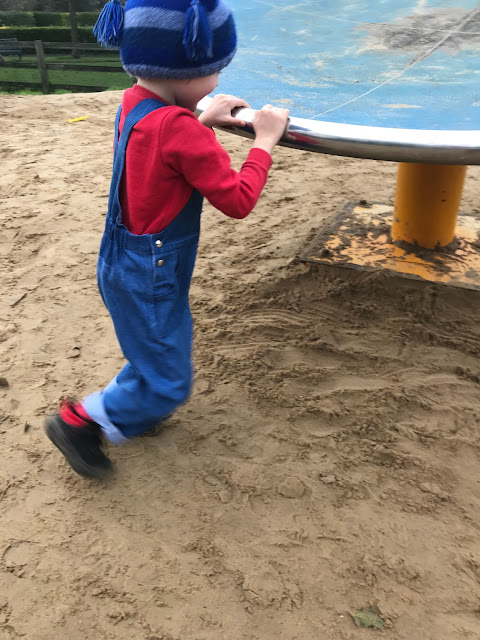
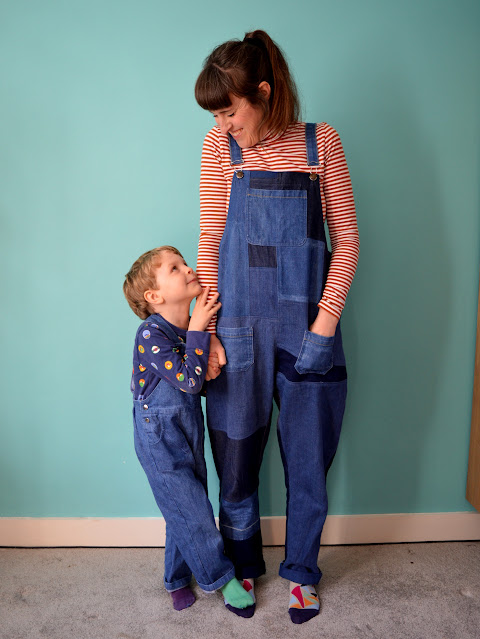
Reclaimed Denim Freddie Dungarees


I've been so inspired by many of the conversations I've had for my podcast Check Your Thread. I guess it was inevitable that inspiration would express itself in my sewing projects! Speaking to Riccardo Guido made me realise that I'm storing (hoarding?) a number of garments that I no longer wear in my wardrobe. I came to accept that I was unlikely to wear my denim Lander pants again because my body shape has changed now that I am firmly in my middle age. And the Cleo pinafore that I made with that leftover precious denim was almost never reached for, and when I did wear it, I didn't feel great. I realised that the lovely broken twill denim could be harvested and turned into something that would see much more use. 


Fabric:

So I unpicked and cut apart both the trousers and pinafore in order to harvest as much of the original denim as possible. I carefully set aside the pockets from both garments, and the straps from the pinafore for a different, future project. As I did this, I had in mind my conversation with Guy / The Light Touch, in particular his concept of 'decommissioning clothes'. I loved hearing about how he assesses old and unworn garments, and figures out what he can salvage and reuse in new projects. 


Pattern:

Frankie had been asking for his own pair of dungarees (and a boilersuit, but that's a whole other thing!) for yonks. I decided to make some for him as part of his Christmas present. I already own the Freddie dungarees pattern by Two Stitches (pictured below), having made the pinafore version for my daughter when she was about the same age. Handily, I was able to reuse some of the pattern pieces that I traced out for that project three years ago for Lola! 


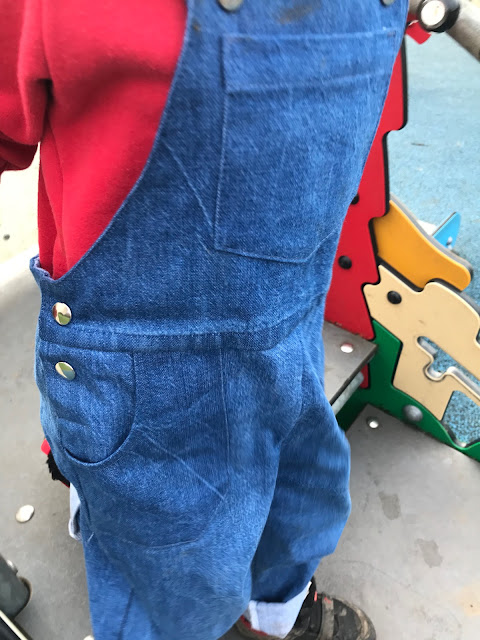
There are things I really like about this pattern, and things I don't. This time round I was able to amend some of those less pleasing elements, like increasing the pattern's scant 6mm seam allowance, and not lining the pockets. For Frankie's dungarees, I also decided to omit the back pockets and the turn-ups with tabs. I added some extra length to the legs to future proof them somewhat. I used no-sew press studs to fasten the straps to the bib, and for the side openings so they'd be easier for him to take off himself. 


Thoughts:

What is extra pleasing about this project is that I was able to take the fabric from the Landers and Cleo and keep it in use as a garment. This is what Shelly Sommer was talking about when we discussed keeping materials at their highest possible level of use. I was so into that concept that I've actually recorded another conversation to be released where I asked her to go into that concept further still. 


Although I made these dungarees before I had the pleasure of speaking with Eliu Hernandez, I can now recognise and appreciate the pocket shadow that I had to include at the top of the back legs (see above). The pocket shadow occurred when I removed the pockets from the Lander pants, but because of the size and shape of the pattern pieces, including that darker section when cutting out the Freddie dungarees was inevitable. I really like it now though: it's a nod to their origins!


Although not exactly thrilled with them when he unwrapped them on Christmas morning, Frankie has since embraced his dungarees. He is very happy to put them on if I select them as part of his outfit for the day. And because they took a comparatively long time to make, compared to the usual simple joggers and such that I make him, I want him to wear them A LOT! 


When you're in the mood, making detailed woven garments, particularly on a small scale, is really satisfying. Thankfully, I gave myself just enough time before Christmas to make these so that they didn't become a stressful rush. I'd definitely consider tracing out a larger size and making them again for him in the future, if he asked me to. 

Thursday, 25 November 2021

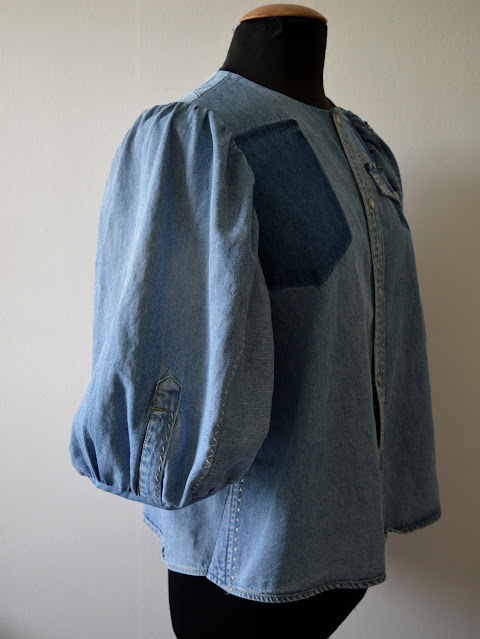
Denim Shirt Anthea Blouse


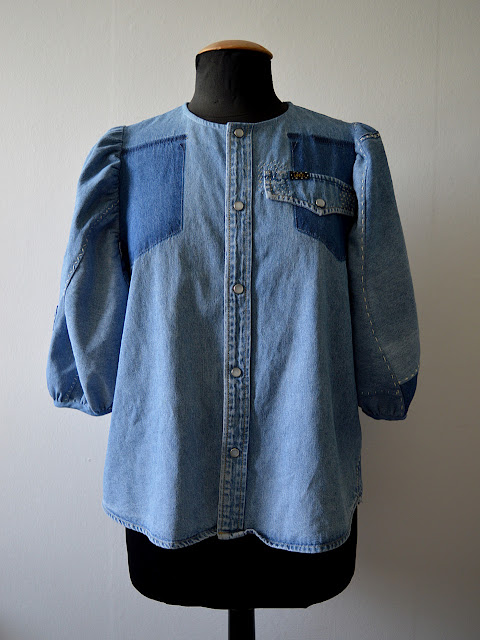
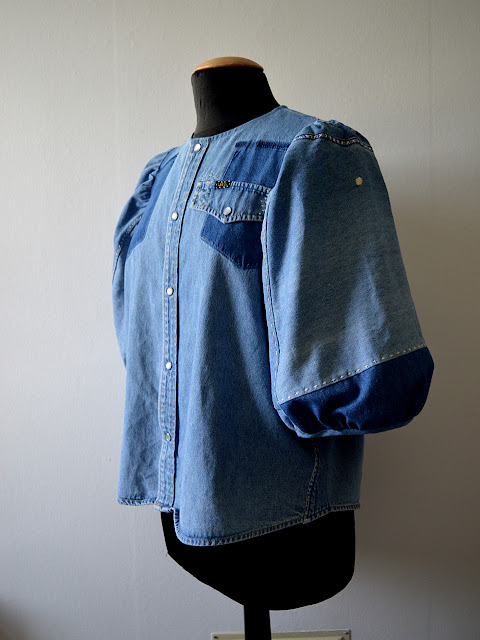
I'm so excited to finally share this project with you because more went into it than most of my projects. More time and more techniques, and a lot more thought. This was an idea-itch that I had to scratch, and I was more invested in manifesting my idea than the actual outcome. However, I do love the outcome also!


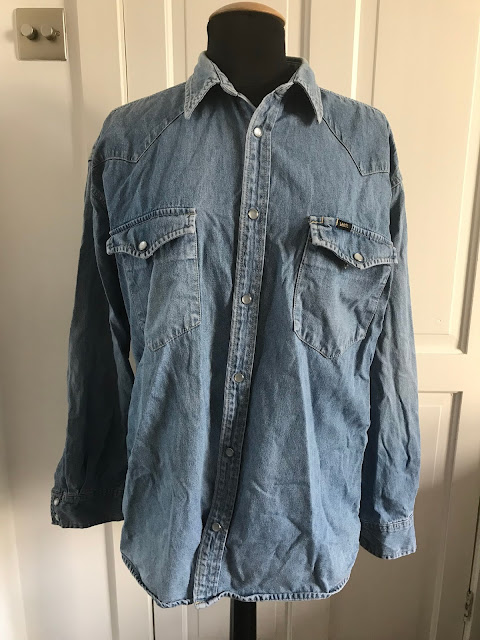
This secondhand denim shirt has been in my stash for a shameful ten years! I feel bad about that because it's possible that someone else could have been during that time. Anyhow, I was keeping it out of landfill at least! I've always loved those pearly snaps and knew that they had to be included in whatever it was to become.


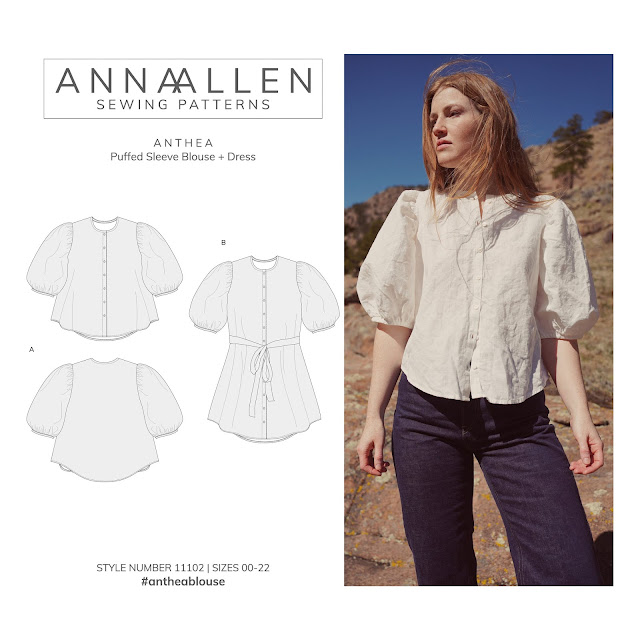
I'd had my eye on the Anthea blouse pattern by Anna Allen (pictured below) as soon as I clapped eyes on it. I have adored every single version I've seen on Instagram. And it's been a very popular pattern so there are a TON of versions to behold! 

(image source: Anna Allen)

The problem was that I didn't have any pieces of fabric in my stash suitable for the pattern, and I couldn't justify buying a new pattern AND new fabric when I already own a lot of both. I'm not exactly sure where the idea came from to use the denim shirt, but I've been having so many inspiring conversations with interesting people lately for my podcast, Check Your Thread, that my mind is kind of permanently in this kind of zone these days. 


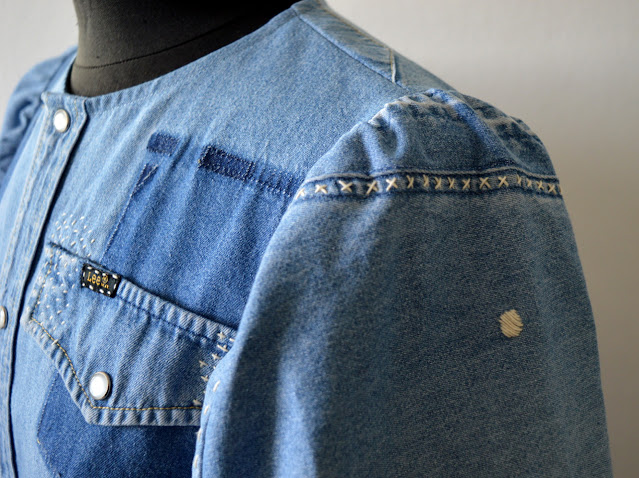
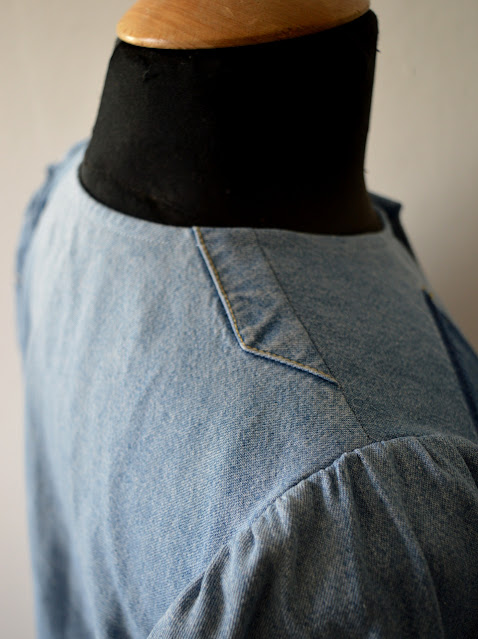
I removed the front pockets so I could fit the Anthea front pattern pieces on, and I love how a shadow of the pockets remain. I reapplied the pocket flap on one side to reference the removed pockets, and stitched it into position with random sashiko style stitching. For this I used some 'proper' sashiko thread that I bought on eBay a couple of years ago but had yet to try. That spot on the sleeve is a hole that I covered with satin stitch to stop it getting any bigger.


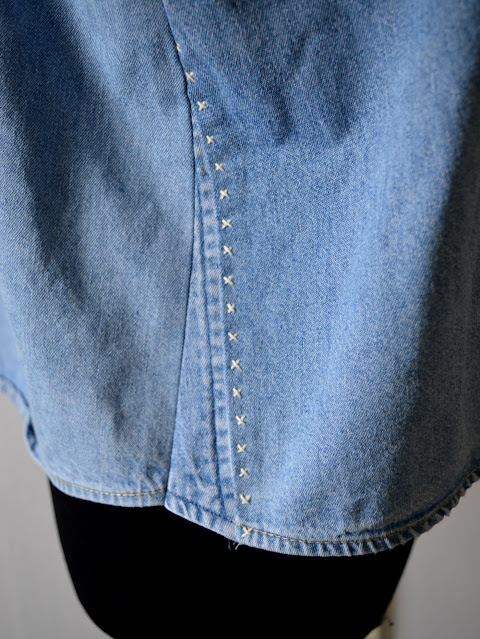
As you can probably imagine, this project was not without it's challenges, but I like how the challenges determined the aesthetic in some cases. For example, the pattern pieces for the body were wider at the hem than the original shirt. So I ended up piecing together the side seams with sections of the original collar (see above). I then decided to highlight the join with another row of sashiko-style stitching, which is a theme that I continued throughout the project.


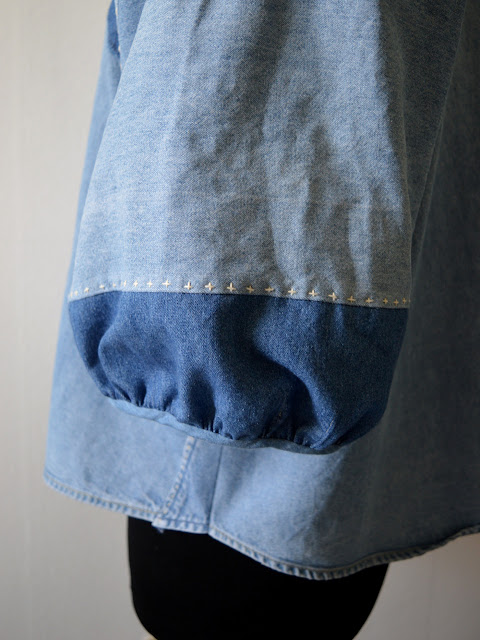
The sleeve pattern pieces on the Anthea are pretty massive, far larger than the original shirt's sleeves. So to form a sufficient area of fabric, I had to piece together pieces of the original sleeves with lots of other pieces harvested from the original garments. I didn't think about it too much, just joined the edges with my overlocker, then 'topstitched' down the seam by hand using a mixtures of stitching styles that I was totally winging. 


I really like the hints of shading and differing colours that existing in the original shirt. However, I tried to play down the patchwork vibe a little, I'm not sure if I quite hit the right balance. 


I made binding from some scraps of lightweight washed denim from my stash. That was used to finish the neckline and the sleeve hems. I don't really like the bias for the sleeve hems and I think the opening is a bit wide. I think I'll go back at some point and make cuff bands instead. 


What is incredibly pleasing is the little pile of scraps that remain from this project. I really wish that I'd weighted the original shirt, and then weighed the scraps to see if I beat the industry average of 15% of fabric wasted during the cutting process.  


The lack of available fabric meant that I couldn't really overthink the placement of various elements in this garment. That felt pretty freeing actually, and I just have to accept the outcome and find elements to enjoy. 


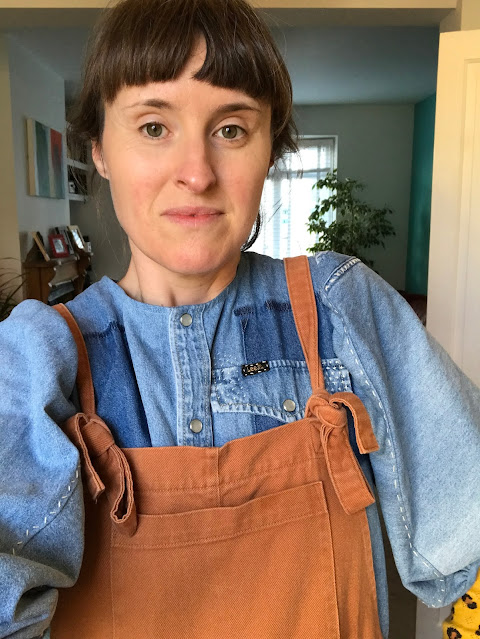
I haven't owned a proper denim shirt since I was a teenager, so I was very surprised by how warm it actually is. Pictured below is how I've enjoyed wearing it the most since I finished it: layered with a long sleeved thermal top underneath and dungarees on top.  

Wednesday, 12 August 2020

Lola's Remade Sundress


About a third of my stash consists of clothes destined to be remade in some way. The original version of this dress (pictured below) was made using some vintage Laura Ashley printed cotton and a vintage Simplicity sewing pattern. I made it 9 years ago, but truth be told, the fit wasn't very good. Why I didn't just toile up the front and back bodice pieces, I don't know.  


Because of the poor fit, it only got a couple of wears, so the fabric was still in excellent condition and prime for remaking. This summer, Lola was short on warm-weather clothes. She loves wearing dresses that have a fitted bodice and a full skirt, which I felt I could easily create from this similar-styled garment. I carefully unpicked the original dress, retaining the side seams and binding of the skirt section. 


To make a pattern for Lola's version I started off with the bodice pieces from a children's pattern from a recent edition of Burdastyle magazine. Lola likes the waistline of her clothes pretty low so I lengthened the pieces. I want it to last two summers, and therefore needs to survive at least one grow spurt. I did what I should have done for the original dress and made a toile of the bodice to assess the fit. This told me I needed to reduce it across the width, but otherwise it looked alright. 


Because the adult version's skirt was obviously going to be too long, I had a bit of fabric from the top of the skirt section to play with which became the straps. Unlike the original dress, I decided to line the bodice of this incarnation. I lined it using some red poly/cotton from my stash (that had been table clothes at Pat and my wedding!), inserting the straps into the seam at the neckline at the front. 


Next I attached the skirt. The original skirt was never very full, so I used the full width of what was available. The original dress had the zip inserted into the side seam but I wanted to position the it in the centre back this time round, which meant that the other, former, side seam ended up at the centre front. Thankfully my original pattern matching wasn't bad, and it's largely hidden amongst the gathers anyhow. 


With the skirt attached and zip inserted, it was time to sort out the other end of the straps. My first thoughts were to have the straps simply going over the shoulders. I got her to put the dress on, and after some playing around, I discovered that a cross back style was possible. I planned to stitch on some buttons at the back as a decorative feature, however, when I realised that it was going to be too tricky for her to get the dress on and off with the straps stitched in place, I added buttonholes and made the buttons functional. It adds some additional future-proofing too, as I can restitch the buttons a little further down on the straps in the future.


Thoughts:

What often surprises me about adult's-to-kid's clothes refashions is how little fabric there is left over! I guess this is especially so now that my six-year-old is almost in eight year old-sized clothing! I'm thrilled that the lovely fabric got to have another life, and she definitely enjoys wearing it. If I say so myself, I think I nailed the fit of the bodice: it's fitted (as per her liking), but not too tight (as per my liking!). Remaking garments always throws up challenges that a regular sewing project that started with an adequate length of fabric wouldn't have. But working out how to roll with those, and coming out with a wearable garment that the recipient enjoys wearing is super satisfying. It also feels like a 'free' project!  

Thursday, 30 July 2020

Crew Neck Sweatshirt Update


Like many parents, I try to keep an eye on my kids' clothing selection to avoid getting caught out when a growth spurt occurs. I think this is particularly necessary if, like me, you don't buy new clothing for your kids, because getting what they need can take a bit more time and planning. My children's wardrobes are comprised of handmade, hand-me-downs, thrifted and the odd new item given to them as a present from someone else. 


A recent sort through of Frankie's future-selection of clothes showed me that he has very few items for the next size up (aged 4/size 98+), which he is rapidly hurtling towards. I had a rummage in my clothes-to-upcycle/reuse pile and found a couple of sweatshirts, the first being a sweatshirt that has already had a number of incarnations! I made it (see below) when I worked for Traid about 8 years ago by combining a couple of red, donated sweatshirts and adding a leather anchor applique.   


Adding the navy leather shape was a gamble because I had no idea how it would wash, but actually it came out perfectly well from each wash cycle. Obviously I have no idea how much wear the original sweatshirts received, but I wore mine a lot over the years. 


I used the Brindille & Twig crew neck sweatshirt pattern for these upcycles, as I already had it in my stash and have enjoyed using it previously. I had to make seams at the shoulder for Frankie's version, just as I had to when making my adult-version. I like the additional detail that it brings. 


The second sweatshirt started out as a plain, turquoise, Damart sweatshirt that I picked up in a charity shop for 50p a few years ago. I really liked the colour but it was too small for me so it had been hanging around waiting for a purpose.  


I took the opportunity to finally bust out my Bobbinhood screen printing kit that I had got for my 40th birthday last October. I'd wanted one of these kits ever since I got to have a play with my friend Emily's last summer. But as soon as I got one of my own, all my print ideas seem to evaporate! 


Just to finally give my kit a go, I decided to use someone else's design as a starting point. I found this awesome Octopus design in one of my kids' copies of DOT magazine (which I highly recommend, BTW). I obtained permission from the designer (@annalisedunn) via Instagram, explaining that I was only going to use the design for my son's sweatshirt, and got going. Cutting the stencil out of the special plastic-y paper was the trickiest and most time-consuming part. The actual printing took literally 10min, including prepping the screen! The Bobbinhood kits are designed for stencils, so there's no exposing the screen or anything like that required.


Thoughts:

I love how both these sweatshirts came out! The journey the red sweatshirt has been on reminds me how good quality fabric can have many incarnations. Hopefully I can pass this on to someone else when Frankie eventually grows out of it. And I'm thrilled to have been able to have found an opportunity to break the seal on my awesome printing kit! I can't wait to get some new inks (I currently only have black) to give me more options for customising my clothing projects. 


Wednesday, 19 June 2019

Frankie's Joggers Update


It may not be very noticeable in my blog content and IG feed most of the time, however, a lot of my brain space these days is occupied by the topics of waste reduction and the consumption of stuff. But the trouble is: when it comes to my sewing-related consumption, I really can't seem to stop myself from buying some lovely new fabric now and again. So I've set myself two rules by way of compromise, until I finally manage a bigger, better commitment. Firstly: I am only allowed to buy some new fabric if I know EXACTLY what I'm going to make from it, and that that item will definitely receive a decent amount of wear from whoever I'm making it for. And my second, more recent rule, is to alternate my sewing projects between those that use new fabric (either stuff I've bought recently, or that has been languishing in my stash for a while) and those that use fabric that's leftover from previous projects, or that use fabric that has been harvested from unwanted garments. In reality, that has actually manifested as a couple of projects in a row that use unused fabric (category A), followed by a run of items made from the reclaimed section (category B).

I don't always share the category B projects, because often they are repeats of basics for my kids (like yet more leggings), but I will make more of an effort to share them in the hope that it sparks some thought and/or discussion about fabric consumption, even though I'm not exactly a shining example of fabric consumption habits myself at the moment.


So on to these two new garments. Having wee people about the place is a freaking gift to a newly emboldened stash-and-scrap buster, such as myself. The pattern pieces are small, and the need for clothes in the next size and season seems insatiable. The summer is taking it's time to kick in, plus I've got laundry issues at the moment, so a couple of extra pairs of trousers for Frankie would come in VERY handy. I'm also vaguely aware that potty training is on the horizon, and lord knows we're going to get through a lot of bottoms as soon as that begins. 


Pattern:

Most of the time, I prefer to put Frankie in knit garments so that he has complete freedom to move,  hurl himself around and do funny little dances. So I turned to my trusty stash of increasingly dilapidated Ottobre magazines, and had a hunt for a joggers pattern that I hadn't tried before. The gem of an issue that is Spring 1/2014 (pictured above) threw up this sporty looking option called the 'Relaxed Fit Sweatpants' (pictured below) that included his current size, so out came the tracing wheel. 


I really liked the overall shape, plus all the additional details that would make them both a more fun project to tackle, and hopefully a more 'elevated' garment when finished. The details include a faux-fly front, and front and back pockets with visible coverstitch (or in my case, faux-coverstitch) stitching. Frankie is mad into pockets at the moment, so I knew they would appeal to him. I found the waistband design interesting: it's pretty deep, but you only insert elastic in the top half, and topstitching around the centre to keep the elastic from roaming around in there. I decided to omit the waist tie, plus I chose not to include the coverstitch stitching along the waist and ankle cuff seams because I knew my machine would be unlikely to cooperate through those bulky layers. I also swapped the overly complicated front pocket mouth bias finishing for a self-band overlocked on. Oh, and I altered the order of construction by applying the ankle cuffs as a band to the bottom of the legs, rather than stitched on flat to the bottom of the legs after the side seams had been stitched but before stitching the inside leg seams. If that last sentence didn't make sense, then don't worry, you didn't miss anything interesting.


Fabric:

My first version were the lightning flash French terry pair (pictured above and below). There are no prizes for noticing that I used the leftovers from his dad's Apollon sweatshirt for this pair. I also used up the rest of the matching cotton ribbing so this double-scrap-bust was extra satisfying. This fabric is very soft with quite a loose knit (I really struggled not to type 'weave' then), so scored high for comfort and movability.


Once I knew that this pattern was a pretty good bet, I felt emboldened to use it as the basis for a refashion/upcycle project, and finally cut into Pat's unwanted hoodie that I'd been storing for a year or so. He's decided he no longer suits hoodies (something about turning 40 apparently), but this one's zip had broken so we couldn't send it to a charity shop in the hope that someone else could get some use from it. I'd always really liked the colour, plus the fabric was still in good nick, so I decided to hang on to it knowing that I could weave some magic with it somewhere down the line.


Harvesting its fabric wasn't too tricky, I just had to unpick the front pockets and cut along the seam lines. I lengthened the legs on the pattern because the cuffs from the original sweatshirt were narrower than the ankle cuff pattern piece required, and I didn't want to lose overall length. As you can see I managed to include the little metal Fenchurch logo on the front of the final trousers. The placement isn't ideal, but the hoodie was a small size so I didn't have much width to work with. I also included the little side seam tab from the original hoodie, positioning it at the side of one of the back pockets. Anyways, these joggers totally fooled my friend Joe who commented on Frankie's Fenchurch trousers when he saw him recently!


Thoughts:

Despite the issue of Ottobre being over five years old, I think the shape and proportions of these joggers look fresh and modern, and definitely a bit Scandie-cool. All the extra topstitching and details meant these took a lot longer to make than the very basic joggers I usually rustle up for Frankie, but I really think it was worth it and I'm happy he has some nice new bottoms. I am going to go back to my super-fast, down-and-dirty basic joggers pattern though to make more in preparation for potty-training, but I imagine I'll definitely trace out bigger sizes of this Relaxed Fit Sweatpants pattern to make more in the years to come.

Related Posts Plugin for WordPress, Blogger...