Showing posts with label dungarees. Show all posts

Friday, 11 March 2022

Denim Patchwork Dungarees


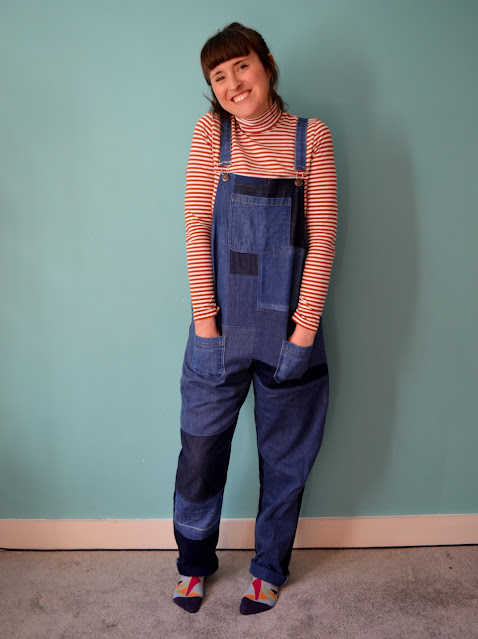
This project, as you can imagine, was not a speedy one. I've been obsessed with the idea of combining fabric scraps to make more 'fabric' for garment sewing projects for a while now. Previously, I've done this with viscose, cotton lawns and jersey fabrics. And having been left with some scraps from my son's reclaimed denim dungarees (see below), I decided to combine those with the rest of my other non-stretch denim scraps to see what could be made from them. 
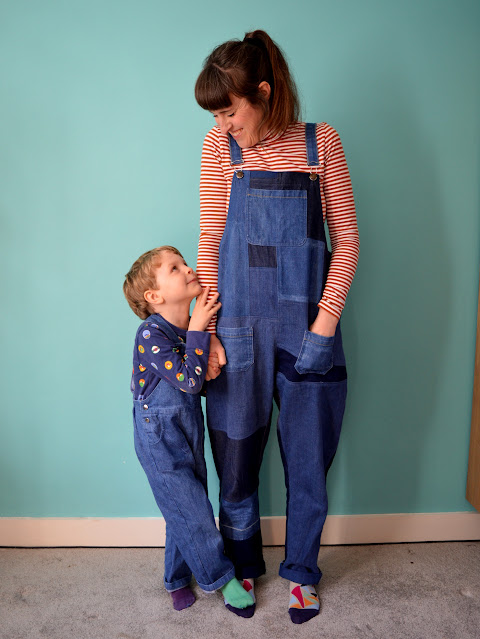
 

Inspiration came from a number of conversations I'd had for my podcast Check Your Thread, and fortified by an online workshop on abstract piecing hosted by quilting legend Sherri Lynn Wood. I love how I can remember where almost every one of these pieces of denim came from. It's also allowed me to use the very last scraps of some of my absolute favourite fabrics. 
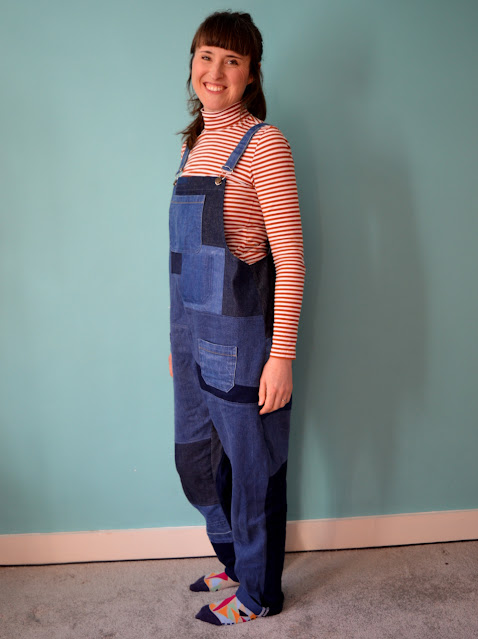

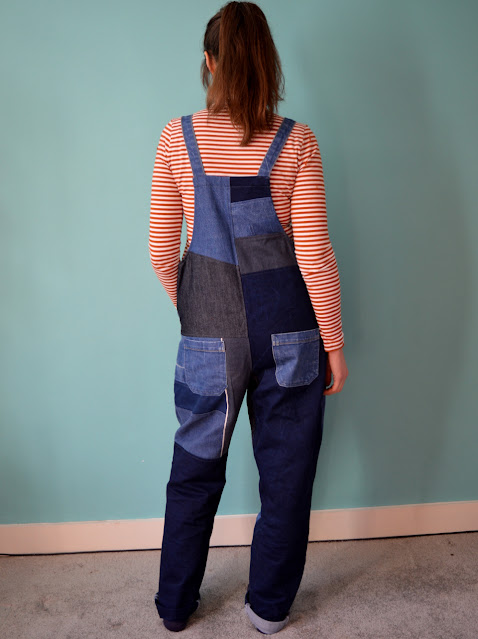
There are sections where you can see the darker denim exposed by removing pockets (#pocketshadow!). And there are fade lines that have been exploded by unpicking and letting down the hems. The dungaree straps and chest pocket were reclaimed from my Cleo pinafore, and the front and back pockets from my Lander pants, all of which were harvested when I 'decommissioned' those garments in preparation of making my son's dungarees.  
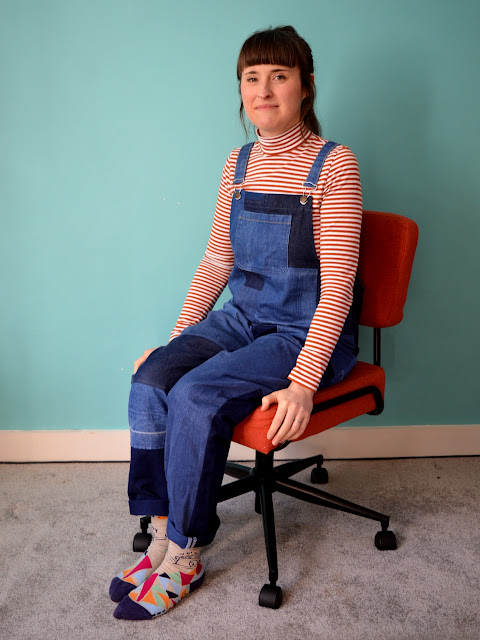

The denim pieces are combined with a 1cm seam allowance, which I then overlocked together, pressed to one side and top-stitched down. I wanted to give the denim 'fabric' as much strength as possible, but I didn't have the energy to make flat felled seams at all the joins. I also thought that flat felled seams might create too much bulk in some areas and make the eventual garment construction a bit tricky. I wanted to create sections where the pieces were quite small, and others that included larger panels for variety. 

Pattern:

Having combined the pieces into four large panels, I cut the pattern pieces from them and constructed the actual garment. I used my TNT Heyday Dungarees pattern (pattern by Waves and Wild) as the basis. This version obviously took way longer to create than my first and second version. However, reusing and applying existing pockets is soooo much easier and speedier than making new ones!

Thoughts:

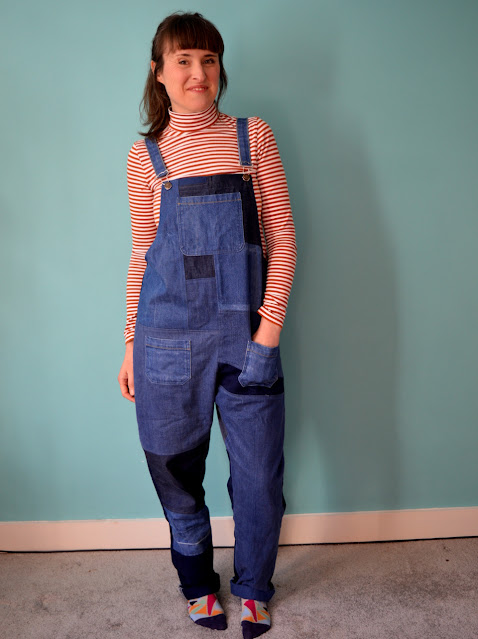
How 90's do these look?! I didn't expect them to look quite so retro, but I'm ok with it! I had a lot of fun making these, and it scratched a creative itch that making something from a flat piece of virgin fabric can't always reach. 

I've worn these a lot and they've received a surprising amount of love. My friend Eve even said she wanted to lick them! I'm very excited to see how they change over time with wear and washing. I'm hoping that the seams joining the pieces will start to get some interesting fading, and that the pockets will start to blend in more. 

Thursday, 24 February 2022

Greta + Nikko = A Happy Couple!


I recently made a couple of garments that I've discovered look pretty good together! I had plans to make the top for months, but the dungarees came about more spontaneously. 


Top:

I've had the Nikko top pattern by True Bias for over a year, waiting for the right fabric to appear. I bought it in the the hope that it'll make useful layering garments to help extend the use of my warmer-weather clothes into the autumn and the spring. To be honest, I already have the Freya pattern by Tilly and the Buttons from her Stretch book, which is similar. But whilst I really like the Freya, the Nikko caught my eye because it looks like the sleeve and armhole are drafted to have a closer fit which I thought might make the garment better suited to layering under things.

I made my usual adjustments to the pattern: grading to a larger size for the waist and hips and folding out 2cm of length from the body. Plus I graded to a larger size in the bicep, but I think I could do with even more width in the arms for next time. 

Eventually I found the right fabric, which had, of course, been under my nose (i.e. on the shelf at work) all the time. I bought the rust and white striped cotton/Lycra jersey from Fabric Godmother, and it has the perfect weight, stretch and recovery for this garment. The leftovers became this vest and undies set

The construction was very quick and enjoyable, I can definitely see myself making more of these tops in the future. 

Dungarees:

I can't remember if I got hold of the fabric or the pattern first, but the combination has worked out really well. The fabric is/was, in fact, a pair of 100% cotton curtains bought from a charity shop. They have a ribbed texture which gives them the appearance of corduroy, but without the plush pile. 

The pattern I used is the Greta dungarees by Made My Wardrobe. I'm a big fan of their whole aesthetic and I love how this pattern has zero fastenings. It can be worn tied at the front or the back. I obviously chose to make them so they tie at the front, however, I may go back at some point and shorten the straps so they tie at the back instead. 

Despite there being no fastenings, it wasn't a particularly speedy pattern to make, if that is something that you look for in a sewing project! I made things a touch more complicated by adding a patch pocket to the front. Not only do I like that utility look, but I find it useful to pop my phone in when I'm wandering around the house. I applied a Kylie and the Machine label for extra cuteness (see above). 

I'm not entirely sold on the pale cream colour yet. It's rarely I colour I wear, particularly on my lower half. On their very first outing I spilt my coffee right down the front (which was captured on audio, as you can hear in this episode of my podcast!). I think the colour gives them a definite spring/summer feel, plus also painter/decorator vibes! I need to wear them some more to see if I can get used to both those aspects. 

Thursday, 10 February 2022

Reclaimed Denim Freddie Dungarees


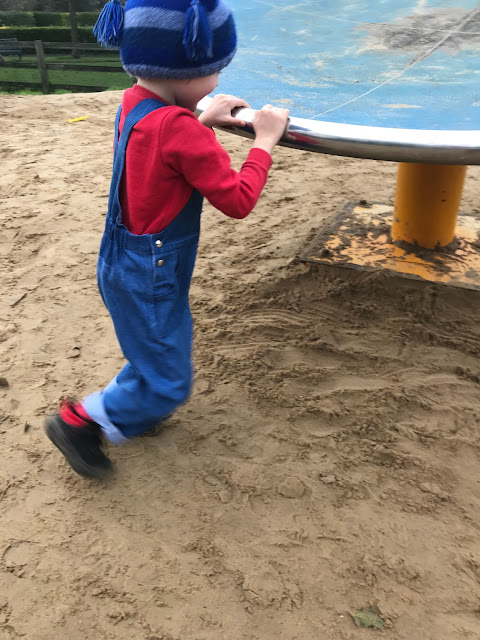
I've been so inspired by many of the conversations I've had for my podcast Check Your Thread. I guess it was inevitable that inspiration would express itself in my sewing projects! Speaking to Riccardo Guido made me realise that I'm storing (hoarding?) a number of garments that I no longer wear in my wardrobe. I came to accept that I was unlikely to wear my denim Lander pants again because my body shape has changed now that I am firmly in my middle age. And the Cleo pinafore that I made with that leftover precious denim was almost never reached for, and when I did wear it, I didn't feel great. I realised that the lovely broken twill denim could be harvested and turned into something that would see much more use. 


Fabric:

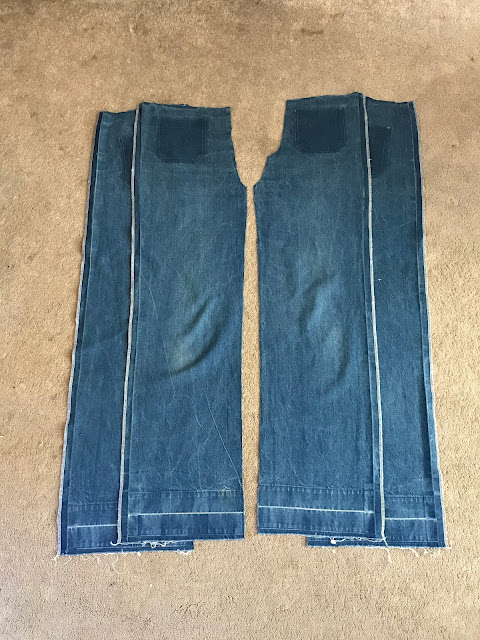
So I unpicked and cut apart both the trousers and pinafore in order to harvest as much of the original denim as possible. I carefully set aside the pockets from both garments, and the straps from the pinafore for a different, future project. As I did this, I had in mind my conversation with Guy / The Light Touch, in particular his concept of 'decommissioning clothes'. I loved hearing about how he assesses old and unworn garments, and figures out what he can salvage and reuse in new projects. 


Pattern:

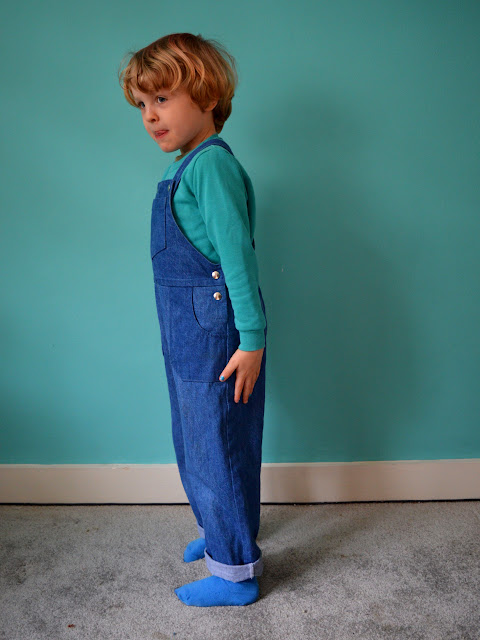
Frankie had been asking for his own pair of dungarees (and a boilersuit, but that's a whole other thing!) for yonks. I decided to make some for him as part of his Christmas present. I already own the Freddie dungarees pattern by Two Stitches (pictured below), having made the pinafore version for my daughter when she was about the same age. Handily, I was able to reuse some of the pattern pieces that I traced out for that project three years ago for Lola! 


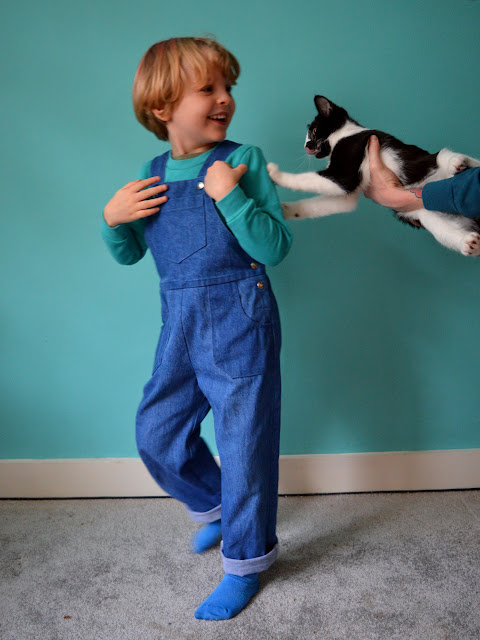
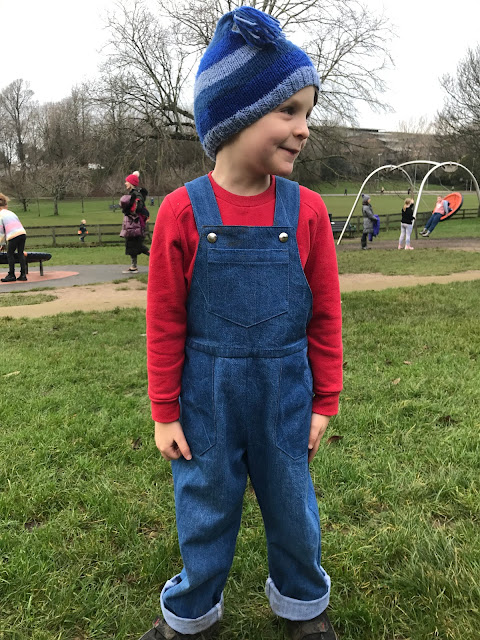
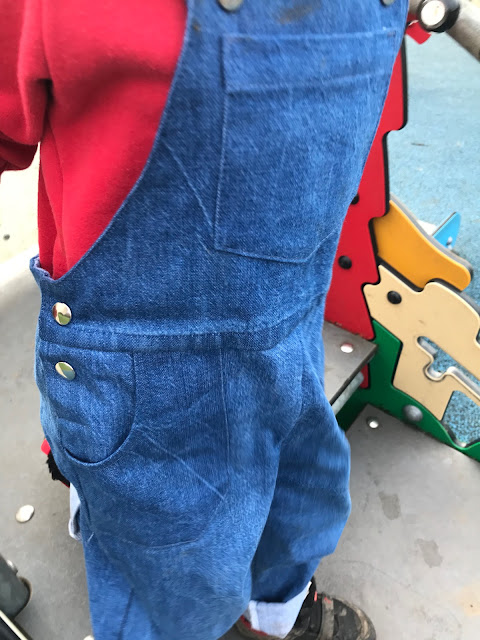
There are things I really like about this pattern, and things I don't. This time round I was able to amend some of those less pleasing elements, like increasing the pattern's scant 6mm seam allowance, and not lining the pockets. For Frankie's dungarees, I also decided to omit the back pockets and the turn-ups with tabs. I added some extra length to the legs to future proof them somewhat. I used no-sew press studs to fasten the straps to the bib, and for the side openings so they'd be easier for him to take off himself. 


Thoughts:

What is extra pleasing about this project is that I was able to take the fabric from the Landers and Cleo and keep it in use as a garment. This is what Shelly Sommer was talking about when we discussed keeping materials at their highest possible level of use. I was so into that concept that I've actually recorded another conversation to be released where I asked her to go into that concept further still. 


Although I made these dungarees before I had the pleasure of speaking with Eliu Hernandez, I can now recognise and appreciate the pocket shadow that I had to include at the top of the back legs (see above). The pocket shadow occurred when I removed the pockets from the Lander pants, but because of the size and shape of the pattern pieces, including that darker section when cutting out the Freddie dungarees was inevitable. I really like it now though: it's a nod to their origins!


Although not exactly thrilled with them when he unwrapped them on Christmas morning, Frankie has since embraced his dungarees. He is very happy to put them on if I select them as part of his outfit for the day. And because they took a comparatively long time to make, compared to the usual simple joggers and such that I make him, I want him to wear them A LOT! 


When you're in the mood, making detailed woven garments, particularly on a small scale, is really satisfying. Thankfully, I gave myself just enough time before Christmas to make these so that they didn't become a stressful rush. I'd definitely consider tracing out a larger size and making them again for him in the future, if he asked me to. 

Tuesday, 14 January 2020

More Heyday Dungarees of Dreams


I don't know why I'm looking so moody in these pics. Clearly I've forgotten that I'm wearing the bestest dungarees! I made this pair a few months ago, but getting photos has been a challenge. But now that I have, let me flood your screen with pics of them.  


Fabric:

I saw a couple of projects on Instagram made from this rust coloured twill, and my 'want' alarm went off VERY loudly. I found that it was this Ventana cotton twill by Robert Kaufman, stocked by Sew Me Sunshine. I've been trying to slow my fabric buying fabric right down lately, but this was so perfect and ticked so many of my boxes that I decided I could justify getting some. It took a while because it was out of stock for ages, but when it arrived I was not disappointed. It's the nicest quality and the perfect shade of brick/orange/rust. 


Pattern:

Before the fabric arrived, I had planned to use it to make the Republique du Chiffon Danielle dungarees pattern, which I have in my stash. However, upon arrival I discovered that the fabric was a lighter weight IRL than I feel would be suitable for the Danielle pattern. So instead I reached for the Made by Jack's Mum Heyday dungarees pattern that I made previously in black linen twill and have worn to near-death.  


As with my lack version, I used the pattern's bib and back pocket pieces, but used my own self-drafted pocket shape for the front hip pockets. I added a cute little piece of woven ribbon from Textile Garden to create a little label/tab for an extra personalised detail. 


The only other difference between this pair and my black ones, was to make two fabric loops rather than buttonholes to thread the straps through. The loops make this pair look more like Lucy & Yak dungarees I realise, and in general my dungers have ended up very similar to theirs (see below). It's a resemblance I'm more than happy with!

Lucy & Yak Dungarees Organic 'Umi' Cotton Dungarees in Rust Orange
(image source: Lucy & Yak)

Thoughts:

These are the best, most comfy dungarees and I'm in love with them. Today I'm wearing them with this wool top underneath because it's pretty chilly out (and in my work place), but I can't wait for warmer days so I can comfortably wear them with lighter tops and different footwear. 


Wednesday, 7 November 2018

Heyday Dungarees of my Dreams


This exact outfit is all I'm interested in wearing at the moment. It's my mumiform, and the rest of my wardrobe may as well go on holiday. You've seen my stripy Gable top many times before, so let me introduce you to the new element.

(image source: Beaton Linen)

So it went down like this... Frankie and I are regulars at a playgroup that is also attended by this cool mama called Seonid (pronounced Shona). She made me aware of the overalls by Beaton Linen (pictured above and below) via Instagram after seeing me rock my Burnside bibs, thinking I'd appreciate them. She wasn't wrong, and I couldn't stop thinking about them. 

(image source: Beaton Linen)

Pattern:

Shortly after discovering the Beaton Linen overalls, I received an email from the Made by Jack's Mum pattern company announcing the release of their new women's 'Heyday' dungarees pattern. They were even offering a 20% discount for the first week or so after it dropped. Despite the discount and their obvs similarity to my inspiration source, I hesitated for a couple of days. I feared that they'd make me look a bit too ceramics-evening-class-tutor. As I have discussed before, my style seems to be travelling towards Art Teacher chic, and I was concerned that this garment would seal that fate. But, ultimately, the pull of linen dungers was too strong and the purchase was made. 


The sizing range of this pattern is very generous, running from XXS to 5XL. The size chart put me as a Small which I wasn't entirely convinced about, so I added an additional 1cm to the side seams in case I wanted to adjust the fit (I wasn't making a toile). The seam allowance of this pattern is 1cm, which I enjoy sewing with, but wouldn't have left me enough wiggle room to take them out. I did end up giving myself slightly more room by letting them out at the side seams around the hip/bum area. 


Aside from adjusting the fit slightly for my booty, the only deviation I made from the pattern was to draft new front hip pockets. The pattern includes two pocket pattern pieces; one larger pocket for the bib, and four smaller pockets (two for the bum, two for the front hip). I wanted a slightly different look at the front, so I used the hip pocket piece I drafted for my black denim Cleo pinafore, but folded the bottom corner in to reflect the shape of the other pockets on the dungarees. Unlike with my Cleo, this time I remembered to apply some twill tape to the pocket opening so I can shove my hands in these ones as often as I like without fear that they'll stretch out. 


Fabric:

I fell in love with this linen twill from Fabric Godmother after sewing with and wearing it as my York pinafore. The weight, feel, movement and even how it fades slightly made it my number one choice this dungarees project, and I don't regret a thing.


Thoughts:

As I already said at the top of this post, I adore these dungarees. After the minor tweaking, I think the fit is bang on, and they are so comfortable that I don't even want to change out of them into some 'lounge wear' for relaxing in the evening, which I normally always do. I even think that I prefer them to the Beaton Linen ones, which look a bit too short and wide towards the bottom of the legs for my liking. Which is handy, because those Beaton ones are $270 a pop. I definitely plan to make another pair in a cotton/linen mix next spring.

Thursday, 11 October 2018

Burnside Bibs: Serving Land Army Realness


I've got so much love for dungarees and pinafores these days, I can't even tell you. I bought this pattern back in May whilst I was making the most of the generous Me-Made-May'18 celebration discount codes after coveting almost every pair I'd seen on Instagram.They finally got made at the tail end of the summer after I'd finally managed to answer the all important question of what fabric to buy. 

(image source: Sew House Seven)

Pattern:

In case you haven't come across the Burnside bibs pattern by Sew House Seven, lemme talk you through. Both versions include fabulous, large, curved, front pockets and clever straps/ties that narrow from the shoulder to the back and can be tied in a number of ways. There are two different bib shapes: scooped and straight across. Both versions feature a gathered back waist detail (great for bypassing a lot of trouser-fitting headaches), but version #1 is a little more fitted, with back darts and a concealed side zip to help you get in and out. There are optional patch back pockets and two leg lengths. 


Initially, I preferred the straight across bib shape, but had changed my mind by the time I had to cut the pattern pieces out. I was always going to go for the more fitted back waist option, as I wanted to reduce the likelihood of the back area looking like a gathered-up bin bag as much as possible. I hoped the addition of back pockets would help with that too. 


There was something that I found a bit off-putting about the back belt loops as well. I think the way the straps run through them and they gather up makes me think of curtains or something, so I decided to perform a small pattern hack to eliminate them. I made a channel from a rectangular strip of fabric and stitched that to the area where the belt loops should have been applied instead, and I'm much happier with the resultant look. 


Fabric:

After two recent successful firsts (1, sewing with and wearing linen and 2, embracing this colour green), I felt emboldened to choose this olive green cotton/linen mix from Fabric Godmother, which I never would have chosen before those two projects. The linen content gives it a lovely flow, and the cotton content means it doesn't wrinkle half as badly as regular linen probably would. It's quite a loose weave, so I was afraid of it fraying, but I just handled it carefully and there wasn't an issue. Plus, after making my Lander shorts and wearing them extensively during the summer, I was really surprised by how well this colour fits with the very limited colour palette that the rest of my wardrobe adheres to. Until recently I had been freely calling this colour 'khaki', but this week I received some schooling that khaki is actually this colour, and my shorts and burnside bibs are more accurately described as 'olive', or  'army green' perhaps. You live and learn.


Thoughts:

Truth be told, when I first put these bibs on after completion, I must admit to feeling disappointed. Even having chosen the 'fitted' option for the back waist, I feel that I haven't fully avoided the gathered-up bin bag look from the back. Also, the crotch depth is REALLY low. And this is coming from someone who needs to 'scoop out' the rise (i.e. lower the crotch point) of every trouser sewing pattern I'm ever going to encounter. And I think that the position of the back pockets is much too low, and that plus the unflattering gathering and low crotch are all combining to give me the appearance of a saggy bum. And lastly, although I'm now down with this colour, is this much of this colour in this style of garment just too Land Army re-enactment? Is 'Land Army reenactment' even a thing? (Fun fact: one of my nans worked in the Land Army during WW2.)

(image source: Women's Land Army Tribute)

On the other hand, I love the shape of the bib section and they are tremendously comfortable to wear, so wear them I most definitely will. I think that the angle that these pics have been taken at aren't showing them totally at their best, and when I wore them whilst helping out at the recent Fabric Godmother open day, I inspired two people to buy this pattern. 

Will I use this pattern again? I'm not sure. I'd be tempted to try again with a drastically raised crotch and some tweaking to reduce the fullness at the back. However, I *may* have accidentally just bought another dungaree pattern to play with in the meantime... 

If you have any ideas on how to approach reducing the fullness in the back whilst maintaining the balance between the front and back leg pieces, I'd be VERY grateful to read your thoughts. Thanks in advance...
Related Posts Plugin for WordPress, Blogger...