Showing posts with label linen. Show all posts

Friday, 5 July 2024

Free Pattern Friday: Wide Strap Maxi Dress for Adults


Welcome to my monthly 'Free Pattern Friday' feature, where I road test a free sewing pattern or tutorial: sometimes a children's one, sometimes an adult's one. I try to publish these posts every first Friday of the month, timed to provide inspiration for those who plan to get their sew on over the weekend. I firmly believe that, if you pick your projects carefully, sewing doesn't have to be a crazy-expensive way to clothe yourself and your family. Thanks to all the amazing pattern designers who have offered up their hard work for us to enjoy for free.

I'm guessing that most sewers who have been at it for a while are aware of the wonderful treasure trove that is Peppermint Magazine's sewing pattern collection. With each edition of the Australia-based magazine, they work with an independent pattern designer to produce a sewing pattern that gets included with that issue. All the previous patterns are also available via their website. They all used to be free, but more recently they have introduced a pay-what-you-can system, which I love. 


(image source: Peppermint Magazine)


The Wide-Strap Maxi Dress pattern, produced by Lauren Boyle from pattern brand Elbe Textiles, caught my eye some time ago but I wasn't really sure if it was 'me'. But at some point I realised that it could be worn like a pinafore with a T-shirt underneath, plus I could shorten it so I wouldn't feel like I was drowning in fabric. I am in the lucky position to be able to afford sewing patterns, so I picked one for the paid options. I would really like to encourage anyone who can afford to pay to do so. It helps keep this wonderful magazine, and it's collection of fantastic patterns, afloat. But if you really can't afford to pay for the pattern, don't feel guilty for accessing it. See if you can support them in other ways, for example by posting about the pattern and magazine on social media. Massive thanks to both Peppermint Magazine and Lauren Boyle for creating and making this pattern available for the community to enjoy. Also, big thanks to Ruby for taking these pro photos of me in my dress!


Pattern type:

The pattern is for an A-line maxi dress with side splits and a elasticated back. I shortened the length by about 20cm so mine isn't quite as 'maxi'.


Sizing info:

The pattern is graded from 30" bust to 51" bust. My measurements put me in the 'D' size, but when I tried it on near the end of construction, I found it very loose around the bust. Thankfully, this is very easy to adjust, you just need to make the elastic tighter at the back. 


Fabric info:

There isn't much guidance given on fabric selection. There's nothing on the webpage, other than a link to the particular linen they've used for the sample photographed. In the instructions PDF is specifies 'Midweight woven fabrics – linen, cotton, hemp, rayon'. For my version, I used the Riviera viscose & linen blend in 'Olive' from Fabric Godmother (not sponsored but I get a staff discount). Aside from needing to be ironed every two minutes, I think it was a great choice for this pattern. My initial fear was that it might be too lightweight, but it has such a nice drape and feels very breezy on hot and sticky days. 


I bought a cone of Tencel thread from James Tailoring. So aside from the elastic at the back, this garment is, theoretically, biodegradable. 


Findings:

As with the other Peppermint Magazine patterns I've tried, I found this pattern to be very well produced. I love that the pattern file includes the layers function so I could specify which size I wanted when I got it printed in A0 format. The instructions are lovely and clear, with very helpful diagrams to illustrate the steps.  

The construction method for this project is really fun. It looks like a really simple garment, but the designer walks you through creating a really lovely finish with french-seamed everything! To my surprise, I didn't use my overlocker to finish a raw edge once. It makes this simple-looking garment really elevated. That said, there is a down-side with the method: there are practically no opportunities to assess and adjust the fit or length until it's practically finished. You're going to have to make a toile/muslin (I did not) or baste/tack everything together first to be able to assess the fit and length. 


As mentioned above, the saving grace is that the elastic that brings the top back in can be easily adjusted, which will effect the closeness and volume to some degree. But if you've cut a size that turns out to be too small, there's not much you can do about it, plus you won't be able to change the overall length. I would very much advise you study the finished garment measurements before selecting your size/s, and hold the paper pattern pieces up to your body to decide on your preferred length before any scissors slice any fabric. 


Customisation ideas:

Here's some ideas to get more from this pattern:

  • cut the length even shorter for a mini-dress or top
  • ignore the in-seam pockets and add patch pockets at the thigh, and even to the front bib area, for a more utilitarian look
  • make the straps narrower for a more delicate look
  • cut the bodice around the waist and add a gathered skirt or gathered peplum
  • insert gathered frills into the seams of the straps


Would I make this again?

I'm low-level keeping my eyes peeled for a drape-y lightweight denim type fabric to make another in. It'd be tempting to add gold/orange top-stitching to give a nod to classic denim garment. 


Wednesday, 15 September 2021

Slub Linen Arden Pants


I wanted to drop a quick post about the trousers that I was wearing in my last post about the Lou Box Top, because I feel they deserve some attention of there own. These days I only buy fabric if I have a very clear idea of what it'll become. Sometimes I even have a specific pattern in mind, sometimes not. And when I do by some fabric, I really try (but often fail) to use it before long, so it doesn't become another piece of stashed fabric. With this linen, I DID manage to use it within a few weeks of purchasing. WIN! Zoe, 1 : Stash, 0. 


Fabric:

A few months ago, Fabric Godmother (where I work part-time) got in some lovely, slubby linen in navy with white flecks (sadly now sold out, sorry). It had such lovely drape and body and movement, but I reminded myself that I hadn't sewn up the last lot of fabric I bought yet, so couldn't justify buying more at that point. Then a couple of weeks later I saw my colleague Claire wearing a pair of Merchant & Mills 101 Trousers made in the same linen and they looked AMAZING. Claire has incredible taste and buys fabric only when she sees something INCREDIBLY special. I decided that if Claire felt this was some good stuff, then it would be an investment to get some for myself.

For a few years now I've been interested in creating 'summer jeans': bottoms that are really comfy and that will go with so many other items in my wardrobe that they get worn ALL THE TIME during the warmer months. I felt that this almost denim-y look linen might fit the bill. 


Pattern:

There are soooo many elasticated-waist woven bottoms patterns out there now that it's almost impossible to keep track of them all. But the one that instantly appealed to me the most (apart from the Luna pants pattern by Made by Rae, which I feel is more suitable to very drape-y fabrics) is the Arden Pants pattern by Helen's Closet. I was lucky enough to receive this pattern for free shortly after it was released and I've tried it a couple of times so I had a good idea of the fit I could expect and the size I should use. 


I love the elasticated ankle views included in this pattern, but I chose to make the regular hem that I wear turned up hoping they will be suited to a wider range of outfit vibes. The construction of these trousers is very simple, but with some nice details like topstitched seams that should ensure longevity. In hindsight, I should have added some stabilisation to the pocket mouths though, because I'm pretty sure they will stretch out over time. 

The only other issue I have with these trousers is that I can't decide if the waist should sit higher up near my natural waist (which I like to look of more), or lower on my hips (which feels more comfortable but I don't like the way my belly protrudes a bit over the top!). I'm erring to the former/higher position, but I need to tighten the waist elastic to stop them from slipping down. The pattern calls for topstitching through the waistband after the elastic has been inserted. I really like the look of that, but I find it makes the elastic less effective and looser after the topstitching has been added. For future pairs, I should probably overcompensate and make the elastic too tight to begin with. Or include the step to insert a cord or tie through the waist so you can tighten them up when worn.


Thoughts:

In short: I have achieved my summer jeans! I have worn them A TON since making them (I'm wearing them right now, in fact). They look great with all sorts of casual tops, and I'm interested to see how far into autumn I can get away with wearing them before I feel too cold. I definitely plan to make another version or two of this pattern in the future, perhaps slimming them down through the hip ever so slightly. 

Thursday, 23 April 2020

Sewing Basics for Everybody Blog Tour: Harper Pants


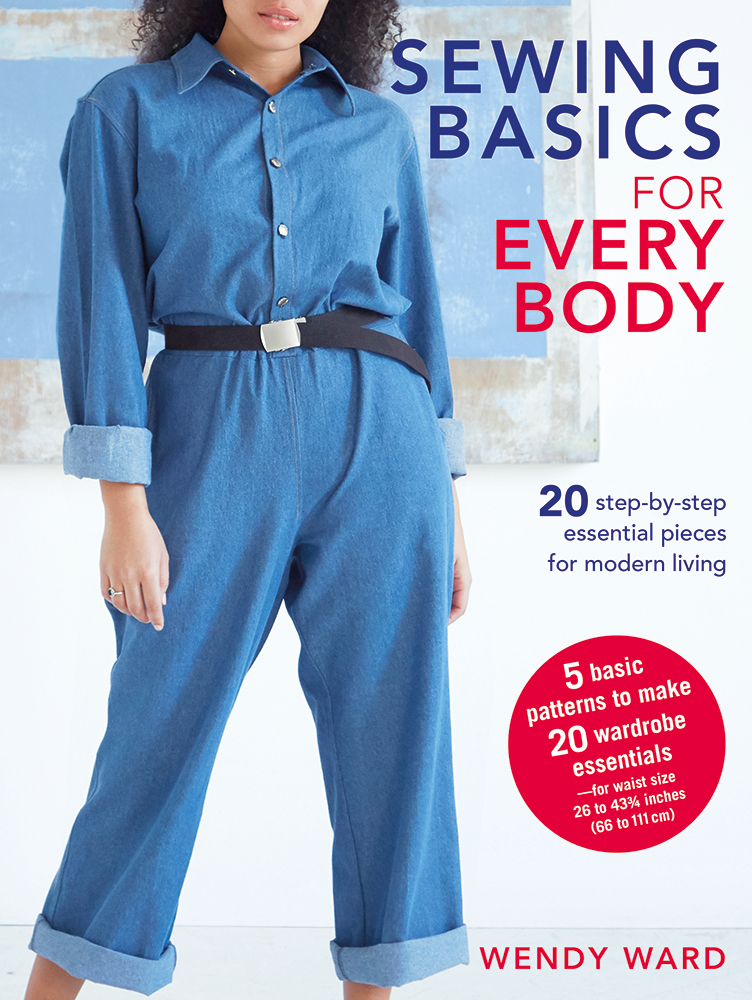
Seeing as we can't go on any other kind of tour at the moment, let's go on a blog tour! Wendy Ward's latest book, 'Sewing Basics For Everybody', is a collection of patterns designed to produce a capsule wardrobe of simple garments suitable for everyone, regardless of gender, age or body shape. It's a really interesting idea, and firmly in keeping with the growth of inclusivity in the sewing scene, and in society more generally. The book contains graded sewing patterns for five types of garments, with pattern pieces for three-to-five variations of each garment included, along with lots of idea and info on how to create many more styles. 

To be suitable for the widest variety of body shapes, the styles are all pretty loose-fitting and unisex. And if that kind of silhouette and aesthetic are your bag, you're going to want to check this book out. This blog post represents the third stop of six on the tour to see some of the styles made up on a variety of sewing bloggers. Here we go...


Pattern:

I accepted the invitation to make a garment for this blog tour before the UK corona virus lockdown was a thing. Initially, I had big plans for a hack of the Kim jumpsuit project. However, once lockdown became a reality, the space in my brain available for this project narrowed, and the gap in my wardrobe for a nice pair of comfy trousers widened! My attentions and plans therefore switched to the Harper pants pattern.

The Harper pants are a wide legged trouser pattern that Wendy has cleverly developed to be the basis for a number of different looks. The waist can be elasticated, or can have front pleats, a waistband and fly front fastening. The legs can be cropped or full length, and a genius way to form a harem-style with an ankle pleat is offered.


There are three styles of trouser specifically set out in the Harper pants section, but I chose to combine some of the elements in a different combo that would be more suitable to my current needs. I wanted these trousers to be work-from-home and homeschooling friendly, so I chose the comfier, elasticated waist option. (And because lockdowners can't be choosers, I had to alter the width of the waistband to suit the only wide elastic I had in my stash.) I really wanted to try that clever harem-style, tapered ankle detail, so I threw that into the mix as well. 

Like most pattern books, you need to find your chosen pattern pieces on the pattern sheets included and trace them off onto paper before you can begin. My one issue with this was that the trouser pattern pieces aren't all on the same pattern sheet. No doubt the design of the pattern sheets has been done that way to conserve paper, but I was glad that I was only having to locate three pattern pieces for my project. The sizing is based on body measurements and finished garment measurements. If you have a curvier shape, you may find you need to combine and blend between sizes, as the patterns are designed for a waist/hip measurement difference, for example, that isn't as great as most of the women's pattern companies' sizing range you may be used to working with. Wendy gives a TON of information on taking measurements, and masses of additional advice about picking the right size for you.   


As for sewing these pants, as you would expect, they came together quickly. I can really see that the style would suit a variety of fabrics, but I'm very happy with the linen that I picked. Which leads me to...

Fabric:

Wendy's publisher got us a hook up with UK-based, online fabric seller, Fabworks, for this tour. We were able to use the fabric of our choice from their website, providing there was enough in stock to fulfil future orders that may follow from the tour. We were also encouraged to order samples so we could have a good feel before committing to our selection. After having checking out samples of a few options, I went for the Slubby Linen & Cotton in Tawny. Oh my goodness it's lovely! It's got a fine, textured, linen look, yet it doesn't really crumple in the way you'd expect a fabric with linen content to do. 


The colour is a caramel-y brown, a shade or two away from my beloved rust. I wasn't too sure if this colour would be too brown-brown for me, so I made sure to use cotton thread in case I decided to dye them further down the line. Yet I doubt I will now as this colour is really growing on me. I'm not sure I could carry if off closer to my face, yet on my bottom half, in particular when paired with navy, black or white, I think it looks really good. 


Thoughts:

It was really great to be part of a blog tour again. It doesn't seem so common an occurrence these days as it used to. And this really is a book that's worth checking out, especially if looser, simpler styles are your thing. Wendy is a phenomenal font of sewing knowledge, and she ploughs soooo much of it into her books. Even if you're a pretty experienced sewer, there's a lot of information, techniques and tips you're likely to absorb by reading through this book. 

As for the trousers themselves, it was fun to experiment with a style that is a slight step out of my comfort zone. There's a bit more volume going on, and they sit higher on my waist than I'm used to. I'm going to wear them a few times to see if I can get into it. Making them was a very pleasant experience, thanks to both the construction method and the lovely fabric. And I particularly enjoyed creating the unusual ankle pleat detail. 

I recommend that you visit the other participants in this blog tour. Mercedes and Fiona have already shared their fantastic and inspired garments created with patterns from this book, and I'm so excited to see the rest.

Wednesday, 7 November 2018

Heyday Dungarees of my Dreams


This exact outfit is all I'm interested in wearing at the moment. It's my mumiform, and the rest of my wardrobe may as well go on holiday. You've seen my stripy Gable top many times before, so let me introduce you to the new element.

(image source: Beaton Linen)

So it went down like this... Frankie and I are regulars at a playgroup that is also attended by this cool mama called Seonid (pronounced Shona). She made me aware of the overalls by Beaton Linen (pictured above and below) via Instagram after seeing me rock my Burnside bibs, thinking I'd appreciate them. She wasn't wrong, and I couldn't stop thinking about them. 

(image source: Beaton Linen)

Pattern:

Shortly after discovering the Beaton Linen overalls, I received an email from the Made by Jack's Mum pattern company announcing the release of their new women's 'Heyday' dungarees pattern. They were even offering a 20% discount for the first week or so after it dropped. Despite the discount and their obvs similarity to my inspiration source, I hesitated for a couple of days. I feared that they'd make me look a bit too ceramics-evening-class-tutor. As I have discussed before, my style seems to be travelling towards Art Teacher chic, and I was concerned that this garment would seal that fate. But, ultimately, the pull of linen dungers was too strong and the purchase was made. 


The sizing range of this pattern is very generous, running from XXS to 5XL. The size chart put me as a Small which I wasn't entirely convinced about, so I added an additional 1cm to the side seams in case I wanted to adjust the fit (I wasn't making a toile). The seam allowance of this pattern is 1cm, which I enjoy sewing with, but wouldn't have left me enough wiggle room to take them out. I did end up giving myself slightly more room by letting them out at the side seams around the hip/bum area. 


Aside from adjusting the fit slightly for my booty, the only deviation I made from the pattern was to draft new front hip pockets. The pattern includes two pocket pattern pieces; one larger pocket for the bib, and four smaller pockets (two for the bum, two for the front hip). I wanted a slightly different look at the front, so I used the hip pocket piece I drafted for my black denim Cleo pinafore, but folded the bottom corner in to reflect the shape of the other pockets on the dungarees. Unlike with my Cleo, this time I remembered to apply some twill tape to the pocket opening so I can shove my hands in these ones as often as I like without fear that they'll stretch out. 


Fabric:

I fell in love with this linen twill from Fabric Godmother after sewing with and wearing it as my York pinafore. The weight, feel, movement and even how it fades slightly made it my number one choice this dungarees project, and I don't regret a thing.


Thoughts:

As I already said at the top of this post, I adore these dungarees. After the minor tweaking, I think the fit is bang on, and they are so comfortable that I don't even want to change out of them into some 'lounge wear' for relaxing in the evening, which I normally always do. I even think that I prefer them to the Beaton Linen ones, which look a bit too short and wide towards the bottom of the legs for my liking. Which is handy, because those Beaton ones are $270 a pop. I definitely plan to make another pair in a cotton/linen mix next spring.

Wednesday, 12 September 2018

The York Pinafore


I know that it's common to find the statement 'This new thing I made is all I want to wear right now' on sewing blogs and Instagram posts, but I can't help that. This pinafore IS my favourite thing to wear right now. The pattern appeared, as if by magic, in my inbox, sent by its designer Helen from Helen's Closet as a freebie shortly after she released it. I was under no obligation to sew it up, but as soon as I saw a few modelled versions pop up on the interwebs, I knew I had to make it when the right fabric came my way.... 

Pattern:

The York pinafore is a clever little pattern. Despite the number of pinafore and dungaree type patterns out there these days, I think it's unique. Part of its brilliance, IMO, it how simple it is: consisting of just a front and a back piece, and a couple of pockets. The neck and armholes are bound so there's not even facings to deal with. Once you've printed it out and stuck it together, there are three choices you need to make: which neckline (I went with the higher, but I adore the lower option too), pocket style (I love these big, scoopy ones, but there's also a cute hoodie-style, kangaroo version) and hem length (I picked the longer length so it'd be more suitable for chasing and wrestling with small children). 

(image source: Helen's Closet)

Going into this project, I remembered the realisation I came to during my Gemma tank escapades, that simple garments need to fit really well to look fantastic. I made a toile of this pinafore in some stable cotton to try and figure out if some pattern alterations would need to be made. I have to say at this point that the York pinafore pattern instructions may be the best pattern instructions I have ever encountered. This is in part because they include is a sizeable section on what to look for when fitting this garment, which is incredibly useful and makes this a wonderful pattern for helping beginner sewers to level up. I toiled the size M, and although the general size was fine, I found that the hip area sat too low on my body. This was unsurprising because I'm both short-waisted and an inch shorter than the height the pattern was designed for. I pinched out 3cm total (split into two places, as per the lengthen/shorten lines on the pattern) from the bodice are on both the front and back pieces. Plus, although I don't think it applies to me, I really liked how Helen explained an easy method for adjusting the pattern for larger bust sizes.  


The only other modification I made was related to the bias binding. I bought ready made bias (the instructions include how to make your own if you wish), but I picked a narrower width than suggested and applied it using the Grainline Scout tee method because I find it gives a nicer finish  around curved areas. But in short: the whole construction was super simple, and took very little time. 

Fabric:

I knew that I had nothing suitable in my stash for this pattern, so the next time I visited Fabric Godmother, I was in the look out. I didn't have a clear vision of what I was aiming for, other than I wanted a solid. With some guidance, I landed on this linen twill. I'm going to go out on a limb here and say that this may be the best fabric/pattern match I've EVER made! I've never worked with or worn linen before, let alone a linen with a twill weave, but it feels soooo nice on, kind of slinky but stable, I really love it. I'm struggling with the urge to go back and buy up the rest of the roll like some hoardy fabric-Gollum. 


Top:

With the pinafore complete, I couldn't ignore the desire for a new, super plain top to go with it. I already had this white cotton/spandex jersey in my stash that I'd procured from Girl Charlie UK for a different project that I later changed my mind about. I reached for my well-used copy of TATB's Agnes top pattern, and the perfect plain white knit top was born, that can also be paired with heaps of my other garments. 


Thoughts:

As you can probably tell, I adore this pinafore, and the outfit generally. Style wise, I'm not sure how you'd describe this whole vibe; the linen and the silhouette of the pinafore makes me think of art teachers, which is a direction Mr SoZo would probably argue I've been heading in for a while. I now own TWO floaty scarves which I wear quite a lot, and I've decided to allow my hair to go grey without dyeing it. Anyways, I don't think you could describe this pinafore as sexy, it gives my bum a kind of teletubby look (see below), but thankfully that's not an adjective I often aspire to. I wish I'd had this pinafore in my wardrobe when I was breastfeeding. I think it would give you sufficient boob access without too much outfit rearrangement required. I got so fed up of the limited collection of separates I wore for over a year, and it would have been great to have a dress option in the mix. 


I'm very happy with the tweaks I made to the fit, and the finish I achieved during construction. The only criticism I have for this garment, and it's a very mild one, is that I often find it shifts backwards a little, and I have to rearrange it slightly so the shoulder seams sit back on top of my shoulders where they belong. Anyone have any idea why that might be happening, or what I can do about it? I'd really love to make another of these early next year, probably with the lower scooped neckline and perhaps in a soft denim. I saw a version on Instagram made by @twodogs_and_a_sewingmachine where she had added centre front and back seams and went to town with topstitching, which looked really amazing. Helen has shared some great blog posts with other pattern hack ideas for the York pattern, as well as releasing an expansion pack to turn it into an apron. What fabric would you make this pattern in and what tweaks would you suggest? 
Related Posts Plugin for WordPress, Blogger...