Showing posts with label scrap buster. Show all posts

Friday, 1 March 2024

Free Pattern Friday: Sam Apron for Adults


Welcome to my monthly 'Free Pattern Friday' feature, where I road test a free sewing pattern or tutorial: sometimes a children's one, sometimes an adult's one. I try to publish these posts every first Friday of the month, timed to provide inspiration for those who plan to get their sew on over the weekend. I firmly believe that, if you pick your projects carefully, sewing doesn't have to be a crazy-expensive way to clothe yourself and your family. Thanks to all the amazing pattern designers who have offered up their hard work for us to enjoy for free.

To be honest, I haven't done a great job this month in actually showing you what my chosen free pattern actually looks like made up. I've omitted the pockets and created my own 'fabric' for it that makes it tricky to see what's actually going on. ANYWAY. Hopefully you will get a sense of the proportions at least, and also the versatility of this pattern as a canvas of sorts. If you want to get a clearer idea of what this pattern can look like, I'd recommend checking out Amy from Craft and Thrift's awesome versions (here and here). But what am I even talking about? Let me introduce you to the Sam Apron pattern by Helen's Closet. Thanks so much to Helen for sharing this (and a number of others) for free. There are many free apron patterns and tutorials out there on the interwebs, but I wanted to highlight this one specifically because of the interesting details and multiple sizing options. In my experience, Helen's Closet patterns also have excellent instructions. You can access the Sam Apron pattern through the webshop on their site (no payment is required).


(image source: Helen's Closet)


Pattern type:

The Sam Apron is cleverly designed to be suitable for lots of activities. I can imagine cooks, bakers, barbers, hairdressers and all manner of artists and crafts-people wearing a version of this apron. It includes chest and waist pockets, towel loops, and two strap options. But what is really unusual about this pattern over most free apron patterns is the graded size range and instructions for creating a custom fit based on your width, height and even bust size. 


Sizing info:

The apron fits sizes 0-34 (up to a 62″ / 157.5 cm hip) which has been broken down into five size bands. There are also five height options, from less than 5" to over 6". My plan was to make a cooking apron that would fit both Mr SoZo and myself. Helpfully, our hip measurements are similar so I cut the size 8-12. He's taller than me, but I don't think a cooking apron needs to be knee length anyhow, so I used the length that's shorter than both of us. Included are instructions for adjusting the bib section to accommodate a larger bust. Not something I need personally, but I appreciate that they included that for others. 


Fabric info:

The pattern recommends medium to heavy-weight woven fabrics with no stretch. Cotton broadcloth, denim, linen, cotton twill, quilting cotton and canvas are all suitable options. Waxed Canvas can also be used for a water-resistant apron. I didn't have any suitable fabric in my stash (thanks Last Sewist Standing challenge!) so I 'made' fabric by combining scraps of non-stretch denim and twill. It's basically the same technique I used for my denim patchwork dungarees. If this approach to scrap-busting is of interest to you, I have an episode of my podcast planned for next month with an accompanying downloadable guide that will talk you through using scraps for garment making. 

I used a lighter weight denim for the straps, because I thought a heavy weight fabric would be difficult to tie. You could also use twill tape, wide ribbon, braid or cord for the straps. 


Findings:

Ah I love a Helen's Closet pattern. Your hand is so thoroughly held and it feels like no detail has been overlooked. Presumably, their free patterns have been created to give potential paying customers a sneaky peek into what their patterns and instructions are like, and they deserve to get a good conversion because the quality is high.

I literally found only one thing that didn't work well. I found that the bias strip pattern piece that's used to finish the side curves was too narrow if using the 1cm seam allowance that is suggested. It would have resulted in the bias strip being too thin to cover the seam allowance when you flip the bias over to the wrong side. I used a narrower seam allowance and trimmed down the seam allowance to prevent that happening. 


The finished apron is pretty cool though. The denim is perhaps a bit thicker than necessary for a kitchen apron. And if I were to make it again, I'd add velcro to one end of the neck strap so it could be tighter but we'd still able to get it on and off with ease. 


Would I make it again?

If I ever had the need for another apron, then yep. I'd give more thought to fabric suitability depending on the intended use however. 


Friday, 8 September 2023

Free Pattern Friday: Hat and Leggings for Babies


Welcome to my monthly 'Free Pattern Friday' feature, where I road test a free sewing pattern or tutorial: sometimes a children's one, sometimes an adult's one. I publish these posts every first Friday of the month, timed to provide inspiration for those who plan to get their sew on over the weekend. I firmly believe that, if you pick your projects carefully, sewing doesn't have to be a crazy-expensive way to clothe yourself and your family. Thanks to all the amazing pattern designers who have offered up their hard work for us to enjoy for free.


Today you've got a two free pattern reviews for the price of one! The reason why I'm posting both of these today is because they make such a sweet pairing: they can be worn together AND make a lovely set to give as a gift. If you don't have any babies in your life at this time, and no one you know is currently expecting a child or grandchild, I recommend you bookmark this post for the future. And if you're in that phase of life when it feels like everyone around you is having babies, you could make a few in advance to have on hand as gifts.

Big thanks to Sweet Red Poppy for creating the Double Top Knot Baby hat pattern for free, and to Patterns for Pirates for creating the Petite Pegs pattern for free. I really wish both of these patterns had been around when I was pregnant with my babies!


(image source: Sweet Red Poppy)


Pattern type: 

The Double Knot Baby hat pattern is ridiculously cute and consists of just two pattern pieces: the hat and the band. The Petite Pegs are a casual leggings style with knit waistband (no elastic), with a rise designed to easily cover a nappy. There are four leg lengths included: shorties, bike, capri and ankle. They also consist of two pieces: the legs and the waistband. 


(image source: Patterns For Pirates)


Sizing info:

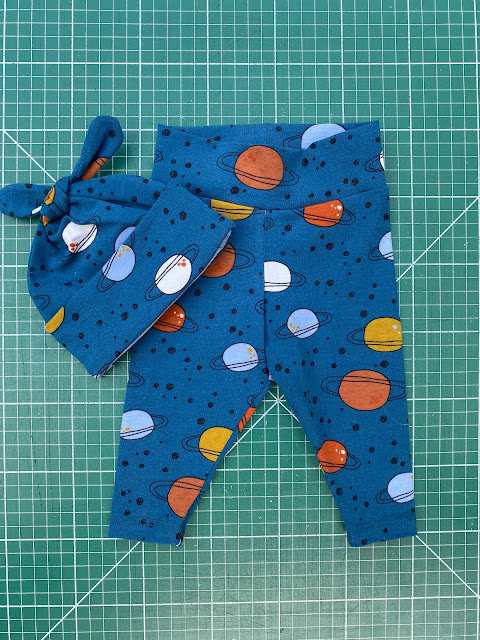
The hat pattern includes six sizes ranging from Newborn to 2Y, and the leggings from Premie to 12 months. After much debate, I created these two sets both using the 3-6 months size for the hat and Newborn for the leggings. I was scared of making the hat too small and them being useless, so I erred on the side of caution with that. I felt more confident going with the Newborn size for the leggings. As you might be able to tell from the tiny feet in the pic below, my friend's child was just a couple of weeks old, to give you a sense of the fit. 

As well as the age of the baby, you should also pick your pattern sizing in relation to the amount of stretch in your fabric: going for a smaller size for super stretch knits, or a larger size if the stretch percentage is much lower. 


Fabric info:

For the hat pattern, it is recommend that you use a medium-weight knit fabric with a content of 95% Cotton, 5% Lycra/Spandex. But then a couple of paragraphs down includes a greater list of other types of knit that could be suitable. I'd probably stick to the cotton/spandex (AKA Lycra or elastane) jerseys because I would be concerned that the other suggestions might be a touch too thick for that tight curve at the top of the knots, or quite slippery and therefore a challenge to work with. 

For the Petite Pegs pattern, they recommend a four-way stretch fabric with at least 50% stretch and good recovery. They also emphasise Lycra or spandex in the content, which is particularly important for this pattern so they stay in place and don't fall down, seeing as the pattern doesn't use elastic at the waist. 


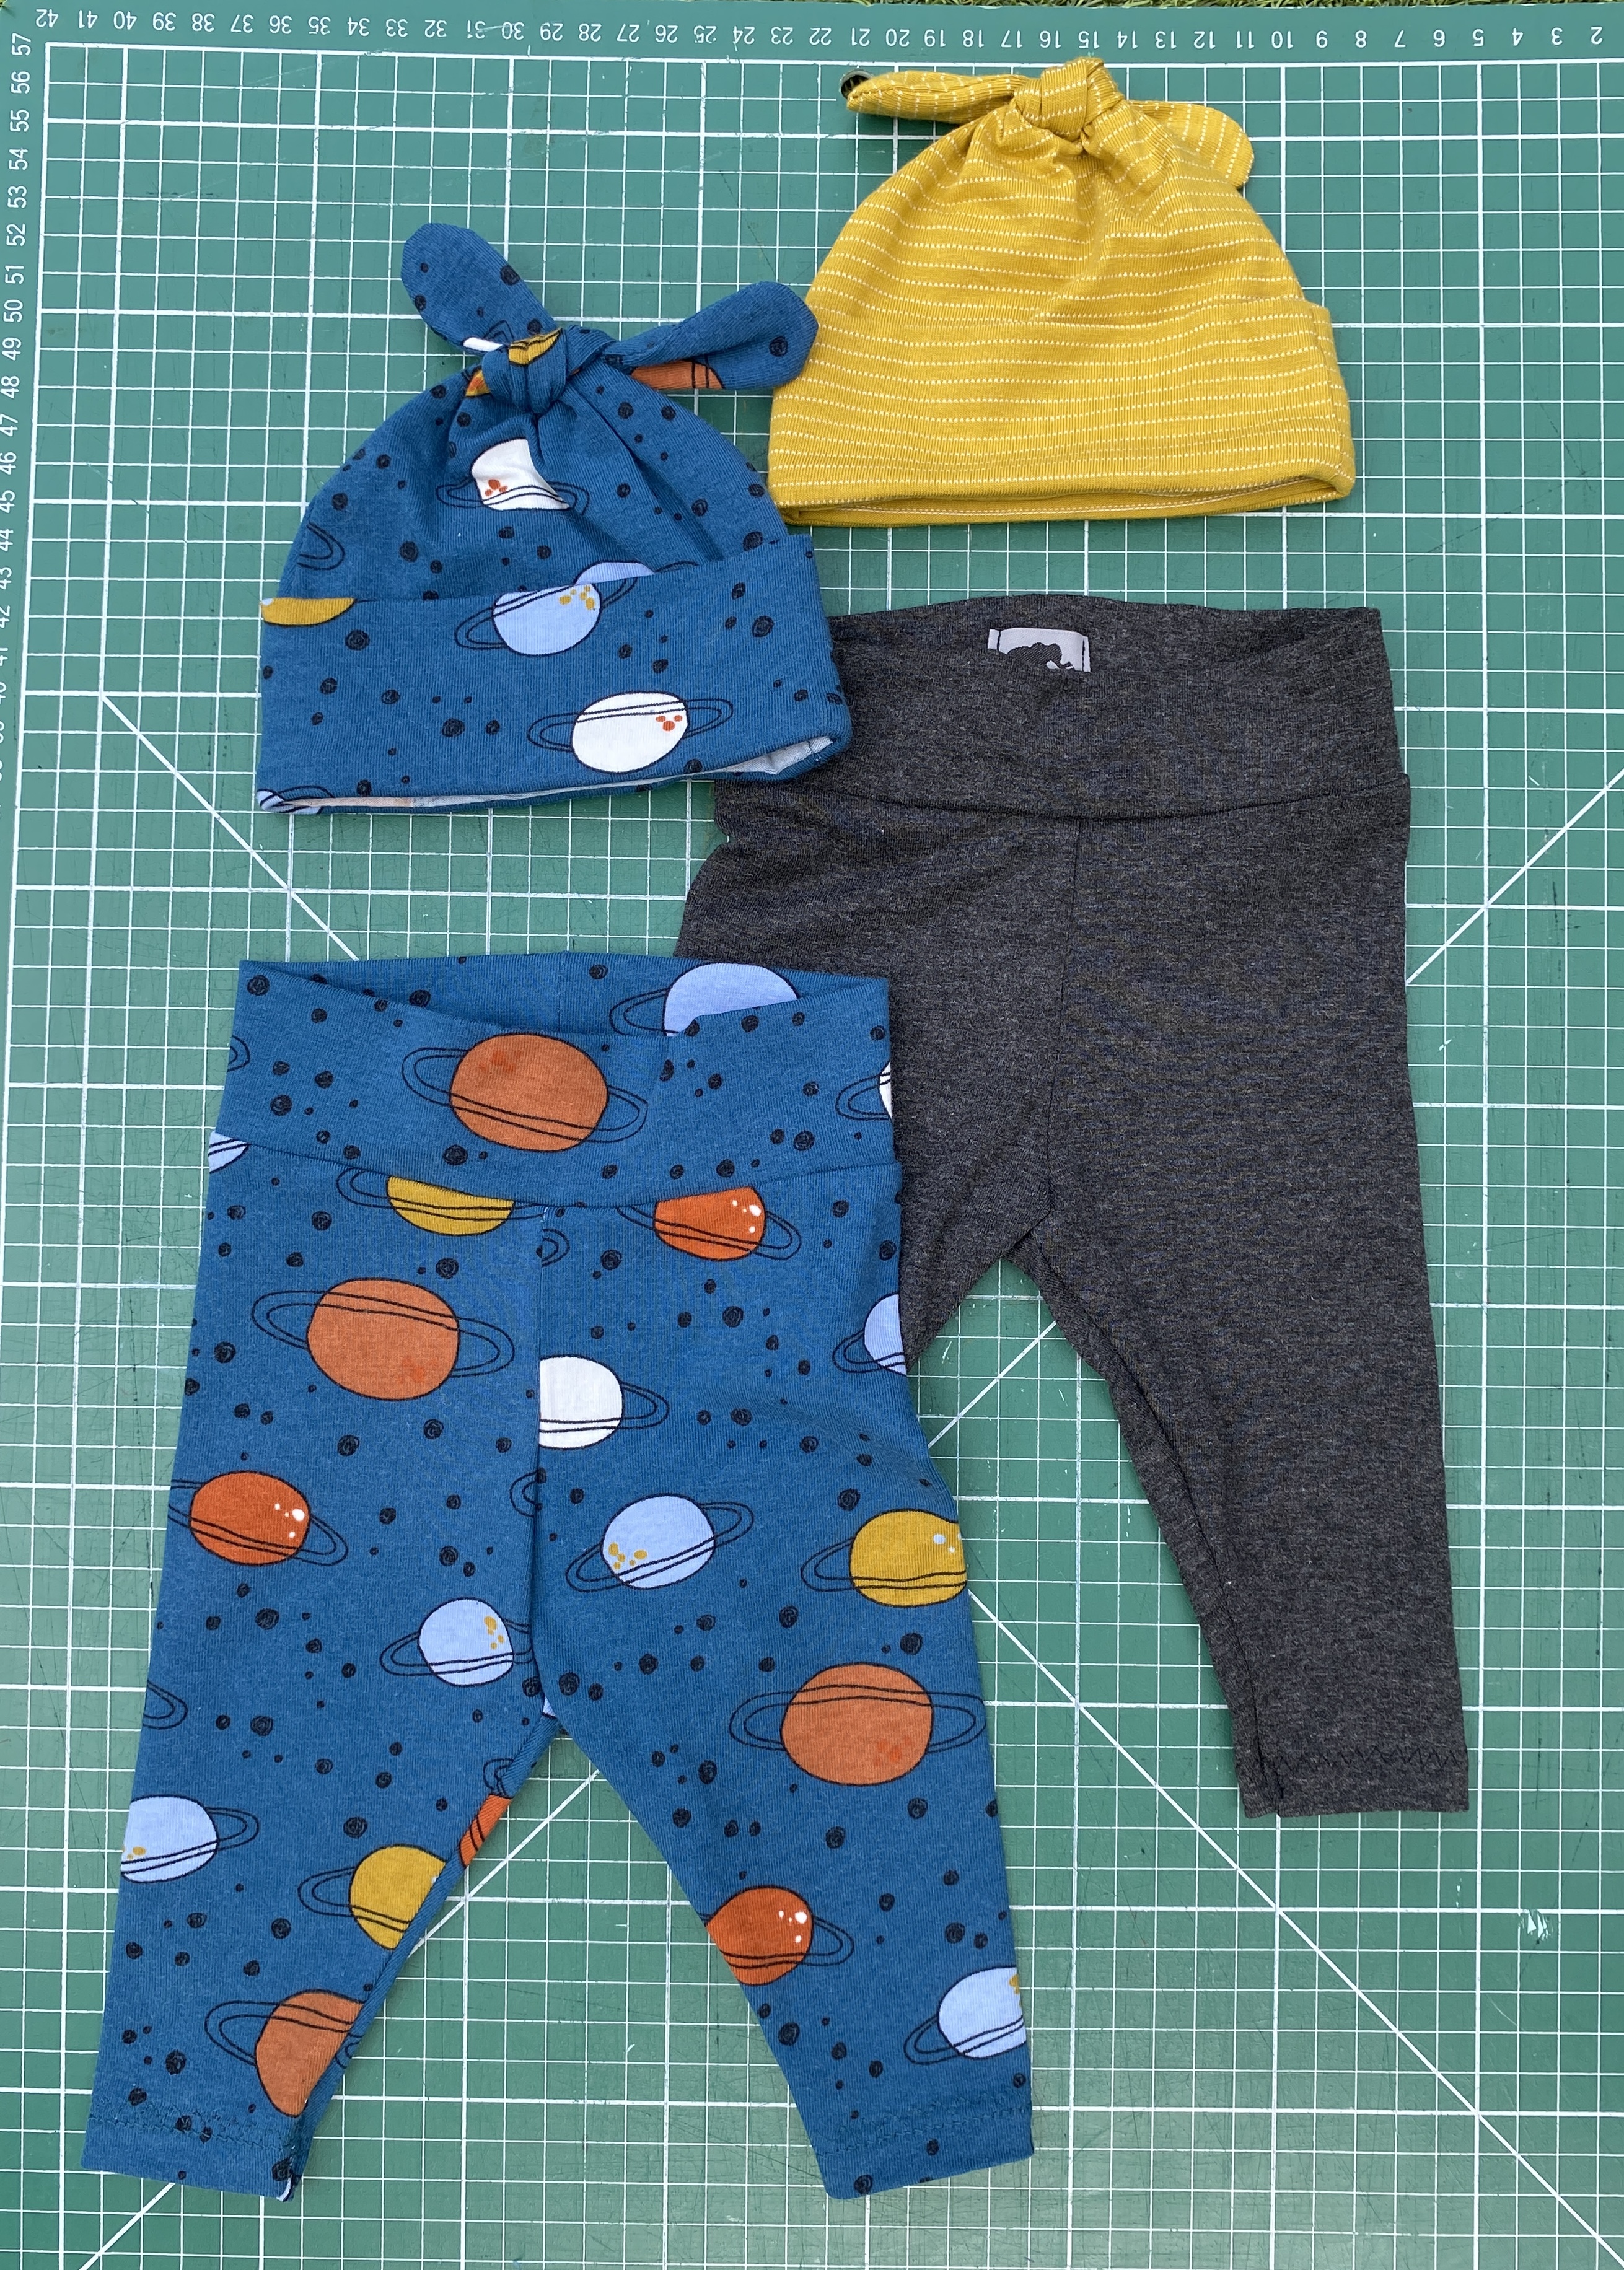
The space print fabric (leftover from these men's PJs - another free sewing pattern!) I used here is exactly on spec for these patterns: cotton/elastane with a good four-way stretch. The mustard fabric for the second hat wasn't quite as stretchy, and more of a two-way stretch, than a true four-way. But I've also used this fabric for making undies and they hold up fine so I was confident in my choice, particularly because I wasn't making the smallest size of hat. The grey jersey I used for the second pair of leggings was probably more like a viscose/elastane jersey. I got this from a charity shop many years ago and it was unlabelled so I can't be sure. It's quite drapey and lighter in weight than the other two but it's really soft, so I knew it would feel particularly nice against the skin. 

Of course, with both of these patterns, I'm going to emphasise what excellent potential scrap busters they are! They take so little fabric, and you can play around using different constrasting fabrics for the bands and the main parts. For the leggings, you could even use two different fabrics for the two legs. And with the hat, you could use different fabrics for the front and back hat pieces. But as always with combining different fabrics, just make sure they have the same amount of stretch and a similar weight. 


Findings:

Downloading the print-at-home pattern for the hat was easy enough. The instructions are in the form of a blog post that you read directly on their site. There's also a YouTube video to support you if you'd like, but I didn't watch it. The instructions on the blog post are good, however it's one of those sites that is dripping with distracting ads. Which I accept because that how this person's business models works in order for them to offer free patterns, including this one. 

Generally speaking, I think the instructions (when you can find them between the adverts) are great. However, there's one step of the process that I did differently and I'm glad I did. The last step gets you to attach the band to the hat with the band on the right side of the hat. You then press the seam allowance up into the hat. My feeling is that the seam allowance would not stay put and probably poke out the bottom because it's not stitched in place. To prevent that, I stitched the band to the WRONG side of the hat, so when you flip the band out to the right side, the seam allowance will always be hidden. I would also recommend tacking the band in place with a few invisible stitches. 


The leggings pattern, by contrast, is accessible via the shop and cart on the Patterns for Pirates website. You have to create an account and go through more steps (you don't need to input any payment details). However, you then have a downloaded file that includes the pattern AND instructions - no ads. 

The construction process was a breeze. The only thing, and this is very minor and personal, is that I dislike a 1/2" seam allowance! It's not one I have to use very often, so I can't visually easily where to position a project on my overlocker so I'm trimming off the correct amount. Oh, and one point I'd make that I think they missed is to add some kind of tag or label so the back is easily identifiable. When parents are trying to change a wriggly baby whilst sleep deprived, they need all the help they can get! But honestly, that's it. I could make these leggings all day.


Would I make them again?

Hell yes! I've really whittled down my stash of jersey fabrics over the last couple of years, but if some more suitable fabric came my way, I'd definitely be making more of the leggings in particular. I do really like the two of these patterns together as a set, so if there are any new babies on the horizon, I'd love to do this again. 

Sunday, 18 December 2022

Scrap Busting Apollon Sweatshirt

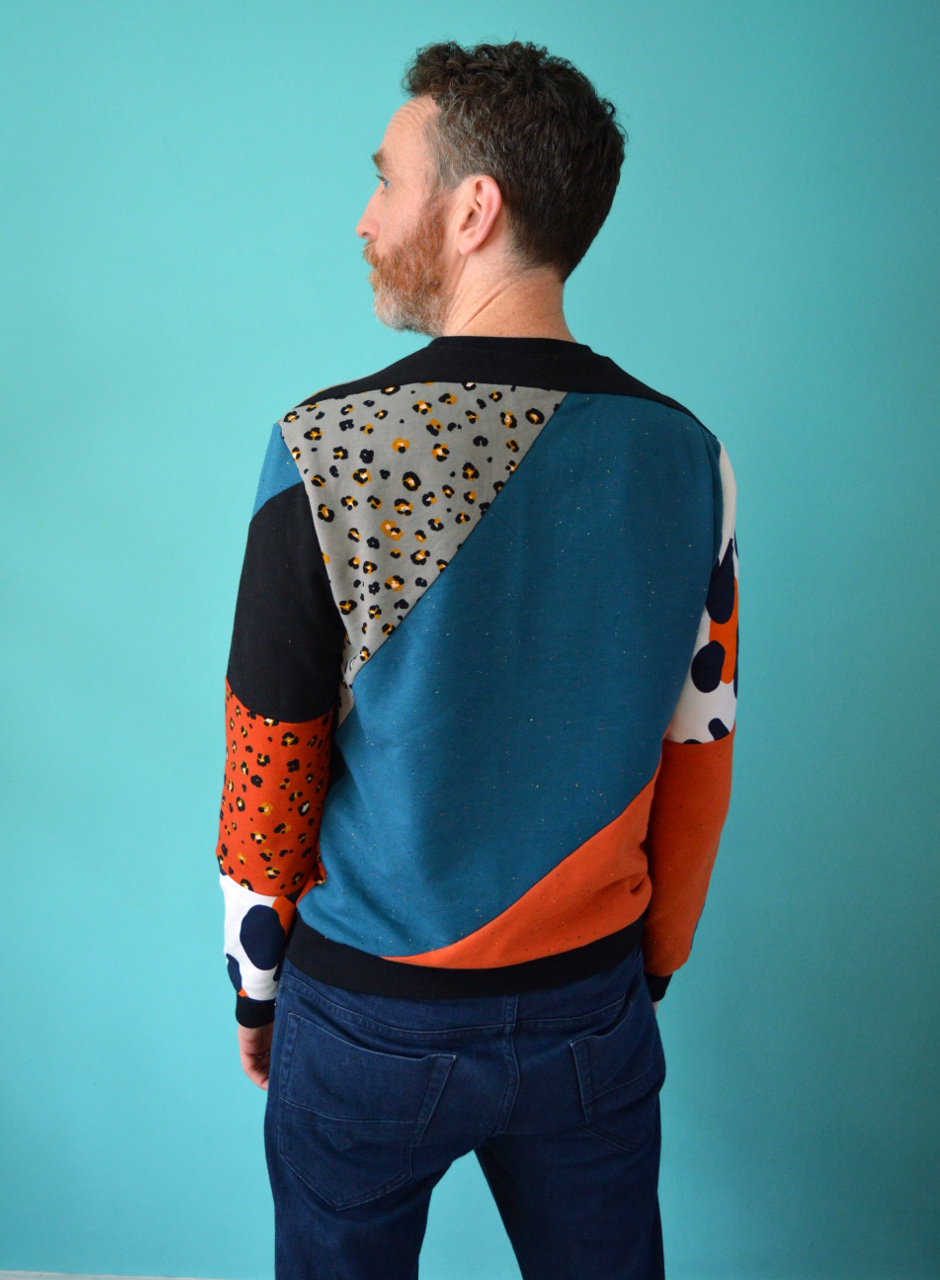
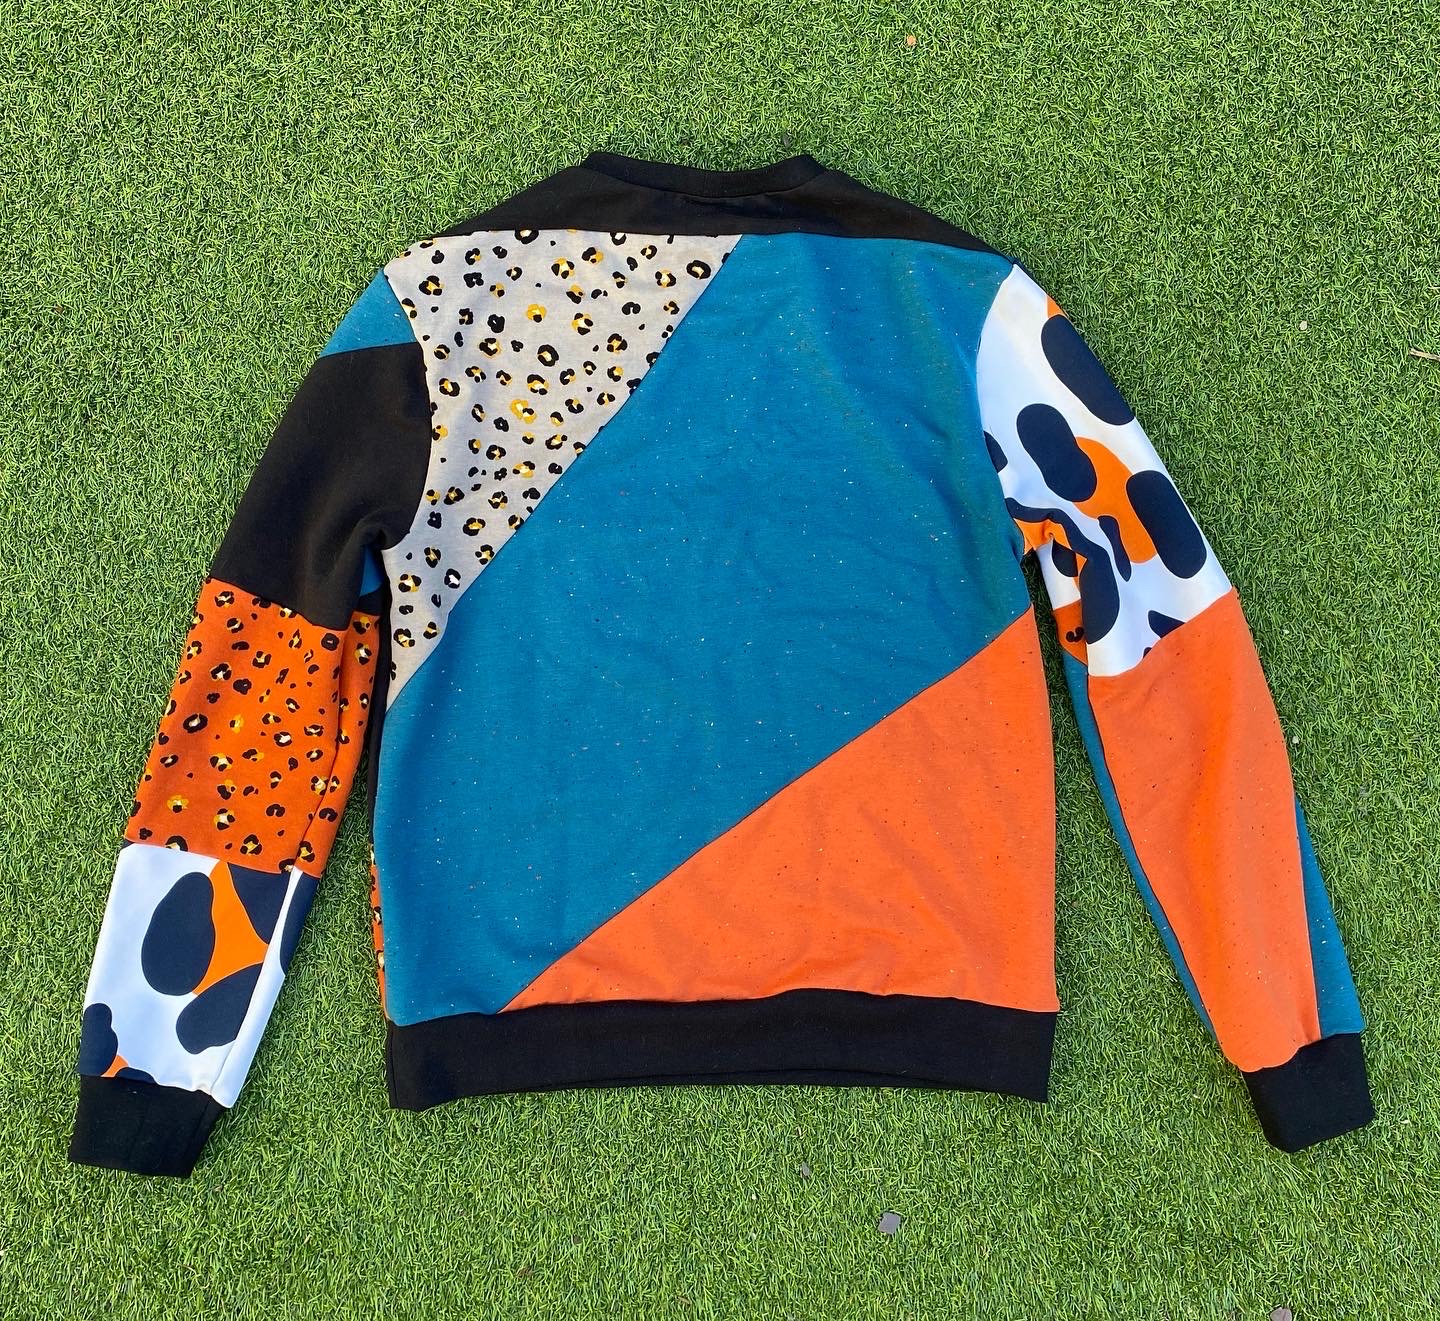
I can't remember precisely where the idea for this project came from, but it has served to solve two issues. The first was Mr SoZo running low on clothes, and the second was my own excess of sweatshirt scraps. In many ways, it's an extension of the scrap busting jersey T-shirts I made for him and our daughter last year. This project follows the same principles and largely the same technique. 

I was becoming aware that my collection of sweatshirt scraps was taking up a sizeable chunk of space in my fabric stash. I started out by getting all my sweatshirt scraps and remnants out and getting Mr SoZo to pick out any that particularly appealed to him. We then messed around with combinations until we had developed a pleasing colour palette. Some of the scraps came from sweatshirts I'd made for him previously, so were already within his existing wardrobe colour scheme. However, having made him the very wild scrap T-shirt that he is happy to wear, I knew I could push the combination further than many people might be comfortable with!

Here's some things I've learned about scrappy garment projects:

  • Make sure you're using a TNT pattern. You need to know that the fit will be spot on: now is not the time to try something new that may require tweaks. The pattern I used for this is the Apollon sweatshirt for men by I Am Patterns that I have used at least six times for him previously.
  • Limit your colour palette, unless you're really doubling down on the scrappy look.
  • Keeping the scraps large results in a bold look, reduces the amount potentially-annoying seams in the inside, and makes the process of piecing MUCH quicker.
  • For this project I kept an eye on the direction of the grain line of each piece, and tried to keep them vaguely in line with each other. However, with sweatshirt fabric you can probably get away with ignoring grain lines altogether.
  • Keep joining scraps until you have shapes large enough to fit your pattern pieces on. Keep your pattern pieces to hand so you can keep checking. 
  • Be aware that the additional seams create additional bulky bits inside. It doesn't bother Mr SoZo at all, but when I made a pieced sweatshirt fabric cardigan for my daughter, she refused to wear it because she found the seam allowances on the inside uncomfortable. If making tighter fitting garments, or garments for kids or sensitive folk, top stitch down the seam allowances as you go to reduce the bulk. 
  • When you have made sections large enough to fit your pattern pieces on, try flipping them 180 degrees to see which way looks best. I tried this and found the upside down version of what I'd been creating looked way cooler. 
  • If your combination of scraps is pretty bold, using one colour for any neckbands, cuffs and waistbands can create a nice 'frame' and make the whole garment look more intentional. 


If you're interested in creating something along similar lines, I hope these pointers helped. And above all, have fun!!!!! Pieced fabric garment projects are more time consuming than 'regular' sewing projects that use a length of virgin fabric, but can be so much more creatively fulfilling. 

Related Posts Plugin for WordPress, Blogger...