Showing posts with label fabric scraps. Show all posts

Tuesday, 1 October 2024

Scrap Busting September 2024

Happy October! Did you participate in Scrap Busting September this year? The endeavour is organised by my pal Meg Grandstaff who encourages us all to explore our creativity and resourcefulness by crafting with scraps and leftovers of fabric and yarn. If you'd like to hear more, check out this recent episode of my podcast, Check Your Thread, in which I have a hilarious chat with Meg. 


Trainer socks:

I'm making this post to record the items I made using fabric scraps last month. First up, I made two pairs of trainer socks using this free sewing pattern and tutorial. The pair pictured above were made using some 100% cotton interlock with cotton/lycra jersey for the band. The pair pictured below were made using some Liberty cotton/lycra jersey entirely. Both are wearable, but the second pair are more so because I adjusted the heel dart so there's less bulk underneath my foot. I'm so excited to have a well-fitting trainer sock pattern that I can use over and over in the future. 


Kid's undies:

I continued to raid my jersey scraps tub to create a couple of pairs of undies for my son. I used a new-to-me undies pattern from an Ottobre Design magazine because it was comprised of quite a few pattern pieces that would make it easier for using with scraps. I also chose it because the leg holes were hemmed rather than finished with bands. The waist is finished with visible elastic which feels to me like they'll have more longevity than with a band of fabric like most of the previous pairs I've made him.


I had a lot of fun picking the different jerseys to go together. I have had some of these scraps for so long, it feels good to get them out of my stash. 


Kid's joggers:

Next up was a pair of joggers, also for my son. I had lots of remnants of the same speckly sweatshirt fleece from the scrap bin at work. I didn't do anything clever, simply pieced sections together and topstitched down the seam allowances to reduce bulk. I wanted these to look fairly understated so he has the option of wearing them for PE at school, but I chose a scraps of striped french terry for the back pocket and cuffs for a tiny bit of interest. 


Again, the pattern comes from an Ottobre Design magazine. Those magazines are such a great resource for basic knit garment patterns. I didn't bother with the side seam pockets however, as I find they often create visible bulk, and he doesn't really use those pockets anyhow. I combined sizes (116 width and approx. 128 length) to more closely reflect his long, thin frame. He's already been wearing and enjoying them. I had to buy elastic to finish these off. 


Kid's scrappy cardigan:

And lastly, I wanted to reduce the volume of ponte and double knit scraps in my stash, so I proposed a scrappy cardigan for my daughter. She's got a whole Goblincore thing going on these days, and over-sized scrappiness fits well in that aesthetic. 


Compared to women's patterns, and patterns for younger children, the selection available for tweens and teens is really poor. I plan to create a post that lists the pattern companies I have found that do cater to this age group at some point. However, with the selection of suitable cardigan patterns incredibly limited, I ended up tracing her school cardigan to make my own pattern. 


I got my daughter to select the scraps that most appealed to her from the tub, which produced quite a wild effect! She also chose the top stitching colour, ribbing and wooden buttons from my stash also. It's so pleasing to make an entire garment from items you already own. And the best part is that she loves it! She's worn it basically every day since I finished it up. 

Friday, 1 March 2024

Free Pattern Friday: Sam Apron for Adults


Welcome to my monthly 'Free Pattern Friday' feature, where I road test a free sewing pattern or tutorial: sometimes a children's one, sometimes an adult's one. I try to publish these posts every first Friday of the month, timed to provide inspiration for those who plan to get their sew on over the weekend. I firmly believe that, if you pick your projects carefully, sewing doesn't have to be a crazy-expensive way to clothe yourself and your family. Thanks to all the amazing pattern designers who have offered up their hard work for us to enjoy for free.

To be honest, I haven't done a great job this month in actually showing you what my chosen free pattern actually looks like made up. I've omitted the pockets and created my own 'fabric' for it that makes it tricky to see what's actually going on. ANYWAY. Hopefully you will get a sense of the proportions at least, and also the versatility of this pattern as a canvas of sorts. If you want to get a clearer idea of what this pattern can look like, I'd recommend checking out Amy from Craft and Thrift's awesome versions (here and here). But what am I even talking about? Let me introduce you to the Sam Apron pattern by Helen's Closet. Thanks so much to Helen for sharing this (and a number of others) for free. There are many free apron patterns and tutorials out there on the interwebs, but I wanted to highlight this one specifically because of the interesting details and multiple sizing options. In my experience, Helen's Closet patterns also have excellent instructions. You can access the Sam Apron pattern through the webshop on their site (no payment is required).


(image source: Helen's Closet)


Pattern type:

The Sam Apron is cleverly designed to be suitable for lots of activities. I can imagine cooks, bakers, barbers, hairdressers and all manner of artists and crafts-people wearing a version of this apron. It includes chest and waist pockets, towel loops, and two strap options. But what is really unusual about this pattern over most free apron patterns is the graded size range and instructions for creating a custom fit based on your width, height and even bust size. 


Sizing info:

The apron fits sizes 0-34 (up to a 62″ / 157.5 cm hip) which has been broken down into five size bands. There are also five height options, from less than 5" to over 6". My plan was to make a cooking apron that would fit both Mr SoZo and myself. Helpfully, our hip measurements are similar so I cut the size 8-12. He's taller than me, but I don't think a cooking apron needs to be knee length anyhow, so I used the length that's shorter than both of us. Included are instructions for adjusting the bib section to accommodate a larger bust. Not something I need personally, but I appreciate that they included that for others. 


Fabric info:

The pattern recommends medium to heavy-weight woven fabrics with no stretch. Cotton broadcloth, denim, linen, cotton twill, quilting cotton and canvas are all suitable options. Waxed Canvas can also be used for a water-resistant apron. I didn't have any suitable fabric in my stash (thanks Last Sewist Standing challenge!) so I 'made' fabric by combining scraps of non-stretch denim and twill. It's basically the same technique I used for my denim patchwork dungarees. If this approach to scrap-busting is of interest to you, I have an episode of my podcast planned for next month with an accompanying downloadable guide that will talk you through using scraps for garment making. 

I used a lighter weight denim for the straps, because I thought a heavy weight fabric would be difficult to tie. You could also use twill tape, wide ribbon, braid or cord for the straps. 


Findings:

Ah I love a Helen's Closet pattern. Your hand is so thoroughly held and it feels like no detail has been overlooked. Presumably, their free patterns have been created to give potential paying customers a sneaky peek into what their patterns and instructions are like, and they deserve to get a good conversion because the quality is high.

I literally found only one thing that didn't work well. I found that the bias strip pattern piece that's used to finish the side curves was too narrow if using the 1cm seam allowance that is suggested. It would have resulted in the bias strip being too thin to cover the seam allowance when you flip the bias over to the wrong side. I used a narrower seam allowance and trimmed down the seam allowance to prevent that happening. 


The finished apron is pretty cool though. The denim is perhaps a bit thicker than necessary for a kitchen apron. And if I were to make it again, I'd add velcro to one end of the neck strap so it could be tighter but we'd still able to get it on and off with ease. 


Would I make it again?

If I ever had the need for another apron, then yep. I'd give more thought to fabric suitability depending on the intended use however. 


Monday, 5 February 2024

Corduroy Remnants Backpack


Here's a recent project that has already put to daily use: my new backpack! I became a backpack convert when my kids were tiny. When my son came along, it became very useful to have both hands free. Plus backpacks aren't likely to swing round and hit a small child in the face! However, my kids are no longer tiny, so when my last backpack died (after years of service), I thought I'd make a crossbody shoulder bag next. It was fine, and I used it for quite a while, but I started to develop the suspicion that it's not great for my posture. Time for another backpack...


Inspiration:

The feeling that I should make a backpack switched from being a feeling to an actual plan when I found the above photo on Pinterest. There weren't any links attached to the image, but my pal Julia did a reverse image search for me and discovered it's by Zara. Corduroy is, of course, usually used for making garments. And seeing it used for a style of bag that you'd usually see made from canvas or something synthetic really appealed to me. I also loved the mix of colours, and I'm always drawn to styles that could be recreated using scraps, leftovers and remnants of fabric. 


Fabric:

I had a rummage around and unearthed my collection of corduroy scraps. A couple of them are leftover from previous projects, the rest came from the scrap bin at work. Very spookily, the colours of my selection are incredibly similar to the colours of the Zara bag! I decided to put the leopard print cord aside for now, and work with the solid coloured pieces. They are all different colour ways of the Fabric Godmother 5 wale cord: super soft but also pretty robust. 


I also used some quilting-weight cotton from my stash for the lining (the same fabric that I used to line my previous version, actually). Plus the gold bias binding that I got in the Fabric Godmother advent calendar was put to use to finish the inside raw edges. These days I struggle to find the motivation to make my own matching binding. The interfacing required to give the bag some body was frankensteined-together random pieces from my stash. I'm trying to move away from synthetic interfacing where possible, but this bag won't get washed much, so won't release microplastics into the waterways too often. Therefore, I felt this was a good opportunity to use up a lot of what I still own.


Pattern:

I wasn't desperate to recreate the exact shape of the Zara bag, it was more the combining of the corduroys that was inspiring me. Therefore, my main criteria when selecting a pattern was that it could be cut from different pieces of fabric easily enough. In the end, I used the Sarah Kirsten Raspberry Rucksack pattern that I made previously three years ago. It worked because all the pattern pieces could be cut from the different fabrics, and I already owned it! Which was another plus because I'm still challenging myself as part of Last Sewist Standing, so wouldn't have to wait to get this project underway until I could buy a pattern. In this vein, I realised that I could also harvest the zips and hardware from my now-dead previous version. I'm glad I hadn't got round to chucking it out yet!


Using the pattern, fabric and zips already in my possession meant I could get cracking straight away. However, for a while I was thinking that I would have to wait until my self-imposed buying ban came to an end to buy some webbing for the straps to be able to finish it off. But then I realised that I never actually liked the webbing straps that the pattern specifies. Amy from Craft and Thrift came to the same conclusion when making her versions. So I had a play around and realised I could cut the straps from the corduroy as well, as long as I made them slightly shorter. Pushing the corduroy straps through the sliders was NOT easy, and I'm not sure how these straps will hold up over time, but they feel good at the moment. 


Conclusion:

I gave this bag a finishing touch with the Handmade label by Little Rosy Cheeks, also from my Fabric Godmother advent calendar. You have no idea how satisfying it was to put this project together using only stuff I already owned. And I've been really enjoying using it every day since. It's a great size for my day-to-day requirements, and feels really comfy to wear. 


Friday, 8 December 2023

Free Pattern Friday: Doll's Clothes by Fleece Fun


Welcome to my monthly 'Free Pattern Friday' feature, where I road test a free sewing pattern or tutorial: sometimes a children's one, sometimes an adult's one (or even a doll's one!). I try to publish these posts every first Friday of the month, timed to provide inspiration for those who plan to get their sew on over the weekend. I firmly believe that, if you pick your projects carefully, sewing doesn't have to be a crazy-expensive way to clothe yourself and your family. Thanks to all the amazing pattern designers who have offered up their hard work for us to enjoy for free.

At time of writing, Christmas is less than three weeks away. I do not condone panic sewing, but if you did find yourself with a couple of free hours and the energy to sew, and have some stockings to fill for someone who likes dolls, then this could be a great little project. Personally, I LOVE making doll's clothes. It can be super fiddly, but it's a fun use for fabric scraps and the results are almost always adorable. However, sadly (for me), my daughter has hardy played with her dolls all year, and it's been nearly two years since I posted on this blog about any free doll's clothes patterns. The last time I shared about a super versatile dress pattern by Ellie & Mac that included lots of styles options. Today I'm posting about a stash of free doll's patterns by Fleece Fun that I discovered at the beginning of the year through a lovely Instagram follower. Thanks to that follower, and thanks very much to Fleece Fun for their hardwork and for sharing this little treasure trove for free. 

Please note: I haven't road tested all of these little Fleece Fun patterns, so I can't vouch for every one of them. Plus, it needs to be highlighted that different dolls have different proportions. So, just like I'd advise with a human garment, only cut out one and make a (hopefully) wearable toile before going into full production mode! 

Remember: if the doll you wish to dress isn't the height the pattern is designed for, you can adjust the size of the pattern by adjusting the scale setting when printing it out. The patterns on this site are designed for 18" dolls. The doll I was dressing was 14" so I had to print these at about 77% scale. 


(image source: Fleece Fun)

Pattern type:

If you wanted to, you could create a pretty comprehensive feminine-styled wardrobe with this collection of patterns. I asked my daughter which of these patterns she'd like me to make, and she picked out the cuffed leggings, cardigan and robe (AKA dressing gown)


(image source: Fleece Fun)


Sizing info:

As mentioned above, the patterns on this site are designed for 18" dolls. The doll I was dressing was 14" so I had to print these at about 77% scale. However, the doll is portioned with comparatively longer legs and a narrower body than the patterns are designed for. So the leggings came out a bit cropped and the cardigan came out a bit wide. Hence my suggestion to make a trial version before cutting out a load from your favourite fabric scraps. I would also advise cutting any elastic to fit the actual doll in question (if possible) rather than following the pattern's suggested lengths to the letter. 


Fabric info:

So this is the fun bit: finding small bits of fabrics that are languishing in your stash and putting them to good use. Knits are particularly good for making doll's clothes because you don't need to worry about fraying and finishing tiny raw edges. For the cuffed leggings, I used a scrap of very stretchy, lightweight, loop-back french terry. For the cardigan, I used some zebra textured double knit. And for the robe, I used a scrap of fleece that was leftover from the backing of a floor quilt I made for my daughter whilst I was pregnant with her!! These days, I wouldn't buy fleece because it's made from synthetic fibres and will therefore stay on our planet for millennia, in some form or other. But finding uses for what already exists, especially uses that won't have to go through the wash and release microplastics into the waterways, is important and satisfying.


Findings:

Each of these patterns seemed to be well drafted and easily accessible to download in exchange for a sign-up to their newsletter (you can, of course, unsubscribe at anytime). The construction steps are all in the form of a blog post. The cardigan has illustrations to show key steps, the other two have photos to guide you. I have to warn you that it's one of those websites that is dripping in distracting and annoying ads. I understand that every one has bills to pay, but I don't have to like this way of doing it!

The garments came out very cute, despite the proportion issues. I could tweak the patterns and make more, better fitting versions. But as I say, my daughter isn't so into her dolls any more (sniff) so that seems like a waste of sewing time, as much as I enjoy making these. 


Customisation ideas:

Oh my goodness, you could go to TOWN using these patterns as the basis for many more versions. 


Would I make these again?

Are you trying to make me cry?!


Wednesday, 30 August 2023

Viscose Scraps Patchwork Trousers


Hello! First up, apologies for these terrible, dark photos. We tried to take some pics just before we went on holiday but clearly the light levels were too gloomy. So even after some editing you still can't see what's going on too well. Anyway! 

I tend to find my projects largely fall into one of two camps: 
  1. A garment or accessory I really want to wear or use
  2. An idea or thought experiment or that I want to see come to fruition 
This project was definitely from the second camp. In my experience, when it comes to working with scraps, slinky woven fabrics such as viscose and Tencel are the hardest to find uses for. I've tried piecing them together to make a garment from previously, but it didn't hold up very well because of my choice of seam finishing, plus I wasn't in love with the outcome stylistically. So I wanted to see if I would have more success by using a similar piecing technique to the one I adopted for my patchwork quilted denim jacket project. 


Piecing:

I started by getting all my slinky woven scraps out and selecting some that formed a nice colour palette. As you can tell, I'm really into autumnal shades such as mustard, rust, teal and forest green. It's fun seeing my previous garment projects represented in this selection! There's leftovers here from a dress that I still wear a fair bit, a Vali top that I love, a rust coloured tank that didn't work for me that I gave to a friend, my slinky Luna pants, plus a couple of bits from the scraps bin at work. 


The next step was to dissect larger scraps and trim everything up into rectangles. I find my rotary cutter, cutting mat and set square make this part of the process pretty quick. Then with the rectangles laid out, I started to find a pair that each have an edge about the same length. I pined, stitched and overlocked them together, then pressed the seam allowances to one side (I do this in batches to save time and energy). 

I would then add another shape to that joined pair, or another pair of shapes, with an edge a similar length and so on. The shapes then started to come together to make larger 'islands' of fabric. You'll often get to a point where you need to cut some 'custom' shapes to make the design work, so I kept some of the original scraps back for that. The main piece of advice is to not overthink the piecing process. It's super easy to spend too long questioning the position of each rectangle in relation to the rest and drive yourself insane!


Pattern:

It took quite a long time to eventually land on what I was actually going to make from these pieced together scraps. At first I thought a top, then I realised that I'm in far shorter supply of bottoms and I thought a wide-legged pair of culottes might look good. Then I realised I had enough scraps to make full-length, palazzo-style trousers, so I went with that plan. The pattern I created for this project is a hybrid of two other patterns. I used the top part of the trouser section from the Peppermint magazine/Ready to Sew Valley jumpsuit (then lengthened the rise in both the front and back). Plus I used the leg width and shape of the Wide-leg jumpsuit pattern by The Assembly Line, but eliminated the side seam as per the Valley jumpsuit. Having no side seam was going to result in less waste and fewer awkward shapes of pieced fabric at the side seams. 


Construction:

The 'fabric' I was creating by piecing scraps together slowly continued to grow until I could see that it had become big enough to fit the pattern piece on top. Obviously, I needed two of these large shapes of fabric. Then I cut out a pair of the pattern piece and constructed then garment as if I had cut it out of a flat piece of virgin fabric. The waist is elasticated, the channel constructed by simply turning down the top edge twice and edge stitching. 


Thoughts:

I LOVE that I managed to make an entire garment from leftovers from other projects, the scraps that would so often just go into the bin. I'm not sure if I'm super into the finished look, but I'm certainly into how they feel! Tencel and viscose fabrics usually have a wonderful drape to them anyhow, but all the additional seaming on this project has given the fabric some extra weight and made them somehow feel extra luxe. I do notice the seams on the reverse side a little against my skin, but I wouldn't describe it as unpleasant or annoying. 

I really hope that more sewers/sewists develop the habit of saving their scraps and leftovers where possible to use for other things. It's a good way to extract more value from the natural resources and the financial costs that went into the fabric in the first place, and it can keep textiles out of landfill for a bit longer. 


Sunday, 18 December 2022

Scrap Busting Apollon Sweatshirt

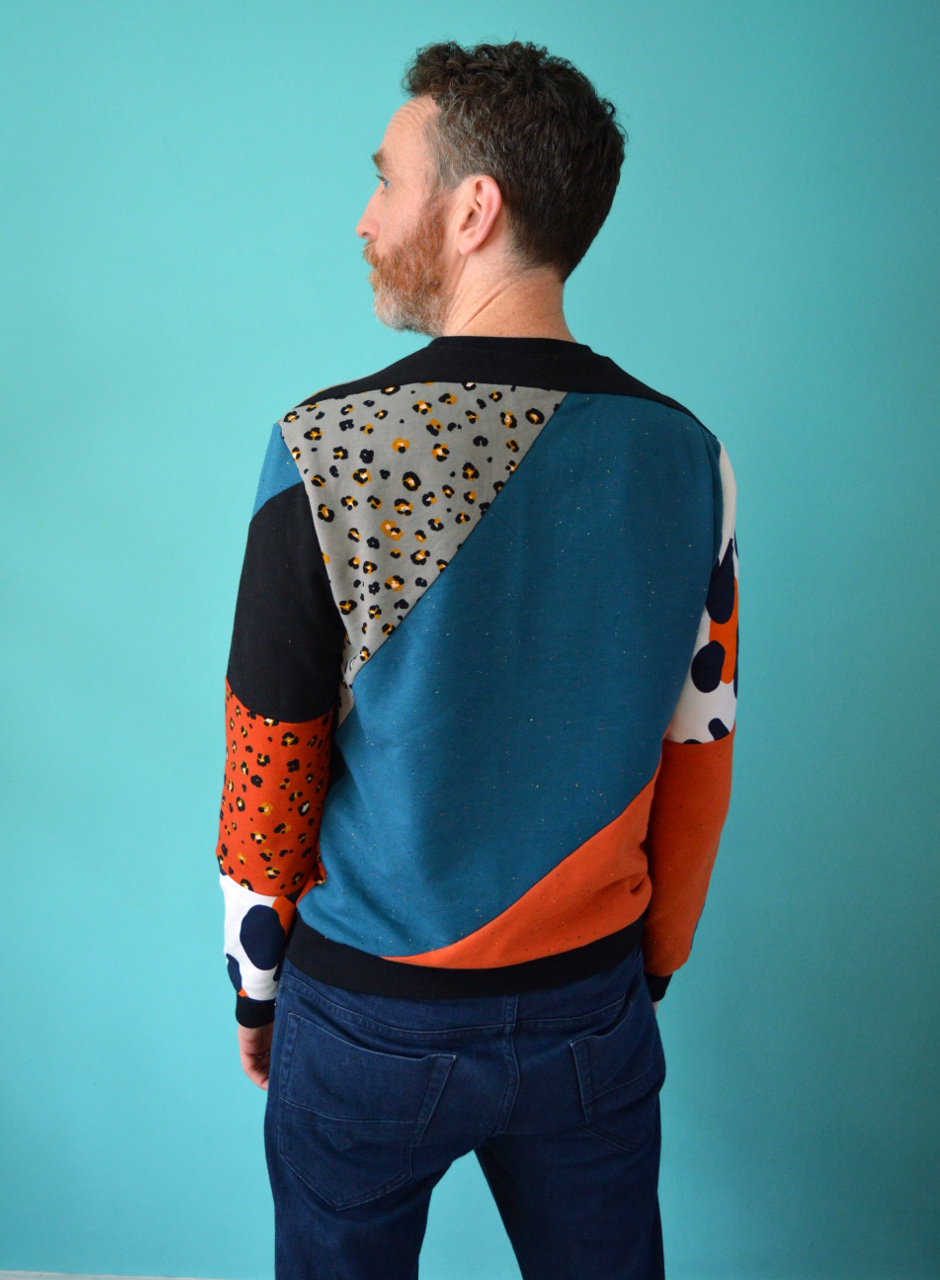
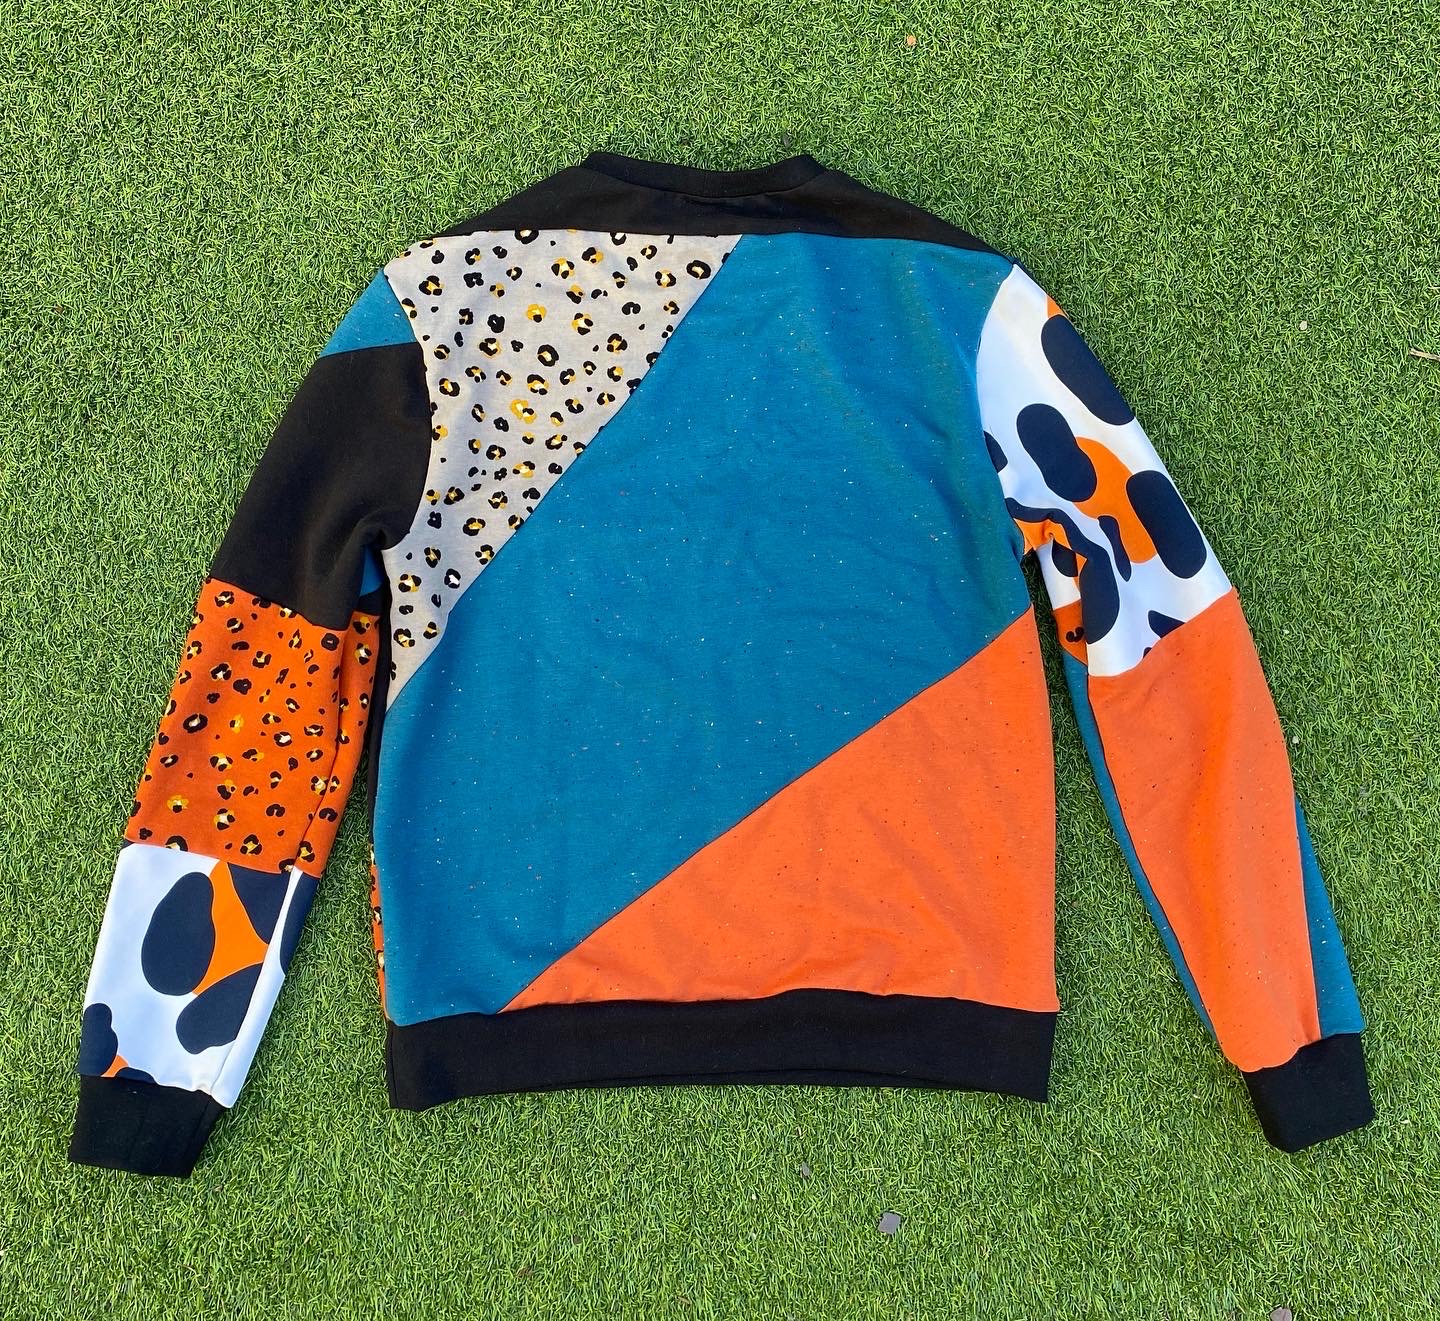
I can't remember precisely where the idea for this project came from, but it has served to solve two issues. The first was Mr SoZo running low on clothes, and the second was my own excess of sweatshirt scraps. In many ways, it's an extension of the scrap busting jersey T-shirts I made for him and our daughter last year. This project follows the same principles and largely the same technique. 

I was becoming aware that my collection of sweatshirt scraps was taking up a sizeable chunk of space in my fabric stash. I started out by getting all my sweatshirt scraps and remnants out and getting Mr SoZo to pick out any that particularly appealed to him. We then messed around with combinations until we had developed a pleasing colour palette. Some of the scraps came from sweatshirts I'd made for him previously, so were already within his existing wardrobe colour scheme. However, having made him the very wild scrap T-shirt that he is happy to wear, I knew I could push the combination further than many people might be comfortable with!

Here's some things I've learned about scrappy garment projects:

  • Make sure you're using a TNT pattern. You need to know that the fit will be spot on: now is not the time to try something new that may require tweaks. The pattern I used for this is the Apollon sweatshirt for men by I Am Patterns that I have used at least six times for him previously.
  • Limit your colour palette, unless you're really doubling down on the scrappy look.
  • Keeping the scraps large results in a bold look, reduces the amount potentially-annoying seams in the inside, and makes the process of piecing MUCH quicker.
  • For this project I kept an eye on the direction of the grain line of each piece, and tried to keep them vaguely in line with each other. However, with sweatshirt fabric you can probably get away with ignoring grain lines altogether.
  • Keep joining scraps until you have shapes large enough to fit your pattern pieces on. Keep your pattern pieces to hand so you can keep checking. 
  • Be aware that the additional seams create additional bulky bits inside. It doesn't bother Mr SoZo at all, but when I made a pieced sweatshirt fabric cardigan for my daughter, she refused to wear it because she found the seam allowances on the inside uncomfortable. If making tighter fitting garments, or garments for kids or sensitive folk, top stitch down the seam allowances as you go to reduce the bulk. 
  • When you have made sections large enough to fit your pattern pieces on, try flipping them 180 degrees to see which way looks best. I tried this and found the upside down version of what I'd been creating looked way cooler. 
  • If your combination of scraps is pretty bold, using one colour for any neckbands, cuffs and waistbands can create a nice 'frame' and make the whole garment look more intentional. 


If you're interested in creating something along similar lines, I hope these pointers helped. And above all, have fun!!!!! Pieced fabric garment projects are more time consuming than 'regular' sewing projects that use a length of virgin fabric, but can be so much more creatively fulfilling. 

Friday, 1 October 2021

Free Pattern Friday: Bombazine Oven Mitts


Welcome to my monthly 'Free Pattern Friday' feature, where I road test a free sewing pattern or tutorial: sometimes a children's one, sometimes an adult's one. I publish these posts every first Friday of the month, timed to provide inspiration for those who plan to get their sew on over the weekend. I firmly believe that, if you pick your projects carefully, sewing doesn't have to be a crazy-expensive way to clothe yourself and your family. Thanks to all the amazing pattern designers who have offered up their hard work for us to enjoy for free.

Ugh! I hate to be the one who mentions the C-word so soon (I'm talking about Christmas! Get your mind out of the gutter) but somehow it's October. If you've ever decided to make a bunch of Christmas presents, or presents for any other holiday you celebrate, you know that starting too soon to the actually event always results in masses of stress. So I'm dropping this post well in advance in case you decide to give this project a go in time for Christmas. Massive thanks to Bombazine for doing all the work to make the perfect oven mitt pattern and sharing it with the world of us to enjoy for free. 

For the record: I only condone making presents for anyone if you absolutely want to, not because you think you should, and ONLY if that person has a history of appreciating handmade items AND values your time and skills. 


(image source: Bombazine)

Pattern type:

I love the description on the Bombazine website: 'This oven mitt is a quick and easy project designed to use up your fabric remnants and scraps. Perfect for beginner sewists, scrap hoarders, or any maker with an hour or so to kill.' The pattern and tutorial are combined in the same file that consists of four pages for home printing. It is clear and beautifully designed, and accessible by adding it to the cart on their website (no payment necessary). 

Sizing info:

This pattern is one size, and fits most adult hands. If you need to tailor the fit, you could try altering the scale on your printer settings to make it smaller or larger. 

Fabric info:

This is the absolute ideal project to bust some of your fabric scraps and leftovers that you may have hoarded from previous projects. For the outer layer, natural fibres are going to be your best choice to avoid any accidental melting when they come into contact with heat. The pattern recommends medium/heavy weight fabrics like drill, denim and thicker linens, however I think you could go as light as quilting cotton (or Ankara/wax print cotton like I've used for mine) if your insulating layer is pretty thick. If your pieces are large enough, you could cut the whole mitt from one fabric, or if the pieces are smaller, combine two fabrics for the different sides (as I have done). If your scraps are even smaller, you could go the extra mile and make a pieced-together/patchwork effect like the example above. The pattern also encourages decorative sashiko-style stitching if you have the time and patience (I do not).

For the middle/insulation layer, the pattern recommends using scraps of wool coating, felted wool blankets and so forth. For mine, I used scraps of wadding leftover from my Tamarack jacket project. My wadding is synthetic, so I'm guessing probably not suitable for use near flames. 

For the lining layer, pretty much any light-weight woven fabric would be suitable. I used some woven poly/cotton that used to be tablecloths that my mum made for our wedding venue! Once again, you could use one complete section of fabric, or piece together scraps if you have nothing big enough. 


Findings:

I really love how nicely designed and accessible this project is. It really is suitable it is for all levels of sewing experience, because you can make it as simple or as complicated as you wish. Aside from the patchwork and sashiko stitching, you could also amp up this project by hand- or machine-quilting the two sides before joining them if you wished. 

I actually made this batch last winter, so if I'm honest, the sewing experience is no longer crystal clear in my memory. I saved posting about them until now because it turned out to be such a fun, quick gift project, I wanted to share it in advance of another holiday season. I kept a pair for my own home, and the other three pairs were Christmas gifts for friends of mine (all of whom appreciate my time and skills!). I batch-sewed this lot over a couple of evenings, hoovering up pretty much all my leftovers of Ankara/wax print cotton.  


Would I make it again?

Definitely! It's great to have a project idea for a useful item that can be busted out at will, whenever the need arises. It's a great gender-free gift for pretty much any adult, and you don't need to know the tastes of recipient particularly well like you would if you were making something to wear. It would be a lovely last-minute house-warming present as well, now I come to think of it.... 

Saturday, 10 July 2021

Scrap Busting Jersey T-shirts


During the winter lockdown, I was without an overlocker. Now, I know that you can sew any garment on a regular machine: that overlockers are entirely optional. I have told people this a million times during sewing classes I've taught. However, I just didn't want to make anything that wouldn't look as neat on the inside as I've become used to. 


Because of this, the only things I made were oven mitts that have no exposed seam allowance plus a couple of items with french seams. I also cut out a few projects to stitch together in the future, and I allowed myself to go down a rabbit hole that resulted in these wild patchwork tops! 


I'm really into the idea of using up fabric scraps and leftovers from previous projects to make new garments. Most examples of this kind of thing, including most of my previous attempts, involve woven fabric. However, in the autumn I made a couple of sweatshirts for Frankie using up pieces of sweatshirt fleece and ponte roma pieced together, which really helped me get those types of scraps under control. So the next logical step was to try something similar with jersey scraps. 


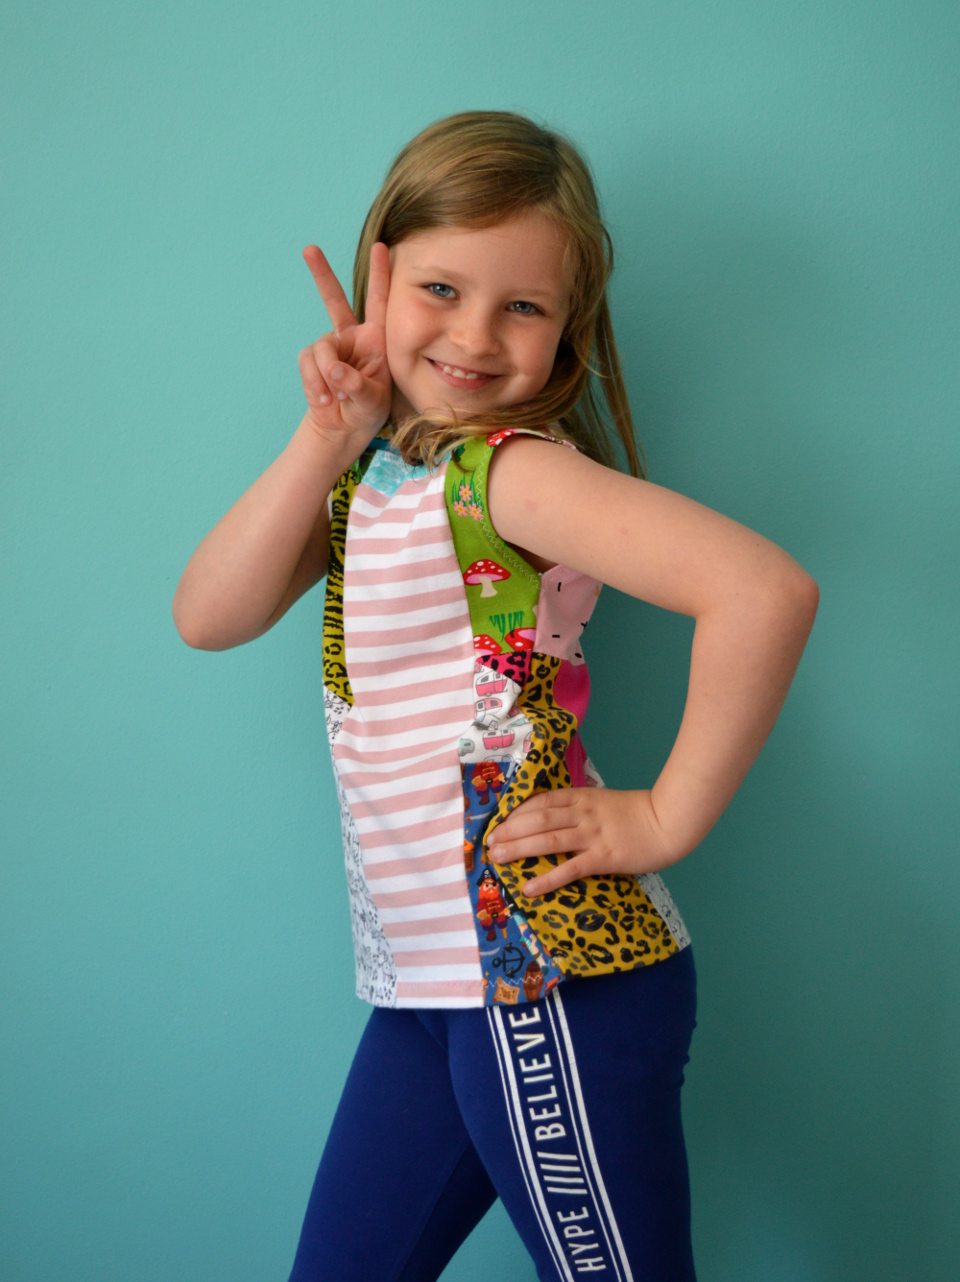
My jersey scraps tub was becoming overwhelming. I'd cut out as many pairs of adult and kids undies as possible from suitable pieces of jersey, but I was left with so many pieces that were too small or odd-shaped to squeeze out any more. I decided to try piecing some of them together to make a top for my daughter. And when my husband saw what I was creating, to my enormous surprise, he commissioned one for himself! 


Method:

My approach to piecing was to play around with how I could combine some of the shapes without needing to trim too much away whilst also keeping the grainlines in roughly the same direction. If the edges weren't straight, or at not quite the right angle, I'd trim away a bit from the edge, then I stitched two pieces together using my regular sewing machine. I stitched them using a narrow seam allowance and a narrow lightning flash stitch which meant the seam allowances weren't too bulky. I kept adding more and more shapes until the bigger pieces could be combined, and eventually became big enough to fit the pattern pieces within them. 


Patterns:

If you are attempting to create jersey tops from scraps and leftovers, you either need to use a sewing pattern that already features a lot of seams (like the new Shift tee pattern by Misusu patterns), or you need to do the piecing yourself and choose a very simply sewing pattern with minimal seams. For my daughter's top, I chose a very basic top pattern (see the two images below) from a 2014 edition of Ottobre Design magazine. 


It's effectively just a front and back, with a neckband. I forgot that the armholes were also meant to be bound, and I just turned those under and stitched them. I love Ottobre Design for these basic, knit fabric garment patterns. Their styles tend to be really wearable and comfortable, and IMO don't look dated. I got a year's subcsription back in 2013 when I was pregnant with my daughter. As she's grown, she's fitted into the different styles in the magazines, so it's been like getting new sets of patterns every few years.


For Mr SoZo's T-shirt, I traced round one of his very favourite T-shirts that was starting to fall apart at the seams. Next time I make him a T-shirt from the pattern, I'll add a little extra width at the hips, but other than that, it's a great fitting garment. 


Having cut out the main pattern pieces from the pieced together fabric, they then lay dormant for a few months. During that time we moved house, seasons changed, and I bought a new (secondhand) overlocker! So a couple of weeks ago I took them out again and finally whipped them together. 


It's so pleasing to reduce the amount of scraps in my stash (particularly the pieces that I'd owned for years and was sick of the sight of) and turn them into useful, wearable garments. I'd say that the colour palette in Lola's top works better, but Pat has definitely got more use from his T-shirt so far. The scraps bins will never be completely emptied of course, because new projects results in new scraps. However, I'd like to try making undies from pieces together fabric next, with wearability being even less of a consideration when combining a wild selection of fabrics.


Related Posts Plugin for WordPress, Blogger...