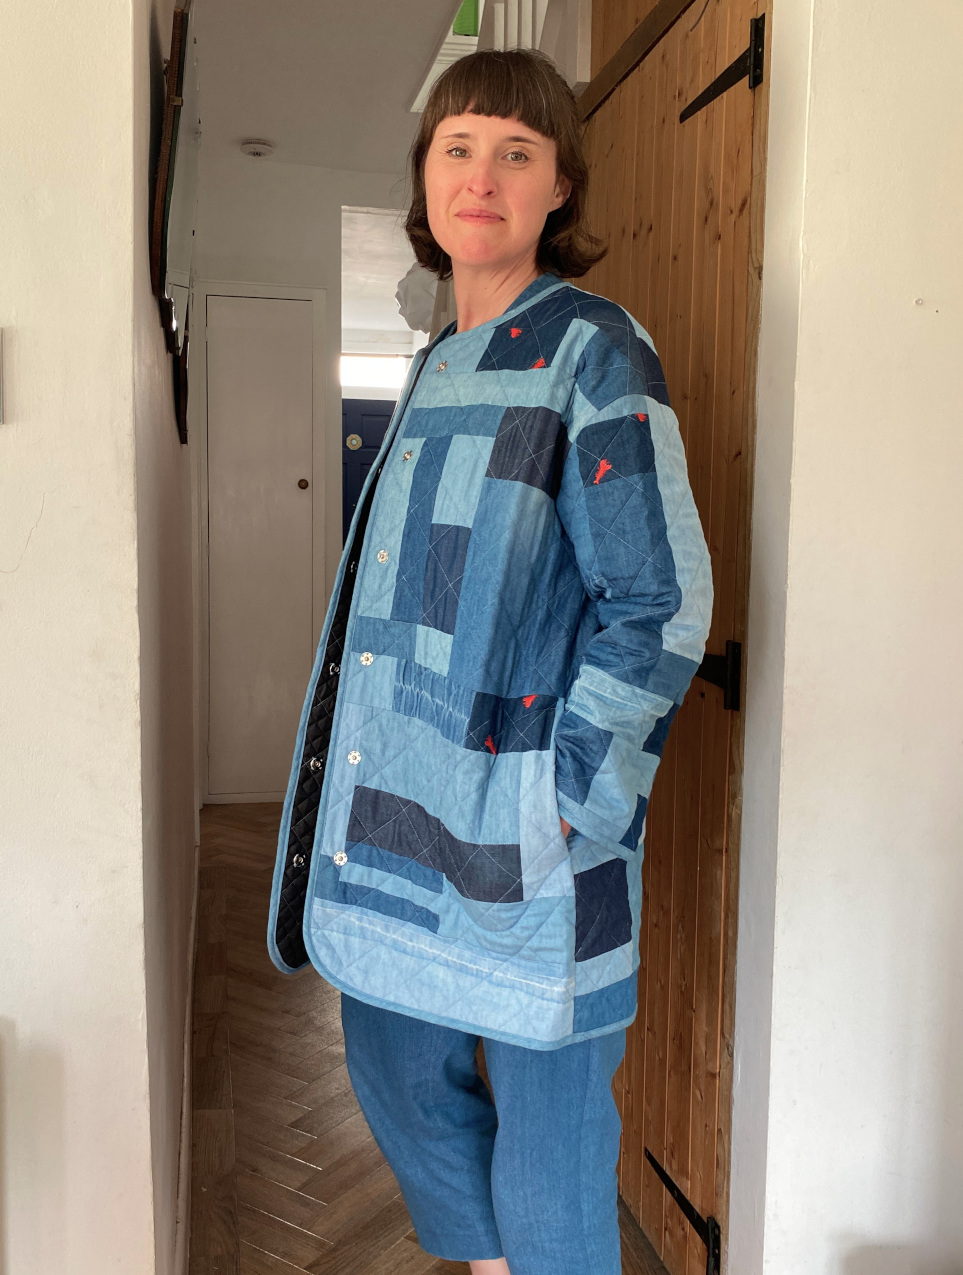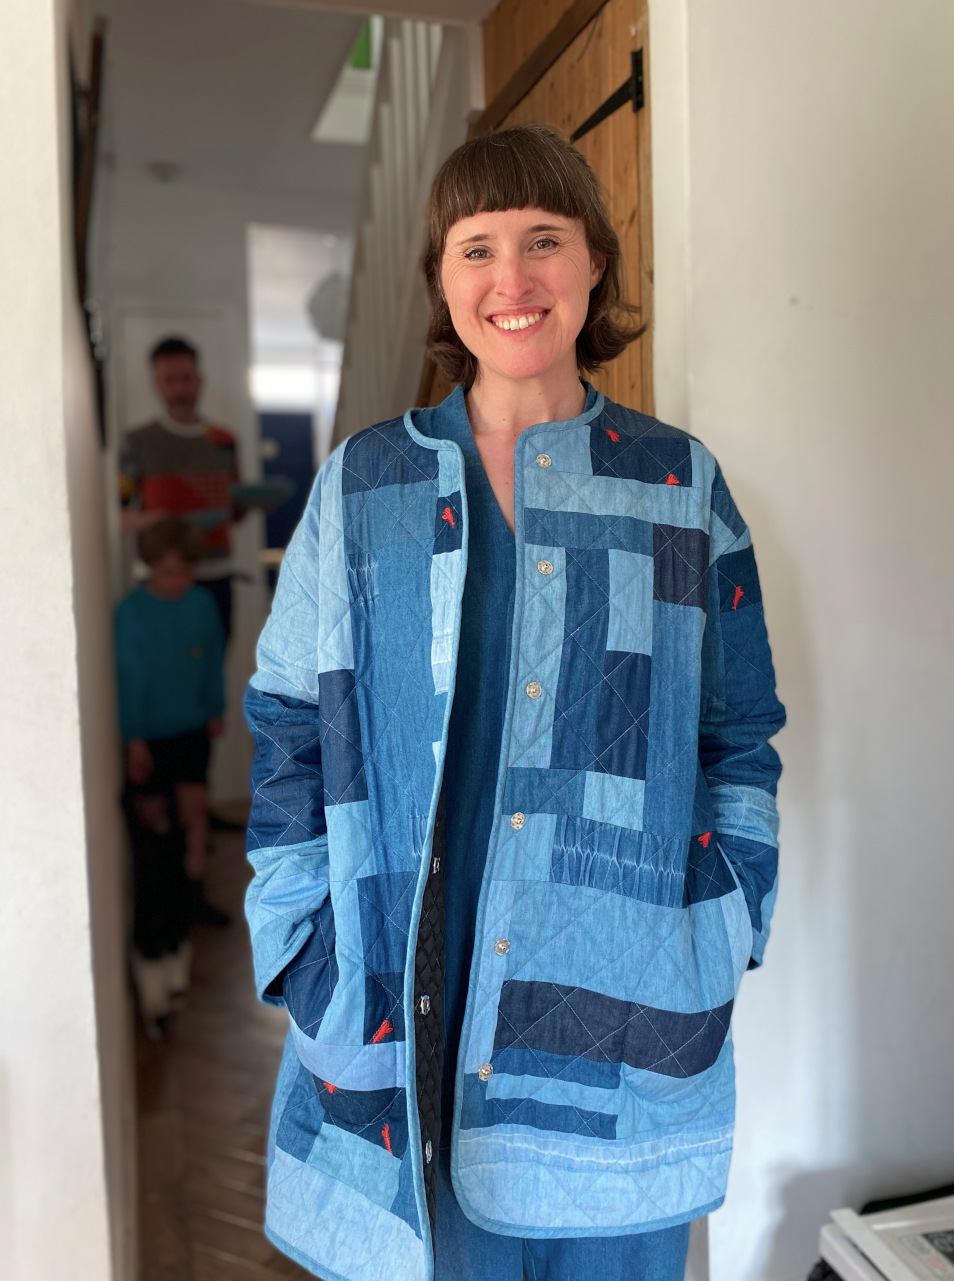
She's done! The jacket with the ridiculously long (but descriptive!) name is complete. This project has been in the works, to some degree, for about two years. That is about how long I've been consciously collecting scraps of this lightweight denim with a view to combining them somehow.
As I've mentioned all over the place many times, I'm currently obsessed with the possibilities of combining scraps and leftovers to make clothes. Fabric scraps and leftovers from sewing projects are a fantastic resource, but they can build up so quickly. Before you know it, they are spilling out of the box you assigned them, and threaten to take over whatever sewing space you have. But pausing your garment-making activities (if, like me, that's the main thing you're into) just to bust out some little projects to use some of them up, seems like a waste of time and energy. I'm far more interested in applying creativity and resourcefulness to work them into garment projects.

Fabric:
So I can't exactly pin-point when the idea for this specific garment was born, but when I realised that I had everything I needed to make it happen, I got started on it almost immediately. This jacket has hoovered up a large carrier bag of scraps of 4oz washed denim. Some of that 4oz denim was in the form of scraps from my previous sewing endeavours, some came from the scrap bin at work (including the washed denim with embroidered lobsters!), there were two unworn tunic-y garments, plus the legs from my daughter's woven joggers (which had, in fact, been made from another previously attempted garment projects), also all made from the same type of fabric. I just really love this soft, lightweight washed denim from Fabric Godmother (it comes in three colour ways but this is my fave), which is clear by how many previous garment projects I've made from it over the years. I'm so happy that the finished jacket includes my Tova top, which I wore A LOT during my second pregnancy (proof!). This project also sits very neatly, both in terms of practicalities and in spirit into the Last Sewist Standing challenge. The only thing I needed to buy to make this happen was thread.

Pattern:
I settled on the Fibre Mood Molly jacket pattern to use as the basis for this project, not least because I already own it! I chose to lengthen it so the garment would A) use up more of the denim, and B) so it would perform a slightly different function in my wardrobe than my other quilted jacket. I traced out the jacket pieces in my size, then laid them out on the remnant of pre-quilted lining that I was planning to use, and moved the pieces around to work out how much longer I could make them so they still fit. I made sure each piece would have 5cm additional space all the way round to accommodate any shrinking or distortion from the quilting process.

Patchwork:
To create the actual patchwork, I took my scraps and leftovers and cut them into random rectangles. I took two rectangles that both had an edge a similar length, and stitched them together. Once I had a bunch of pairs, I then found another shape, or pair of shapes, to add to each pair. I kept building it up like that, until I had 'clusters' of rectangles that could be added to each other to make overall shapes that were big enough to fit the pattern pieces on. You can see some of these clusters forming in this Instagram post. At many points, I had to cut some 'custom' shapes to fill in gaps. This was where the actual garments came in particularly handy. I also made an enormous amount of bias binding from the larger of the tunic garments. I planned to bind all the seams inside, as well as round the outside edges, so I knew I'd need A LOT. Obviously I still didn't make enough initially, and had to go back and make more.
When stitching the patchwork, I used the edge of the machine foot as the seam allowance guide, so it was probably about 7mm. I pressed all the seam allowances open so they'd sit nice and flat, but didn't bother the finish the raw edges because the were going to be hidden by the lining.

Quilting:
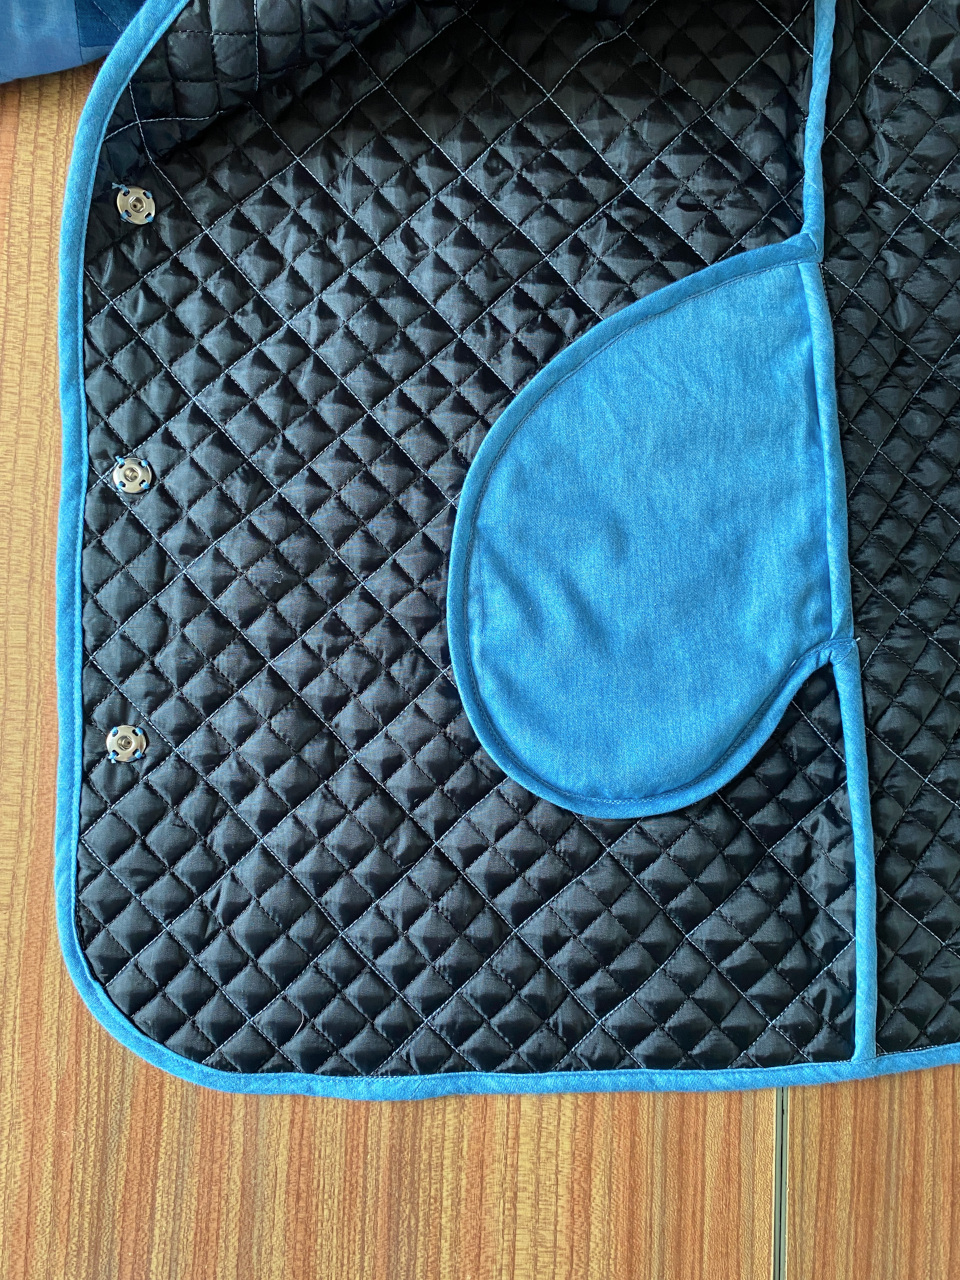
As I say, the lining from my stash that I planned to use was already quilted. With the patchwork panels pinned to the roughly-cut out lining pieces, I stitched along every third row of the quilted lining, so the lining was my guide. I used a walking foot on my machine and really took my time to re-pin after every row to avoid any weirdness in the quilting. I used Gutermann rPET recycled thread for all the quilting and binding, and this project took an embarrassing number of reels to complete! I'm not super happy about that aspect of my 'more sustainable' garment project.
Construction:
With the pieces quilted and properly cut out, I began construction of the actual garment. All seams were first stitched, then bound with my self-made binding. I also added a cute KATM label that I've been hanging onto for yonks for a special project such as this.

Towards the end of the jacket construction I had to make a call on pockets. The original Molly pattern has simple patch pockets, although not a particularly good-looking shape, IMO. I considered drafting and applying my own patch pockets, but I thought that might disrupt the patchwork on the front panels. Instead, I drafted in-seam pocket bags to make pockets inserted into the side seams. This was a real head-scratcher because I've never made in-seam pockets with completely bound edges before. In the end, I just went for it and it worked out pretty well. I then decided to stitch the pocket bags to the front jacket panels around the edges to keep them in place and give them more stability when in use. I really like the way their shape is visible from the outside if you know where to look.

The last decision was about fastenings. I considered both traditional sew-on press studs and the set-in type of press studs that I used for my Tamarack jacket. An Instagram poll revealed that the majority of my followers thought the latter was the best option. However, when I went to get them out, I discovered I didn't have quite enough of the back pieces. Because I can't buy haberdashery and still remain in the heavy weight category the Last Sewist Standing challenge, I went with the traditional press studs from my stash, and I actually really like the look of the hand sewn element.

Thoughts:
I feel triumphant having finished this project! I'm surprised by how similar the outcome is to my original vision, despite winging it the whole time. I love the look of the patchwork. It's got a real abstract, arty vibe, rather than looking like I cut up a quilt, so hopefully it won't look really dated in a year or two. The weight of the garment is also really nice: perfect for late spring and early autumn (plus any rubbish days that summer may throw at us). I also feel great about this project because it's made good use of pieces of fabric that an earlier version of me might have just chucked out. And of course I love that I didn't have to buy anything, other than thread. So. Much. Thread.
I hope this project inspires others to have a rummage and see what scraps and leftovers they can use for garment making. Using as much of the fabric we purchase is the best way to honour the time, energy, resources and labour that went into its production.