Friday, 4 March 2022

Free Pattern Friday: Men's Movie Night Pajamas


Welcome to my monthly 'Free Pattern Friday' feature, where I road test a free sewing pattern or tutorial: sometimes a children's one, sometimes an adult's one . I publish these posts every first Friday of the month, timed to provide inspiration for those who plan to get their sew on over the weekend. I firmly believe that, if you pick your projects carefully, sewing doesn't have to be a crazy-expensive way to clothe yourself and your family. I also firmly believe that pattern designers deserve to be properly paid for their work, so if you enjoy using a pattern and can afford to do so, make sure you support that designer. Some designers' websites offer the option to make a donation, alternatively you can buy one of their paid-for products. If you can't afford to do so, you can support the designer by sharing your project via social media to help draw more attention to their work. Thanks to all the amazing pattern designers who have offered up their hard work for us to enjoy for free.

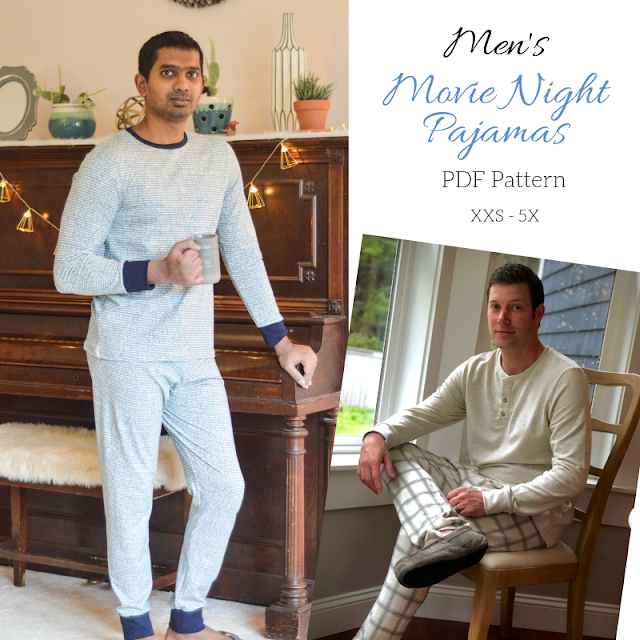
Oh have I got a good free pattern to tell you about today?! (Hint: yes.) Sew A Little Seam are a company that produce patterns for everyone, and have made this specific design for kids, women AND men. All three versions are available for free by joining their Facebook group. That will give you access to a code that you can use at the checkout on their site. The men's version in particular is a real find, because free patterns for men are thin on the ground (which reflects the comparative amount of regular men's patterns, of course). If you don't have a Facebook account, or wish to support Sew A Little Seam with a purchase, this pattern is only $5. Thanks so much to them for making their work available for free. Having used this one, I'll definitely be having a nose around on their site with an eye to buying any that catch my interest. 


(image source: Sew A  Little Seam)

Pattern type:

The Movie Night Panamas are a semi-fitted style designed for knit fabrics. The top pattern includes a number of style options: short or long sleeves (hemmed or cuffed) and with or without placket. The bottoms can be made with cuffs or simply hemmed.

Sizing info: 

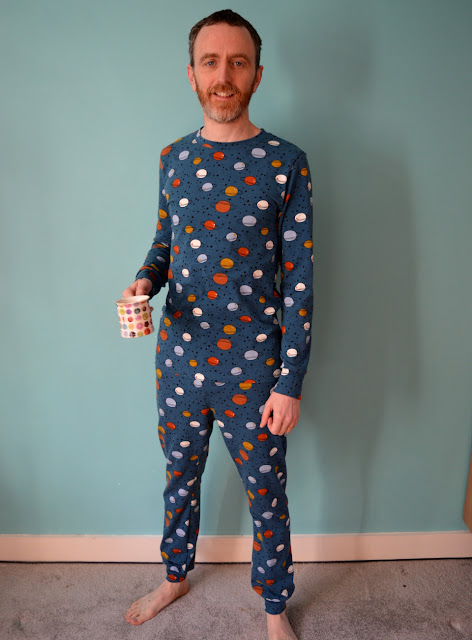
This pattern is sized from XXS to 5X which translates to 32" to 50" chest. For Mr SoZo, I made the XS for the top and S for the bottoms, adding a little length to the sleeves and legs, and the fit is spot on in the fabric I used. 


Fabric info:

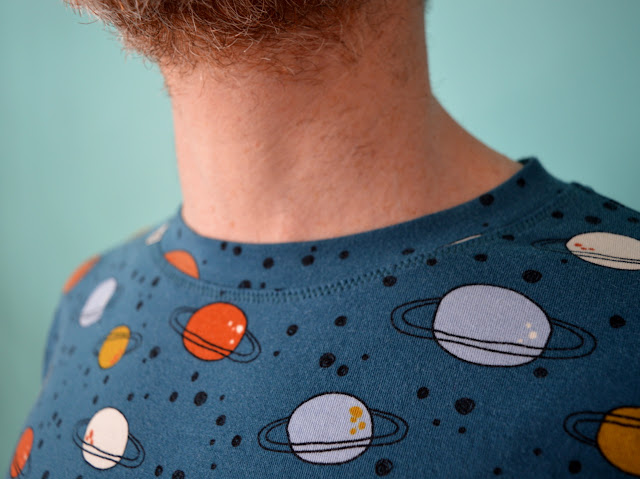
The pattern recommends cotton spandex, rib knits, thermals and French Terry, specifying that fabrics must have at least 50% horizontal stretch and 25% vertical stretch. I used a cotton/Lycra jersey bought from Fabric Godmother. I can't find it on their site now so I'm guessing they might have sold out. I love how the print is fun but the colours are pretty sophisticated! The camera hasn't quite caught how lovely the base teal colour is. 

Findings:

This is a really well produced pattern, IMO. I love that it includes both A4 and A0 files. I used the latter and got mine printed out to save sticking together endless pages myself. I'll be honest with you, I've made many patterns similar to this before, so I didn't really follow the instructions, but it came together flawlessly. 

The only alteration I made was the deepen the neckband a bit. In the modelled photos on the website it looked a little narrow to me. 

I actually made a pair of pyjamas for Mr SoZo about a year ago from a very similar pattern that I bought for a lot more than this would have been, and I greatly prefer this one. Mr SoZo also noted that the pattern for the bottoms could form the basis if you wanted to make joggers, and in the same vein the top pattern could be used as a basic T-shirt.  


Would I make it again?

Absolutely! This pattern is spot on for fit, and I'm very interested in seeing what 'outside' garments could be developed from the pattern also.  

Thursday, 24 February 2022

Greta + Nikko = A Happy Couple!


I recently made a couple of garments that I've discovered look pretty good together! I had plans to make the top for months, but the dungarees came about more spontaneously. 


Top:

I've had the Nikko top pattern by True Bias for over a year, waiting for the right fabric to appear. I bought it in the the hope that it'll make useful layering garments to help extend the use of my warmer-weather clothes into the autumn and the spring. To be honest, I already have the Freya pattern by Tilly and the Buttons from her Stretch book, which is similar. But whilst I really like the Freya, the Nikko caught my eye because it looks like the sleeve and armhole are drafted to have a closer fit which I thought might make the garment better suited to layering under things.

I made my usual adjustments to the pattern: grading to a larger size for the waist and hips and folding out 2cm of length from the body. Plus I graded to a larger size in the bicep, but I think I could do with even more width in the arms for next time. 

Eventually I found the right fabric, which had, of course, been under my nose (i.e. on the shelf at work) all the time. I bought the rust and white striped cotton/Lycra jersey from Fabric Godmother, and it has the perfect weight, stretch and recovery for this garment. The leftovers became this vest and undies set

The construction was very quick and enjoyable, I can definitely see myself making more of these tops in the future. 

Dungarees:

I can't remember if I got hold of the fabric or the pattern first, but the combination has worked out really well. The fabric is/was, in fact, a pair of 100% cotton curtains bought from a charity shop. They have a ribbed texture which gives them the appearance of corduroy, but without the plush pile. 

The pattern I used is the Greta dungarees by Made My Wardrobe. I'm a big fan of their whole aesthetic and I love how this pattern has zero fastenings. It can be worn tied at the front or the back. I obviously chose to make them so they tie at the front, however, I may go back at some point and shorten the straps so they tie at the back instead. 

Despite there being no fastenings, it wasn't a particularly speedy pattern to make, if that is something that you look for in a sewing project! I made things a touch more complicated by adding a patch pocket to the front. Not only do I like that utility look, but I find it useful to pop my phone in when I'm wandering around the house. I applied a Kylie and the Machine label for extra cuteness (see above). 

I'm not entirely sold on the pale cream colour yet. It's rarely I colour I wear, particularly on my lower half. On their very first outing I spilt my coffee right down the front (which was captured on audio, as you can hear in this episode of my podcast!). I think the colour gives them a definite spring/summer feel, plus also painter/decorator vibes! I need to wear them some more to see if I can get used to both those aspects. 

Thursday, 10 February 2022

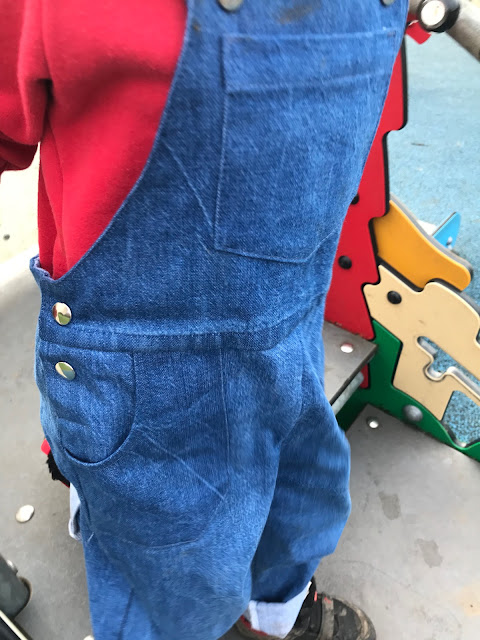
Reclaimed Denim Freddie Dungarees


I've been so inspired by many of the conversations I've had for my podcast Check Your Thread. I guess it was inevitable that inspiration would express itself in my sewing projects! Speaking to Riccardo Guido made me realise that I'm storing (hoarding?) a number of garments that I no longer wear in my wardrobe. I came to accept that I was unlikely to wear my denim Lander pants again because my body shape has changed now that I am firmly in my middle age. And the Cleo pinafore that I made with that leftover precious denim was almost never reached for, and when I did wear it, I didn't feel great. I realised that the lovely broken twill denim could be harvested and turned into something that would see much more use. 


Fabric:

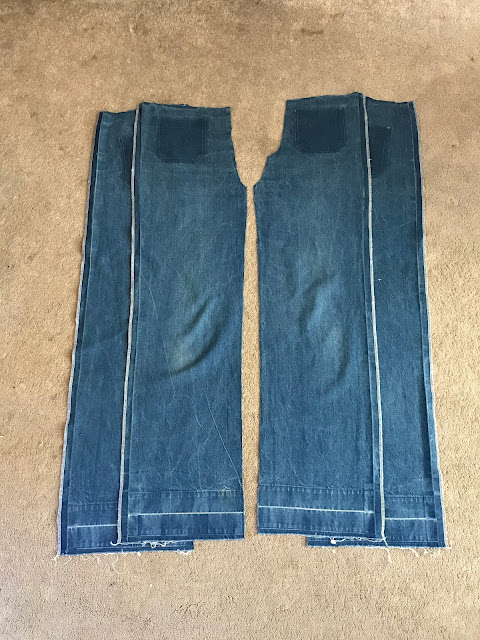
So I unpicked and cut apart both the trousers and pinafore in order to harvest as much of the original denim as possible. I carefully set aside the pockets from both garments, and the straps from the pinafore for a different, future project. As I did this, I had in mind my conversation with Guy / The Light Touch, in particular his concept of 'decommissioning clothes'. I loved hearing about how he assesses old and unworn garments, and figures out what he can salvage and reuse in new projects. 


Pattern:

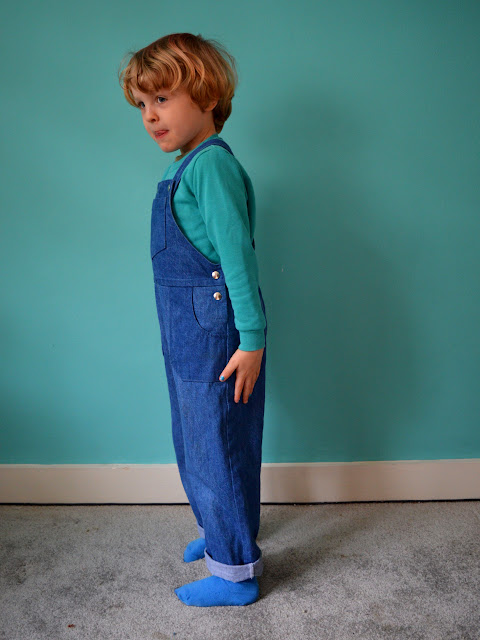
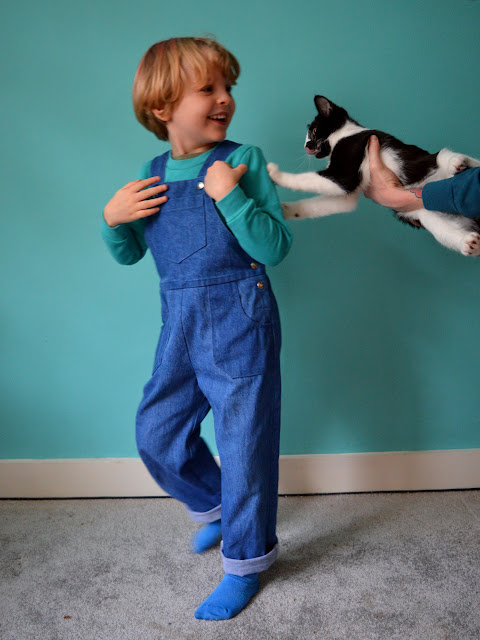
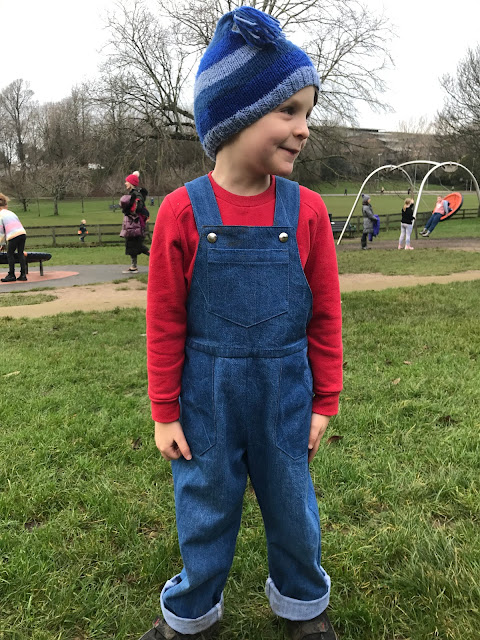
Frankie had been asking for his own pair of dungarees (and a boilersuit, but that's a whole other thing!) for yonks. I decided to make some for him as part of his Christmas present. I already own the Freddie dungarees pattern by Two Stitches (pictured below), having made the pinafore version for my daughter when she was about the same age. Handily, I was able to reuse some of the pattern pieces that I traced out for that project three years ago for Lola! 


There are things I really like about this pattern, and things I don't. This time round I was able to amend some of those less pleasing elements, like increasing the pattern's scant 6mm seam allowance, and not lining the pockets. For Frankie's dungarees, I also decided to omit the back pockets and the turn-ups with tabs. I added some extra length to the legs to future proof them somewhat. I used no-sew press studs to fasten the straps to the bib, and for the side openings so they'd be easier for him to take off himself. 


Thoughts:

What is extra pleasing about this project is that I was able to take the fabric from the Landers and Cleo and keep it in use as a garment. This is what Shelly Sommer was talking about when we discussed keeping materials at their highest possible level of use. I was so into that concept that I've actually recorded another conversation to be released where I asked her to go into that concept further still. 


Although I made these dungarees before I had the pleasure of speaking with Eliu Hernandez, I can now recognise and appreciate the pocket shadow that I had to include at the top of the back legs (see above). The pocket shadow occurred when I removed the pockets from the Lander pants, but because of the size and shape of the pattern pieces, including that darker section when cutting out the Freddie dungarees was inevitable. I really like it now though: it's a nod to their origins!


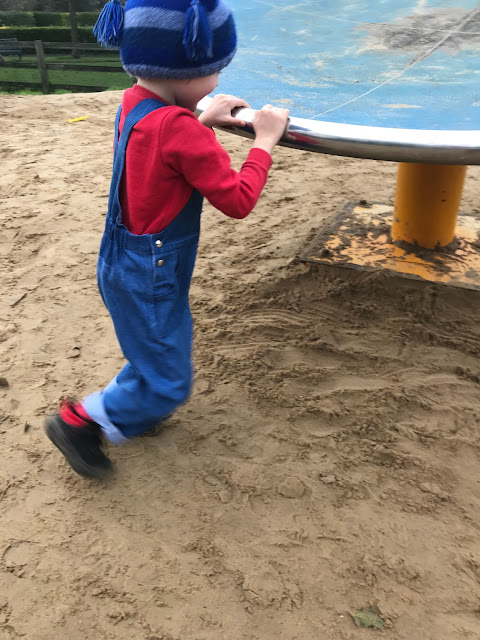
Although not exactly thrilled with them when he unwrapped them on Christmas morning, Frankie has since embraced his dungarees. He is very happy to put them on if I select them as part of his outfit for the day. And because they took a comparatively long time to make, compared to the usual simple joggers and such that I make him, I want him to wear them A LOT! 


When you're in the mood, making detailed woven garments, particularly on a small scale, is really satisfying. Thankfully, I gave myself just enough time before Christmas to make these so that they didn't become a stressful rush. I'd definitely consider tracing out a larger size and making them again for him in the future, if he asked me to. 

Friday, 4 February 2022

Free Pattern Friday: SoZo Undies and SoZo Vest for Adults


Welcome to my monthly 'Free Pattern Friday' feature, where I road test a free sewing pattern or tutorial: sometimes a children's one, sometimes an adult's one . I publish these posts every first Friday of the month, timed to provide inspiration for those who plan to get their sew on over the weekend. I firmly believe that, if you pick your projects carefully, sewing doesn't have to be a crazy-expensive way to clothe yourself and your family. I also firmly believe that pattern designers deserve to be properly paid for their work, so if you enjoy using a pattern and can afford to do so, make sure you support that designer. Some designers' websites offer the option to make a donation, alternatively you can buy one of their paid-for products. If you can't afford to do so, you can support the designer by sharing your project via social media to help draw more attention to their work. Thanks to all the amazing pattern designers who have offered up their hard work for us to enjoy for free.

Ok. I'll admit it. I'm cheating a bit this month. I recently used both my free sewing patterns to use up some leftover jersey to make the set pictured above. Therefore I'm posting (again) about my own free undies pattern! I am, at least, also posting about my free vest/camisole/singlet pattern which I haven't mentioned on this blog for YEARS. I've got some exciting, new-to-me, free pattern road tests in the works, but they weren't ready to post about this month, so look out for those. 

As you may know, I gave the free undies pattern a massive update last year. I extended the sizing greatly and it now includes 32" to 50" hip. I added another version so there are two pattern piece and construction options. One is quicker to make so might be more suitable for less experienced and/or time poor sewers. The other requires smaller pieces of fabric so might be better for those trying to bust their scraps and leftovers. Plus, I gave the instructions a major overhaul to include heaps more detail, tips and information, as well as clearer step-by-step photos. You can find the pattern here, with more details in this post. 

The reason why I don't mention the vest/camisole/singlet pattern is because I released it over ten years ago and it really shows! I haven't given it any kind of update since then, it is what it is. It's available in very limited sizing with pretty basic instructions. Since drafting and sharing my vest pattern, I have seen heaps of effectively identical versions spring up to buy, so there doesn't seem like a lot of point spending my very limited time on going over that one. With my undies pattern, I feel that the fit is different to the other undies patterns I've seen out there, either to buy or for free. Therefore I feel like I'm offering the sewing community something slightly different, but I no longer feel that with the vest pattern. However, if you happen to fit within the sizing, or fancy making it for someone how does, it is also available on this page

Please remember that peops gotta eat and stay caffeinated, so if you do download either of the patterns and enjoy using them, please consider buying me a coffee via the link on the Free Sewing Patterns page

Wednesday, 26 January 2022

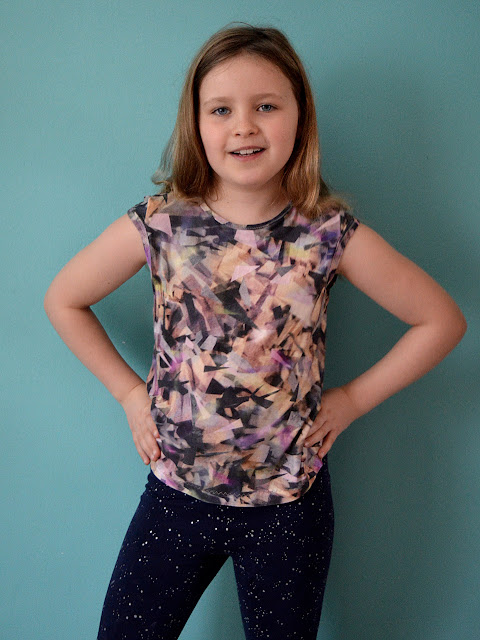
Zero Waste Cap Sleeved Tee for Kids


I'm really into the idea of zero waste sewing patterns and had a lot of fun preparing an episode about them for my podcast, Check Your Thread, a couple of months ago. I'd experimented with Birgitta's Helmersson's Cropped Shirt pattern which I had a lot of fun with, and I was keen to try more zero and low waste patterns. Thread Faction Studio is a Australia-based sewing pattern company that has a range of ZW patterns for children, and as far as I'm aware they are the only ones experimenting with zero and low waste patterns on a little scale (i.e. for kids). I've bought a couple of them and decided to start with the ZW cap sleeved tee pattern (pictured below) for my daughter because it looks like such a useful style.

(image source: Thread Faction)

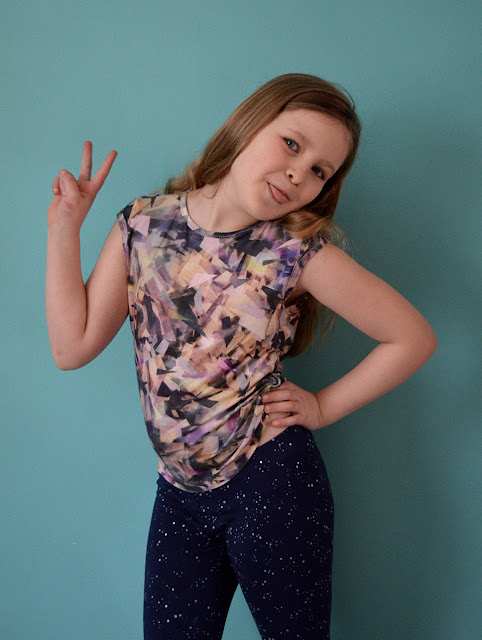
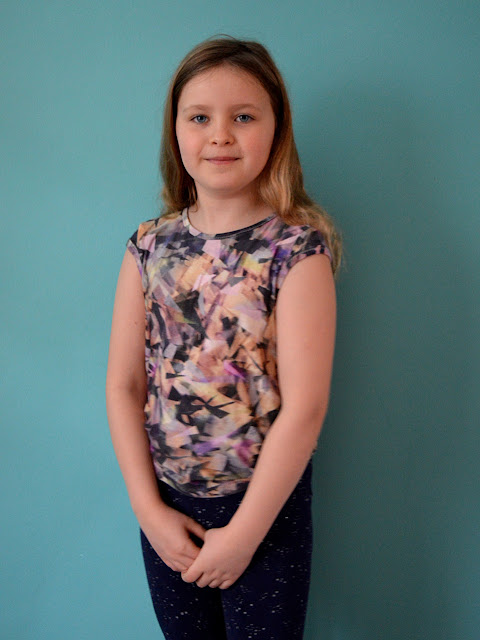
I was also keen to try this one because it requires a really small amount of fabric! It's potentially a great way to make wearable pieces from strips of leftover jersey. The pattern can be oriented either along or across the grain, depending on what you have to hand, as long as the fabric has a four-way stretch. I cut this tee across the grain (so perpendicular to the usually way you'd position T-shirt pattern pieces), and it only required about 55cm of fabric for the size 8. As well as requiring a four-way stretch for this to work, you also have to keep in mind any print design, otherwise the resultant garment might look a bit odd. The fabric I chose for my daughter's top was a piece of slinky jersey with an abstract print design so I could get away with the alternative pattern positioning. 


The pattern actually more of a low rather than true zero waste pattern because the neckband strip isn't part of the tessellated layout of the other pieces. It's also unlikely that your fabric would be the exact width, but I can't see how a true zero waste pattern could be created whilst also offering a wide range of sizes (this pattern runs from ages 2-14). 

The only change I made was to cut the neckband deeper than the pattern called for. And because it's not part of the main rectangle formed by the other pattern pieces, you could easily cut it from a scrap of contrast jersey or ribbing from your stash, or even from the neckband harvested from an unwanted T-shirt. Putting the garment together was very fun, but also pretty fiddly. I made the size 8 and I wouldn't have enjoyed trying to stitch the neck or sleeve bands on a smaller size. 


My daughter wasn't thrilled about my plans when I showed her the pattern and fabric. However, she didn't outright veto it so I pushed on regardless. Now that it is complete, it has actually had quite a lot of wear already, and we're still in winter. I think she actually enjoys the feel of the slinky jersey, and the colours work pretty well when paired with a number of other garments. I'll definitely keep this pattern in mind when I'm next in possession of a suitable piece of fabric. 

Friday, 7 January 2022

Free Pattern Friday: School Cool Dress for Dolls


Welcome to my monthly 'Free Pattern Friday' feature, where I road test a free sewing pattern or tutorial: sometimes a children's one, sometimes an adult's one (or even a doll's one!). I publish these posts every first Friday of the month, timed to provide inspiration for those who plan to get their sew on over the weekend. I firmly believe that, if you pick your projects carefully, sewing doesn't have to be a crazy-expensive way to clothe yourself and your family. Thanks to all the amazing pattern designers who have offered up their hard work for us to enjoy for free.

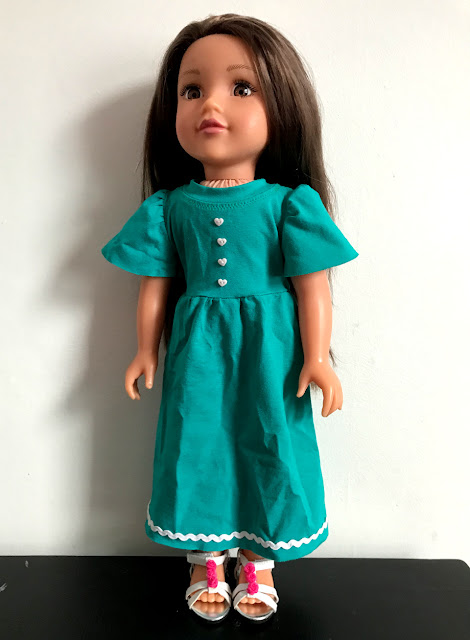
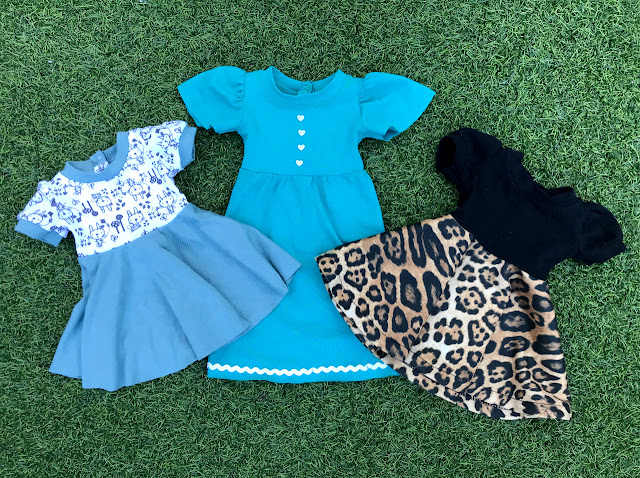
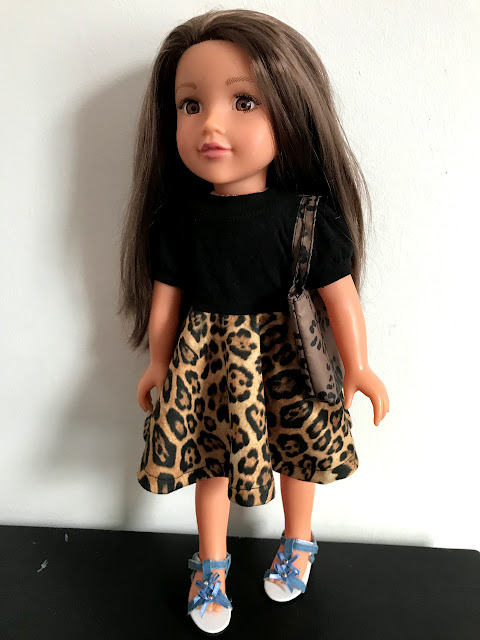
Ok, so the free pattern that I've road tested today may not be of interest to everyone. However, it's a really great little free that pattern that will be a delight for some people. Ellie & Mac have a whole heaps of patterns available for adults, kids and home projects, one of which is a kid's dress pattern called the School Cool tunic and dress. And they have generously made a doll's version available for free. The idea, of course, is that you can make matching tops or dresses for your child and their favourite doll. But whether you choose to go down the matching route or not, the School Cool doll's version is a fantastic scrap buster. I made three versions for my daughter for Christmas to clothe a doll she bought herself from a charity shop. Thanks heaps to Ellie & Mac for sharing their hardworking on this pattern for free. 


(image source: Ellie & Mac)

Pattern type:

This jersey dress pattern has an impressive number of variations. It includes four sleeve options (tank, puff short sleeves, flutter sleeves, and long sleeves) and two lengths (tunic and dress lengths). However, it is incredibly customisable so you can play around and make a variety of garments that all look completely different. I tried the puff short sleeves and the flutter sleeves options. Skirt-wise, I used the standard skirt pattern piece for two versions, but my scrap of the teal colour wasn't the right size or shape so I made a basic gathered skirt in a longer length for that. 

Sizing info:

The pattern has been graded for 15" and 18" dolls. However, the doll I made these clothes for is a bit smaller so I simply adjusted the percentage that I printed the pattern out to a bit smaller. I think that this tactic would work well for pretty much any doll larger than a Barbie sized doll. Things might start to get frustratingly fiddly any smaller than that, but of course you're free to try! 


Fabric info:

The pattern recommends knits with 50% 4-way stretch. However, I think that pretty much any single jersey would be fine. The white/grey bunny print jersey I used for the bodice and sleeves in the top version was a 100% cotton jersey harvested from a little T-shirt my daughter wore when she was two, and it has very little length-ways stretch. The sage-y green fabric I paired it with is a scrap of very stretchy bamboo jersey. The leopard print skirt that I paired with the black bodice is a double knit of some kind, which works fine for the skirt but would probably be too bulky for the top part. What I'm saying is that I think there's some wiggle room to play about with the scraps in your stash. If you're making a gathered skirt to go on the bodice, you could get away with a woven fabric for the skirt as it doesn't really need to stretch to get the garment on and off. Woven might work for the original skirt pattern piece also, but I'd have to try it to say so with confidence. 


Findings:

The pattern is easily accessible via the webshop on the Ellie & Mac website (no payment needed). There's no signups required or anything else. The pattern is professionally produced and easy to use. The instructions offer extra tips for sewing with knits, and I appreciated the many photos of different versions to help you choose which style variations to pick, and which fabrics might look good. 

Cutting out and making this little pattern is pretty fiddly, but the instructions make the construction as simple as possible. I couldn't find any of the hook and loop tape that they recommend for the back fastening, so I bought some tiny press studs to use instead. I also realised after my first one that the jersey isn't going to fray so I stopped bothering to hem it which made the process quicker. 

The finished dresses are incredibly cute. Small things are just so satisfying aren't they? I think for future versions I'll lengthen the bodice slightly to suit the proportions of my daughter's doll a bit better. 


Customisation ideas:

  • Add trim to the hems, or along the centre front like a faux contrast button stand
  • Use small buttons, little decals or even do a some miniature embroidery to create a detail
  • Play around with mixing and matching colours and prints from different scraps for the different pattern pieces
  • Increase or decrease the scaling when printing to make the patterns suitable for a wider range of doll sizes
  • Cut a wide rectangle and create a gathered skirt rather than the circle skirt included in the pattern
  • Turn the bodice round and have the fastening at the front

Would I make it again?

Definitely! Although I feel my daughter's interest in dolls may be on the wane. If it is revived at some point, I'd love an excuse to bust this pattern out again and try the other two sleeve variations. 

Friday, 3 December 2021

Cheap Pattern Friday: Adult's Sorrento Bucket Hat (Winter Edition)

Welcome to my monthly 'Free Pattern Friday' feature, where I road test a free sewing pattern or tutorial (or in today's case, a cheap pattern). Sometimes I post about a children's one, sometimes an adult's one. I publish these posts every first Friday of the month, timed to provide inspiration for those who plan to get their sew on over the weekend. I firmly believe that, if you pick your projects carefully, sewing doesn't have to be a crazy-expensive way to clothe yourself and your family. Thanks to all the amazing pattern designers who have offered up their hard work for us to enjoy for free (or cheap!).

I posted about the Sorrento bucket hat by Elbe Textiles about a year and a half ago, back when it was a no-cost pattern. Since then it's become a very reasonably priced pattern. I have used it a number of times since I last posted about it and continue to recommend it. I recently had an idea to use the pattern in a slightly different way to my other versions: as a winter hat rather than a summer hat. In this post I'm including some of the information from my original post, plus some extra bits that relate to this version. 

Of course, this monthly feature is usually about free patterns and tutorials. Therefore, if you wish to try a bucket hat and are looking for a free pattern, you could try one of the following patterns:

(image source: Elbe Textiles)

Pattern type:

The website says it best: 'The Sorrento Bucket Hat is a unisex design featuring a downwards sloping brim with optional top stitching detail. This hat is fully lined, with the ability to be reversible.'

Sizing info:

The hat pattern is graded to four sizes, 21"-24" head circumference

Fabric info:

It is suggested that medium to heavy weight woven fabric like drill, canvas and denim work best for this pattern, as they hold their structure. I completely agree, however, I would stretch that to include linen and linen-blends, which might not hold their shape so well, but might be more pleasant to wear in the heat. 

For my winter version, I decided to try a look that I've seen around a bit lately. I've seen some sheepskin-esque bucket hats knocking around on advertising and Instagram, and remembered that I have some leftovers of faux-sheepskin from a cardigan project I made last winter. For the lining, I used scraps of black sweatshirt fleece, fleece-side out. 


Findings:

Working with this pattern is a real pleasure. I've made a lot of bucket hats in the past, so I must admit that I didn't refer to the instructions constantly, but when I did, they were clear and easy to follow. This would make a great, confidence boasting project for a beginner, and a satisfying make for those more experienced with a scrap stash to burn. 

Because of the bulky, springy fabric, I didn't bother to do any topstitching for this version, which made it a really speedy make. I probably should have sized up though, to get that real, casual bucket hat look. 


Customisation ideas:

  • Extend the brim for extra sun protection
  • Test the accurracy of your stitching by using contrast thread
  • Make a decorative strip for the band, either with contrasting fabric, grosgrain ribbon or some other trim
  • Insert eyelets to the band for some ventilation
  • Add straps to tie under the chin if it gets windy where you live/holiday!

Would I make it again?

Yes, for sure. I have plans to make myself a summer version next year. Plus I'll most likely to turn to this pattern in future years for Frankie, as the sizing of the Sorrento seems to start roughly where the Oliver + S bucket hat pattern leaves off. 

Related Posts Plugin for WordPress, Blogger...