Showing posts with label zero waste. Show all posts

Friday, 7 February 2025

Free Pattern Friday Guest Post: Zero Waste Knickers / Pants / Panty / Undies for Adults

(image source: Saara Jolkkonen)


Welcome to my monthly 'Free Pattern Friday' feature, where I road test a free sewing pattern or tutorial: sometimes a children's one, sometimes an adult's one. I try to publish these posts every first Friday of the month, timed to provide inspiration for those who plan to get their sew on over the weekend. I firmly believe that, if you pick your projects carefully, sewing doesn't have to be a crazy-expensive way to clothe yourself and your family. Thanks to all the amazing pattern designers who have offered up their hard work for us to enjoy for free.

This month's instalment of Free Pattern Friday is deviating from the usual format because this one has been written by a guest! A lovely maker called Catherine who has always been incredibly supportive of my work offered to write up her recent experience with a free sewing pattern. So I want to say massive thanks to both Catherine AND all the amazing and generous designers who share their work with the community for free. Let's hand it over to Catherine!...

So I suggest that other people might want to contribute towards the “free pattern Friday” posts, so that Zoe did not have not make things for the sake of it, and other patterns that Zoe might not be interested in could also be showcased. I then went on to test out a pattern that Zoe would probably be happy to try herself!!


Anyway on to Zero Waste patterns… inspired by The Check Your Thread podcast episodes on Zero Waste I tried my first zero waste pattern last year and loved it. So then I decided to try a knickers pattern – I must have spent more time “researching” and “falling down the rabbit hole” on the internet than I did actually making them. The delightful pattern I chose comes from designer Saara Jolkkonen. The open source collection of twelve ZW patterns, including these undies, can be found on this website. 


Through my research I also discovered this helpful post by Zebra Spider about making this pattern, plus three awesome blog posts by recent-Check Your Thread-guest Liz Haywood (1, 2 & 3).   


Pattern type:

A zero waste pattern in Finnish which can be printed out on two sheets of A4 paper and used. Translation on Google works Ok – but the above websites have lots of information too. The most important thing to remember is seam allowances are 6mm.


Catherine's pieces ready to stitch together


Sizing info:

According to Google Translate:

The briefs are serialized in five sizes: S, M, L, XL and XXL. S waist 61 cm, M waist 68 cm, L waist 74 cm, XL waist 80 cm, XXL waist 85 cm. The sizes may sound small in centimetres, but the material of the underpants should be flexible and the trousers should be tight.


Fabric info:

You will need to use a jersey stretch fabric with 4-way stretch. I used various scraps of left over fabric from T-shirts and Jersey PJ trousers I have made… I also used old T-shirts that are no longer wearable and white vests for gusset pieces…. All useful for toiles.


Catherine tried these on at this point and found there was not enough coverage over the backside so she went no further with this pair. 

Findings:

I am used to making underwear as I have been doing it for years. I found this an interesting pattern to use – though it was a little low rise at the backside for me..so then I tried Liz Haywood’s pattern (see below) – which was a bit low at the legs.. so like Goldilocks the third attempt was much better… I adapted the pattern making it minimal waste rather zero waste. Though I think there are a number of ways to be Zero waste, one is using a zero waste pattern, and another is to use fabric which has no other use (scraps from other projects, old T-shirts etc). So I still feel this is Zero waste!


If you have not made Zero waste patterns, this might be an easy place to start.Equally, if you have never made underwear before, again this could be a good place to start – especially with all of the information on the above links and Zoe’s own knicker making tutorials!


Catherine's helpful comparison of the original pattern (on top) and Liz's version (underneath)

One point to note is that like many zero waste patterns, it might not be suitable for directional prints as the bottom and front are cut in different directions. However inspired by this I cut out some Acacia Knickers (also a free pattern) and turned one piece upside down to get two pairs from one old T-shirt rather than one pair…. Who’s looking at the underwear anyway? Does it matter if the print is upside down on my backside???


The changes Catherine made to Liz's version of the pattern


Will I make this pattern again?

After I made my adaptions, yes I will be making it again. I already make all of my knickers – fun fabrics, good use of leftover jersey and fit well! 


Catherine's Goldilocks version! 


Wednesday, 26 January 2022

Zero Waste Cap Sleeved Tee for Kids


I'm really into the idea of zero waste sewing patterns and had a lot of fun preparing an episode about them for my podcast, Check Your Thread, a couple of months ago. I'd experimented with Birgitta's Helmersson's Cropped Shirt pattern which I had a lot of fun with, and I was keen to try more zero and low waste patterns. Thread Faction Studio is a Australia-based sewing pattern company that has a range of ZW patterns for children, and as far as I'm aware they are the only ones experimenting with zero and low waste patterns on a little scale (i.e. for kids). I've bought a couple of them and decided to start with the ZW cap sleeved tee pattern (pictured below) for my daughter because it looks like such a useful style.

(image source: Thread Faction)

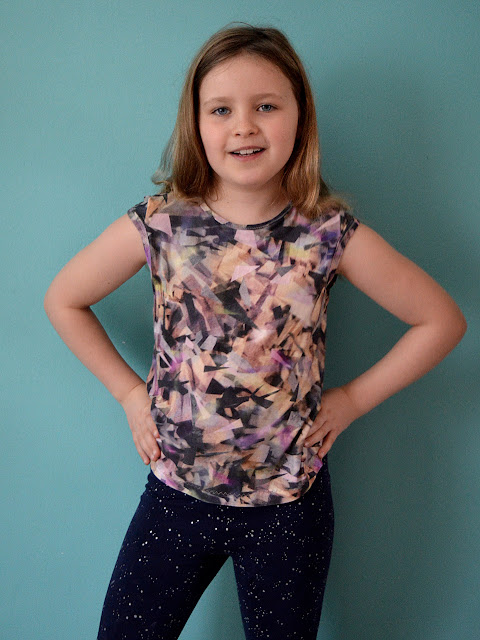
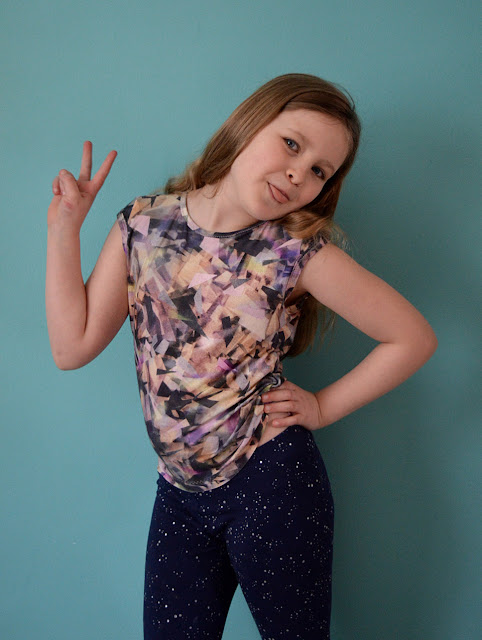
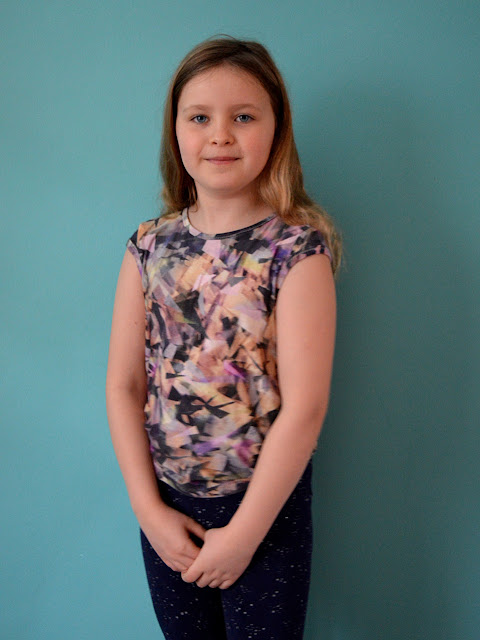
I was also keen to try this one because it requires a really small amount of fabric! It's potentially a great way to make wearable pieces from strips of leftover jersey. The pattern can be oriented either along or across the grain, depending on what you have to hand, as long as the fabric has a four-way stretch. I cut this tee across the grain (so perpendicular to the usually way you'd position T-shirt pattern pieces), and it only required about 55cm of fabric for the size 8. As well as requiring a four-way stretch for this to work, you also have to keep in mind any print design, otherwise the resultant garment might look a bit odd. The fabric I chose for my daughter's top was a piece of slinky jersey with an abstract print design so I could get away with the alternative pattern positioning. 


The pattern actually more of a low rather than true zero waste pattern because the neckband strip isn't part of the tessellated layout of the other pieces. It's also unlikely that your fabric would be the exact width, but I can't see how a true zero waste pattern could be created whilst also offering a wide range of sizes (this pattern runs from ages 2-14). 

The only change I made was to cut the neckband deeper than the pattern called for. And because it's not part of the main rectangle formed by the other pattern pieces, you could easily cut it from a scrap of contrast jersey or ribbing from your stash, or even from the neckband harvested from an unwanted T-shirt. Putting the garment together was very fun, but also pretty fiddly. I made the size 8 and I wouldn't have enjoyed trying to stitch the neck or sleeve bands on a smaller size. 


My daughter wasn't thrilled about my plans when I showed her the pattern and fabric. However, she didn't outright veto it so I pushed on regardless. Now that it is complete, it has actually had quite a lot of wear already, and we're still in winter. I think she actually enjoys the feel of the slinky jersey, and the colours work pretty well when paired with a number of other garments. I'll definitely keep this pattern in mind when I'm next in possession of a suitable piece of fabric. 

Saturday, 21 August 2021

Zero Waste Cropped Shirt: Two Attempts


Pattern:

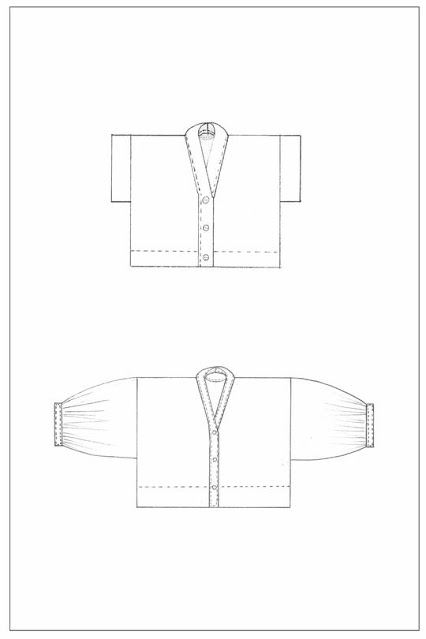
Earlier this summer I bought the ZW Cropped Shirt pattern by Swedish designer, Birgitta Helmersson. There are some really inspiring versions of this pattern on Instagram. Zero waste sewing patterns are unlike regular patterns in that you receive a set of measurements to help you draw shapes directly onto your fabric, rather than paper pieces to cut out and pin on to your fabric. There is zero or very little wasted fabric from this approach, so you often need far less fabric to begin with than with a typical sewing project. For example, the short sleeve version of this shirt in the smaller size range (there are two size ranges available covering bust sizes 33"- 40" and 41" -  50") requires just 90cm of fabric. 


(image source: Birgitta Helmersson)


Attempt #1:

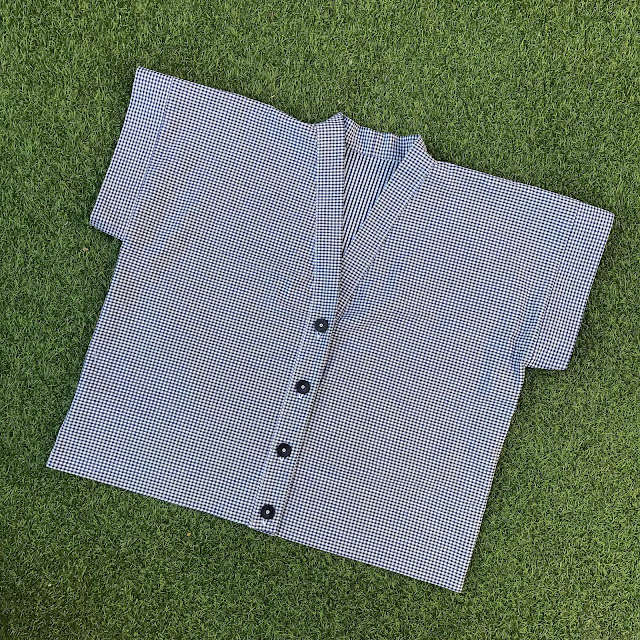
For my first attempt, I used 1m of checked cotton that I thrifted (see below). I really enjoyed this new approach to garment creation, although the project fought me at every turn! Partly the problems occurred because the check is slightly different on each side and I kept messing up my right and wrong sides. The fabric was a little stiff for the sleeves, so I unpicked them, halved them and restitched. Sadly the proportions of this top just weren't right for me, so I found it a new loving home with my friend Sophie, and tried the pattern again a couple of months later when more suitable fabric appeared. 


Attempt #2:

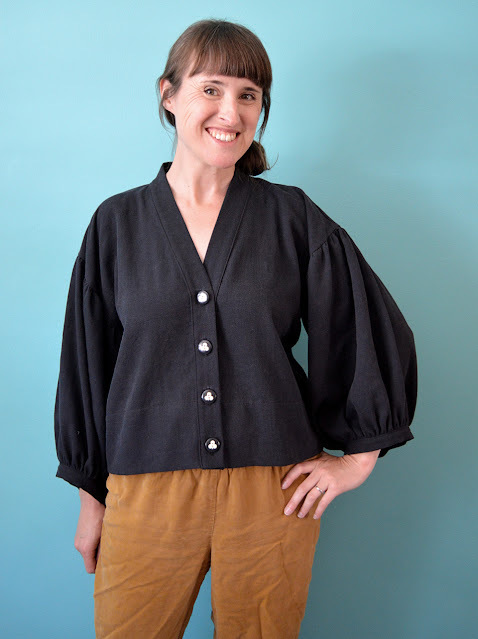
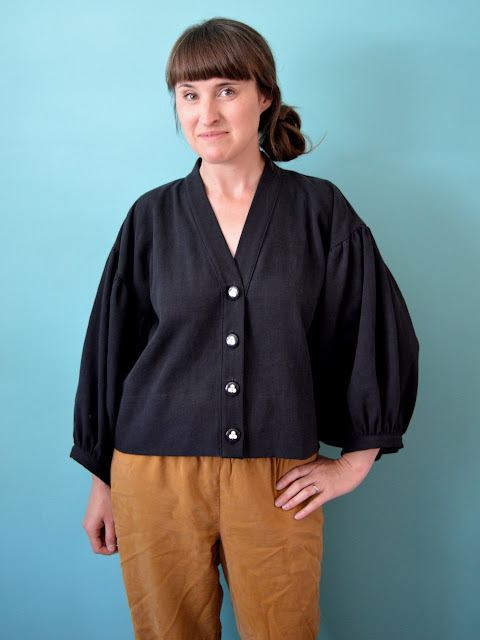
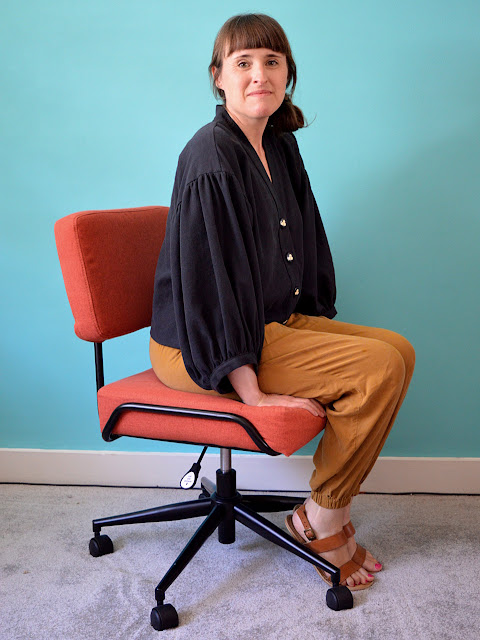
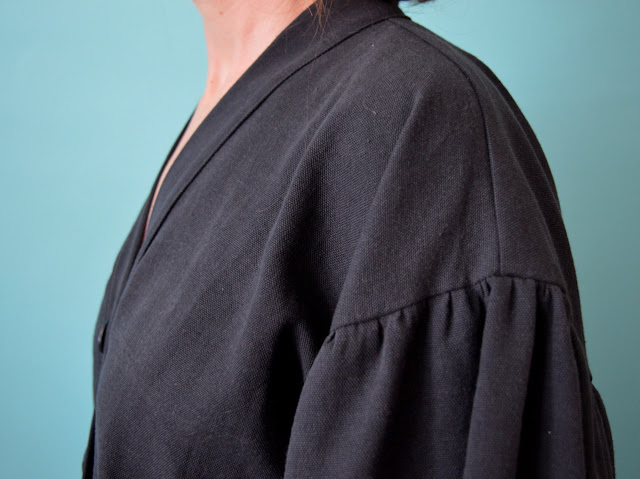
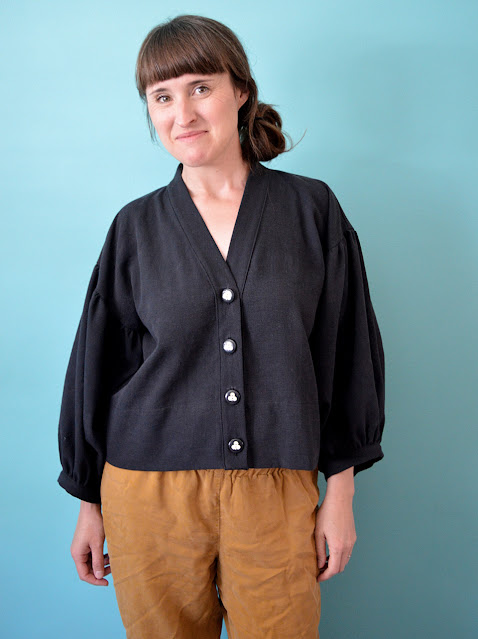
For my second attempt, I used the leftovers of the curtain I used for my recent summer dungers. One of the things I really love about this pattern is how customisable to your own preferences it is. This time I narrowed the width of the body by 5cm front and back (so 10cm all round). I also used the original length (I'd lengthened it by about 5cm for the first version) and tried a version of the long, gathered sleeve hack that is covered in the pattern instructions. For the sleeves, I effectively just used as much of the fabric that I had left and thankfully, I'm thrilled with the volume and length that came out!


I've been wearing this a whole lot since making it. It works well as a top, of course, but also as a kind of summer jacket layer when the weather is a bit changeable. It can be layered over other tops, either buttoned up or left open.  


You can't see them very clearly, but the buttons are ones I've had in my stash for over a decade. I'm pretty sure they came from a market stall when I lived in Barcelona. They have the club symbol from playing cards on them. Playing card symbols have always had a significance for me, not least because I was a croupier for a couple of years in my early twenties! The background colour of the buttons is a dark grey, which suits this fabric perfectly because the black curtain is quite a washed out shade. 


What I'm most surprised about it how soft this curtain feels to wear! I'm definitely on the look out for similar curtains for other future sewing projects. It's such a great way to get a lot of fabric for relatively little money, plus they're often 100% cotton (therefore biodegradable and easily dyed), AND it's not creating additional need for virgin textiles. 


Thursday, 27 June 2019

Sustainable Sewing: Zero-Waste Product Swaps


For the last six months or so I've been seeking out swaps I can make around the home, switching our usual products for non-disposable versions. There are, of course, heaps of fancy-looking, eco-products now available in ethical shops and online to help with this. But I've been relieved to find that a basic level of sewing ability and the reinterpretation of textiles we already own has saved me a stack, even if my versions aren't so pretty! I know that a lot of people are trying to make similar changes, so in the hope of providing inspiration, here's what I've been making:


1) Dish scrubbers. There was a surprisingly involved discussion in the comments section of my IG post about possible alternatives for what to use to when washing up. I bought a couple of VERY cute, fruit-themed, crocheted pads from Etsy, however they disintegrated pretty rapidly when they were put to the task of actually washing up multiple times a day. I finally landed on making these towelling circles for washing up, instead of the disposable, synthetic, sponge scrubbers we were using. I cut up an old, 100% cotton towel that was already pretty abbrasive, and overlocked/serged two layers together. You could even stuff them with scraps if you wanted to make them bulkier and possibly easier to grip. I made three so that I could chuck them in the wash regularly, and after six months of intense use, I can report that they are only just starting to develop a couple of holes. I don't think this is bad going, considering we don't have a dish washer and therefore do A LOT of washing up. And because these are 100% cotton, I feel much happier about eventually chucking them in the textile recycling bank (which may actually mean landfill because sadly who knows where it all actually goes).


2) Surface wiping cloths. Instead of using the same synthetic sponge scrubbers that we used to use to wash up with, or those foam-y sponge cloths that eventually disintegrate, I cut up yet more of that sacrificial towel (which we got via Freecycle about 10 years ago) and simply overlocked around the edges. Pat actually prefers these to wash up with as well; I think I made the circle ones a bit small for him. Anyways, these have been great.


3) Hands/face cloths. A former baby towel that got too ratty for bath-time got cut up into squares and the edges overlocked. We use them dampened for dealing with sticky toddler hands and faces after meals times. I'm not proud to admit that we used to keep a pack of disposable wet wipes/baby wipes on the dining table for this purpose. Marilla Walker recently shared on IG that she'd made some far more attractive ones of these using scraps of vintage towelling, but whatever works!


4) Nappy changing wipes. When we emerged from the 'milky and puke-y' stage of babyhood, we were left with a mountain of muslin cloths. I've still got some on hand for mopping up spills and covering the table when it's painting time, however, I've given a couple of the softest muslins the old cut-into-squares-and-overlock-around-the-edges treatment. I've been using these to further reduce the amount of disposable wet wipes/baby wipes we get through by dampening one before a nappy change to use if it's just a wee-based situation. I then chuck the used wipe directly into the washing machine to be washed in the next round of laundry. I still use regular wet wipes for dealing with pooey nappy changes, but these muslin squares alternative have meant we are buying the disposable kind far less frequently. I'm kicking myself for not doing this when my daughter was a baby/toddler too; I shudder to think how many of those things, plus the plastic packets, we've sent to landfill.


5) Handkerchiefs. I wrote about my foray into making fabric hankies to use instead of paper tissues here, but they have since been embraced by the whole family, so we needed MORE. This batch are bigger, 'man-sized' hankies (45cm x 45cm before hemming) made from a soft, old, bed sheet. I've discovered that when choosing suitable fabric for making them, softness really is the most important factor. Even though we have this new stack in addition to the previous ones, we still don't have enough if one of us has a cold or a bout of hay fever, so more are on the way. Plus Dolores has lost most of hers at school. 


6) Menstrual pads/Panty liners. Last year I made a batch of menstrual pads/panty liners, and I'm pleased to report that they are still going strong. I have not bought any panty liners since making these, which is a total win.


7) Wash mitt. I made a basic wash mitt for myself from yet more of the sacrificial towel. I zigzagged two layers of towelling together that I'd cut into the shape of a mitt. I used some leftover bias binding to finish the edge of the hole where your hand goes in, and some grosgrain to make a hanging loop, although I never actually hang it up. Picture an oven mitt made from an old towel. It didn't warrant a photo, but it does gets used everyday.


8) Cotton pads. I don't use cotton wool pads very often because I prefer to remove my make up with a foaming face wash, rather than specific make up remover. However, when my current stash of cotton wool pads runs out, I plan to make some like these from the Helen's Closet blog for taking off nail varnish.


So what about you? Are there any product swaps you've made that have been made easier and/or cheaper because you have a sewing machine and stash of textiles? Have you made any alternatives to products not listed above? I'm always looking for new ideas!

Related Posts Plugin for WordPress, Blogger...