Friday, 5 November 2021

Free Pattern Friday: Walk the Plank PJ Bottoms for Everyone


Welcome to my monthly 'Free Pattern Friday' feature, where I road test a free sewing pattern or tutorial: sometimes a children's one, sometimes an adult's one. I publish these posts every first Friday of the month, timed to provide inspiration for those who plan to get their sew on over the weekend. I firmly believe that, if you pick your projects carefully, sewing doesn't have to be a crazy-expensive way to clothe yourself and your family. Thanks to all the amazing pattern designers who have offered up their hard work for us to enjoy for free.

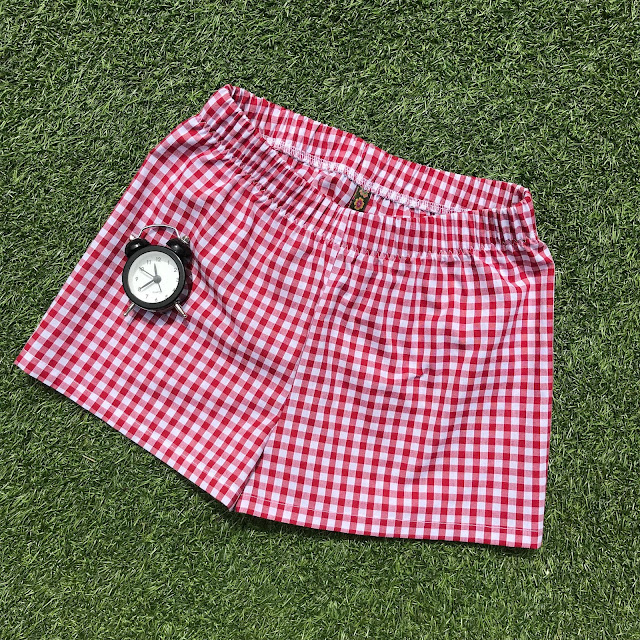
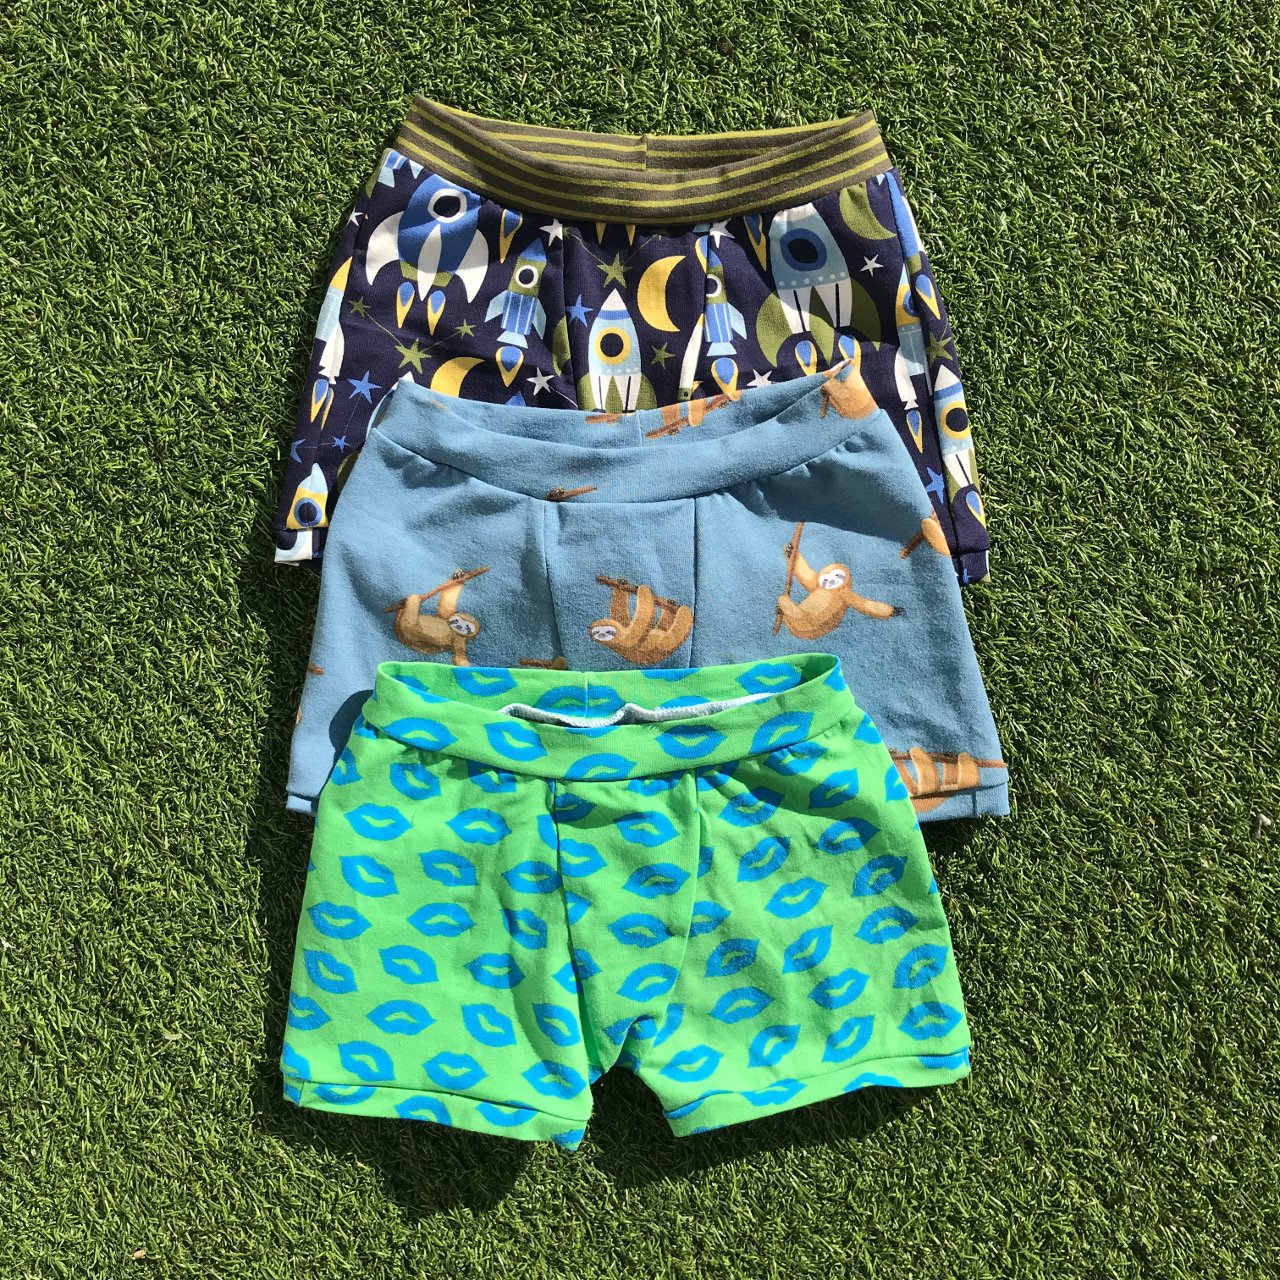
On the odd occasion for my Free Pattern Friday posts, I write about a pattern that I've road tested and reviewed in the past. I think it's useful because it shows which of the patterns are so good that they've been used multiple times. I previously wrote about the Walk the Plank PJ bottoms 18 months ago, and I've made five pairs using the kid's version of the pattern to date. My most recent version were a pair of summer sleeping shorts for my daughter (pictured above) made using some gingham leftover from a school dress I once made her. I just read through that previous post and I don't really have anything to add, other than to highlight the adult version a bit more than I did last time. 

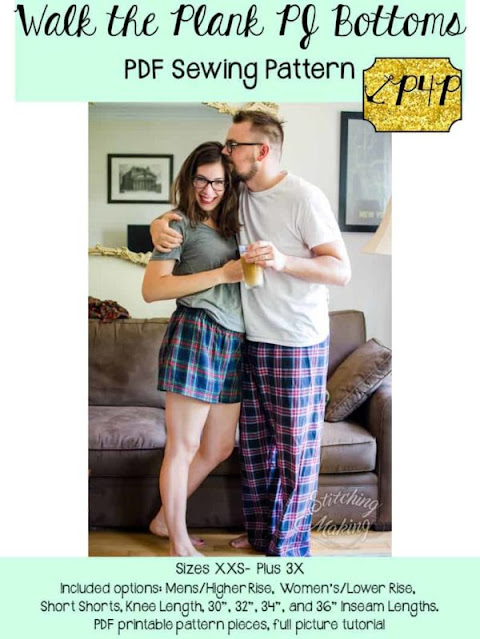
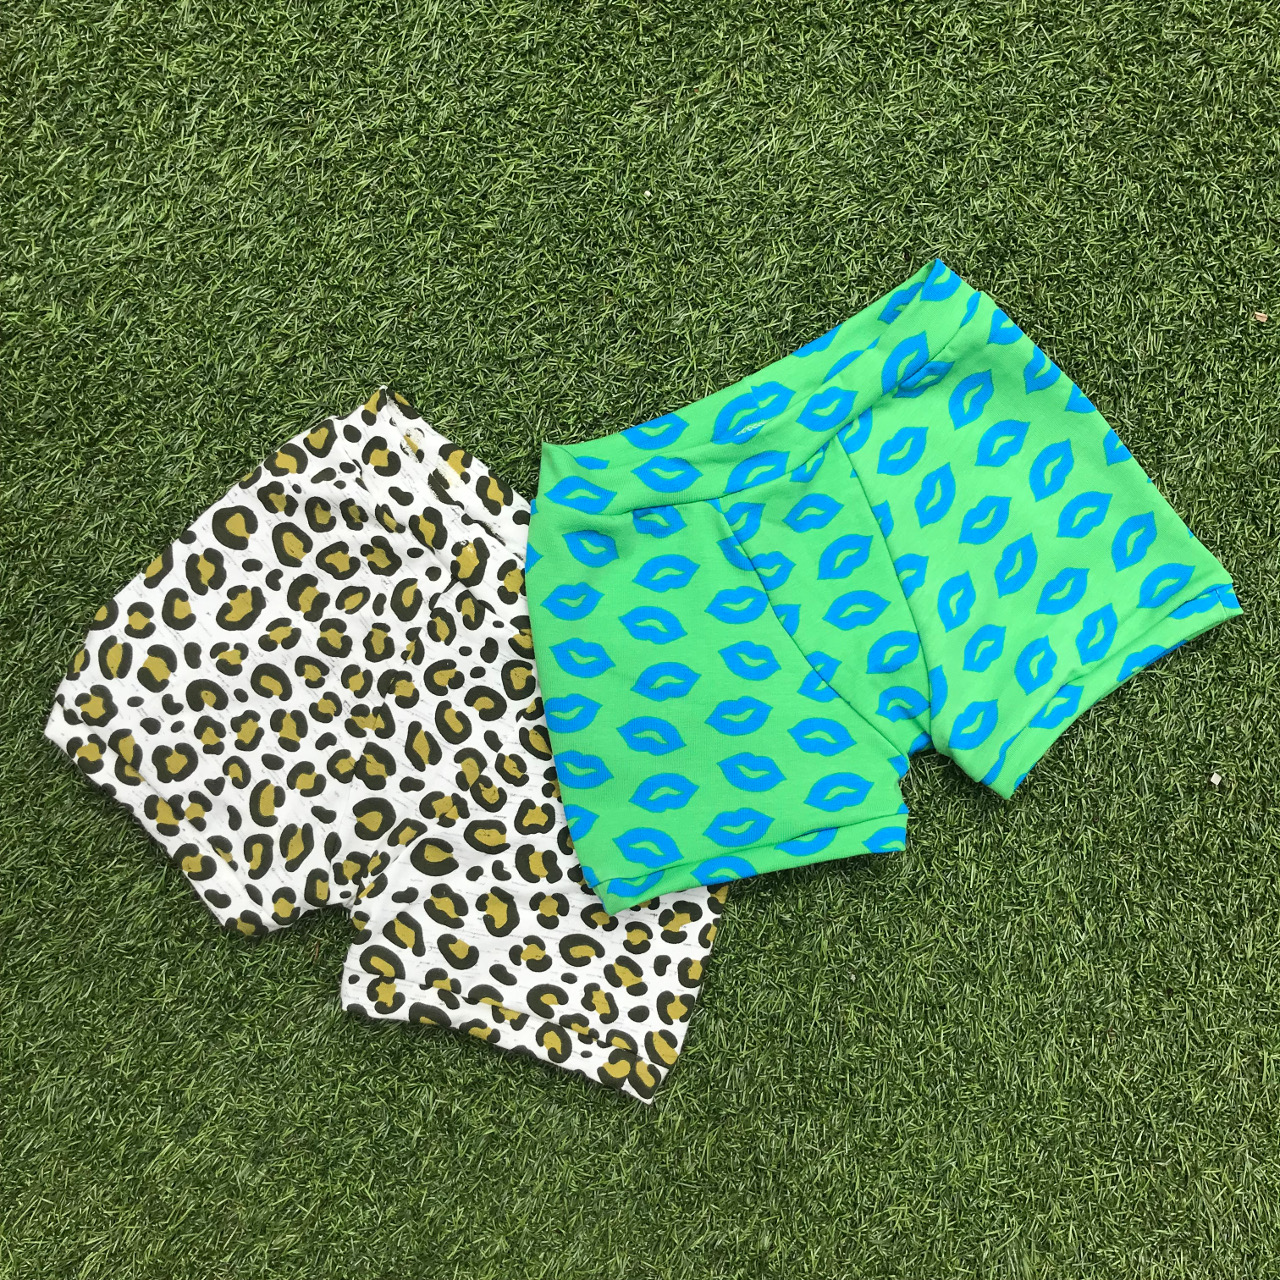
The adult's version (pictured below) is graded between 33" to 58" hips. The largest size of the kids version, 14, fits a hip measurement of 34" so if you're sewing for teens, you can go straight from using the kid's version to the adult's with no gaps! The adult Walk the Plank PJ bottoms pattern also includes two rise heights and three length options, but of course you can make them however long you wish. The only reason why I haven't made the adult version yet is that I already have my own woven PJ bottoms pattern that I copied from a RTW pair years ago. 

I want to say a massive thanks to Patterns for Pirates for sharing their hard work and making these patterns available for  sewers to use for free.  


Tuesday, 2 November 2021

Tadah! I Made Birthday Outfits!


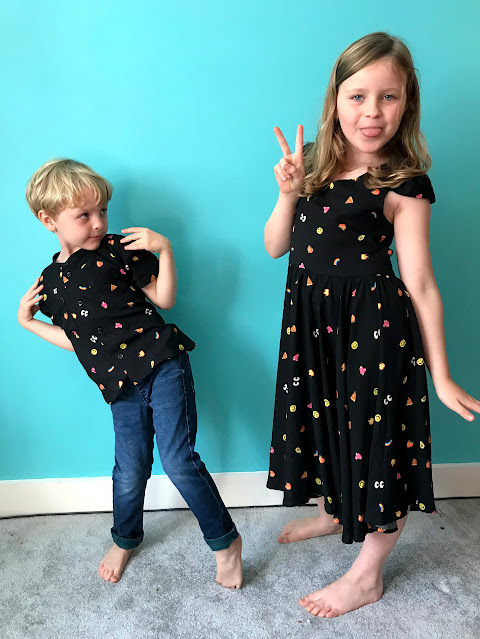
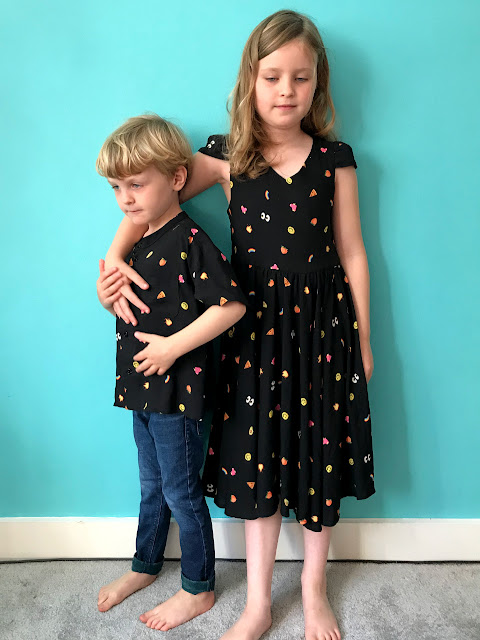
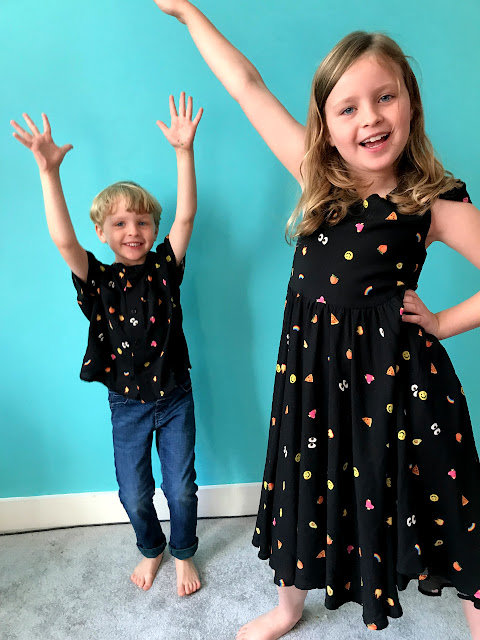
My kids' birthdays are ridiculously close together. In fact, their special days are only one day apart. To date, our family more or less treats the situation like they're twins that are three years apart, and the celebrations kind of overlap and get all smooshed together.  I guess this will change as they get bigger when their friendship groups get more defined and separate, and perhaps as soon as next year the events will be more distinct. I also feel that the clock is ticking for how long I can get away with making them matching clothes! To make the most of this fleeting opportunity, I decided to make these coordinating garments for them to wear as they turned eight and five. 


Fabric:

When I first laid eyes on this fun emoji print viscose lawn from Fabric Godmother, I knew I had to get some for my kids. To be honest, I rarely buy fabric to make clothes for my kids. I mainly use leftovers from other projects and fabric harvested from existing garments when making things for them, with the occasional new purchase or gifted length that's more specifically 'kiddie'. I love how this print is more subtle than a fabric designed for kids though. In fact my colleague Kerry has also bought some to make a dress for herself. Full disclosure: this is not a paid ad or freebie, I bought this fabric myself but with a staff discount.


The fabric is lovely, but as with most viscose fabrics, it's light-weight, slippery and a big fan of developing creases. Having decided to make Frankie a shirt and Lola a dress, I knew I'd be pushing the limit of fabric suitability for the styles I had in mind with this fabric selection. I think I just about got away with it though!

(image source: Tadah! Patterns)

Dress Pattern:

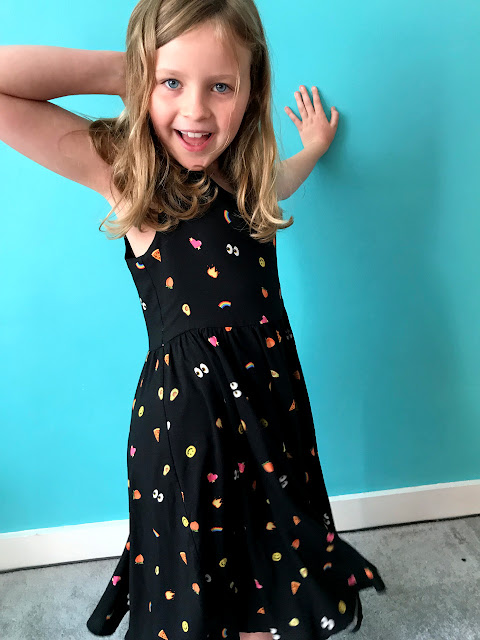
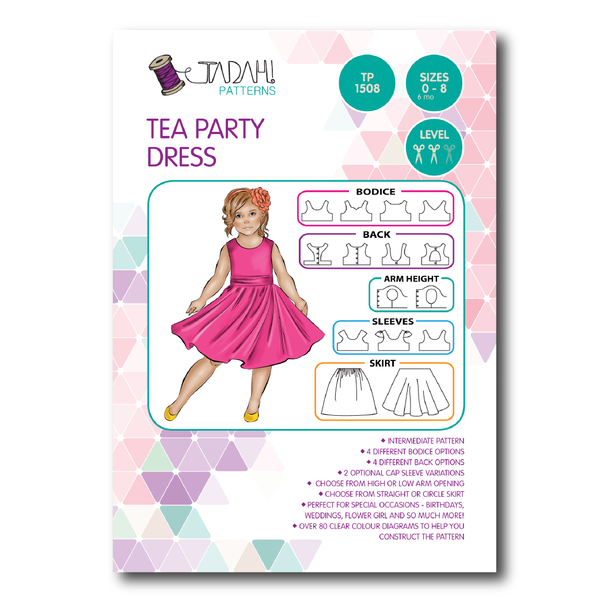
I'll start with Lola's dress. Around the time that I was gearing up to buy the fabric, I was contacted via Instagram by Sewing Gem, a UK-based online sewing shop, asking if I'd like to try out a pattern by Tadah! Patterns, an Aussie brand that they stock and were hoping to promote. It was an obligation-free offer, and the timing was just right considering I was on the hunt for a pattern to make a part dress. When I looked through their selection of Tadah! Patterns, I clocked the Tea Party Dress pattern (pictured above) straight away as one that I've had on my Pinterest board for years. 

(image source: Tadah! Patterns)

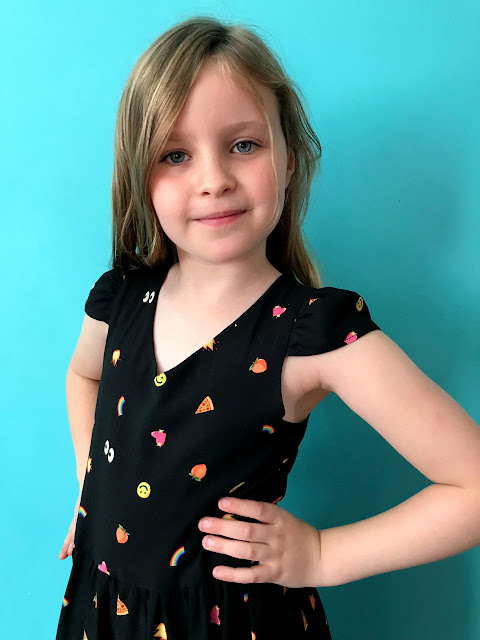
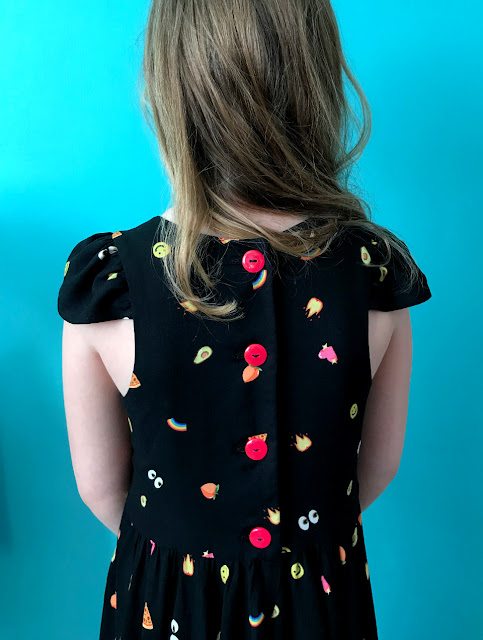
In essence, it's a fairly traditional fitted bodice-and-full skirt dress style. However, it includes a crazy amount of style options (see above). It allows you to make a ton of different looking garments all from the one pattern. I let Lola choose her own style variations. She selected the V-neck, classic back (she was going to be wearing this in October after all!), regular arm height, gathered cap sleeve and circle skirt options. 


The pattern is graded between 6-12 months to 8 years. Lola is a touch larger than the measurements that correspond with the size 8, so I lengthened both the bodice and skirt by about 5cm each (also so she'll be able to get more use from it as she gets bigger still). I also made the bodice a tiny bit wider at the centre front and back. I wish I'd had this pattern from when she was much smaller so I could have made many more garments from it over the years!


The construction was pretty simple and suitable for someone who has made a few other garments previously, particularly if you choose to make it in a more stable fabric. The bodice is fully lined and back fastens with buttons, which makes this a slightly more time consuming project, so I wouldn't recommend making it the same day your child is due to attend a party! The only part of this project that gave me pause was trying to work out whether the top edge of the circle skirt should be gathered into the bottom of the bodice, or if it should be sewn flat. The instructions mention creating gathers, however the illustrations look like it should be sewn flat with no gathers (spoiler alert: it should have gathers). 


For future versions, I would also prefer to make the bodice and skirt separately and the join them at the waist seam, instead of attaching the skirt pieces to the front and back bodice pieces and THEN stitching the side seams in one. But that's just a preference of construction order and wouldn't change the look of the finish garment particularly. 

(image source: Fibre Mood)

Shirt Pattern:

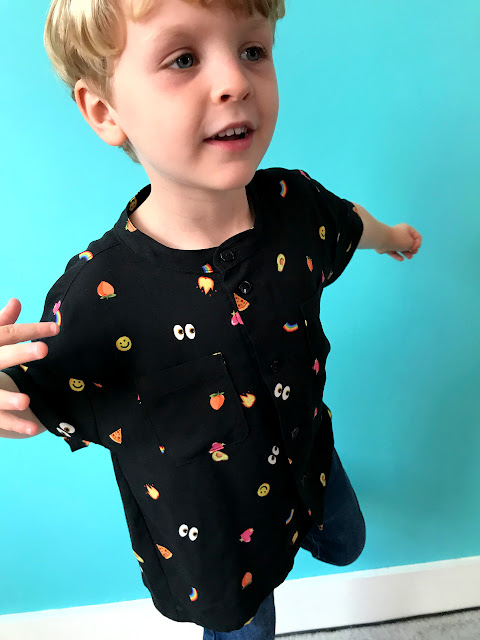
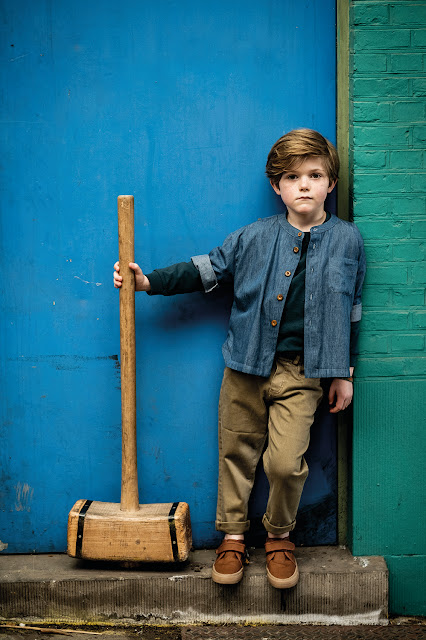
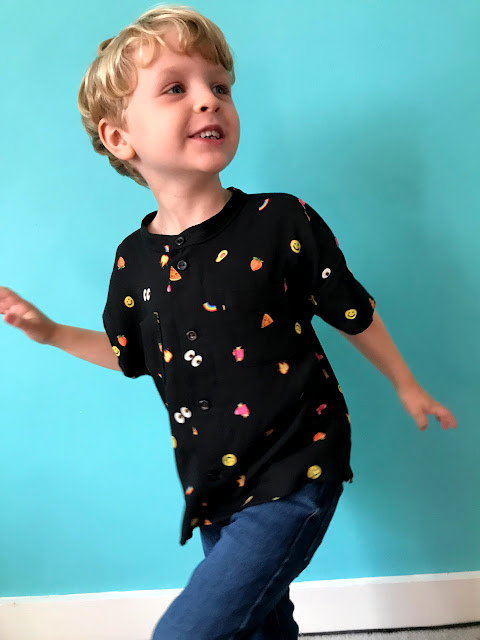
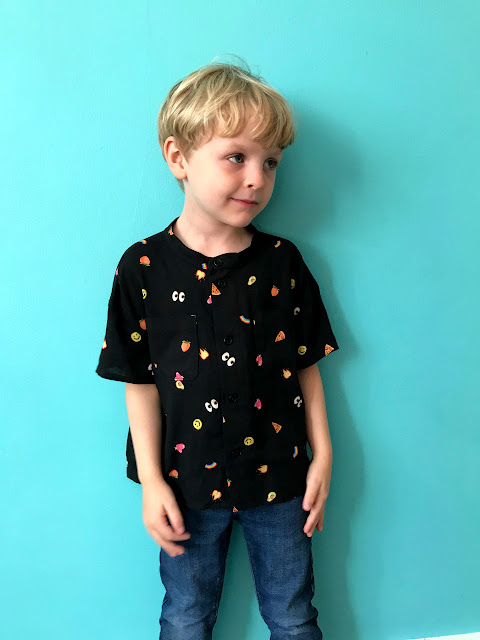
I love making shirts for Frankie, and mercifully he enjoys wearing them also! I recently made him a shirt using my regular little-boy shirt pattern with a camp collar, so I was on the look out for something different this time. I found the Rupert shirt pattern (pictured above) in Edition 14 of the Fibre Mood magazine, but you can also buy it separately here. It's got a different silhouette and collar to the others I made for Frankie so decided it was worth the tracing out for some variety! 


I ended up combining sizes for this garment to prevent it being too wide. I used the size 4 for the width and size 5 for length. I altered the sleeve pattern so it wouldn't have the turn up because I didn't want to reverse of the viscose to be visible. I also made a regular hem instead of the facing around the bottom edge because I felt the latter wouldn't be suitable for the slinky viscose. I also added two pockets to the front rather than one upon Frankie's request.


With the bottom hem facing eliminated, this shirt was pretty quick to put together. I like the look of the collarless neckline, and the wider fit is a nice variation to Frankie's current clothing selection.


Thoughts:

My main conclusion is: viscose isn't the ideal fibre for making kids clothes, but it is do-able! Both kids seem to enjoy the slinkiness of the fabric in their respective garments, even if I don't enjoy the ironing! They both chose to wear these garments multiple times over their extended birthday celebrations, and I've put them aside for a month so they'll be in decent enough condition to wear to a wedding in December. 

Tuesday, 12 October 2021

Handmade Moontide Washable Period Pants

 
If you're a period haver, do you use period pants? I must admit that I'm not an early adopter of anything, which includes period pants when they came out a few years ago. I'm so used to making my own undies, that buying undies from a shop, even if they have a distinct purpose, felt weirdly wrong. So I stuck to my usual period-management set up, despite hearing positive previews about them from friends and colleagues. More recently I'd heard talk in the sewing community of people making their own which peeked my interest. But it wasn't until I was approached a few months ago by Yelena from Sew Projects to see if I'd like to try her products for free in exchange for an honest review, that I finally gave the whole thing a try. Yelena is an underwear designer who has developed washable period pants patterns that she sells along with kits that contain all the materials required to make them. 

(image source: Sew Projects)


The pattern:

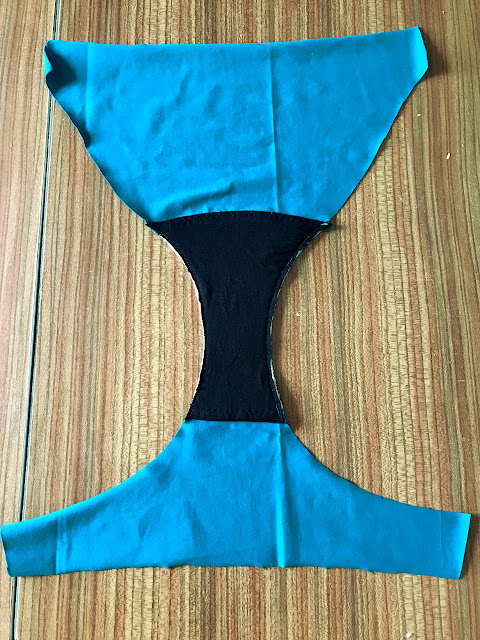
The Moontide period pants pattern is a pretty standard undies style that include SIX different types of gusset so you can tailor your undies to your own specific needs. The gusset options are: light flow, regular flow, heavy flow, heavy flow with wings, very heavy flow and very heavy flow with wings. Phew. You also have some control over the absorbency levels of your undies by adding additional layers of the absorbent material inside the gusset itself. Seeing as this was my first pair, I went with the regular flow option. The sizing of the undies themselves runs from a 34" to 50" hip. 

The instructions are very comprehensive, with lots of useful information about the various materials you'll need (even if you haven't bought the kit) and what they're for. The construction steps are illustrated with clear, colour photographs. I also love that she's thought to include tips for laundering to hep you get the most from your investment of time and money going forwards.

(image source: Sew Projects)

The kit:

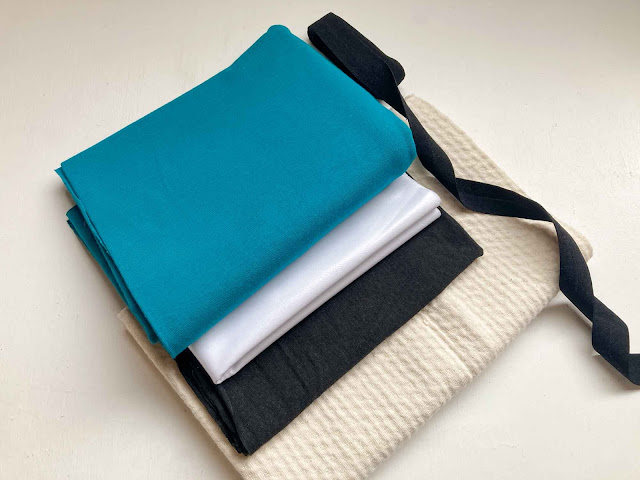
Part of what had prevented me from trying to make period pants sooner was knowing what types of materials would work best, and finding where to source them. With these kits, you don't need to figure that stuff out at all. I also really like that most of the layers are made from natural fibres as far as is possible, thus minimising the release of microplastics during laundering, which I know isn't true of all reusable period pants and pads that are available to buy out there. The kit contains the following: cotton/Lycra fabric for the main part of the undies, 100% cotton absorbent layer, bamboo/Lyrca moisture wicking layer (that sits against your body in the gusset), PUL waterproof layer and wide fold over elastic. 

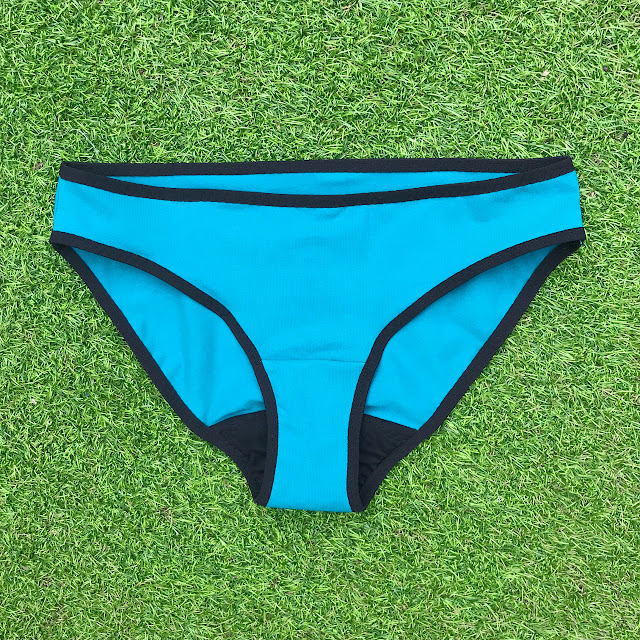
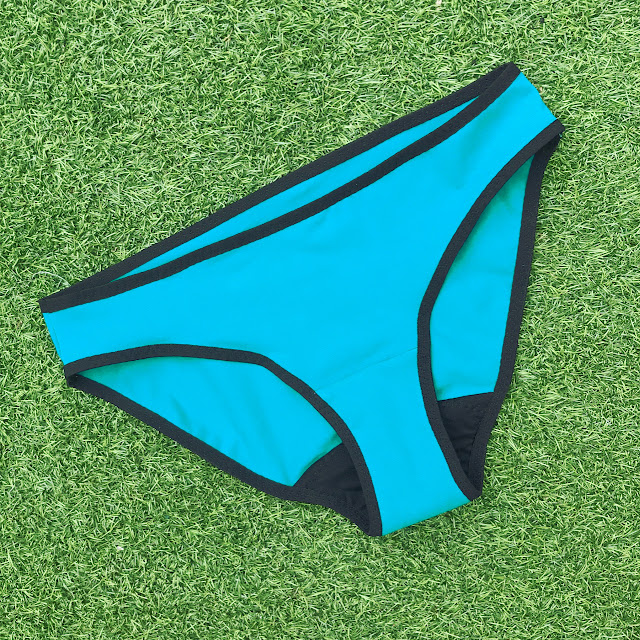
The kit is £43.50 (excluding the pattern) and I found that there was enough for of the main fabric and elastic for two or three pairs, plus enough of the other items for at least five of the regular flow gussets. Yelena has also very cleverly put together packs to purchase that just include the materials needed for the gussets, available with or without the fold over elastic. The full kits come in a variety of colours for the main undies. I chose the teal colour, which is a colour I adore but always struggle to photograph accurately. The picture below shows the colour most successfully.


Findings:

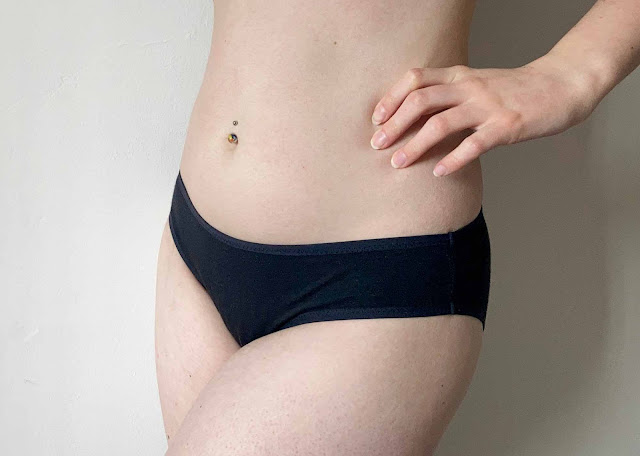
Right. I have given these undies a go through two periods now so I could give the most accurate and honest review. Firstly, the construction. The way these undies are constructed is only slightly more involved than regular undies making. So having made many, many pairs of pants in the past, I found the construction very easy and satisfying. If you have never made undies at all, I would DEFINITELY recommend making a couple of regular pairs of undies constructed with fold over elastic first. It would help to get the hang of applying the elastic before complicating things by adding these additional layers for the period pants. 


When I first put them on, I must admit that I did NOT like the feel of them! It felt like there was a lot of padding around my bum that, as a tampon user, I'm not normally used to. But I stuck with it and the gusset layers softened up within a couple of hours, and I haven't noticed any weird sensation when wearing them since. Each element of these undies feels really good quality, and the bamboo jersey gusset lining, in particular, is lovely and soft.   

I did come to the conclusion, however, that this shape of undies just isn't the perfect one for me. This is no criticism: having developed my own undies pattern and tried some of the others out there, I fully believe that no undies pattern can be The One for everyone. Every bum is different, and everybody's tastes and preferences are also different. I definitely find this style wearable, but going forwards, I'm going to try adapting my own undies pattern using the Moontide pattern as a guide to make more pairs. 


Having tried these at different points of my period, I have also found that I still much prefer wearing tampons on the first two days of my period, but prefer wearing these pants over washable sanitary pads for the remaining days. Not only are these more absorbent than my self-made washable pads, but they are more convenient. For example, I wore these undies on a day when I went with my daughter's class on a school trip. It was great not having to factor in changing tampons or pads during the trip when time was very limited. 

So for me, these undies (and the future pairs I will make going forwards) are going to part of my period-management set up, rather than completely replacing all other methods. But I have found that I've been using fewer single-use, disposable products, so that is fantastic! 

Friday, 1 October 2021

Free Pattern Friday: Bombazine Oven Mitts


Welcome to my monthly 'Free Pattern Friday' feature, where I road test a free sewing pattern or tutorial: sometimes a children's one, sometimes an adult's one. I publish these posts every first Friday of the month, timed to provide inspiration for those who plan to get their sew on over the weekend. I firmly believe that, if you pick your projects carefully, sewing doesn't have to be a crazy-expensive way to clothe yourself and your family. Thanks to all the amazing pattern designers who have offered up their hard work for us to enjoy for free.

Ugh! I hate to be the one who mentions the C-word so soon (I'm talking about Christmas! Get your mind out of the gutter) but somehow it's October. If you've ever decided to make a bunch of Christmas presents, or presents for any other holiday you celebrate, you know that starting too soon to the actually event always results in masses of stress. So I'm dropping this post well in advance in case you decide to give this project a go in time for Christmas. Massive thanks to Bombazine for doing all the work to make the perfect oven mitt pattern and sharing it with the world of us to enjoy for free. 

For the record: I only condone making presents for anyone if you absolutely want to, not because you think you should, and ONLY if that person has a history of appreciating handmade items AND values your time and skills. 


(image source: Bombazine)

Pattern type:

I love the description on the Bombazine website: 'This oven mitt is a quick and easy project designed to use up your fabric remnants and scraps. Perfect for beginner sewists, scrap hoarders, or any maker with an hour or so to kill.' The pattern and tutorial are combined in the same file that consists of four pages for home printing. It is clear and beautifully designed, and accessible by adding it to the cart on their website (no payment necessary). 

Sizing info:

This pattern is one size, and fits most adult hands. If you need to tailor the fit, you could try altering the scale on your printer settings to make it smaller or larger. 

Fabric info:

This is the absolute ideal project to bust some of your fabric scraps and leftovers that you may have hoarded from previous projects. For the outer layer, natural fibres are going to be your best choice to avoid any accidental melting when they come into contact with heat. The pattern recommends medium/heavy weight fabrics like drill, denim and thicker linens, however I think you could go as light as quilting cotton (or Ankara/wax print cotton like I've used for mine) if your insulating layer is pretty thick. If your pieces are large enough, you could cut the whole mitt from one fabric, or if the pieces are smaller, combine two fabrics for the different sides (as I have done). If your scraps are even smaller, you could go the extra mile and make a pieced-together/patchwork effect like the example above. The pattern also encourages decorative sashiko-style stitching if you have the time and patience (I do not).

For the middle/insulation layer, the pattern recommends using scraps of wool coating, felted wool blankets and so forth. For mine, I used scraps of wadding leftover from my Tamarack jacket project. My wadding is synthetic, so I'm guessing probably not suitable for use near flames. 

For the lining layer, pretty much any light-weight woven fabric would be suitable. I used some woven poly/cotton that used to be tablecloths that my mum made for our wedding venue! Once again, you could use one complete section of fabric, or piece together scraps if you have nothing big enough. 


Findings:

I really love how nicely designed and accessible this project is. It really is suitable it is for all levels of sewing experience, because you can make it as simple or as complicated as you wish. Aside from the patchwork and sashiko stitching, you could also amp up this project by hand- or machine-quilting the two sides before joining them if you wished. 

I actually made this batch last winter, so if I'm honest, the sewing experience is no longer crystal clear in my memory. I saved posting about them until now because it turned out to be such a fun, quick gift project, I wanted to share it in advance of another holiday season. I kept a pair for my own home, and the other three pairs were Christmas gifts for friends of mine (all of whom appreciate my time and skills!). I batch-sewed this lot over a couple of evenings, hoovering up pretty much all my leftovers of Ankara/wax print cotton.  


Would I make it again?

Definitely! It's great to have a project idea for a useful item that can be busted out at will, whenever the need arises. It's a great gender-free gift for pretty much any adult, and you don't need to know the tastes of recipient particularly well like you would if you were making something to wear. It would be a lovely last-minute house-warming present as well, now I come to think of it.... 

Wednesday, 15 September 2021

Slub Linen Arden Pants


I wanted to drop a quick post about the trousers that I was wearing in my last post about the Lou Box Top, because I feel they deserve some attention of there own. These days I only buy fabric if I have a very clear idea of what it'll become. Sometimes I even have a specific pattern in mind, sometimes not. And when I do by some fabric, I really try (but often fail) to use it before long, so it doesn't become another piece of stashed fabric. With this linen, I DID manage to use it within a few weeks of purchasing. WIN! Zoe, 1 : Stash, 0. 

Fabric:

A few months ago, Fabric Godmother (where I work part-time) got in some lovely, slubby linen in navy with white flecks (sadly now sold out, sorry). It had such lovely drape and body and movement, but I reminded myself that I hadn't sewn up the last lot of fabric I bought yet, so couldn't justify buying more at that point. Then a couple of weeks later I saw my colleague Claire wearing a pair of Merchant & Mills 101 Trousers made in the same linen and they looked AMAZING. Claire has incredible taste and buys fabric only when she sees something INCREDIBLY special. I decided that if Claire felt this was some good stuff, then it would be an investment to get some for myself.

For a few years now I've been interested in creating 'summer jeans': bottoms that are really comfy and that will go with so many other items in my wardrobe that they get worn ALL THE TIME during the warmer months. I felt that this almost denim-y look linen might fit the bill. 


Pattern:

There are soooo many elasticated-waist woven bottoms patterns out there now that it's almost impossible to keep track of them all. But the one that instantly appealed to me the most (apart from the Luna pants pattern by Made by Rae, which I feel is more suitable to very drape-y fabrics) is the Arden Pants pattern by Helen's Closet. I was lucky enough to receive this pattern for free shortly after it was released and I've tried it a couple of times so I had a good idea of the fit I could expect and the size I should use. 


I love the elasticated ankle views included in this pattern, but I chose to make the regular hem that I wear turned up hoping they will be suited to a wider range of outfit vibes. The construction of these trousers is very simple, but with some nice details like topstitched seams that should ensure longevity. In hindsight, I should have added some stabilisation to the pocket mouths though, because I'm pretty sure they will stretch out over time. 

The only other issue I have with these trousers is that I can't decide if the waist should sit higher up near my natural waist (which I like to look of more), or lower on my hips (which feels more comfortable but I don't like the way my belly protrudes a bit over the top!). I'm erring to the former/higher position, but I need to tighten the waist elastic to stop them from slipping down. The pattern calls for topstitching through the waistband after the elastic has been inserted. I really like the look of that, but I find it makes the elastic less effective and looser after the topstitching has been added. For future pairs, I should probably overcompensate and make the elastic too tight to begin with. Or include the step to insert a cord or tie through the waist so you can tighten them up when worn.


Thoughts:

In short: I have achieved my summer jeans! I have worn them A TON since making them (I'm wearing them right now, in fact). They look great with all sorts of casual tops, and I'm interested to see how far into autumn I can get away with wearing them before I feel too cold. I definitely plan to make another version or two of this pattern in the future, perhaps slimming them down through the hip ever so slightly. 

Sunday, 5 September 2021

Lou Box Top Kit


A couple of months ago I was the grateful recipient of a kit to make the Lou Box Top pattern. The pattern itself is by Sew DIY, however, the kit came from Craft & Thrift, purveyors of vintage, thrifted and deadstock fabric. Amy, owner of Craft & Thrift, was a guest on my podcast Check Your Thread recently, so check out episodes 5 and 6 to hear my super enjoyable conversation with her. 


In the kit you get the printed pattern instructions, the printed pattern pages (you need to stick them together), 2m of deadstock jersey and a recycled rPET Gutermann thread. The particular kit I received included some lovely, slubby black viscose/poly/cotton blend, but they have many different colours available. This may depend on the size you choose to make, but I found you could make two tops from the fabric length included.


The Lou Box Top pattern has been around for a while, so there are plenty of other versions out there to check out. It’s a pretty size inclusive pattern, going up to 56” bust I believe. I have so much time for fairly basic patterns that feature different versions, that can be used over and over (as Amy herself can attest to!). The pattern includes two necklines (I picked the scoop), three hem lines (I went for the curved), optional patch pocket AND it can be made in knits or wovens. You need to add a CB seam and small button closure at the back neck if using woven fabric.


For yonks I’ve fancied a slinky, ever-so-slightly-sheer loose T-shirt. They look so effortless and comfy. I’m delighted that I now have one! I’m absolutely keeping these kits in mind as a gift idea for someone that is fairly new to sewing, or at least is new to sewing with knits. 

Friday, 3 September 2021

Free Pattern Friday: Kids' Speedy Pants (Boxers AND Briefs Edition)


Welcome to my monthly 'Free Pattern Friday' feature, where I road test a free sewing pattern or tutorial: sometimes a children's one, sometimes an adult's one. I publish these posts every first Friday of the month, timed to provide inspiration for those who plan to get their sew on over the weekend. I firmly believe that, if you pick your projects carefully, sewing doesn't have to be a crazy-expensive way to clothe yourself and your family. Thanks to all the amazing pattern designers who have offered up their hard work for us to enjoy for free.

Today I'm writing about a free pattern that I've road tested and written about before, nearly two years ago in fact. I've also included it in a number of free pattern round up blog posts, plus I spoke about it in episode 4 of my new podcast, Check Your Thread. It's such a great pattern, and potentially so useful for parents/carers who like to sew, that I'm not even sorry that I bang on about it so much! We are, of course, talking about the Speedy Pants pattern by Waves and Wild (formerly Made by Jacks Mum). You can access the pattern by adding them to the cart on their site (you won't be charged), as well as via the Waves and Wild Facebook Group (I believe) and at the bottom of their regular newsletter, which I've subscribed to. 

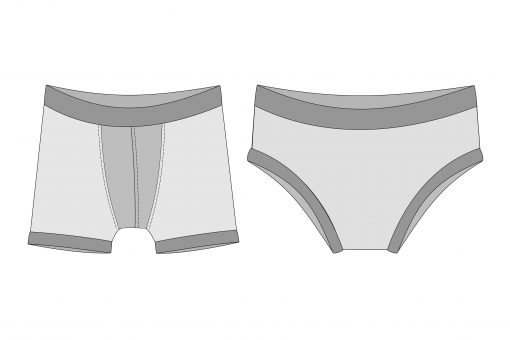
My previous post about this pattern can be found here, a lot of which I've copy-and-pasted into this one. However, I talked about only the briefs style in that post, and now that I've had a chance to try out the boxers style (both are included in the pattern, see spec drawings below), I've included more details about that version in this post. Thanks heaps to Waves and Wild for making this gem of a pattern available for free. 


(image source: Waves & Wild)

Pattern type:

As previously stated, the Speedy Pants pattern download includes briefs and boxers styles. Both styles are finished with strips of fabric which form the waist and leg bands: no elastic required. Each pair could be made entirely on an overlocker, however instructions for using a regular sewing machine are also included. 

The briefs pattern consists of a front piece, a back piece, a gusset, plus the dimensions to draft your waistband and leg band pieces. The boxers pattern is one main pattern piece that is cut on the fold at the centre back. There is also a front gusset piece (not seamed in the centre like the spec drawing above suggests, however), and the dimensions to draft your waistband and leg band pieces. 

The pattern files consist of instructions, print a home pattern pages, A0 pattern page as well as projector files. The print at home version (I haven't checked the A0) features the layers function, so you can print out only the size you require. 


Sizing info:

Both styles are graded to a generous size range of 6-12 months to 12 years. I've made countless pairs of these undies now across a variety of sizes, and find the fit pretty accurate, age-wise. That said, looking back at the original post I wrote about this pattern, I've realised that most of the pairs I made for my daughter when she turned six are still in regular rotation close to two years later! I think that the fabric bands tend to 'give' more than the traditional elastic used in undies-making, particularly over time with repeated wear and laundering. Therefore, these undies might have a longer lifespan than shop-bought undies.


Fabric info:

The fabric suggestion for this pattern is 4-way stretch jersey. I'd go further and say that a decent elastane/Lycra/spandex content is essential for the bands so that they hold their shape for more than a handful of wears, and generally advisable for the other pieces too for maximum comfort. As I highlighted in my Favourite Scraps Projects podcast episode, this is an excellent pattern to use if you have scraps of jersey to use up.

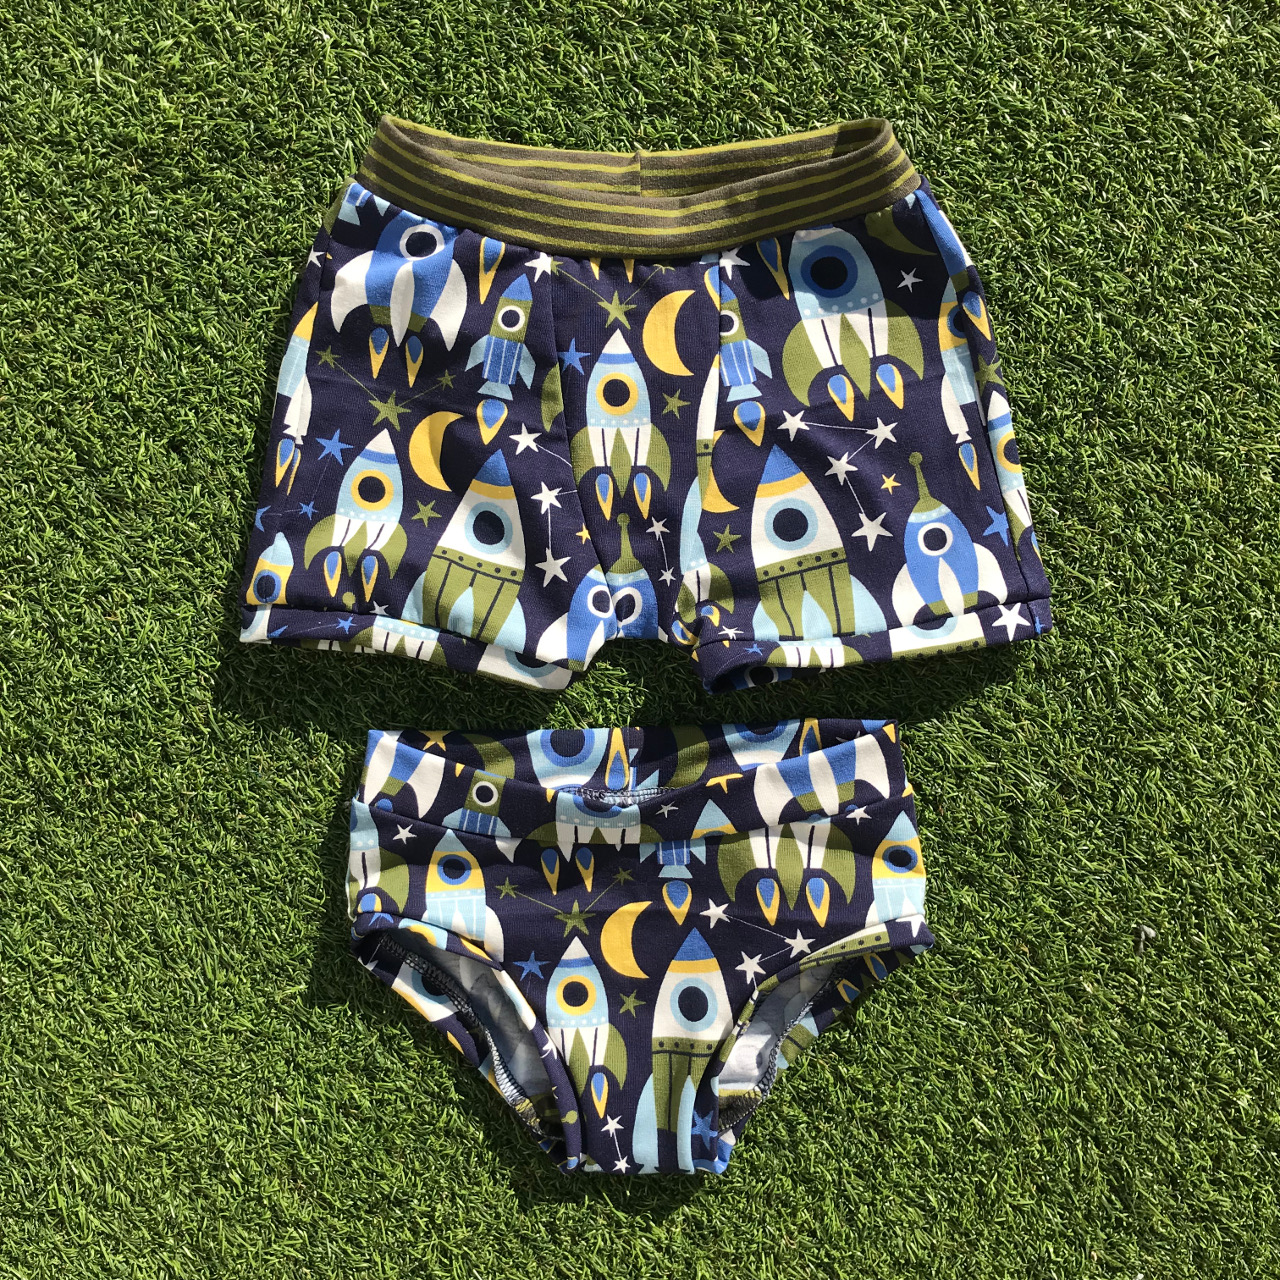
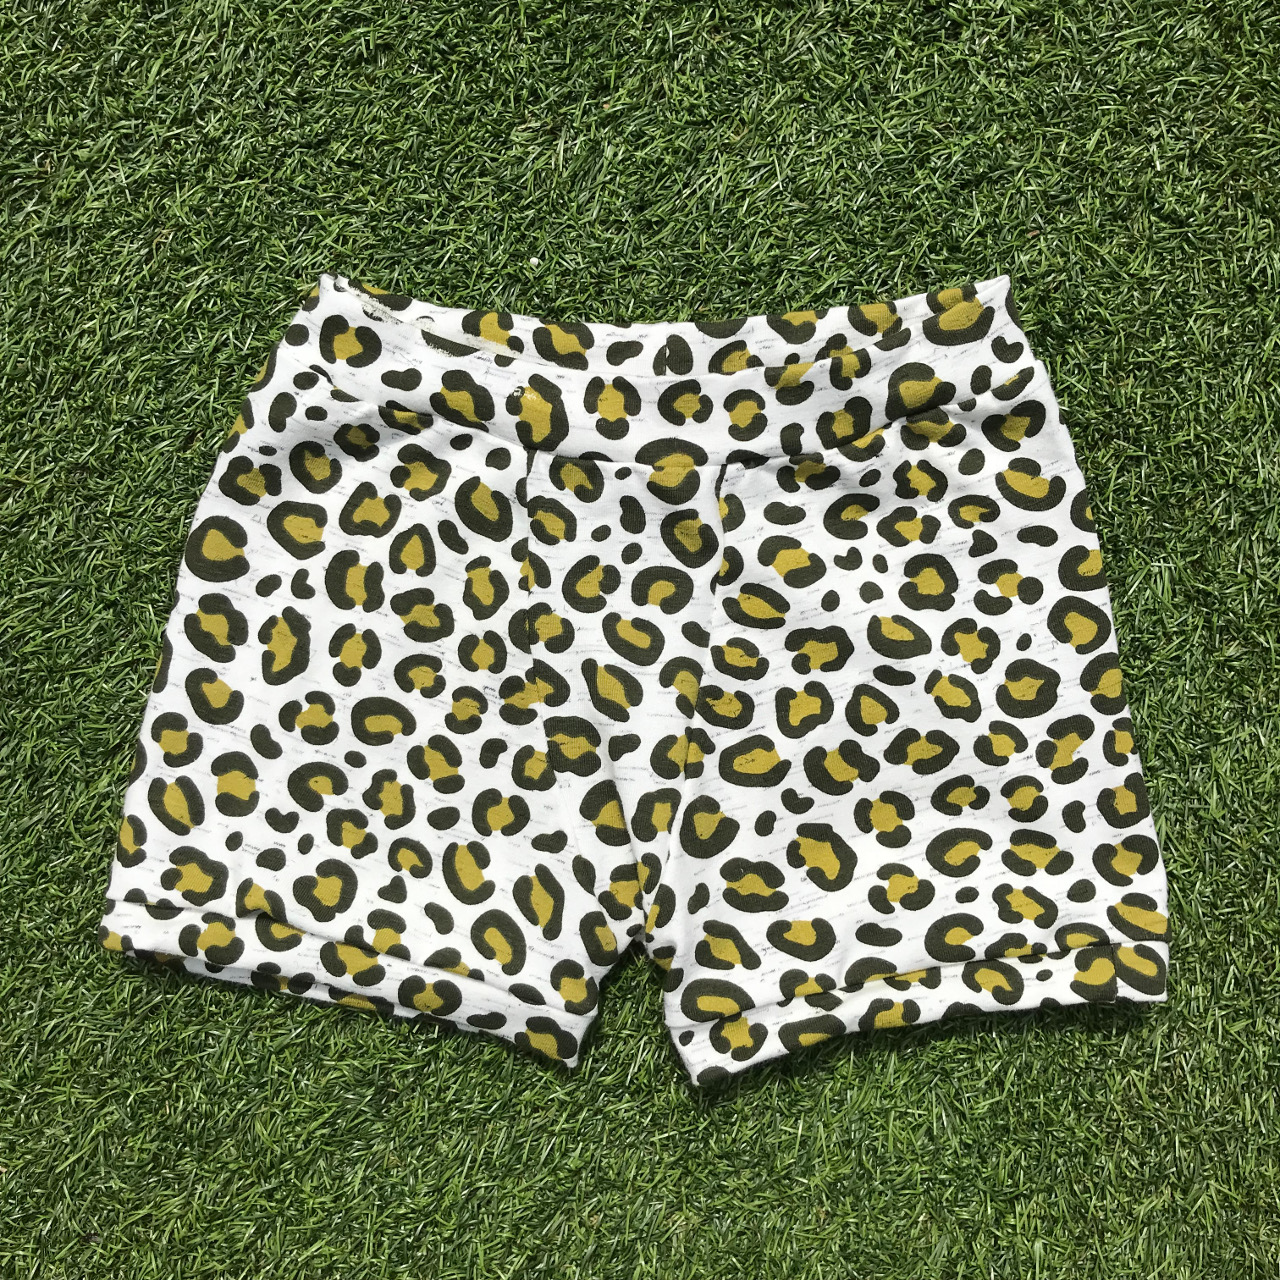
Because I've made so many pairs of undies using the briefs version of this pattern, I've been able to do plenty of experimenting and collecting of data to see how different jerseys behave (or don't) over time. By now I think I've got a fairly good idea of what's going to work well and have a long life. The way I approach selecting fabric for this pattern is to begin by dividing all my jersey scraps into three piles: 1) single jersey with great stretch and recovery (mostly cotton/elastane blends) that I know will be perfect for these pants, the band pieces HAVE to be made from this category, 2) other jerseys that will be ok for the fronts, backs and gusset, especially if they're combined with fabrics from the first pile, and 3) all the jerseys that were too thin and drape-y, or with poor stretch and recovery that are NOT suitable for this project. Then I see what I can use up and what fun combos can be made. However, as you can see, most of the pairs I've made using the boxers version so far consist of only one fabric all over because I had some larger pieces in my stash to use up. The boxers pattern doesn't lend itself quite so well as the briefs version to scrap busting because of that one main pattern piece. However, I have made side seams in a couple of these pairs so the pattern pieces could fit on smaller pieces of fabric. 


Findings:

As you can probably tell, I'm so happy to have found this pattern! The pattern itself is well produced, and the instructions are illustrated with step-by-step photos and easy to follow. The wide size range should see most kids through to when they start to wear adult sizes. So if you have a big enough jersey scraps bin, plus sufficient will and patience, you may never need to look elsewhere for kids' pants again. 

Clearly, making these pants is addictive, but I must admit that making a massive batch in one go can get a bit much. Pinning tiny leg bands into tiny leg holes can definitely start to get old. Instead, I would recommend making a pair or two every now and again, as a palette cleanser between larger sewing projects perhaps. That's one of the reasons that I always make them a size or two in advance: so there's no need to panic-batch sew a whole stack of pants.

My little boy hasn't started wearing these boxers yet so I haven't had any feedback, but I wonder if hemming the leg holes rather than finishing them with bands might be more comfortable. I know my husband didn't like a pair I made him years ago that had a banded hem. I think for future versions I'll try lengthening the legs of the boxer style pattern and hemming the bottom edges instead of the bands, which will reduce the fiddle-iness also! 

For my previous pairs using the briefs version of the pattern, I made a couple of tweaks to the fit. For both Frankie and Dolores, I ended up raising the waistline at the centre back fold by 1cm, blending the curve down to the original waistline by the side seam. And for Dolores, I found that the gusset area was too wide: there was just too much fabric there. To amend this, I narrowed the front and gusset pieces by 0.75cm-ish where it was needed, therefore narrowing it by 1.5cm-ish in total. I found for Frankie that this wasn't necessary. 

The only other point I'd suggest is to include some kind of label or loop of ribbon so they can identify the back quickly.


Customisation ideas:

  • Try piecing together smaller pieces of really small pieces awesome fabrics until the sections are big enough to cut the pattern shapes out of (I think this would work better for the briefs style)
  • Use swim Lycra to make swimming trunks or bottoms
  • If you have some thin and soft enough, replace the leg hole bands on the briefs version with fold over elastic or special undies elastic
  • As mentioned above, consider lengthening the legs of the boxer style pattern and hemming the bottom edges instead of adding bands
  • Use width, soft elastic around the top edge instead of a fabric band for a more 'shop-bought' look, if that's what you're after


Would I make it again?

OF COURSE. I have already used this pattern to make what feels like a trillion pairs of little undies. And now that I've busted out the boxers style as well, I have renewed interest in making heaps more! 


Related Posts Plugin for WordPress, Blogger...