Friday, 23 August 2019

Summer Hat-aganza!


Where we live, it felt like summer 2018 consisted of three months of back-to-back, warm, sunny days. No doubt due to climate change, the consistency of the sunshine and warmth was unlike any summer that I can remember. If this alarming trend is here to stay, then I'm going to have to up my skin-protection game. I'm very good at putting sun hats and sunscreen on my fair-skinned kids, but I'm pretty rubbish about protecting myself, and last summer I frequently came home from a park or beach session with a sunburnt scalp and hairline. So at the beginning of this summer, I set out to make sun hats for one and all. 


Frankie's bucket hat:

Frankie still fit in Dolores's old sun hats but most of them are looking a bit ropey, so I decided to make him a fresh one. I reached for my TNT bucket hat pattern, the excellent and FREE Oliver + S Reversible bucket hat pattern (that I have previous used here, here, here and here). I made him the size Medium with no changes. I was determined to use fabric from my stash of woven scraps and small pieces for all the hats I planned to make. I had a sizeable piece of this tomato-red and white canvas-y stuff that I bought for one of the samples of my Anya shoulder bag pattern, and after an extended session of pattern piece Tetris, I was able to squeeze both Frankie and Dolores's outer hat pieces from this one small piece of stash. I used another scrap for the lining, this time some solid teal/turquoise/green quilting cotton that had been leftover from a commissioned sewing project from a few years ago. 


Dolores's Serpentine hats:

Although Dolores still fit into the crown of her bucket hats, the brim was no longer actually protecting her face from the sun. I could have extended the bucket hat's brim piece of course, but having tried that approach here, I wasn't sure that the proportions would look very good. I'd already had my eye on the Elbe Textiles Serpentine hat pattern for myself, but I had a minor revelation and realised that it might work well for Dolores also. Her face would be suitably protected from the sun, plus I felt that she would enjoy the drama of a wide-brimmed hat! 

Unsurprisingly, her 5yo head was too small for this adult's pattern. I did some measuring and calculated that printing out the pattern at 95% scale and cutting the smallest size should fit, which it did very well. The first version (red with white print) fit her well around the crown, but the brim, which I had interfaced with two layers of medium-weight fusible interfacing, was too wide and floppy. The lining was a scrap of awesome quilting cotton that I scored long ago at a fabric swap. It had a repro print of 1950s children playing, and although it had been initially okay-d, she later claimed to dislike it. She tended to wear this hat with the brim folded back, 1990s Blossom Russo style, and actually got a fair bit of use from it until she left it at school on the last day of the school summer term (sigh).


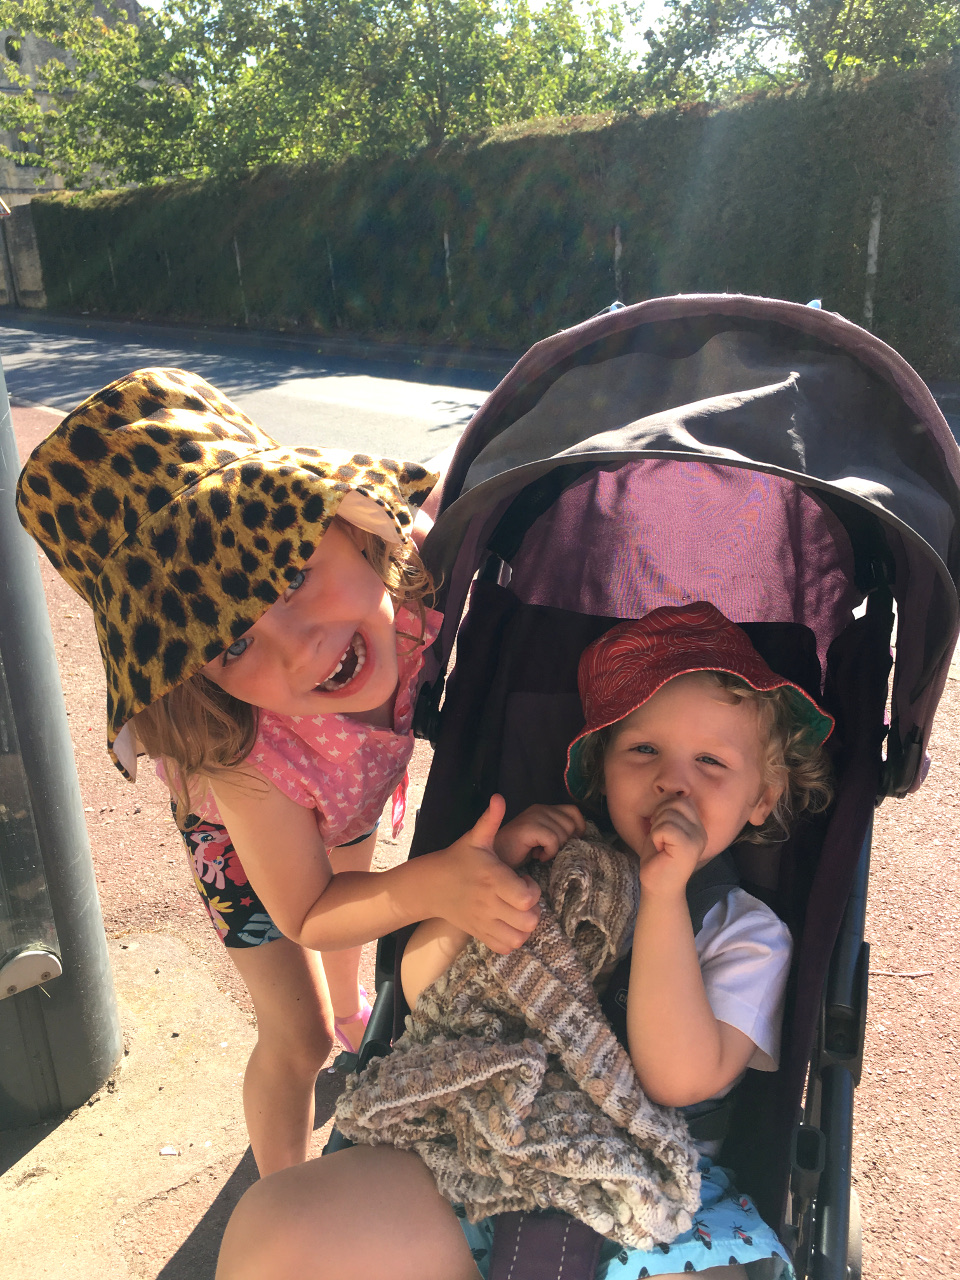
With version 1 locked up in a classroom for the duration of the summer holidays, I quickly had to make another before we left on our trip to France, a few days later. I was running out of suitable scraps of fabric that she approved of, but thankfully she gave the thumbs up to this leopard print fabric that was left over from this coat that I made several years before she was born. I used some solid cream cotton twill for the lining, reduced the depth of the brim a bit, and interfaced with fairly thick, sew-in interfacing instead of the fusible, which keeps the shape far better. 


Mum's Serpentine hat:

Full disclosure before you marvel at all this selfless sewing: the Serpentine hat that became my mum's was actually intended for me. My head measurement corresponded with the size Small, so that's what I made, despite being skeptical as my head has never been described as small! Using scraps from this pinafore and this dress, and using the thick-ish sew-in interfacing, annoyingly for me, it came out too small. But my loss became my mum's gain when she declared that she could make some use from it. Hurrah!


My Serpentine hat:

My second version was made from red canvas fabric that I'm guessing is a cotton/something-synthetic blend that I have no recollection of entering my stash. I used the same fabric for the outer and lining because by this point I just wanted to get the damn thing finished. The fit is much better, but I dislike the look of the fabric, especially now it's spent time crumpled up in my bag. 


Thoughts:

This summer hasn't proved as sunny as last year's, and none of these hats became as indispensible as I thought that they would be. They did get some moderate use, plus who knows what future summers hold, so I don't feel that making them was a waste of time or fabric. I'm a big fan of the Serpentine hat pattern though, and I'm pleased that I bought it. Before next summer, I'd like to make myself another, probably in denim, perhaps with gold jeans-style topstitching. Then we should all be set for hot weather head wear, unless Frankie has a growth spurt and I need to bust out the bucket hat patten in a Large. 


Friday, 9 August 2019

Tricolour Yari Playsuit


I've still got a sizeable list of warm-weather garments that I hope to make before the summer is out. I decided to prioritise this playsuit because I really wanted to be able to wear it on the trip to France that we went on last week. In my attempt to save time, I decided to forgo making a toile/muslin (doh! How many times must I relearn this lesson?!), my thinking being that, with all those seams, any alterations would be a case of a simple pinching-out here or a small letting-out there. WRONG....


Pattern:

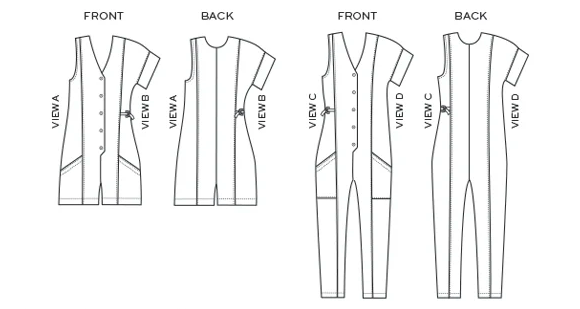
I snapped up the True Bias Yari Jumpsuit pattern using the discount code during the last week of Me-Made-May 2019. I've wanted a playsuit for years, so it was time that I FINALLY make myself one. I planned to make View B: the shorts-length with extended sleeves (although I didn't have enough fabric for the sleeve bands) with the waist ties (but no D-rings) to create some shape at the middle. The size chart put me at a size 8 for the top half, blending out to a size 10 at the hips, so that's initially what I did. Having looked at at the hashtag on IG, I saw that a lot of people's versions came up a bit long in the body, with the crotch a bit too low. However, when making trousers, I usually have to 'scoop out' the crotch, so I decided to proceed with the pattern as-is. 

(image source: True Bias)

I tacked/basted it all together and tried in on. Oh. Not good. I wish I'd taken a picture at that point for you to see, but basically the whole thing was too big, and the crotch was wayyyy too low. I went back to the pattern and graded between the size 6 and 8 (rather than the size 8 and 10), and pinched out 2cm from the length at the waist to bring the crotch curve up to nearer where it belonged. I unpicked the whole thing and recut each piece, and removed the 2cm excess length by folding it out and stitching at the waistline so, when all the panels were joined back together, it would just look like a waist seam. After making all those tweaks, the 'proper' construction was a breeze, and it all came together easily. 


At the tacked-together fitting stage, I decided the waist ties weren't going to be for me. I wasn't convinced that they would bring the waist in without creating some odd folds or tucks at the sides, so I decided to stitch some elastic in at the sides of the waist to bring in that fullness more evenly. 

Because I didn't have enough fabric for the sleeve bands, I finished the armholes with bias tape as per the instructions for the sleeveless version. 


Fabric:

As you can see in the photo above, this fabric has an awesome chevron-y print in red, white and blue. The base is a medium-weight woven fabric that I suspect to be a poly/cotton blend, and I it has lived in my stash for a million years. I have had so many plans for this fabric over the years, but I'm pleased to have finally turned it into a useful item, even if this project really made me work for that outcome! It's likely that this fabric is actually vintage, from the 1970's perhaps, as it was really narrow. The limited amount meant that, not only did I have to omit the sleeve bands, but I also had to use something else for the for the neck line facing. I used a scrap of 4oz washed denim instead, I really like contrasting facings though, so it's possible I would have used a different fabric for the facing anyhow. 

The gold-coloured metal buttons also came from my stash, having previously been used on this cardigan. I harvested the buttons from that Jenna cardigan before it was sent it to the textile-recycling bin due to pilling fabric and not having worn it in years. 


Thoughts:

Why oh why do I not ALWAYS make toiles when attempting new sewing patterns?! In the end, this garment has turned out pretty well and is definitely wearable. But it would have been so much better to have ironed out all the fit issues on a separate toile before snipping into my precious final fabric, rather than stressing myself out by trying hard to salvage my final fabric/only version.  

So, after all the faff, have I nailed the fit? I'm not sure. The Yari jumpsuit is a lovely design, and it I think it successfully walks a difficult line between loose and fitted. I do find though, when I wear it, that I have what feels like excess fabric around the front crotch/hip area. I think that could be reduced by making an adjustment to shorten the front rise, however I'd be fearful to over-fit this and make it too restrictive and therefore uncomfortable to wear. Although it doesn't look like it in these photos because my photographer is taller than me, this playsuit is really short! Wearing it whilst sitting down, I was repeated alarmed to be presented with so much of my own thighs! It kind of felt (and I fear, looked) like I was just wearing my pants!

All that said, it is a successful garment and I'm happy to have it in my wardrobe. I'm tempted to try the pattern again, probably the longer version in a solid black or navy linen. But I'm on a fabric buying ban until my stash has been substantially whittled down, so future Yaris are likely to occur next Spring at the earliest. 

Friday, 2 August 2019

Free Pattern Friday: A Review

Welcome to my monthly 'Free Pattern Friday' feature, where I road test a free sewing pattern or tutorial: sometimes a children's one, sometimes a women's one. I publish these posts every first Friday of the month, timed to provide inspiration for those who plan to get their sew on over the weekend. I firmly believe that, if you pick your projects carefully, sewing doesn't have to be a crazy-expensive way to clothe yourself and your family. Thanks to all the amazing pattern designers who have offered up their hard work for us to enjoy for free.

When this post goes live, I will be on holiday in France (whoop whoop!). The weeks running up to my trip has been jam packed, and subsequently, I do not have a new pattern review to share with you this month. However, I have been publishing these posts for over a year and a half now, so rather than leaving my blog blank for a month, I thought it might be fun and/or useful to have a look at all the women's and kid's patterns and tutorials that I've previously road tested. So (if the html does what I hope it it will), click on any of the images below that take your interest, and you will be magically pinged to the original post. I'll be back with a fresh, new, free pattern review on the first Friday of September (and with other projects before then). 


Women's Durango Tank
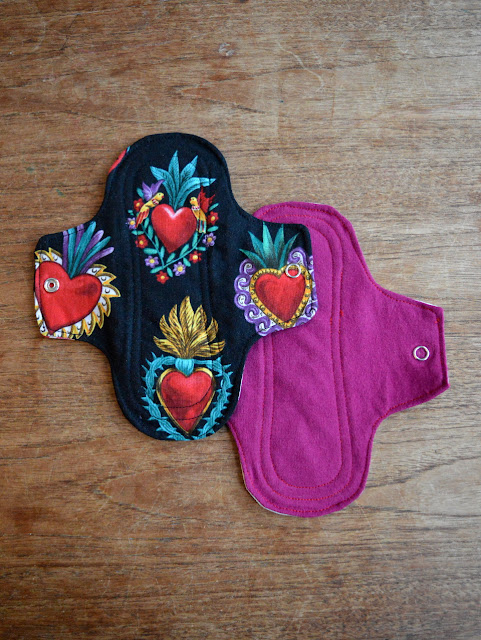
Washable menstrual Pads
Handkerchiefs
Handkerchiefs
Kid's Flora Capri Leggings
Kid's Tank
Kid's Tank

Women's and Kid's City Gym Shorts
Women's Matilda Leggings
SEO-Kid's Retro Sweatpants
Kid's Retro Sweatpants
Kid's Flutter Sleeve Top, Dress & Romper
Kid's Knit Skirt
Kid's Knit Skirt

Women's Lago Tank
Women's Lago Tank
Women's Knit Headband
SEO-Kid's Hoodie
Kid's Hoodie
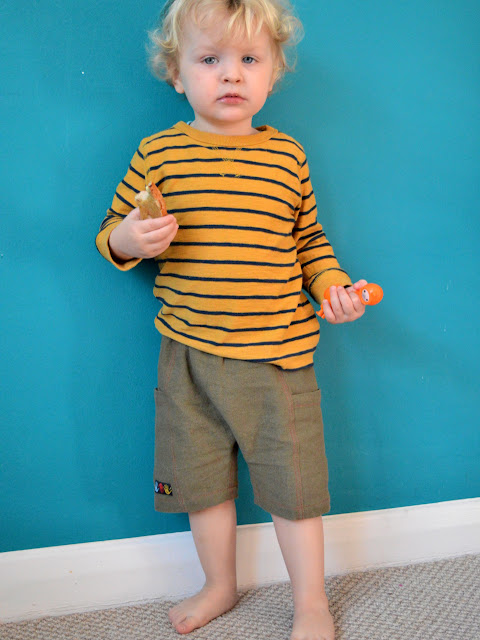
Kid's Olli Shorts
Kid's Olli Shorts
Kid's Rowan Tee
Kid's Rowan Tee

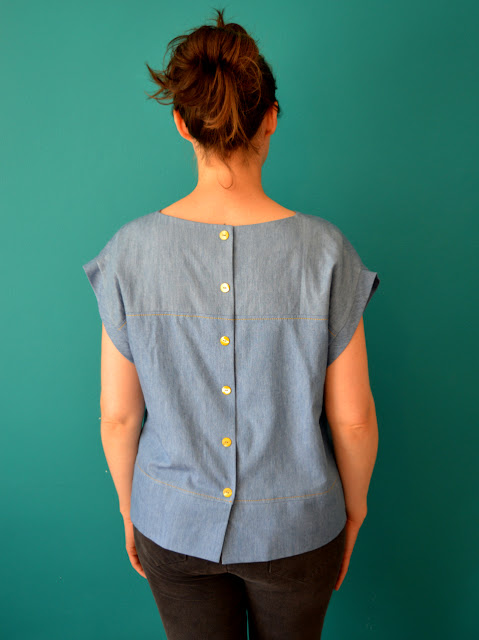
Women's Boxy Top
Women's Boxy Top
Women's Super Basic Tank Top
Kid's Sunny Day Shorts
Kid's Bummies
Kid's Bummies
Kid's Dulcie Dress
Kid's Dulcie Dress

Tuesday, 23 July 2019

Denim Pinafore Cuteness


I've made Dolores a few garments in recent months that have not been well received. So annoying! Despite me running the garment concept by her first, by which I mean showing her the intended fabric and pattern, and her making subsequent positive sounds, she's then either down-graded the finished item to sleepwear, or flat out told me I can take it to a charity shop! (This dress is the most recent garment that she declared could be given away, although I'm hanging on to it and waiting to see if she'll warm to it when she grows a bit and the bodice fits her more closely.) 


I'm not sure if it's because the garments didn't end up looking like she pictured in her head, or that she was just being positive to make me happy when I first pitched her my plans. I've been careful not to let my frustration show, for fear of making the whole me-sewing-for-her thing emotionally charged in any way. Anyways, when she recently requested that I make her a specific garment, a denim pinafore like my denim leftovers Cleo, I was thrilled. I hoped that, if I stuck closely to her brief, I would be able to put some of my sewing time and energy into making her something that would definitely get some wear.


Pattern:

To fulfil the brief of child's denim pinafore, I bought the Freddie dungarees pattern by Two Stitches, which includes a pinafore version as well as the dungarees. I probably would have bought the Penny Pinny pattern by Made By Jack's Mum instead if I'd seen if before I'd bought the Freddie pattern, as it's closer in appearance to my Cleo. However, at least I now have the dungarees version of the Freddie pattern as well, that I could use for either of my kids in the future.  

(image source: Two Stitches Patterns)

The paper version of this pattern takes the form of a cute little booklet with stitched-in instruction pages, and a section where the folded pattern sheets can be tucked away. The booklet includes a page where you can add your own notes, which was useful because I found quite a few things whilst I used this pattern worthy of note. Generally speaking, this pattern was very pleasant to use, however I have one massive gripe which is the tiny seam allowance. I'd be cool with a 6mm seam allowance on a knit project, however on a woven garment like this that has lined section and parts that require turning through, it felt just too small. I wish I'd noticed this before I cut out my traced-off pieces, otherwise I would have added extra to make them 1cm or 1.5cm instead. 


I had a couple of other minor issues with this pattern that may or may not be worth mentioning: a flaw in the cutting guide/lay plan, plus no indication of how far from the edges to stitch the rows o topstitching. Previous experience of making adult-sized denim pinafores and dungarees lead me to make a couple of other additions/changes. I felt the addition of interfacing was necessary on the button plackets and on the inside of the front bib around the areas where the buttons would be applied. The jeans buttons that I intended to use get subjected to quite a bit of tugging, so I wanted those areas stabilised. I changed the method of construction for the straps, plus I made the straps narrower so they would fit the buckles without having to be scrunched up like the sample pictured on their website. I also added topstitching on the straps, and stitched through the elastic at the back to make gathering sit evenly. 


Fabric:

Aside from the additional dungarees view that's included, the other thing the Freddie pattern has over the Penny Pinny pattern is that it is comprised of lots of pieces and panels. On one hand, that made it more time consuming to trace and cut out, but on the other, it allowed me squeeze this pinafore from fabric harvested from a failed garment project. About four or five years ago, I got a length of bark weave stretch denim from Fabric Godmother that I attempted to make into some cigarette trousers using a pattern from the Gertie Sews Vintage Casual book. That project was a total bust. I lacked any knowledge of trouser fitting at that time, but even with both my mum and the Pants for Real People fitting book at my side for help and advice, we just could not work out how to improve the monstrosity that I was attempting to fit to my body. In the end, I just abandoned that project (and trouser making generally for a number of years). I'm so glad that I kept that fail though, as it was the perfect weight of denim for this project. The slight stretch content is going to make it extra comfy to move around in, plus I'm excited to see how the denim fades after a few washes. 


The fabric I used for the lining was also from my stash. This ditsy faux-liberty cotton lawn has been hanging out in there for years (I used some of it for this blouse, among other projects). After this pinafore project, I used the very last of it up by making a couple of hankies for a friend. 


Thoughts:

Aside choosing to make deviations on the fly here and there, this was a very satisfying project. You know me, I loves me some topstitching. I'm still questioning if another pattern would have given more a smoother ride and a better finished item, but generally I'm really happy with how it turned out. In addition to the points I made above, I'm not sure that I'd line all the pockets next time. You don't really get to enjoy the floral fabric when using the pockets, and I kind of dislike the flashes of contrast that you get round the edges of the pocket (despite me cutting the pocket linings slightly smaller that the outer pocket pieces to avoid that happening). I'm not entirely sure what the point of the elastic at the back is either, maybe it makes more sense for the dungarees version. If I use this pattern again, I probably won't bother with the elastic in the back, as I just don't feel the fabric really needs 'controlling' back there. Speaking of fabric, I am thrilled from both a financial AND a sustainability angle that I was able to stash-and-scrap bust this whole project. 


But my thoughts on this garment don't really matter, do they? What DOES matter, is that Dolores seems to have embraced this pinafore (phew)! She wore it shortly after its completion when we went to visit some friends in London, and she looked so cute in her mini-me look. The weather has got super hot lately, so I don't expect to see her in it again for a while, but I hope she embraces it again, and can be encouraged to wear it with long-sleeved t-shirts and knitwear underneath when the weather cools back down. 

Friday, 12 July 2019

Turquoise Ginger Jeans: Lounge Camouflage


It wasn't until I came to resize these images, that I realised just how similar my new jeans are to the colour of our lounge wall! However, this is the only decent spot in our flat for taking photos, plus if you'd seen how many toys I had to clear out of the way to get these pics, you'd understand why I'm not going to re-shoot them. 

Pattern:

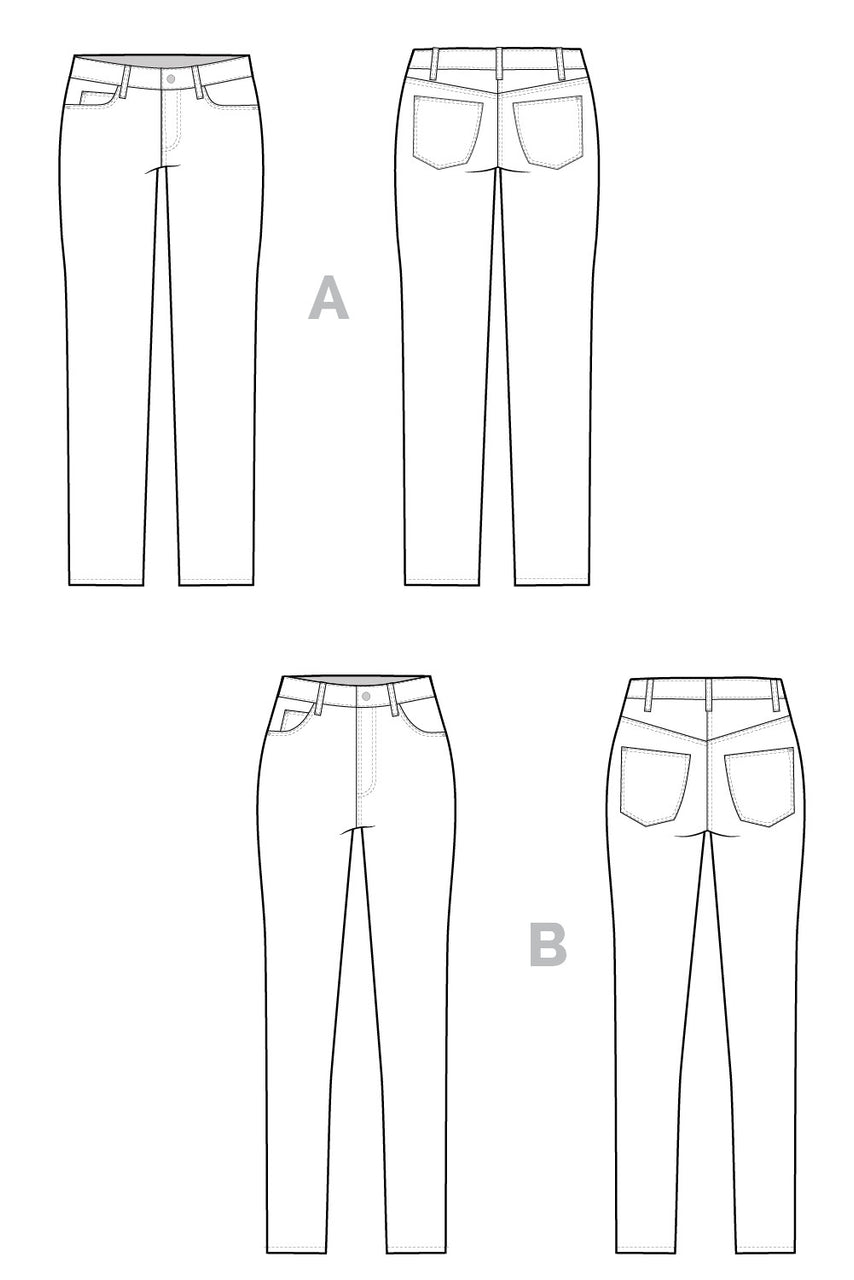
Maybes you remember my first crack at the Closet Case Patterns Ginger Skinny Jeans pattern? Well those have been worn sooooo often, that I knew another pair would be in the pipeline before long. What I have found with my first pair though, is that the low-rise option (view A) really is low. I wouldn't feel decent wearing them without a vest (AKA camisole/singlet) tucked in to them, especially if I planned to sit or bend down. That's fine for the three quarters of the year during which I wear vests, however I wanted my second pair to have year-round wearability. My feeling was that the high-rise option (view B) of the original Ginger jeans pattern would have been too high for me, and I considered buying the mid-rise version until my friend Paula told me that Closet Case had generously published a blog post with a tutorial for drafting your own mid-rise version. Let's do this!

Ginger Skinny Jeans pattern // Technical flats // Closet Case Patterns
(image source: Closet Case Patterns)

To draft a mid-rise pair, it is suggested that you start with the original high-rise option (view B), as the proportions of the pockets and such are more suitable. I chose to make the rise exactly in between the views A and B. I took some additional body measurements to find out what I measured around the waistband of my view A pair, and what I measured around where I intended my new waistband line would be. That different of measurements was very useful when following the steps in the post. I should point out that Closet Case's tutorial doesn't include shortening the fly piece, which does need to be done. 


I'm not the first to say that each time you make the Ginger jeans, or any pattern that uses a fabric with some stretch content, it's important to have a mid-way fitting sesh. Even if the fit on your last pair was perfect, each stretch denim will have slightly different properties so can't assume your next pair will also be spot on. I was relieved that, after all that pattern tweaking and the different denim, the fit of my second pair before I attached the waistband was great. After I tacked the waistband on, I tried them on again, but found them too tight at the waist, so I unpicked and reapplied the waistband,  easing in some extra length. 

One fitting note that I didn't discover until they were all finished and being worn, is that I think they are too wide around the ankle. You can see it pretty clearly in these pics. At the moment the weather is pretty warm, so I'm wearing them with the hems rolled up a bit. However, when it cools off and I want to cover my ankles up again, I'll unpick the hem and take some of that width out from the side seam. 


For the topstitching on the back pocket, I used one of the downloadable designs that you can access from the Closet Case Patterns site when you sign up for their newsletter. I transferred the design to the pocket pieces using white carbon paper and a tracing wheel, and I'm soooo happy with how they came out. I would definitely recommend the designs that use straight rather than curved lines for getting a clean result.  


Fabric and Interfacing: 

If you recognised that this turquoise denim was one of the nine pieces of stash fabric I pledged to use up in my #2019makenine plans, then you get a million points. This project is my fourth completed project for that challenge, although a lot more sewing has been happening that aren't part of those make nine plans. This fabric is some turquoise-y stretch denim that I bought from Fabric Godmother a few years ago. Since buying it, I'd fallen out of love with it, but now that it's made up into a garment that feels good to wear, I'm a fan again. The elastane/Lycra content must be pretty high, because it has a kind of synthetic-y sheen, but because of that content, it feels like I'm basically wearing leggings rather than jeans. 


I had a long debate with myself about what to use for the facing and interfacing for the waistband. Feeling comfortable, particularly round my waist is of MASSIVE importance to me, and can totally dictate whether or not a garment I've made ever gets worn. I can't remember if I used interfacing on the waistband of my first pair of Gingers, however I used a non-stretch woven cotton for the waistband facing, so that waistband basically has no give. However, due to the fact that that pair sits so low, I still find them comfortable to wear, as long as I have a belt to stop them heading south.   

But because this second pair were going to be sitting higher up, closer to my natural waistline, I wanted to ensure more give so that I wouldn't feel constricted. I decided to use the same stretch denim to face the waistband, plus I applied fusible interfacing for knits to the waistband piece itself. The result is a pleasingly stretchy waistband that definitely does not feel constricting. Howevs.... they do start to migrate down a bit whilst they are being worn. I'm wearing a belt with them to counteract this, which slightly nullifies the point of a stretchy waistband. Any thoughts?!


Oh but wait! Did you see my pocket bags?! I got to use up an awesome remnant of quilting cotton that I'd bought from Ditto in Brighton yonks ago. It's got a cute 1950s kitchen print which is kind of at odds with a pair of turquoise skinny jeans, but I think that makes me like the combo even more. 

Thoughts:

You've probably already gathered that I'm really into this me-made! I promise to dig deep and sort out the excess width around the ankles so that I'll like them even more. I find jeans making sooooo satisfying. This year's Me-Made-May challenge taught me that a pair of black skinny jeans would be a useful addition to my wardrobe. So when Autumn hits, I'll keep my eyes peeled for some great black stretch denim and use this pattern exactly as it is for those. 


Friday, 5 July 2019

Free Pattern Friday: Kids' Olli Shorts and Pants


Welcome to my monthly 'Free Pattern Friday' feature, where I road test a free sewing pattern or tutorial: sometimes a children's one, sometimes a women's one. I publish these posts every first Friday of the month, timed to provide inspiration for those who plan to get their sew on over the weekend. I firmly believe that, if you pick your projects carefully, sewing doesn't have to be a crazy-expensive way to clothe yourself and your family. Thanks to all the amazing pattern designers who have offered up their hard work for us to enjoy for free.

If you're looking for a summer shorts pattern for younger kids that's more interesting than your standard basic shorts pattern, then if you haven't already, you're going to want to check out about the Olli patternMisusu Patterns have a very generous selection of free sewing patterns in their range, and after a very pleasant experience trying their free Rowan tee pattern, I was very excited to download this one also. To obtain this pattern for free, you will need to join their Facebook group, Misusu Patterns Sew & Tell, to access a code that you can then use at the checkout. Thanks Elles for offering this pattern up for free. 


Pattern type: 

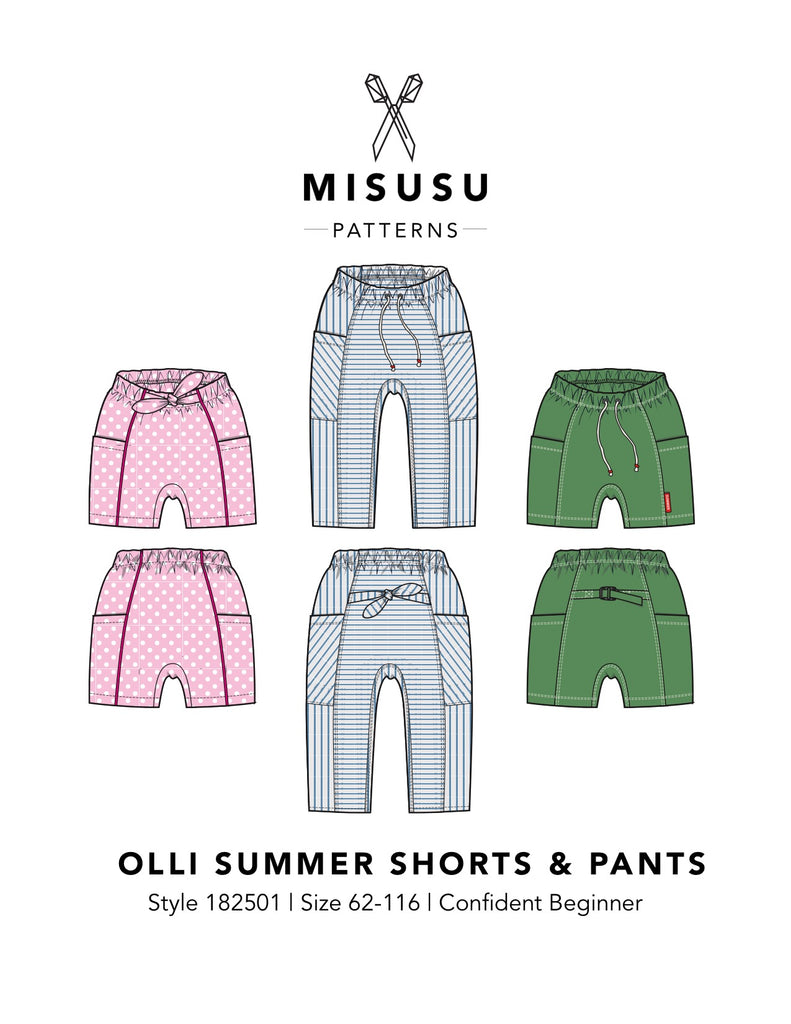
The Olli shorts and pants/trousers patterns have a modern, baggy look and feature big side pockets and interesting panels. Pattern pieces for bow or buckle strap details are included, plus there are squillions of ways you can monkey with this pattern to create different looks. 

Olli Shorts & Pants PDF Sewing Pattern 
(image source: Misusu Patterns)

Sizing info: 

This pattern is graded for sizes 62 to 116, which refers to the child's height in centimetres, and roughly equates to ages 0 - 3 months to 5 - 6 years. I would DEFINITELY recommend going by height rather than age with this pattern. After checking his height, I ended up making a size smaller than Frankie's actual age, and the fit has worked out really well. It might not be such an issue if you live somewhere that is hot for a large portion of the year, as shorts that turn out a bit big will get worn in due course. But where we live, the shorts-wearing window of time is limited to a few months, so I really wanted to make sure I was making a garment that he could wear, like, now.


Fabric info:

This pattern is designed for wovens, and includes cotton, double gauze, flannel, denim, ribcord (needlecord?) and linen as suggestions. Let it be known that this pattern is excellent for scrap-and-small-piece busting. Frankie needed plain-ish bottoms to go with some jazzier tops, so I used leftovers of army green cotton/linen mix from my Burnside bibs, and some black stretch denim leftover from some jeggings. The various panels that make up these shorts means that you can cut the pieces from weird-shaped offcuts from previous projects, or even pieced together from a mix of fabrics that are different colours or prints, but have a similar weight. The versions I've made here are a little dull, but you could really go to town with the prints if you so wished. I'd LOVE to make some from African wax fabric, perhaps mixing up scraps of different print designs.  


Findings:

This Olli pattern is a really good advert for Misusu patterns. The instructions are so clear and well illustrated, and all the pieces come together flawlessly with everything matching up as it should. I love the look and fit of the finished garments, and it's wonderful to have a pattern that can be squeezed out of leftovers and remnants that you may already own. The basic pattern itself is interesting enough that a fantastic result can be achieved without needing to add anything. However, you can also get super creative and have a lot of fun dreaming up a really unique garment.

The Olli shorts and pants are clearly designed to be unisex garments, and initially I printed out two copies in different sizes (this PDF pattern has the layers function), one for Frankie and one for Dolores. However, after making Frankie's, I decided not to use this pattern for Dolores because she's annoyingly, stereotypically gender-minded when it comes to the fit of her clothing, and I know that sadly she wouldn't want to wear a pair of shorts with a baggy fit such as these at this point in time. 

Customisation ideas:

Rare is a pattern as customisable as this one! Here's some ideas:
  • Go crazy with your scraps and make a mash up of different prints for each of the panels
  • Alternatively, play around with colour blocking by using two or more solids fabrics
  • Monkey with the rules and ignore the grainlines to make interesting effects using striped, checked or printed fabrics. I'd love to do this with needlecord
  • Add single or double rows of visible, contrast topstitching. I used regular sew-all thread on the army green pair because I wanted a subtle look, but you could use upholstery or full on topstitching threads for a bolder effect
  • Insert piping, braid, ric-rac or pom-pom trim into the vertical seams
  • Apply braid, ric-rac, lace etc at the back of the top edge of the pocket piece so it peeks out from behind, or stitch it across the pocket piece just below the top edge like on Frankie's black pair
  • Add a button and buttonhole to each pocket so they can be closed up
  • Stitch on ready-made patches, or make your own like I did on the army green pair by using a section of woven ribbon with a cute motif
  • Shorten the pants version to 3/4 or 7/8 lengths for capri or clam digger styles. 

Would I make it again?

A number of months passed between making these two versions, so technically I have already made this pattern again! But I definitely see more versions in the future. I may prep the next size up to have on hand so if I have any suitable leftovers from future projects, I can cut some pairs out in advance of next summer. 
Related Posts Plugin for WordPress, Blogger...