Friday, 7 October 2022

Free Pattern Friday: Neck Warmers for All


Welcome to my monthly 'Free Pattern Friday' feature, where I road test a free sewing pattern or tutorial: sometimes a children's one, sometimes an adult's one . I publish these posts every first Friday of the month, timed to provide inspiration for those who plan to get their sew on over the weekend. I firmly believe that, if you pick your projects carefully, sewing doesn't have to be a crazy-expensive way to clothe yourself and your family. I also firmly believe that pattern designers deserve to be properly paid for their work, so if you enjoy using a pattern and can afford to do so, make sure you support that designer. Some designers' websites offer the option to make a donation, alternatively you can buy one of their paid-for products. If you can't afford to do so, you can support the designer by sharing your project via social media to help draw more attention to their work. Thanks to all the amazing pattern designers who have offered up their hard work for us to enjoy for free.

You may or may not know that I recently made a two-part mini series on my podcast, Check Your Thread, about sewing and saving. In it I explored both how sewing might save us money AND how we might save money with our sewing. It soon became clear that two episodes weren't enough, and another specific theme of how we might use sewing to keep us warm started to emerge. You can hear that episode from Monday 10th October. So many people in the UK plan to keep the heating off as much as possible this winter in reaction to the dramatic hike in fuel and energy costs. So I looked at garments, accessories and homeware projects we can create to hopefully keep the chills at bay. In the show notes you'll be able to find all the links to everything I mentioned. 

Preparing the episode gave me the nudge I needed to try a project I've had in mind for a while: neck warmers made from upcycled knitwear and sweatshirt scraps. Sometime ago awesome sewing lady Kerry, AKA @kestrelmakes on Instagram, helpfully sent me the link to a template and tutorial that she's previously used with success. It's by Applegreen Cottage, and the tutorial part is in the form of a blog post, but if you sign up their newsletter, you get access to the template (also in the form of dimensions so there's no need to print anything out). Thanks to Damjana at Applegreen Cottage for sharing their work for free. 
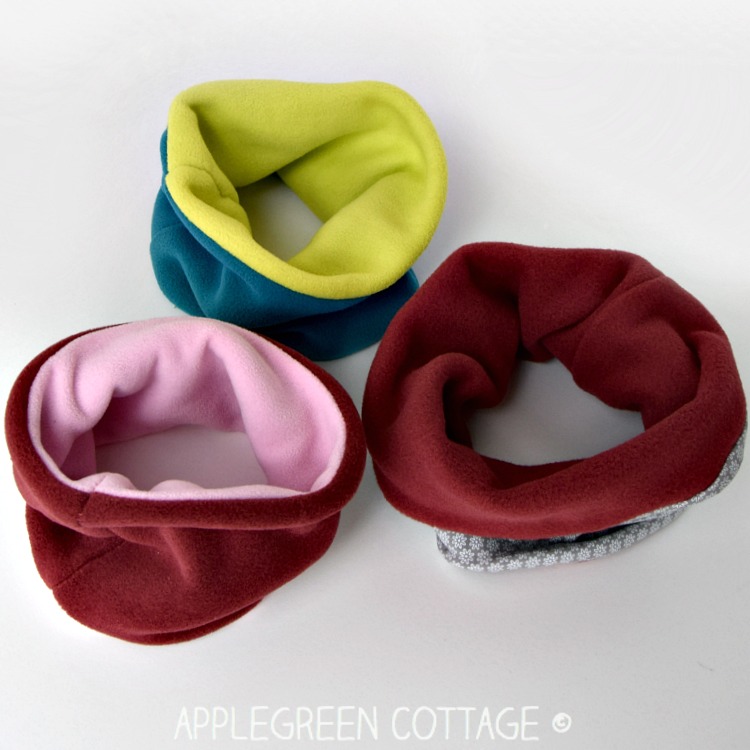

(image source: Applegreen Cottage)


Pattern type:

Designed specifically for fleece, this is billed as a basic, reversible neck warmer that is suitable for beginners that can be sewn on a regular sewing machine.

Sizing info: 

There are three measurements/templates included: Toddler (1T - 3T), Child (4 - 10 years) and Teen/Adult. I made the child size for my daughter (who is nine) and it fits her well. I tried it on my son (who just turned 6) before cutting his out, and decided the Child size would be a bit big, so I made his the midway between Toddler and Child sizes. My own is the Adult size. I haven't managed to get a photo of me wearing mine yet, but it's fine, if a little loose, which I think is related to the just of fabric I used. 


Fabric info:

The supplies list for this project specifies fleece fabric for this project, but one of the versions photographed on the site used jersey for one half which they recommend for not so chilly days. I've been seeking out uses for my stash of moth-eaten and felted knitwear and scraps of sweatshirt fleece, so that's what I used for mine. Plus, I want to encourage people to find uses for their own unworn knits and scraps as a more sustainable approach. In the same vein, I want to discourage people form buying new polar fleece because it is made from synthetic fibres (i.e. fossil fuel extraction plus lack of biodegradability). But if you have some unwanted, tatty fleece garments, this could be a good way to extend the use of the fibres already in existence. 

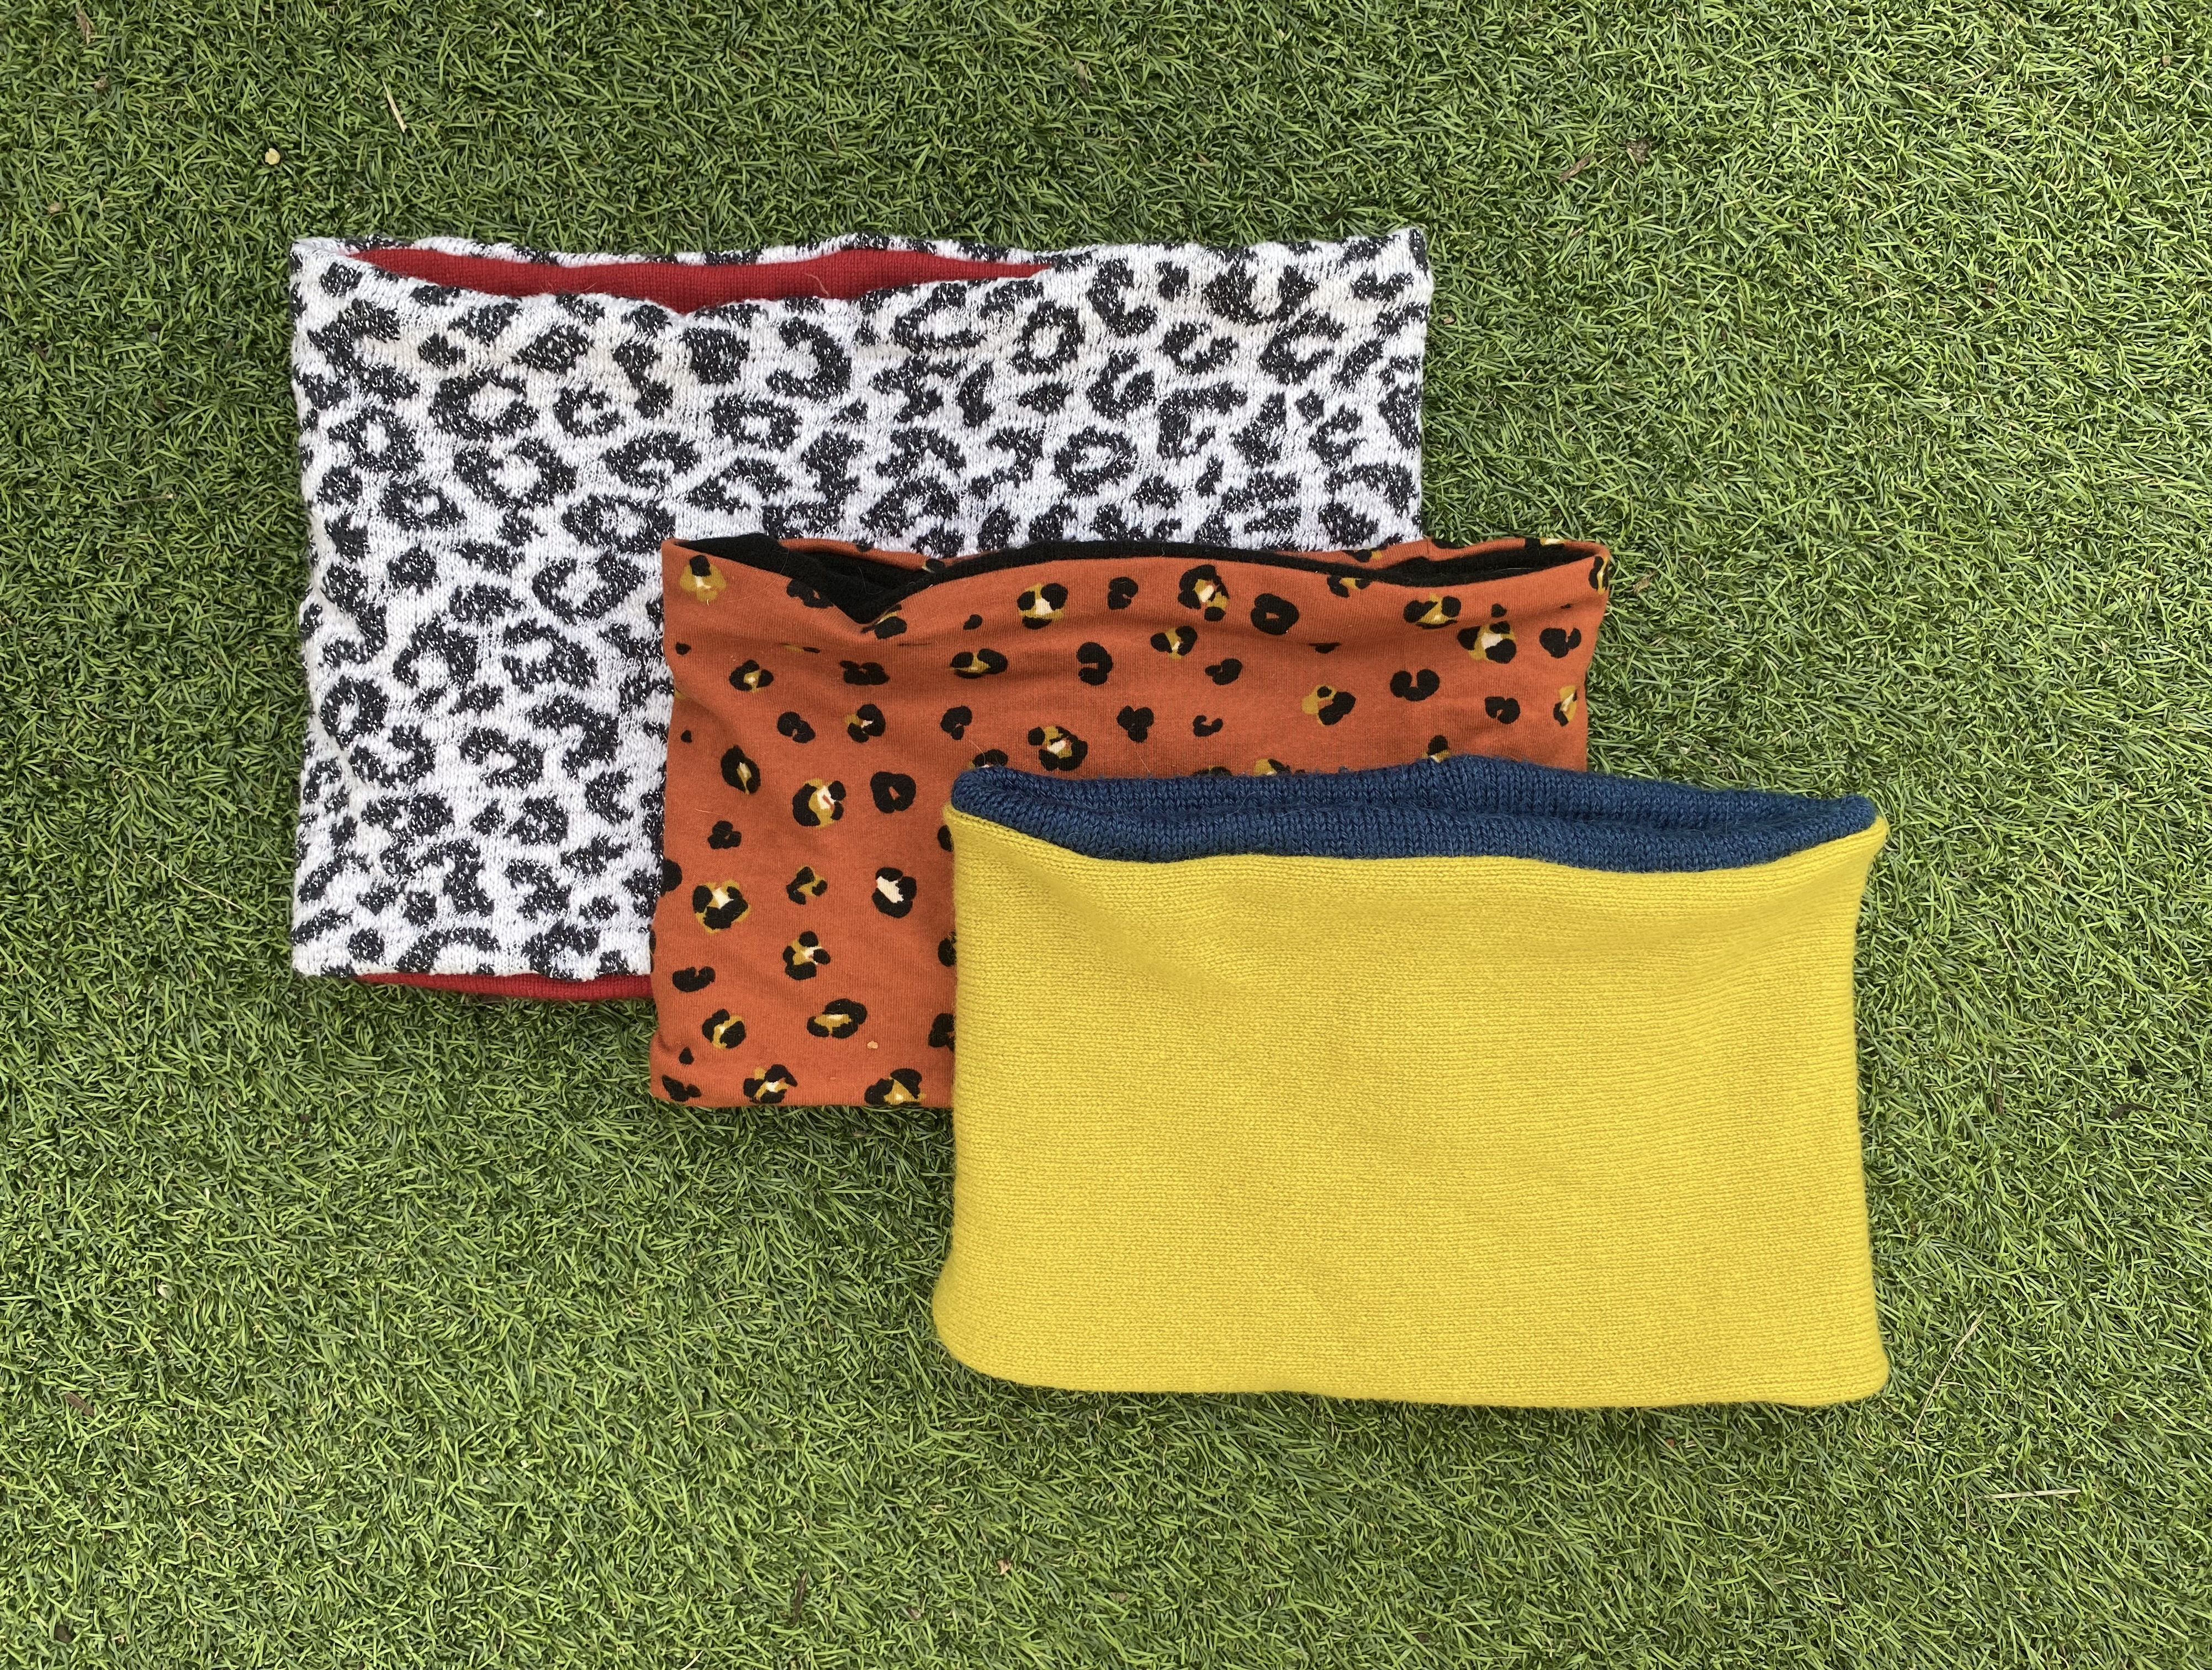
I encouraged my kids to pick their own materials from my stash. Lola chose a scrap of leopard print sweatshirt fleece and plain black knit harvested from a misshaped old wool jumper. Frankie chose blue knit harvested from a felted old wool jumper of his dad's, and chartreuse knit harvested from a moth-eaten wool jumper I've been slowly dissecting for years. For mine, I used some leopard knit from a damaged jumper donated to me by my friend Ilana, and some red knit harvested from another moth-eaten jumper. I had to cut sections of the red and piece them to avoid the holes. I could have cut it in one piece and stitched up the holes, but moth holes really creep me out. I once discovered a knitted hat that basically disintegrated in my hands due to moth larvae...

Unsurprisingly, the looser knits create more drape-y and looser neck warmers, and the tighter knits (particularly the sweatshirt fleece, and I imagine polar fleece) stretch the least and retain the original dimensions better. 

Findings:

The tutorial is simple and well explained, albeit on one of those blogs that bombards you with ads from ever angle. Getting access to the template was a bit pointless, because the finished dimensions are given in the tutorial, plus the seam allowances, so working out the dimensions to cut for the pieces wouldn't exactly be difficult to calculate, and the download offers nothing else. However, I understand that this is a transaction: free tutorial in exchange for joining their mailing list. 

The finished neck warmers are great and very useful. Both kids wore theirs repeatedly during the chilly week that followed the creation of these. I think they make a lot of sense for kids because they can't get unwound, caught up in some way, or dragged along the floor like kids' scarves so often seem to. I've been wearing mine a lot around the house, which has been great since I got my hair cut short and I can no longer rely on it to keep my neck warmer. 

This project has great scrap busting potential, and I love how you can easily tailor these to the recipient with the choice of colour, pattern, fibre and fabric choice. They would also make wonderful gifts that are super speedy to make. 


Customisation ideas:

  • Alter the dimensions to make them deeper/narrower or looser/tighter. 


Would I make this pattern again?

Absolutely. I'd consider changing the dimensions a bit to either exaggerate the cowl or create a tighter, less draft-y warmer, but I'm already thinking about who I know that might need one of these to get them through the winter...

Friday, 2 September 2022

Free Pattern Friday: Walk The Plank PJ Bottoms for all!


Welcome to my monthly 'Free Pattern Friday' feature, where I road test a free sewing pattern or tutorial: sometimes a children's one, sometimes an adult's one . I publish these posts every first Friday of the month, timed to provide inspiration for those who plan to get their sew on over the weekend. I firmly believe that, if you pick your projects carefully, sewing doesn't have to be a crazy-expensive way to clothe yourself and your family. I also firmly believe that pattern designers deserve to be properly paid for their work, so if you enjoy using a pattern and can afford to do so, make sure you support that designer. Some designers' websites offer the option to make a donation, alternatively you can buy one of their paid-for products. If you can't afford to do so, you can support the designer by sharing your project via social media to help draw more attention to their work. Thanks to all the amazing pattern designers who have offered up their hard work for us to enjoy for free.


(image source: Patterns For Pirates)

Right. This is now the third time I've posted about the Walk The Plank PJ bottoms pattern by Pattern for Pirates. The first time was having used the pattern to make PJ bottoms in a variety of lengths for my little cuties. The second time I used it to make sleep shorts for my daughter, but highlighted in that post that this pattern is also available in adults' sizing. Well, today I'm posting about both the adults' and kids' versions, now that I've just used both. A big thanks is due to Patterns for Pirates for sharing this awesome, useful pattern for free. 


Pattern type:

These loose and comfy PJ bottoms are described as a super easy, pull-on style with elasticated waist and no side seams. This is basically a one-piece pattern! Both the kids' and adults' versions come with three length options: shorts, knee-length and long. The adult version also includes different leg measurements for the long length, and two waist heights/rise lengths according to preference.


Sizing info: 

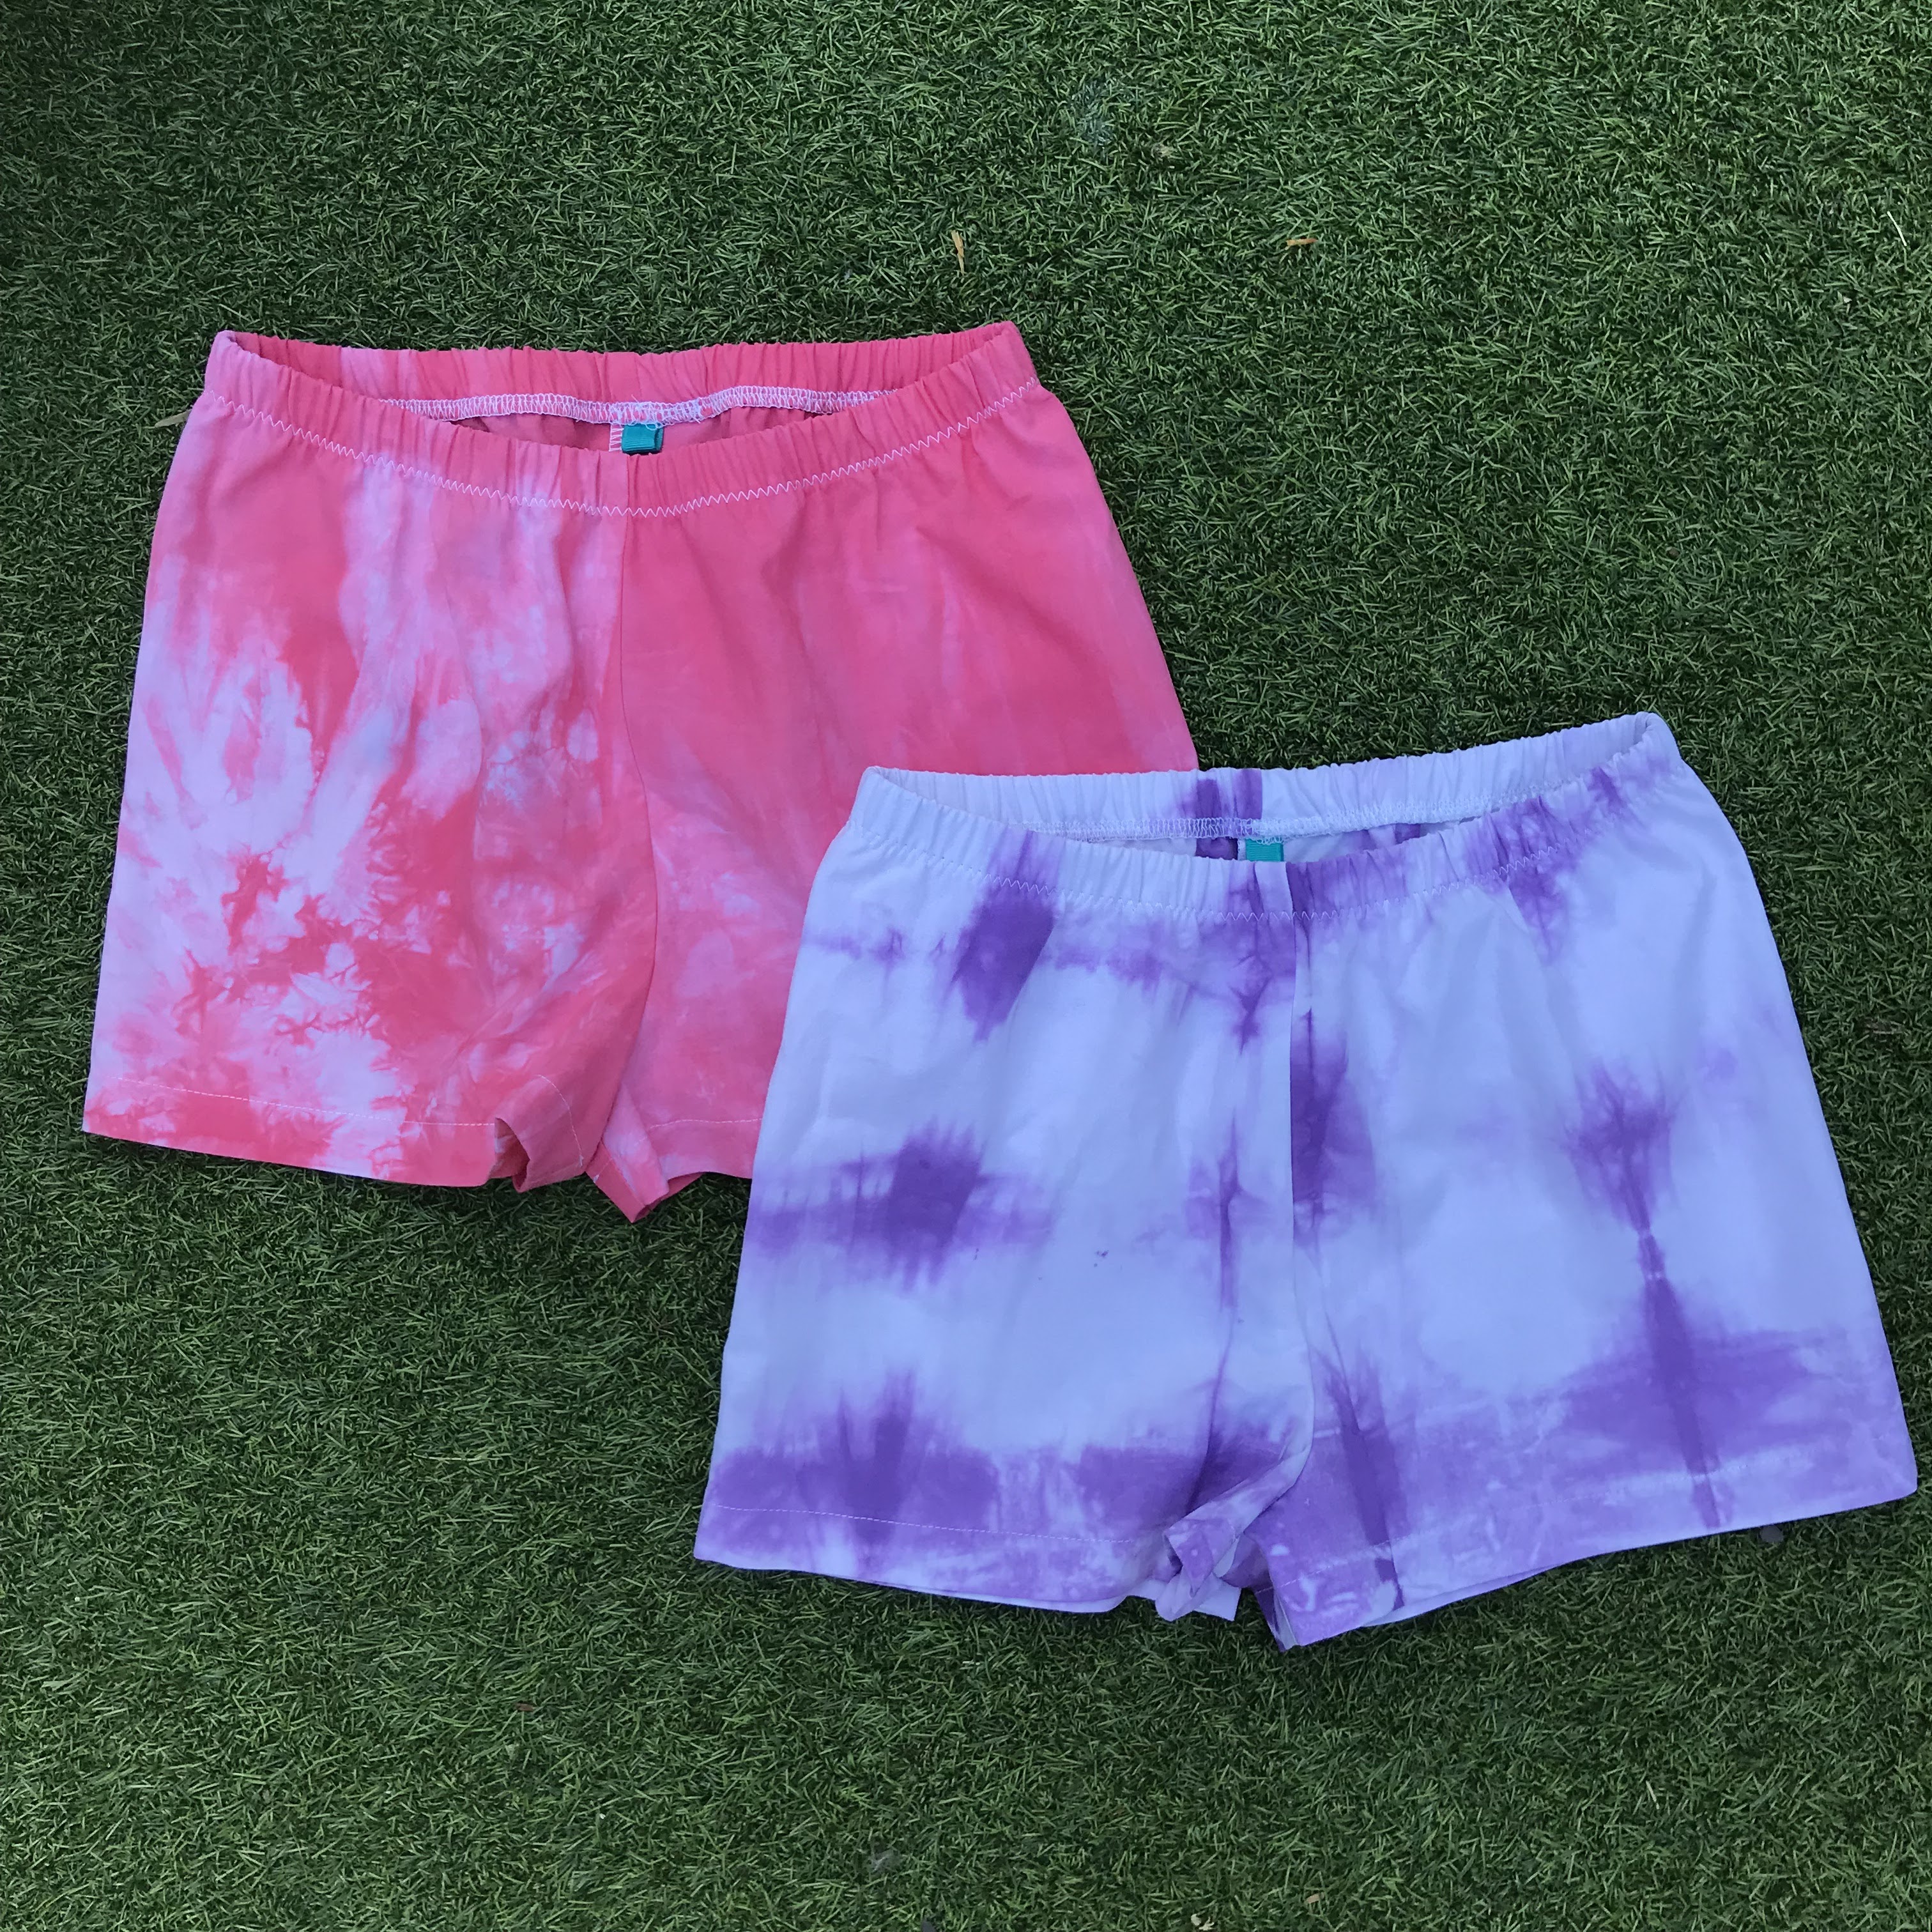
The kids' version of this pattern is graded between 3 months and 14 years (17.5" to 34" hip), and the adults' goes from XXS to 3XL (33" to 58" hip). My hip measurement is about 40" but I chose to make the L (41"-43" hip) because my current jammie bottoms are feeling a bit tight and I didn't want to risk recreating that with these pairs. Unsurprisingly, they have come out about a size too big! My daughter is currently between the sizes 8 and 10, so for the tie-dyed versions pictured here that I made the 10 so she has plenty of room to grow into them. 


Fabric info:

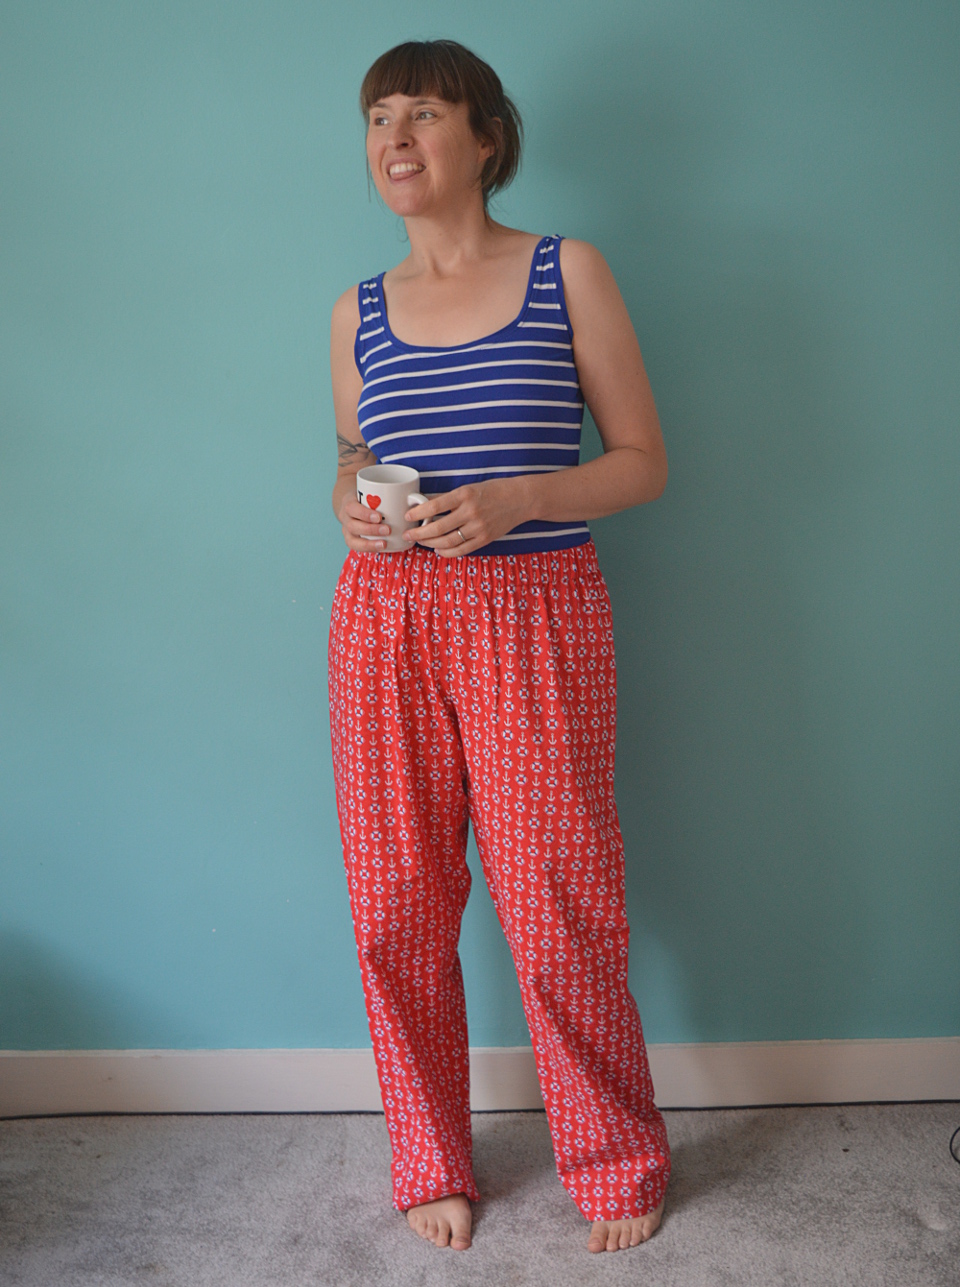
The pattern specifies non-stretch, woven fabrics such as flannel (AKA brushed cotton) and cottons. I really think you want to stick with 100% natural fibres for these. Quilting cottons on the softer end of the scale (like these food print and anchor print fabrics), or cotton lawn would work really well. My daughter's were made from an old cotton bed sheet that we tie-dyed at home. Some parts of the bedsheets fabric are more worn, and therefore thinner, than others!


Findings:

As I concluded in my previous post, this is a simple sewing pattern that would be suitable for beginners, or a pleasingly quick and useful make for more experienced sewers. The instructions are clear with photos for each step. The only parts of this pattern that I would change are based mainly on personal preference rather than any faults or flaws. For example, in the instructions for this pattern the waist elastic is attached by zigzagging or overlocking it to the raw edge around the waist, then turning the elastic under and zig-zag stitching through all the layers to secure it in position. My preference is to create a channel to feed the elastic through, with the elastic overlapped at the ends, which is what I did instead. I like to do this for a number of reasons, but mainly because I can let the elastic out a bit at a later date when my kids' waist measurements increase.

Now that I have made both kids' and adults' versions, I can also conclude that the sizing is accurate for comfy PJ bottoms! In fact, the long length might be the comfiest jammie bottoms I've ever owned. I would say, however, that the shorts version for adults came out quite balloon-y, and not just because I got the size wrong. I think the wide legged style doesn't work so well in that length, so I'll probably use a different pattern for adult PJ shorts in the future. 


Customisation ideas:
  • Disregard the specified length of short-shorts, knee or full lengths, and try board-shorts or capri lengths too (or just make them as long as your fabric will allow!). 
  • Applique contrast knee patches.
  • Use jersey fabric instead of woven to push the comfy factor off the chart!
  • Spilt the pattern piece to include a side seam and add in-seam pockets, or to fit the pattern pieces on an awkward shaped piece of fabric. 
  • Add patch pockets to the front and/or back. 
  • I'm sure you don't need me to suggest this, but download the adults' pattern too and make matching PJs for everyone in your family. 


Would I make this pattern again?

Absolutely! For both myself and my kids. 


Friday, 5 August 2022

Free Pattern Friday: Kid's Olli Shorts and Pants


Welcome to my monthly 'Free Pattern Friday' feature, where I road test a free sewing pattern or tutorial: sometimes a children's one, sometimes an adult's one . I publish these posts every first Friday of the month, timed to provide inspiration for those who plan to get their sew on over the weekend. I firmly believe that, if you pick your projects carefully, sewing doesn't have to be a crazy-expensive way to clothe yourself and your family. I also firmly believe that pattern designers deserve to be properly paid for their work, so if you enjoy using a pattern and can afford to do so, make sure you support that designer. Some designers' websites offer the option to make a donation, alternatively you can buy one of their paid-for products. If you can't afford to do so, you can support the designer by sharing your project via social media to help draw more attention to their work. Thanks to all the amazing pattern designers who have offered up their hard work for us to enjoy for free.

You know how sometimes I post about a free pattern that I road tested years ago, but have come back to because they're great? Well, you know that those patterns are definitely worth taking note of! Today's post is about one of those. I originally posted about Misusu Pattern's Olli shorts and pants pattern three years ago, when my sweet little boy was just two years old. Today he's five, still incredibly sweet, and in need of new shorts. Now he fits into the biggest size this pattern comes in, so it's basically my last chance to sew up and enjoy this excellent free pattern. I've used a number of their patterns, both free and paid-for, and they've all been a real joy to use and dress my kids in. Thanks very much to Misusu Patterns for sharing their hard work for free with this one. To get this pattern for free, you will need to join the Misusu Patterns Sew & Tell Facebook group to access a link that will automatically add the freebie discount code at check out. This pattern is also available to purchase on their site


(image source: Misusu Patterns)

Pattern type: 

The Olli shorts and pants/trousers patterns have a modern, baggy look and feature big side pockets and interesting panels. Pattern pieces for bow or buckle strap details are included, plus there are squillions of ways you can monkey with this pattern to create different looks. 

Sizing info: 

This pattern is graded for sizes 62 to 116, which refers to the child's height in centimetres, and roughly equates to ages 0 - 3 months to 5 - 6 years. I would DEFINITELY recommend going by height and waist measurements rather than age with this pattern. Going by height on both the occasions I made this pattern I ended up making a size smaller than Frankie's actual age, and the fit has worked out really well. 


Fabric info:

This pattern is designed for wovens, and includes cotton, double gauze, flannel, denim, ribcord (needlecord?) and linen as suggestions. This pattern is excellent for scrap-and-small-piece busting. The various panels that make up these shorts means that you can cut the pieces from weird-shaped offcuts from previous projects, or even pieced together from a mix of fabrics that are different colours or prints, but have a similar weight. 
I'd LOVE to make some from African wax fabric, perhaps mixing up scraps of different print designs. 

This pair photographed in this post are made using a small length of quilting cotton. I didn't have enough to concern myself with print placement particularly. The previous pair I made him using cotton/linen mix worked really well, but the black stretch denim version was a tiny bit on the thickness side. Those previous two pairs got use from another child after Frankie though. 

Findings:

This Olli pattern is a really good advert for Misusu patterns. The instructions are so clear and well illustrated, and all the pieces come together flawlessly with everything matching up as it should. I love the look and fit of the finished garments, and it's wonderful to have a pattern that can be squeezed out of leftovers and remnants that you may already own. The basic pattern itself is interesting enough that a fantastic result can be achieved without needing to add anything. However, you can also get super creative and have a lot of fun dreaming up a really unique garment. The gusset panel allows for a lot of movement which I think is really important for kid's clothes. 


Customisation ideas:

Rare is a pattern as customisable as this one! Here's some ideas:
  • Go crazy with your scraps and make a mash up of different prints for each of the panels
  • Alternatively, play around with colour blocking by using two or more solids fabrics
  • Monkey with the rules and ignore the grainlines to make interesting effects using striped, checked or printed fabrics. I'd love to do this with needlecord
  • Add single or double rows of visible, contrast topstitching. 
  • Insert piping, braid, ric-rac or pom-pom trim into the vertical seams
  • Apply braid, ric-rac, lace etc at the back of the top edge of the pocket piece so it peeks out from behind, or stitch it across below the opening of the pocket piece.
  • Add a button and buttonhole or snaps to each pocket so they can be closed up
  • Stitch on ready-made patches, or insert labels or tabs into the seam like I did with this 'Yo Mama Made It' Kylie and the Machine label (pictured above). 
  • Shorten the pants version to 3/4 or 7/8 lengths for capri or clam digger styles. 

Would I make it again?

I can't remember if I used the 4-5 or 5-6 size for the anchor pair, however I'm pretty sure he'll get another summer's worth of wear after this one from these so it'll definitely be worth it to make another pair. I'm going to keep my eyes peeled for leftovers from my forthcoming adult garment projects. 


Tuesday, 26 July 2022

Hula Leftovers Marcel Top


Honestly, I don't know exactly when I made this top, but I know it's taken me at least 18 months to get some photos of it. I haven't worn it much either, probably because it doesn't usually feel very tropical here in the UK, plus we haven't been abroad for three years. However, in advance of our trip to Italy next week during which I predict I'll wear this a lot, I thought I'd share this project. 


I also want to highlight a sewing pattern that is a great potential scrap buster. I had some weird-shaped leftovers of Hula viscose crepe from my Helios dress. The tank top view of Chalk and Notch's Marcel pattern was a great basis for making a casual, hot-weather top from those leftovers. It's formed from panels, although this busy fabric print obscures the seam lines so it's hard to tell. The volume is created by gathers into the front and back yoke, and this, combined with the flow-y nature of the fabric, will hopefully make it a breezy top to weather in the hot, Italian summer. 


I love how making your own clothes means you can customise details you might otherwise not think to alter on a RTW garment. I have one shoulder lower than the other. This means that one of the straps of shop-bought clothing (and a few handmade ones also before I realised this about myself!) would repeatedly, and annoyingly, slide off my shoulder. To correct this, I made one of the straps considerably shorter than the other. I also took care to fix the strap to the back yoke to follow my bra strap position to provide almost-complete bra coverage. 

This project might also look cool using different scraps of viscose for each of the pieces and panels. 

Friday, 1 July 2022

Free Pattern Friday: Full Moon Bag


Welcome to my monthly 'Free Pattern Friday' feature, where I road test a free sewing pattern or tutorial: sometimes a children's one, sometimes an adult's one . I publish these posts every first Friday of the month, timed to provide inspiration for those who plan to get their sew on over the weekend. I firmly believe that, if you pick your projects carefully, sewing doesn't have to be a crazy-expensive way to clothe yourself and your family. I also firmly believe that pattern designers deserve to be properly paid for their work, so if you enjoy using a pattern and can afford to do so, make sure you support that designer. Some designers' websites offer the option to make a donation, alternatively you can buy one of their paid-for products. If you can't afford to do so, you can support the designer by sharing your project via social media to help draw more attention to their work. Thanks to all the amazing pattern designers who have offered up their hard work for us to enjoy for free.

(image source: All Well Workshop)

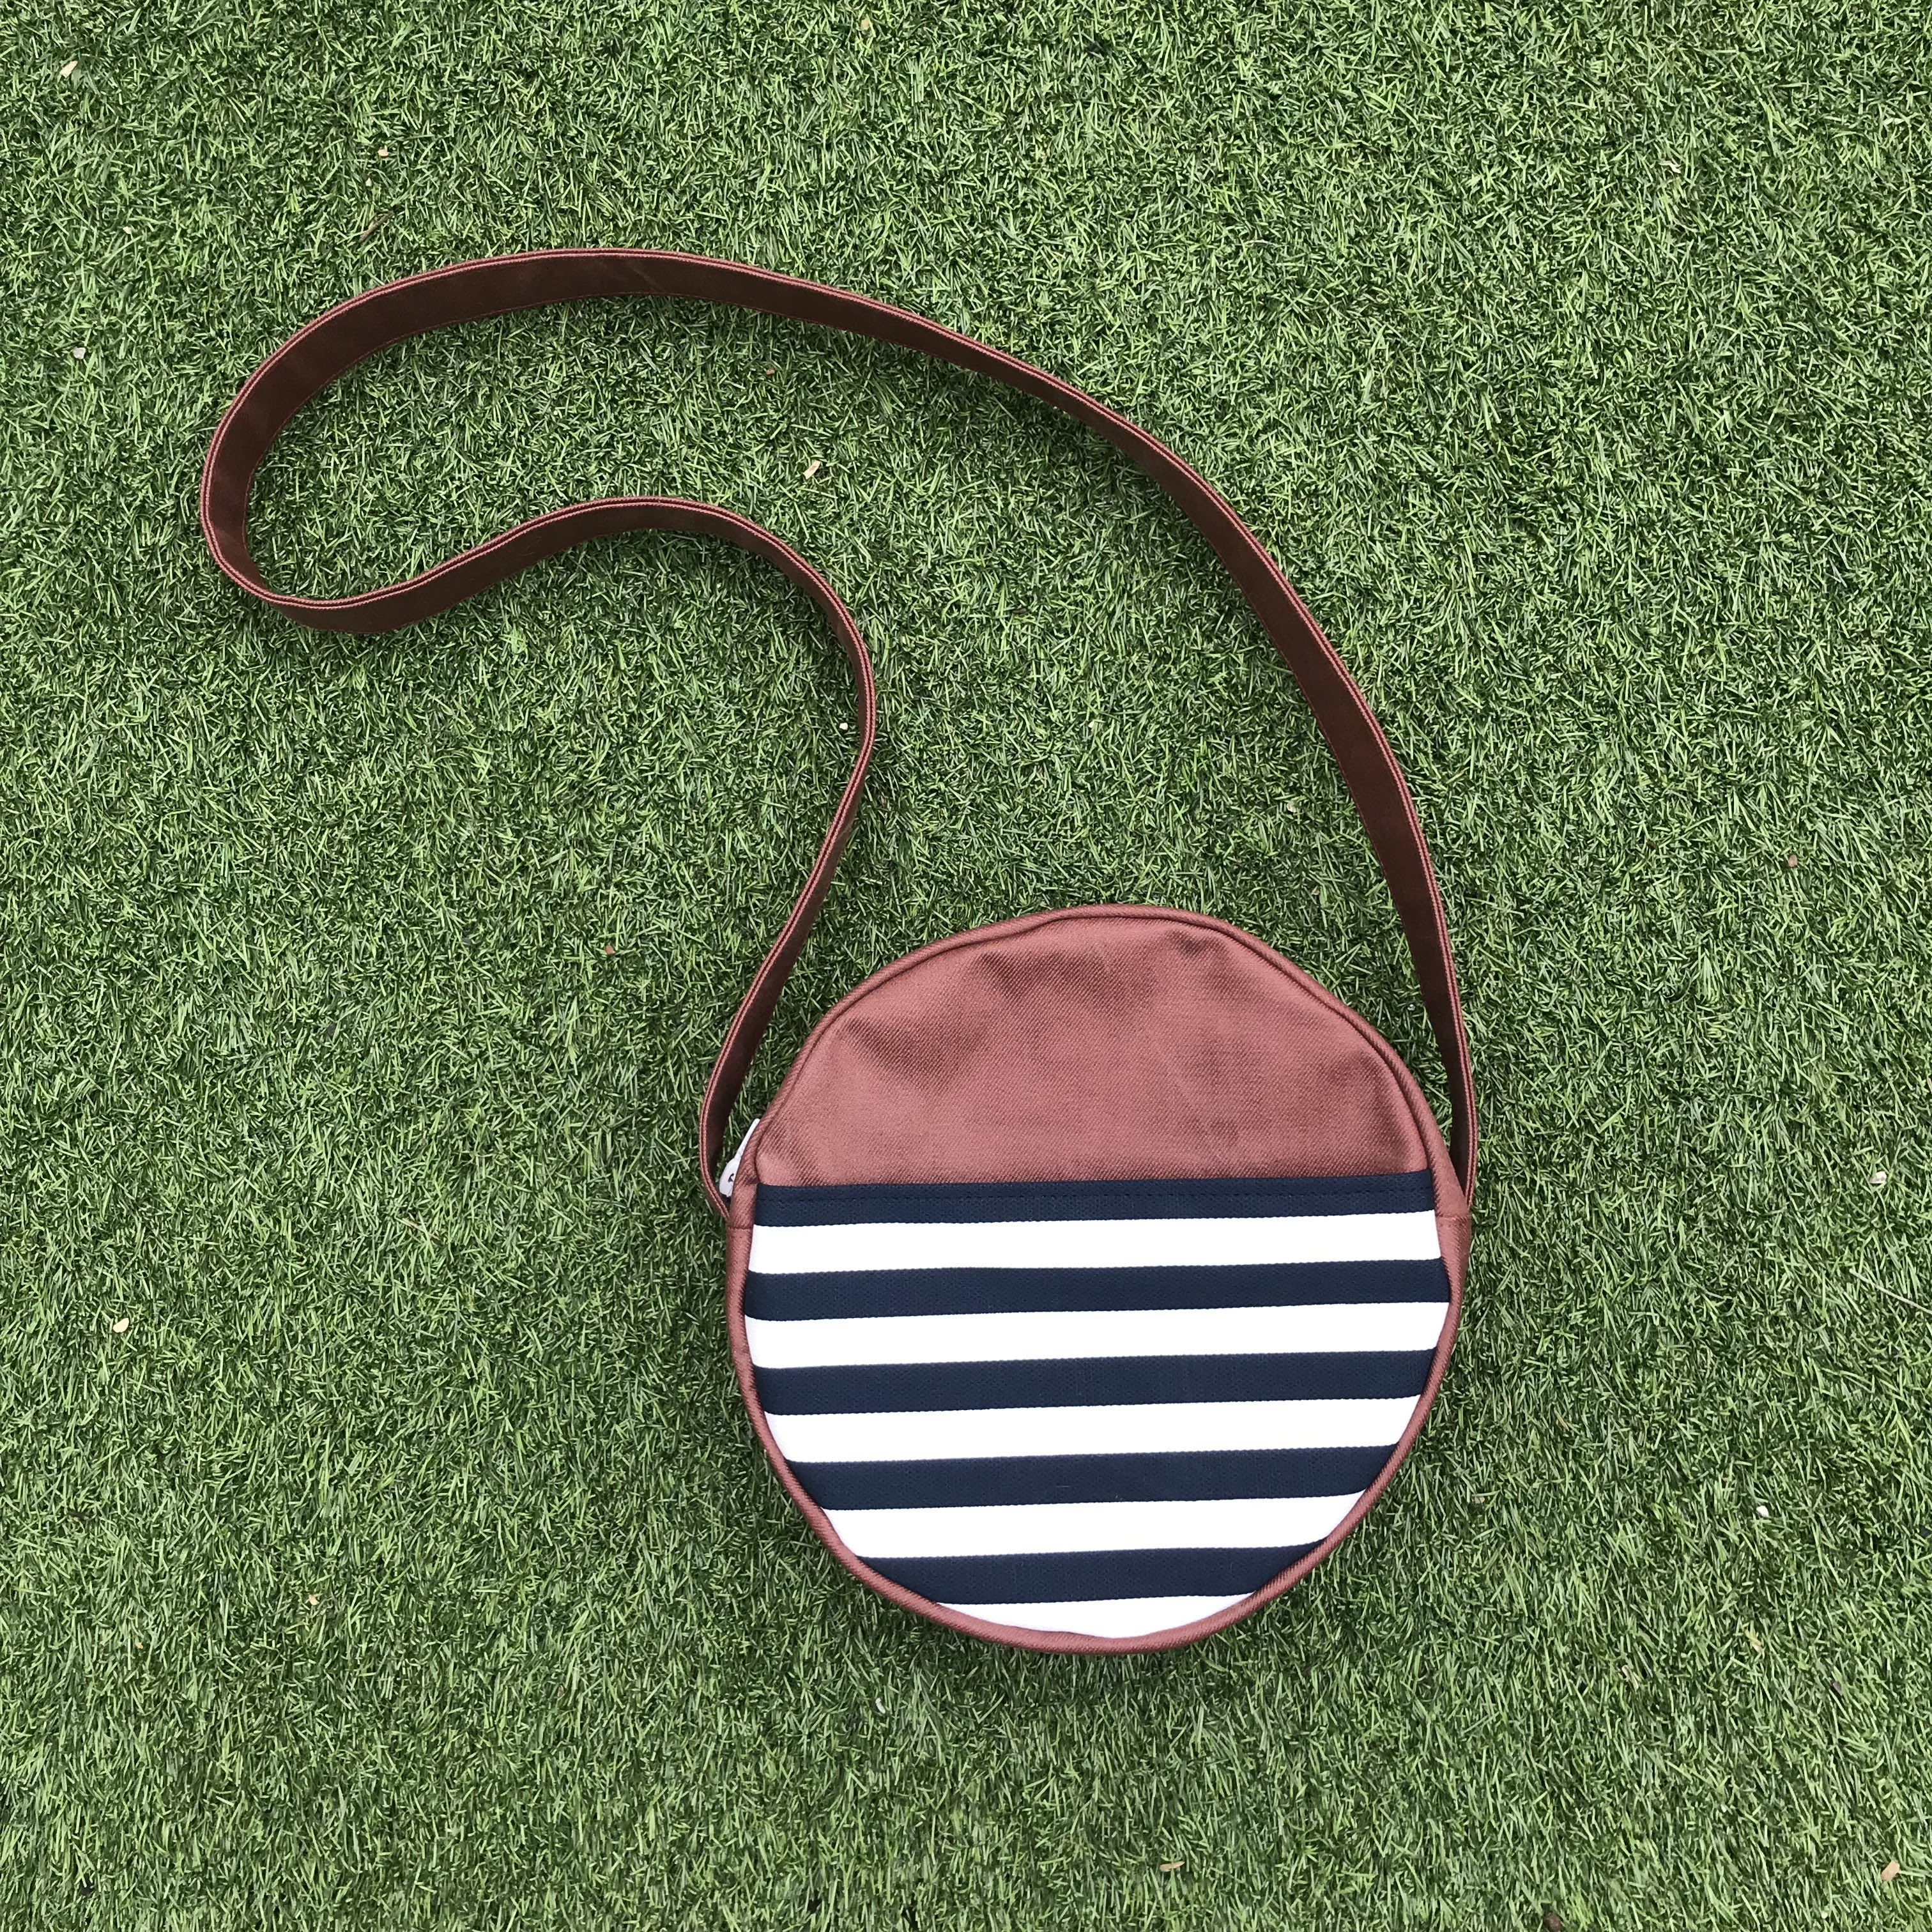
I first heard about the Full Moon bag pattern(s) by All Well Workshop through a conversation I was having on Instagram with someone about teaching kids to sew. Sadly I can't remember who it was with, but the person was saying that they used the pattern as the basis for a sewing party for their child's birthday. Impressively, they had borrowed a bunch of sewing machines and managed to get a group of kids through the steps to make their own versions. When I checked out the pattern for myself, I really loved it, and quickly convinced myself to make one as an alternative to my ropey ol' backpack. I felt it was the ideal basis for using up some scraps and I imagined that I'd use it for travels and days out when I didn't need to carry much. Unfortunately, I've got so used to carrying my water bottle everywhere that it hasn't proved quite as useful as I'd predicted. So it's become the bag I take with me when I go for a drink because that's basically the only time I don't bother to take my water bottle with me! Anyway, the lovely little bag pattern comes in two sizes, and can be accessed for free when you sign up to the All Well newsletter. 


Pattern type:

The Full Moon bag pattern is a simple, circular shoulder bag that comes in two sizes. Both feature zip closures and interior and exterior pockets. Instructions for applying a leather strap or making fabric ones are included. 


Sizing info:

The smaller is 6.5" across, ideal for travelling (very) light and for kids. The larger is 9" across.


Fabric info:

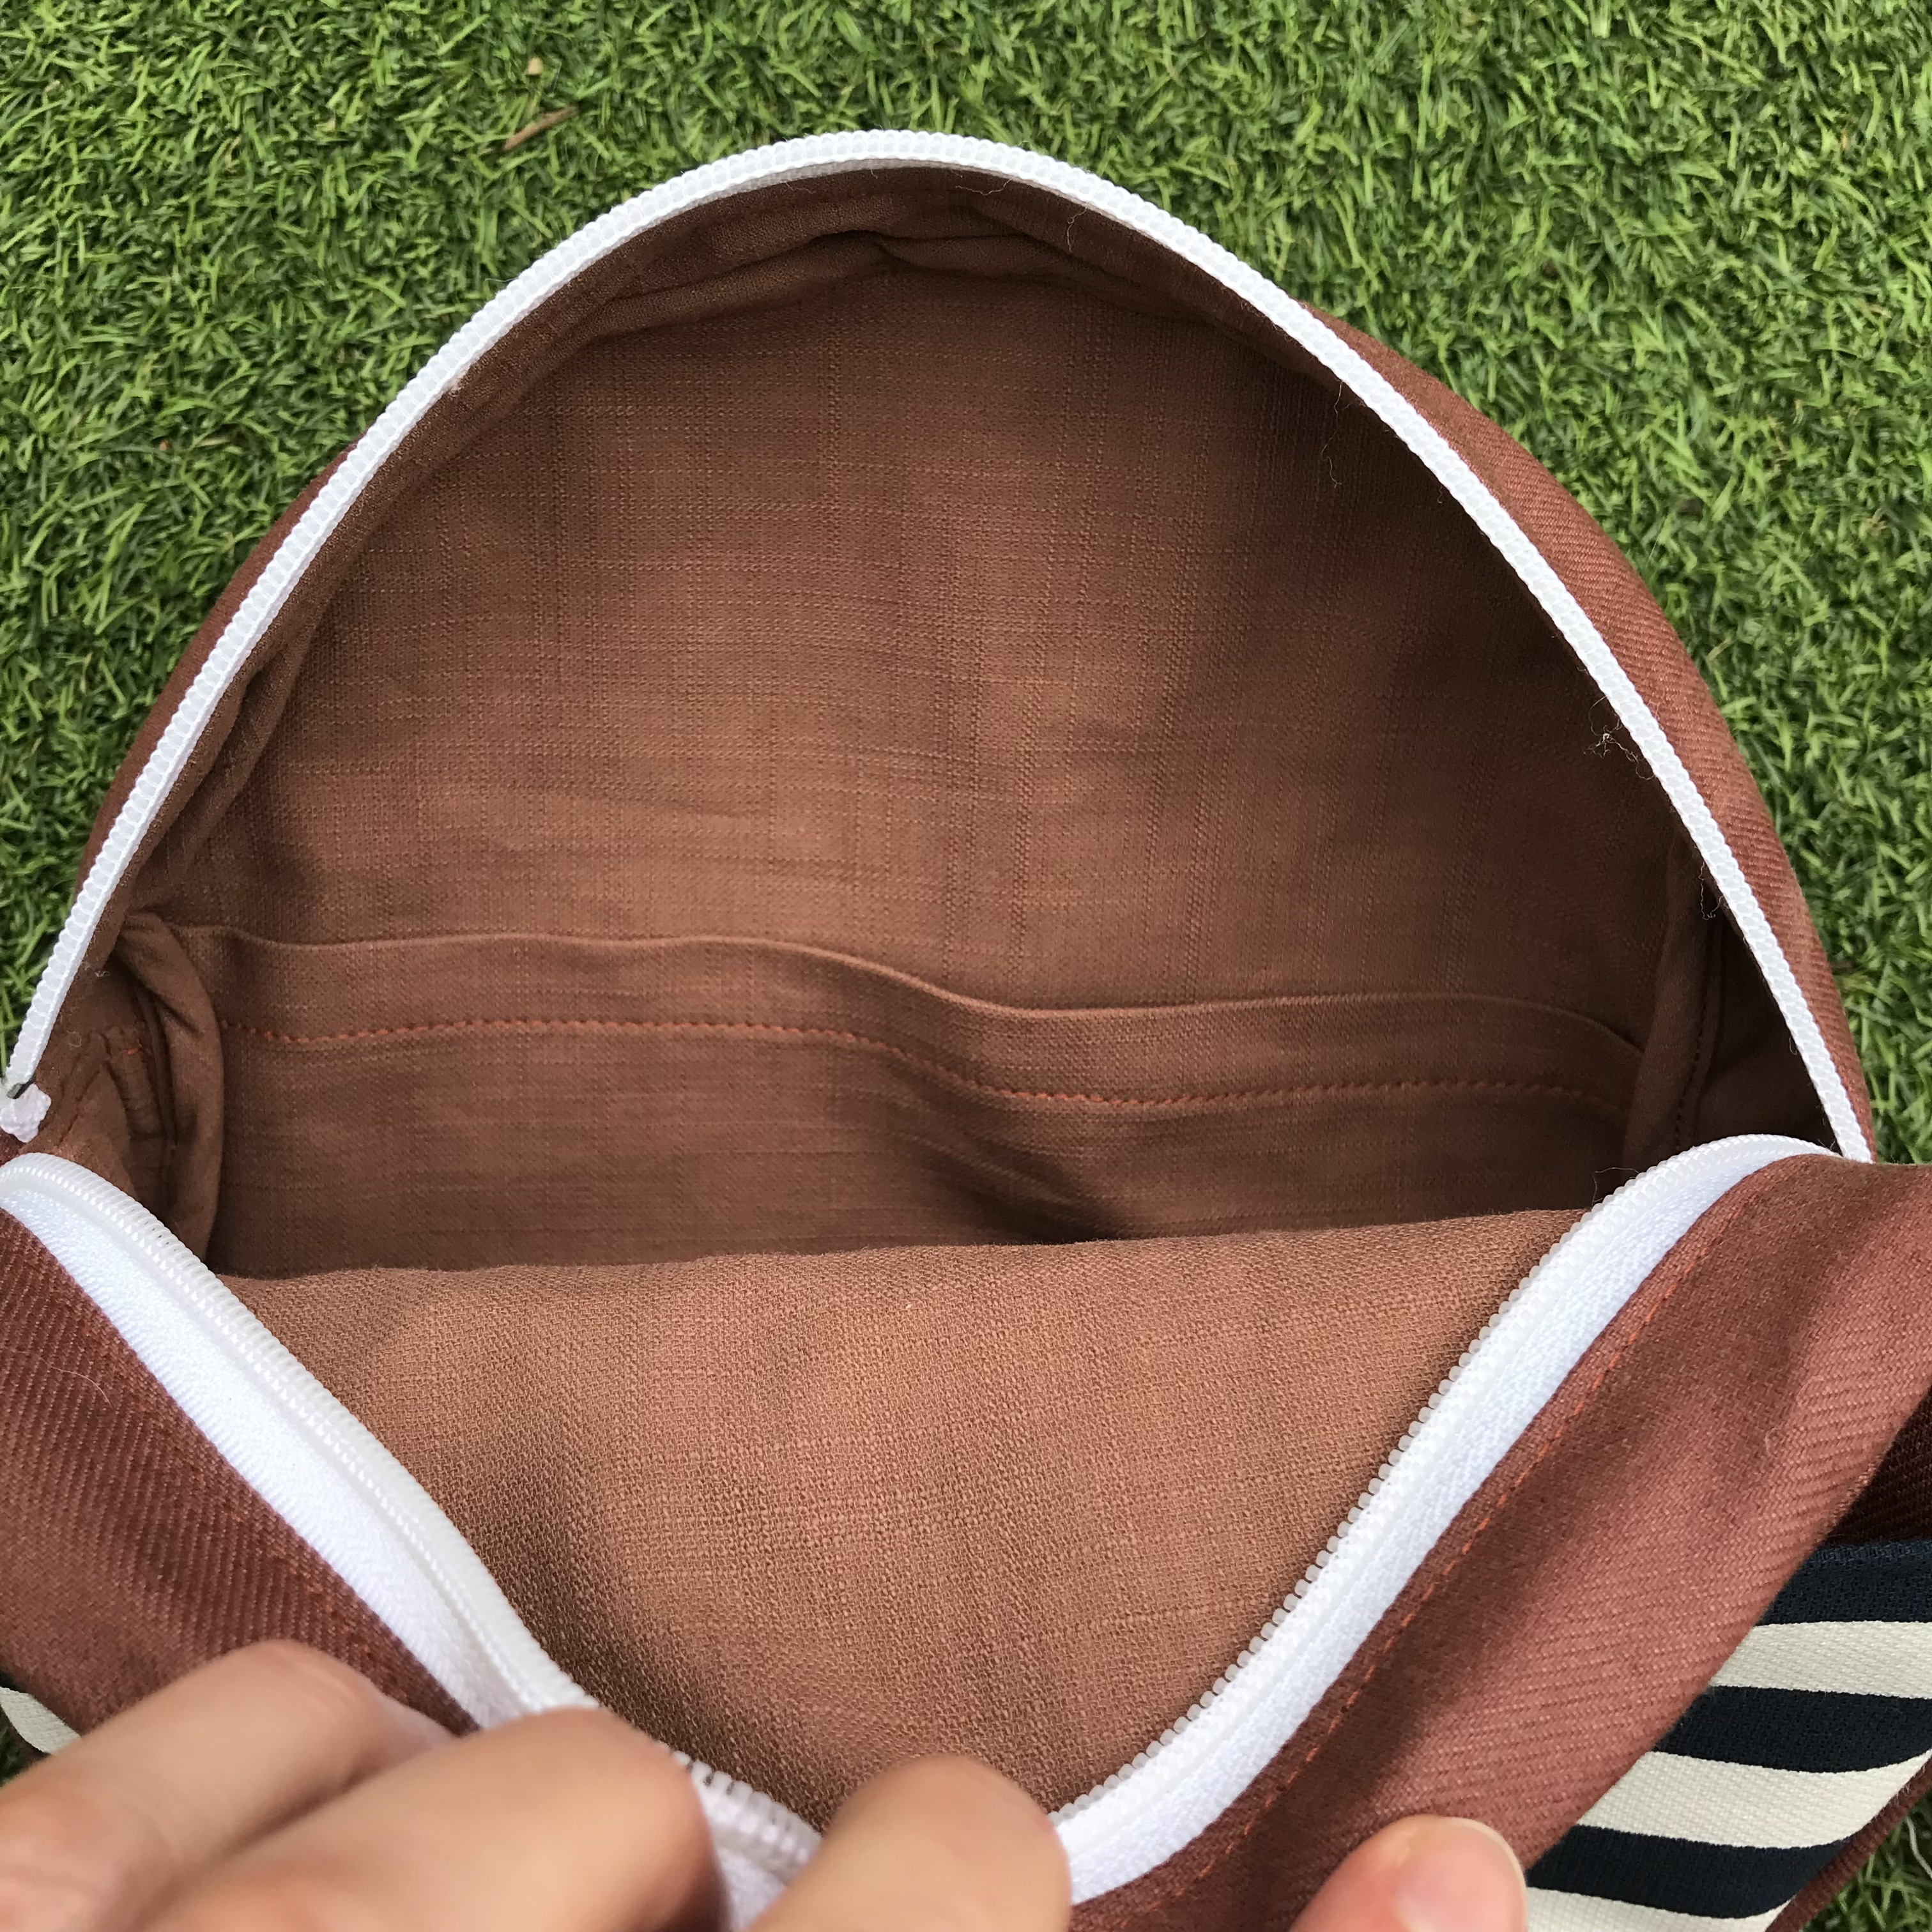
The pattern advises using canvas type fabrics around 10oz-12oz in weight. I used scraps of rust denim and striped cotton twill, and I think interfaced the base and zip shield pieces to help them keep their shape better. Like a number of other people who shared their versions on Instagram, I also decided to adapt the construction to add a lining. For that I used some scraps of fawn coloured linen that worked tonally with the rust denim. 


Findings:

This was a really fun little project and a great opportunity to use some fabric leftovers. The pattern is well drafted with both A4 home printing and A0 copy shop file options. The instructions are clear and easy to follow, making this very much a beginner-friendly option. The only real challenges are handling layers of thick fabrics and making/applying the binding to finish the raw edges inside. This would be a wonderful project for making speedy gifts for adults and kids. 


Customisation ideas:

  • Add a lining! This was very easy to do and gives body to the bag and a more finessed finish. 
  • Use zips to make the external or internal pocket more secure.
  • Use sliders and rectangular D-rings to make the strap adjustable.
  • Insert piping into the seam around the edge of the bag for a professional look and give more stability to the circle shape. 

Would I make it again?

I'll most likely use this pattern to make one for my daughter, or as a gift for a friend. It's such a cute style and genuinely useful scrap buster. 
Related Posts Plugin for WordPress, Blogger...