Welcome to my monthly 'Free Pattern Friday' feature, where I road test a free sewing pattern or tutorial: sometimes a children's one, sometimes an adult's one. I try to publish these posts every first Friday of the month, timed to provide inspiration for those who plan to get their sew on over the weekend. I firmly believe that, if you pick your projects carefully, sewing doesn't have to be a crazy-expensive way to clothe yourself and your family. Thanks to all the amazing pattern designers who have offered up their hard work for us to enjoy for free.
Sometimes I like to revisit free patterns that I have road tested previously. I think (/hope) that it's helpful for you to see that these patterns are useful enough to want to return to. Also, I think it can be fun to show how the same pattern or tutorial can be used as a basis to make a very different looking item. That's what I've done with this post. The basis of these projects is the Full Moon Bag by All Well Workshop that I previously road tested here when I made the larger size. This time I wanted to explore how the basic circle shaped bag could be adapted and personalised, in this case for my kids. Big thanks to All Well Workshop for sharing this fun pattern for free. To access the pattern, you will need to sign up to their newsletter.
Pattern type and changes:
The Full Moon bag pattern is a simple, unlined, circular shoulder bag that comes in two sizes. Both feature zip closures and interior and exterior pockets. Instructions for applying a leather strap or making fabric ones are included.
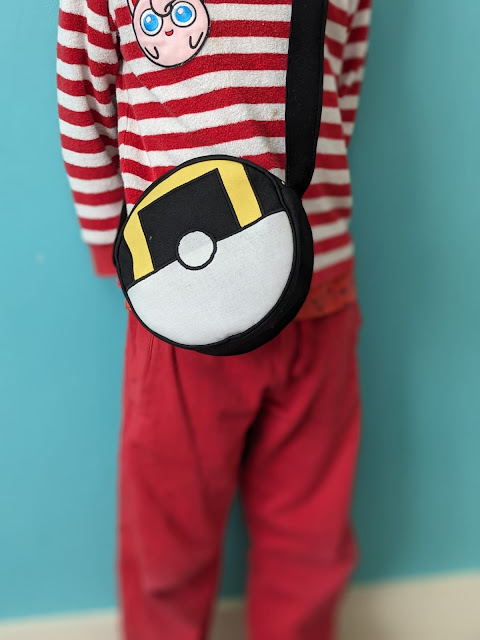
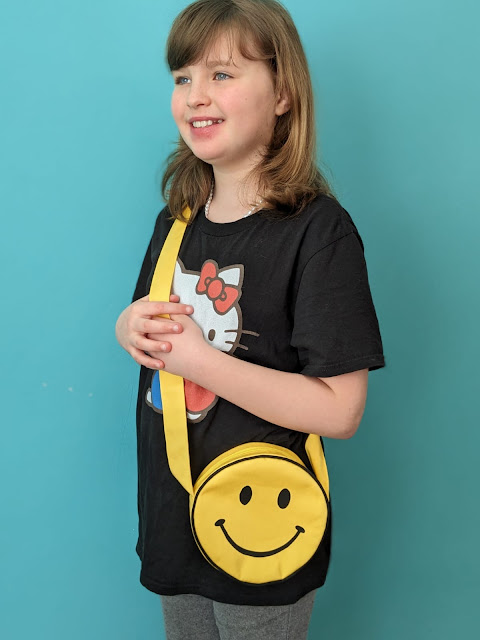
This time I decided to omit the pockets entirely, and instead use the circular design to make a Poké Ball for my son and a classic smiley face for my daughter. I used fabric scraps secured with wonderweb and machine satin stitch to form the details of the pokeball. For the smiley face, I sketched out the features and made a stencil, then used my little screen printing kit to print the design onto the fabric. The other changes were to line both bags and add piping to the edges.
Sizing info:
The smaller is 6.5" across, ideal for travelling (very) light and for kids. The larger is 9" across. Previously, I made the larger size. This time I used the smaller.
Fabric info:
The pattern advises using canvas type fabrics around 10oz-12oz in weight. For both of these I used scraps of cotton or poly/cotton twill for the outers. The pattern is unlined, however I lined both of these with scraps of poly/cotton from my stash. Random lengths of bias binding were used to finish the inside seams. I also made and inserted piping round the edges which has given the bags some pleasing additional structure.
Findings:
I stand by my previous findings: that this is a really fun little project and a great opportunity to use some fabric leftovers. The pattern is well drafted with both A4 home printing and A0 copy shop file options. The instructions are clear and easy to follow, making this very much a beginner-friendly option. The only real challenges are handling layers of thick fabrics and applying the binding to finish the raw edges inside. This would be a wonderful project for making speedy gifts for adults and kids. In fact I had these bags cut out with the intention of making them for my kids two Christmas's ago! For whatever reason, it didn't happen then, and I'm pleased to have the guilt lifted by having completed them!
Now that I have had my version of this bag (the larger one from the previous post) for a while, I can honestly say that I use it regularly. It's great for any time I'm popping somewhere but don't need to take a water bottle with me (i.e. the pub).
Customisation ideas:
In addition to the ideas mentioned in my previous review of this pattern, you could applique or printing to make the circle into other designs including:
- a pizza
- various types of ball
- the moon
- a donut or bagel
- cross section of a tomato/cucumber/orange/grapefuit
- a fried egg
- a plate with food on
- various emojis
- various characters such as the cookie monster!


No comments:
Post a Comment