Sunday, 26 April 2020

Tencel Twill Tank


This post is going to be short and sweet. Consider it an extension of my Gemma tank journey from two years ago. To recap: I'd hit a bit of a brick wall with Made by Rae's Gemma tank pattern. It's possible that I was trying to over-think and/or over-fit it. However, when this lovely fabric dropped into my lap, I decided to try a different starting point.


Fabric:

A few months ago, Fabric Godmother got a delivery of a whole rainbow of tencel twill. It's light and flowy with fantastic drape, and a washed, almost sanded appearance. I scored just under 1m of the rust colour way. Tencel (a brand name of lyocell) is a bit of buzz word these days. It's often claimed to be a 'sustainable' fabric, because it is produced in a closed-loop process, which reuses a lot of the chemicals (and water?) required to break down the base material (wood pulp) into useable fibres. A lot of people are hailing it as a better alternative to viscose/rayon, the more common of the regenerated fibre fabrics. However, I have also heard that Tencel/lyocell isn't as stable as viscose, and has a shorter lifespan. Plus, I personally bristle when the label 'sustainable' is assigned to any virgin fabric, particularly a regenerated fibre that has to undergo so much processing to be ready for fabric production. I'll be interested to see how this fabric wears over time with use and washing. 


Pattern:

As I mentioned above, I was on the hunt for a new woven tank pattern to try. I'd previously considered the Wiksten tank pattern, but had opted for the Gemma in the end because the latter has bust darts. Yet, seeing as this fabric is so drape-y, I thought the looser shape of the Wiksten tank might be better suited for this project. I also bought it with half an eye on making more patchwork viscose garments in the future, and thought that this might be a great blank canvas for that also. The looser, roomier style also allowed me to avoid sway back adjustment headaches, and I made the size M with no adjustments at all. 


I like the curved hem detail, which makes this pattern suitable for both tucking in to bottoms as well as wearing loose. Included is a little basic patch pocket, which I nearly didn't bother with, but I thought this top might look too plain without. This slippy fabric, as you can imagine, is a bit of a pig to work with, and when I'm wearing the finished garment, I can see that the pocket isn't applied completely straight and the bottom righthand corner (when worn) is a bit askew. 

Another nice feature is that all the seams are french seams, which is perfect for light, slippy fabric such as this Tencel. Overlocked seams might show through on the right side, plus, from my experience, overlockers sometimes enjoy chewing up fine fabrics a bit and can create some unwelcome gathering. The neckline and armholes are bound with self-made strips cut on the bias. Because my main fabric was so tricky to cut and handle, I cut my bias strips from some lightweight 4oz washed denim from my stash, and I love the contrast it brings. I should have taken a photo of this garment flat so you can see, but you'll have to use your imagination!  


Thoughts:

OMG, I didn't predict that Tencel would feel so nice to wear! It feels so soft, and I also want to say slightly rubbery, however I'm not sure that that gets the right concept across. As for the pattern, I'm really pleased that I invested in this basic woven tank pattern, as I'm sure I'll reach for it again before long. It'll probably be my version of the popular Odgen cami by True Bias. One thing to note though: the neckline is pretty low! Lower than I was expecting. I'm definitely not prudish, however I think I may raise it slightly for future versions, just so that I don't need to be so conscious when leaning forwards.  

Thursday, 23 April 2020

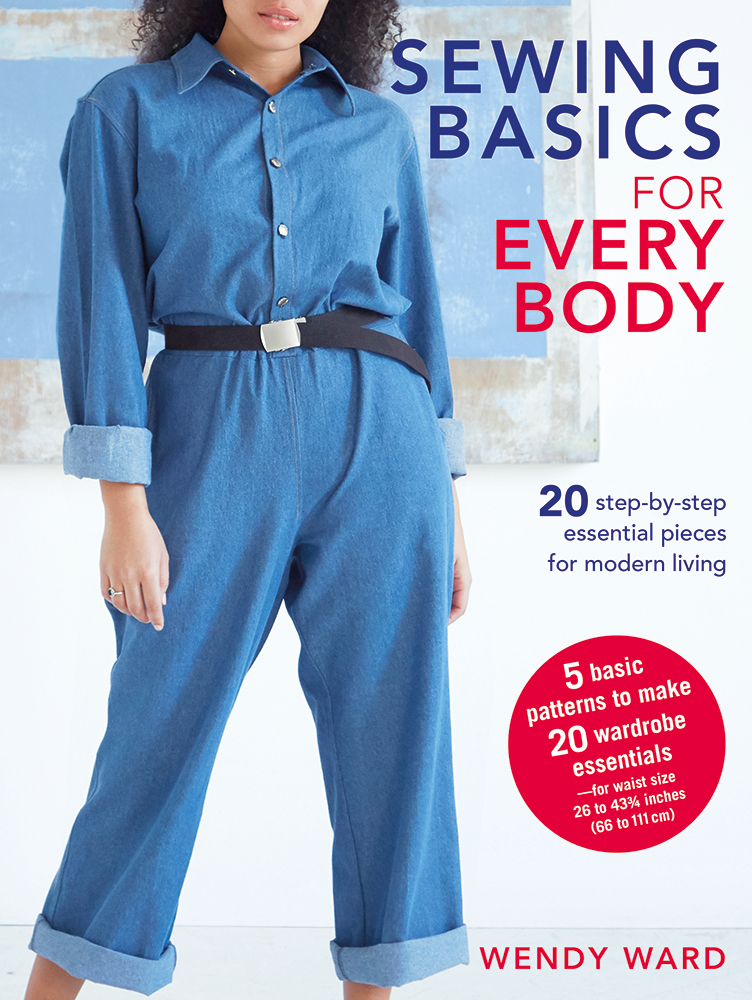
Sewing Basics for Everybody Blog Tour: Harper Pants


Seeing as we can't go on any other kind of tour at the moment, let's go on a blog tour! Wendy Ward's latest book, 'Sewing Basics For Everybody', is a collection of patterns designed to produce a capsule wardrobe of simple garments suitable for everyone, regardless of gender, age or body shape. It's a really interesting idea, and firmly in keeping with the growth of inclusivity in the sewing scene, and in society more generally. The book contains graded sewing patterns for five types of garments, with pattern pieces for three-to-five variations of each garment included, along with lots of idea and info on how to create many more styles. 

To be suitable for the widest variety of body shapes, the styles are all pretty loose-fitting and unisex. And if that kind of silhouette and aesthetic are your bag, you're going to want to check this book out. This blog post represents the third stop of six on the tour to see some of the styles made up on a variety of sewing bloggers. Here we go...


Pattern:

I accepted the invitation to make a garment for this blog tour before the UK corona virus lockdown was a thing. Initially, I had big plans for a hack of the Kim jumpsuit project. However, once lockdown became a reality, the space in my brain available for this project narrowed, and the gap in my wardrobe for a nice pair of comfy trousers widened! My attentions and plans therefore switched to the Harper pants pattern.

The Harper pants are a wide legged trouser pattern that Wendy has cleverly developed to be the basis for a number of different looks. The waist can be elasticated, or can have front pleats, a waistband and fly front fastening. The legs can be cropped or full length, and a genius way to form a harem-style with an ankle pleat is offered.


There are three styles of trouser specifically set out in the Harper pants section, but I chose to combine some of the elements in a different combo that would be more suitable to my current needs. I wanted these trousers to be work-from-home and homeschooling friendly, so I chose the comfier, elasticated waist option. (And because lockdowners can't be choosers, I had to alter the width of the waistband to suit the only wide elastic I had in my stash.) I really wanted to try that clever harem-style, tapered ankle detail, so I threw that into the mix as well. 

Like most pattern books, you need to find your chosen pattern pieces on the pattern sheets included and trace them off onto paper before you can begin. My one issue with this was that the trouser pattern pieces aren't all on the same pattern sheet. No doubt the design of the pattern sheets has been done that way to conserve paper, but I was glad that I was only having to locate three pattern pieces for my project. The sizing is based on body measurements and finished garment measurements. If you have a curvier shape, you may find you need to combine and blend between sizes, as the patterns are designed for a waist/hip measurement difference, for example, that isn't as great as most of the women's pattern companies' sizing range you may be used to working with. Wendy gives a TON of information on taking measurements, and masses of additional advice about picking the right size for you.   


As for sewing these pants, as you would expect, they came together quickly. I can really see that the style would suit a variety of fabrics, but I'm very happy with the linen that I picked. Which leads me to...

Fabric:

Wendy's publisher got us a hook up with UK-based, online fabric seller, Fabworks, for this tour. We were able to use the fabric of our choice from their website, providing there was enough in stock to fulfil future orders that may follow from the tour. We were also encouraged to order samples so we could have a good feel before committing to our selection. After having checking out samples of a few options, I went for the Slubby Linen & Cotton in Tawny. Oh my goodness it's lovely! It's got a fine, textured, linen look, yet it doesn't really crumple in the way you'd expect a fabric with linen content to do. 


The colour is a caramel-y brown, a shade or two away from my beloved rust. I wasn't too sure if this colour would be too brown-brown for me, so I made sure to use cotton thread in case I decided to dye them further down the line. Yet I doubt I will now as this colour is really growing on me. I'm not sure I could carry if off closer to my face, yet on my bottom half, in particular when paired with navy, black or white, I think it looks really good. 


Thoughts:

It was really great to be part of a blog tour again. It doesn't seem so common an occurrence these days as it used to. And this really is a book that's worth checking out, especially if looser, simpler styles are your thing. Wendy is a phenomenal font of sewing knowledge, and she ploughs soooo much of it into her books. Even if you're a pretty experienced sewer, there's a lot of information, techniques and tips you're likely to absorb by reading through this book. 

As for the trousers themselves, it was fun to experiment with a style that is a slight step out of my comfort zone. There's a bit more volume going on, and they sit higher on my waist than I'm used to. I'm going to wear them a few times to see if I can get into it. Making them was a very pleasant experience, thanks to both the construction method and the lovely fabric. And I particularly enjoyed creating the unusual ankle pleat detail. 

I recommend that you visit the other participants in this blog tour. Mercedes and Fiona have already shared their fantastic and inspired garments created with patterns from this book, and I'm so excited to see the rest.

Wednesday, 15 April 2020

Me-Made-May 2020!


Well, if it was a ‘normal’ year I would have announced the approaching Me-Made-May challenge on the 1st April. I would have written a post explaining what the challenge is, why you might want to take part, and how you can customise it to your own specifications and desires to make it truly useful and enjoyable for YOU. Well this year has most certainly failed to present itself as a ‘normal’ year, eh?! I think it’s safe to say that 2020 so far has been collectively the weirdest and most terrifying few months in most people’s memories. When the 1st April rolled around two weeks ago, my emotions were everywhere, and the last thing I felt like adding to my life was an additional challenge, and I felt that most people would probably feel the same so I didn't mention MMM. 

But since then I've been thinking about it some more. There are a number of elements that Me-Made-May annually brings that people might actually appreciate, and benefit from perhaps now more than ever. Much of the world is currently on lock down (/sheltering in place/self isolating/practising social distancing/whatever it's called where you live). Many of us who are lucky enough to not have to go outside very much and risk infection, are spending so much more time at home in our pjs or lounge wear, feeling lonely and miserable and not at all ourselves. Maybe a gentle, 'light' version of the Me-Made-May challenge IS what some of us may feel we need right now?


What IS Me-Made-May?

  • MMM is a personal challenge to wear your handmade items more often, or in different ways somehow, to help you improve your relationship with your handmade wardrobe. 
  • It is entirely personal: you can set the specifications of your challenge as you wish so that it will help YOU. Think about what you would like to improve and/or learn. 
  • You do your challenge for the duration of May.
  • It's entirely up to you whether you wish to keep your challenge entirely to yourself, or share some or all of it with others. If you wish to share the odd (or daily!) photo or comment on social media, please use the hashtag #memademay2020 so other participants can find you and cheer you along.

But the whole world has flipped upside down, should I take part?

Totally up to you. I wouldn't blame you if you took one look at the title of this blog post and screamed "NO WAY!" and slammed down the lid of your laptop. However, if you do fancy challenging yourself this year, PLEASE DO SO GENTLY. The last thing any of us needs right now is an additional challenge to complicate our lives.


But what might I gain by taking part?

You know what I need right now? I need a reason to wear something other than leggings every day. I need a reason to pull out my favourite handmade garments that I know will make me feel more like myself. I need something fun to think about each morning, rather than dwelling on the news headlines. I need to feel more connected with a community (of makers) and have a reason to celebrate each other and our achievements. Oh, and I want be nosy and see what you've made and how you wear it!


Ok, I want some of that too, what do I do now?

You need to think about the specifics of your (GENTLE) challenge. Think about what you'd like to achieve/improve/learn by the end of the month, and what you can do throughout the month to make that happen. Normally, I ask participants to fill out a pledge and post it in the comments of this post. If you would like to do that, awesome. If you'd like to share it on Instagram or anywhere else, then also awesome:

'I, (insert name or username here), pledge to (insert specifics of your challenge here) throughout May 2020'

So as an example, here's mine:

'I, Zoe aka @sozoblog, pledge to wear only handmade garments in unique combinations as much as possible throughout May 2020'.

If you have any questions or queries, please email me at sozoblog (at) g mail dotcom, or message me on IG @sozoblog. Please remember, if you do want to take part, be as gentle and kind to yourself as possible, and DO NOT beat yourself up if you wake up on 1st May and think, 'actually, no I can't be arsed'!. This is meant to be fun and useful and affirming! Please take care of yourselves, lots of love xxx

Thursday, 9 April 2020

Romero Trousers: Work in Progress


May I present to you the March project from my #2020makenine sewing plans?! Like last year, at the beginning of 2020, I chose nine pieces of fabric in my stash and promised to sew them up throughout the course of the year. Having just realised that I never shared my 2020 plans here on my blog, check it out below:


Fabric:

The piece of fabric in the middle of my 2020 selection is some AMAZING, mid-blue denim that I bought from Merchant & Mills in Rye last year. It's broken twill weave (my fave!), medium weight and just the nicest quality ever. I bought it without a precise project in mind. I have a self-imposed rule of only buying fabric if I can envision what I'll make from it, however I'm so glad that I ignore that rule this time. The medium weight lends itself well to a spring/autumn weight garment. The buttons I used were also from Merchant & Mills, from a separate trip. I was running low on blue thread and determined not to buy another reel, so I stitched them on with contrasting red thread. 


Pattern:

I'm very rarely an early adopter when it comes to sewing patterns. Sewing pattern styles usually have to grow on me, and I like to see other people's versions pop up on the interwebs before I, myself, commit. This pattern was somewhere in between for me though. It's not a newly released one (so I had the joy of exploring the hashtag), however I knew I wanted it as soon as I saw it. I felt my beautiful, medium-weight denim would work well for the cropped/'trans-season' style. I don't have any cropped trousers in my wardrobe currently, but I chose to keep the length as per the pattern (rather than follow my instinct to lengthen the pattern pieces to ankle length) so that this garment would fulfil a different function to my broken twill Lander pants

(image source: Pauline Alice)

I am a ginormous fan of sailor style trousers. I even made a pair almost exactly ten years ago! I wore those a lot, until the cheap, nasty fabric I used shrunk and faded. That was at the beginning of my Rockabilly phase, and even though I'm out the other side of that now, I still love that nautical-style button detail. 

Once I'd bought the PDF pattern, I took the rare (for me) step of getting the A0 file printed out in large format using the Fabric Godmother printing service. I usually print out the A4 file at home and spend an evening sticking all those sheets together, but this felt like a special occasion! Before cutting out my pattern, I laid my Lander pants pattern pieces over the top to compare them. I could see that I would need to alter the crotch curve of the Romeros a bit, and I preemptively curved the back waistband so it would sit nicely against my lower back. 


I haven't used a Pauline Alice pattern before, and it was fun to try out a new-to-me company. I believe her patterns are available in English, French and possibly also Spanish, which is awesome. The instructions were fairly clear, although the pocket/button stand construction was pretty complicated, and I had to wing it at a couple of points. 

(image source: Pauline Alice)

Thoughts:

Now that we're in lockdown in the UK, I'm rarely out of leggings and joggers at the moment. However, I made myself wear these on a recent trip to the shops so I could analyse the fit. Generally, they were great and I was super happy with them. However, there was one thing that was bothering me. Because of the construction of the pockets and fastening method, the side seam at the pocket mouth isn't straight, and the pocket facing won't sit very flat. You can even see this happening on the sample pair on the Pauline Alice website (pictured above), as well as in my pair (below). As much as I like having the pockets, I've decided to try to remedy this by stitching through the pocket and button stand, which will seal the pockets shut but should help that whole area sit more neatly. 


Another issue that I think I can improve on, is the rise. I didn't notice until I was going through these pictures, but the back rise is too high. I didn't even want to share that picture here because the look is a bit embarrassing if I'm honest. I'm going to scoop the crotch away a bit to give my bum some more space, which should fix this issue. I love these trousers and the fabric so much that I really want to go the extra mile and finesse them as much as I can. 


There's also something a bit weird going on with the fabric around the front crotch area. It's particularly noticeable in the image above. I'm not sure if it's a tightness caused by not enough space in the front rise (some kind of rounded pubis (!) situation?) or a pooling of fabric due to some other factor. If you have any ideas, please leave a comment! I may not try and address this last issue in this particular pair, but I'd like to learn from them for future versions.


It may not surprise you to learn that I plan to use this pattern again, with tweaks. Or I may frankenstein the fastening pieces onto the Lander pattern, seeing as I achieved a better fit generally with that pattern. I'd love to make some shorts next, perhaps in red twill or linen. It seems that my renewed sailor pants obsession is here to stay for a while...

Sunday, 5 April 2020

Liberty Wilder Blouse: Meh


Right. So what do we think about this blouse then? As much as I wish I did, I just don't think I like it. Both the colour and fit aren't right for me. Which is super annoying because I adore both the fabric and the pattern. On other people. 


Fabric:

Perhaps the most annoying thing is that I've had this fabric in my stash and have been mulling over what to make with this it for YEARS. Literal years. Not continuously of course, but regularly. I even included it in my #2019makenine sewing plans, although I didn't get round to using it until early 2020. It's some gorgeous Liberty tana lawn, the print is called Jonathan, that I bought from the Sewbox.co.uk stand at the GBSB live event two or three years ago. I've seen a few projects on the internet where people have used it the other way up, but to me it looks likes ruffles and I prefer it this way. 


It almost goes without saying, but this fabric was a dream to work with, and feels amazing against the skin. The issue I appear to have with it is that it is orange. I'm a big fan of wearing rust, and I thought that I could pull off wearing it's purer, less muted cousin, however it would appear that I cannot. Oh, and did you see the pattern matching I pulled off along the centre front seam (see above, if you can!). Mic drop!


Pattern:

As I mentioned before, I internally debated my pattern choice for this fabric for an embarrassingly long time. For quite a while, I thought a pattern that actually included ruffles would be fun to make in this ruffle-y print. However, in the end I fell down on the blouse version of the insanely popular Wilder Gown pattern by Friday Pattern Co.. I'm not really a dress wearer, and certainly not a gown wearer, but I've really liked all the other blouse versions I've seen on Instagram, so I decided to give it a whirl. 

I felt confident to go ahead without making a toile, basing my sizing choices on the finished garment measurements (I blended between sizes, as per usual). The only change I made to the pattern design was to alter the sleeve: I straightened the otherwise tapered shape and added elastic to the hems to make them a little poufy. A decision I do not regret. The construction was straightforward and fun. I omitted the topstitching down either side from the centre front seam because I was trying to disguise it as far as possible (did you see my pattern matching, BTW?!), and I finished a few of the seam allowances together (closed seams) rather than separate and pressed open (open seams) because I thought the finish would be neater.  


Thoughts:

As I previously said, I don't think this colour looks good on me, but I'm not convinced that that's the only issue here. Something doesn't feel right around the neck/shoulder area. Perhaps it's related to volume: maybe there's not enough fullness for the gathering at the neck to be fully effective and subsequently it feels slightly wrong. I'd be interested to compare these pattern pieces to the True Bias Roscoe pattern to see how differently the volume in those patterns is handled.  

Of course, things would never have got this far if I'd just made a freaking toile of the damn pattern. I could have then sized up or something, or opted for a different pattern for this fabric altogether. But to be honest, I still would have made something orange that wouldn't have suited me, even if the fit was better, so all in all I feel like I saved some time. If you know me IRL and would like to own this blouse after the pandemic (oh yeah, that whole GLOBAL PANDEMIC thing I'm just blogging through), then give me a buzz! 

Friday, 3 April 2020

Free Pattern Friday: Women's Peplum Top


Welcome to my monthly 'Free Pattern Friday' feature, where I road test a free sewing pattern or tutorial: sometimes a children's one, sometimes a women's one. I publish these posts every first Friday of the month, timed to provide inspiration for those who plan to get their sew on over the weekend. I firmly believe that, if you pick your projects carefully, sewing doesn't have to be a crazy-expensive way to clothe yourself and your family. Thanks to all the amazing pattern designers who have offered up their hard work for us to enjoy for free.


I may be wrong, but I think a near-global lockdown with many people staying in their homes for weeks (months?) on end is exactly the right time for some free sewing pattern inspiration. It's possible that you, like me, have had your income effected by the corona virus, so in these financially uncertain times you may be looking for some free resources to keep you sewing. You are probably already well aware of the amazing array of free sewing patterns available for download on the Peppermint magazine website. But what are the patterns actually like to use? Previously I reviewed their Boxy top pattern, and now I've come back for more and have tried out their popular Peplum top pattern, created by In The Folds designer, Emily. Massive thanks to Peppermint magazine and the designers who collaborate with them to make so many wonderful free patterns available to the sewing community. Oh, and to help them stay afloat during this international crisis, they have added a little donate link on their pattern page so you can flow them a couple of quid. I did and I suggest you do too if you can. 

(image source: Peppermint mag)

Pattern type:

This is a simple little summer top with gathered peplum, rounded neckline that goes into a V shape at the back. The shoulders are formed from separate panels. Please note: I altered the pattern by lengthening both the bodice and peplum (each by 2cm), so my version is not exactly true to the original pattern. 


Sizing info:

The pattern has been sized from A-K, which translates to bust measurements 30" to 51½". I often fall between sizes so I opted for the smaller based on the finished garment measurements, and I'm happy with the fit as I didn't want to be swimming in it. 


Fabric info:

It is suggested that you use lightweight woven fabrics for this pattern, and I'd really advise against anything too stiff or with too much body. Although the sample on the website has been made in linen, I'd be careful to avoid anything that made the peplum stick out too much. For my version, I harvested the fabric from a vintage viscose dress (see above) that's been in my stash for at least seven years. I'm guessing by the small shoulder pads that it was made in the 1990s, and I've always loved the 1940's-esque print. 


It's amazing how much fabric even a small top project will need, and I had to disregard a number of existing seam lines when cutting out the peplum pieces. Thankfully the busy print and gathering hides them well. I'm really happy with how the viscose works with this style. It's not too slippery so it wasn't a total headache to sew, but the slinkiness feels nice to wear and doesn't allow the peplum to poof out too much.  


Findings:

This pattern was a real pleasure with work with. Both the pattern itself and instructions were clear and user friendly. As for the finished garment, well I'm not entirely sold on it for myself. If I had to describe this garment in one word, I'd say it's 'flirty', however my daughter announced it looked like a little girl's dress (!), and I can kind of see what she means.


The main front and back pieces are really quite A-line,
 so the lower edge of the top section is pretty wide even before the peplum is attached. When I added the additional 2cm to the top section, I made sure to slash and insert 2cm across the width of the pattern pieces about half way down, not just to add the 2cm at the hem because I didn't want to make the lower edge even wider. But generally, I'm not sure the extra fullness around my waist is doing me many favours. 


Plus I am not a fan of the separate shoulder sections, I can't figure out what the point of them is, it kind of feels like design for design's sack. I do, however, love love love the neckline. The scoop at the front and V at the back are perfectly proportioned, IMO. Overall, it does feel really fun and swishy to wear, so I'll give it a couple of wears during actual summer, and who knows, I may fully fall in love with it.


Customisation ideas:

To be honest, I've not got much for you with this one. 
  • Alter the pattern pieces to eliminate the separate shoulder pieces, making a regular shoulder seam instead.
  • Extend the peplum pieces to make this into a dress.
  • Extend the peplum pieces AND add an additional tear for a different dress style. 
  • Add a small ruffle/frill into the arm hole over the shoulders. 


Would I make it again?:

Hmm. I probably wouldn't make this pattern again exactly as it is, I'm just not sure how many of this style of top my wardrobe really needs. I am tempted to incorporate this neckline into other garment projects though. 
Related Posts Plugin for WordPress, Blogger...