Showing posts with label top. Show all posts

Sunday, 5 September 2021

Lou Box Top Kit


A couple of months ago I was the grateful recipient of a kit to make the Lou Box Top pattern. The pattern itself is by Sew DIY, however, the kit came from Craft & Thrift, purveyors of vintage, thrifted and deadstock fabric. Amy, owner of Craft & Thrift, was a guest on my podcast Check Your Thread recently, so check out episodes 5 and 6 to hear my super enjoyable conversation with her. 


In the kit you get the printed pattern instructions, the printed pattern pages (you need to stick them together), 2m of deadstock jersey and a recycled rPET Gutermann thread. The particular kit I received included some lovely, slubby black viscose/poly/cotton blend, but they have many different colours available. This may depend on the size you choose to make, but I found you could make two tops from the fabric length included.


The Lou Box Top pattern has been around for a while, so there are plenty of other versions out there to check out. It’s a pretty size inclusive pattern, going up to 56” bust I believe. I have so much time for fairly basic patterns that feature different versions, that can be used over and over (as Amy herself can attest to!). The pattern includes two necklines (I picked the scoop), three hem lines (I went for the curved), optional patch pocket AND it can be made in knits or wovens. You need to add a CB seam and small button closure at the back neck if using woven fabric.


For yonks I’ve fancied a slinky, ever-so-slightly-sheer loose T-shirt. They look so effortless and comfy. I’m delighted that I now have one! I’m absolutely keeping these kits in mind as a gift idea for someone that is fairly new to sewing, or at least is new to sewing with knits. 

Saturday, 21 August 2021

Zero Waste Cropped Shirt: Two Attempts


Pattern:

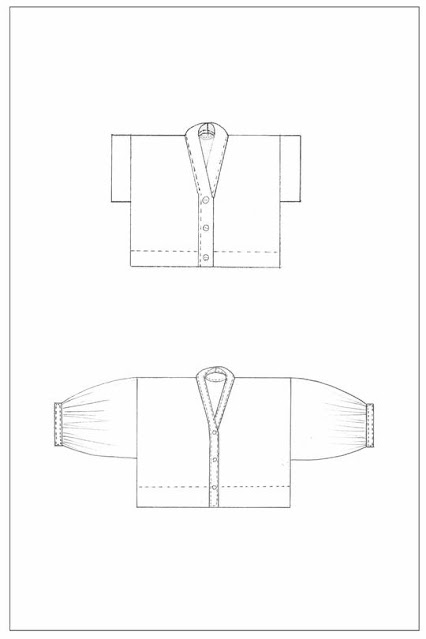
Earlier this summer I bought the ZW Cropped Shirt pattern by Swedish designer, Birgitta Helmersson. There are some really inspiring versions of this pattern on Instagram. Zero waste sewing patterns are unlike regular patterns in that you receive a set of measurements to help you draw shapes directly onto your fabric, rather than paper pieces to cut out and pin on to your fabric. There is zero or very little wasted fabric from this approach, so you often need far less fabric to begin with than with a typical sewing project. For example, the short sleeve version of this shirt in the smaller size range (there are two size ranges available covering bust sizes 33"- 40" and 41" -  50") requires just 90cm of fabric. 


(image source: Birgitta Helmersson)


Attempt #1:

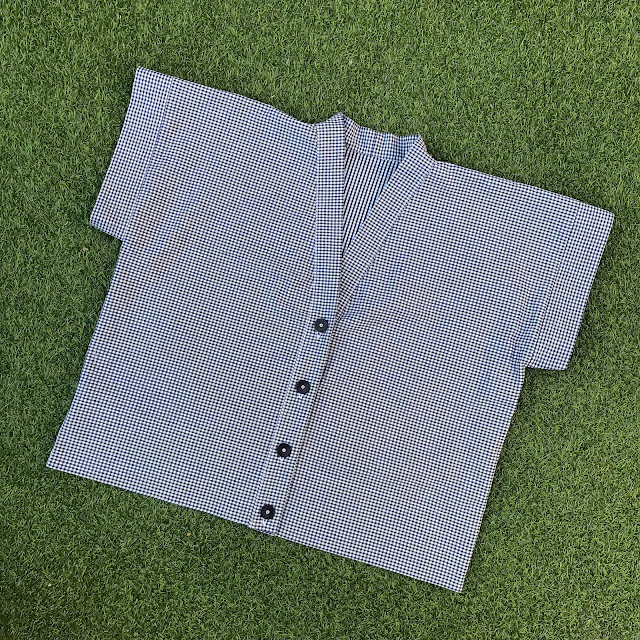
For my first attempt, I used 1m of checked cotton that I thrifted (see below). I really enjoyed this new approach to garment creation, although the project fought me at every turn! Partly the problems occurred because the check is slightly different on each side and I kept messing up my right and wrong sides. The fabric was a little stiff for the sleeves, so I unpicked them, halved them and restitched. Sadly the proportions of this top just weren't right for me, so I found it a new loving home with my friend Sophie, and tried the pattern again a couple of months later when more suitable fabric appeared. 


Attempt #2:

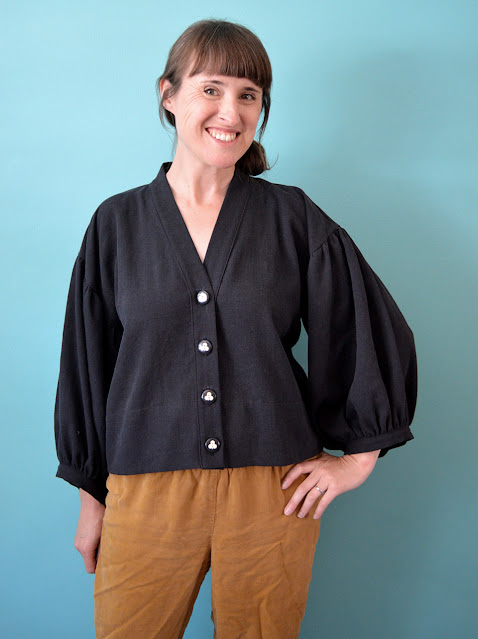
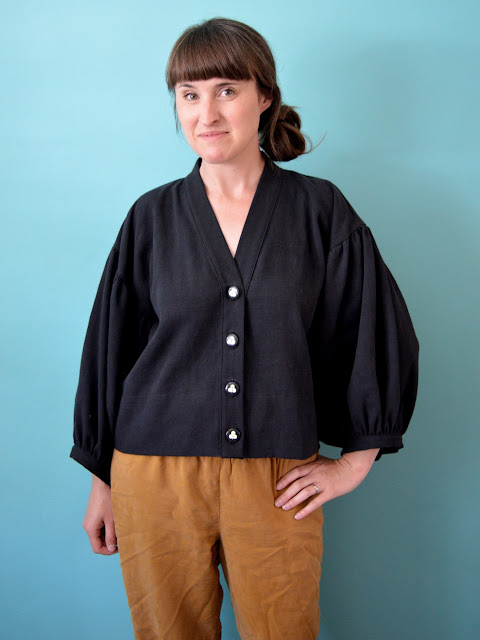
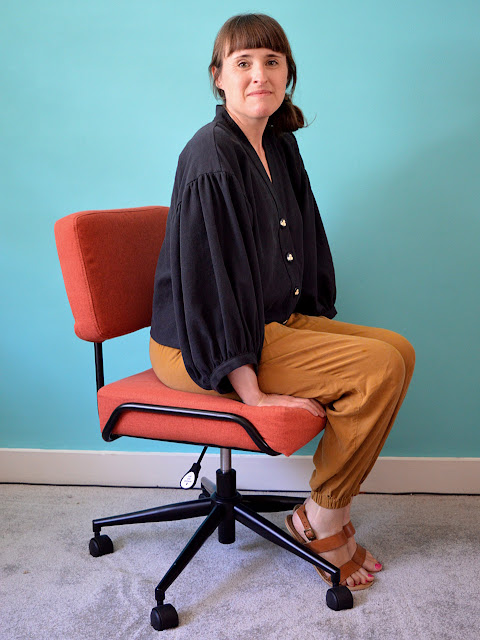
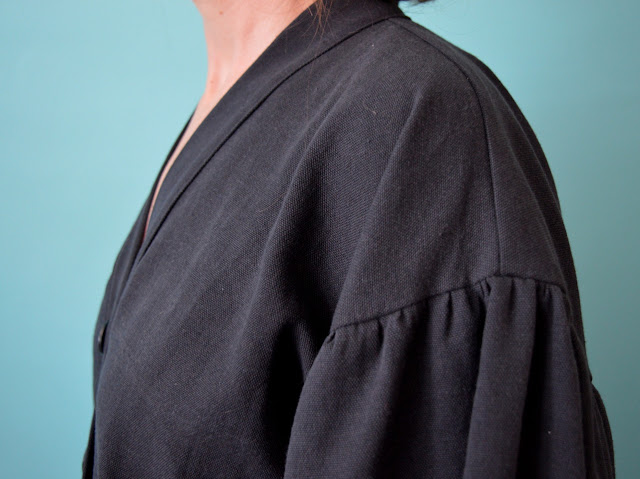
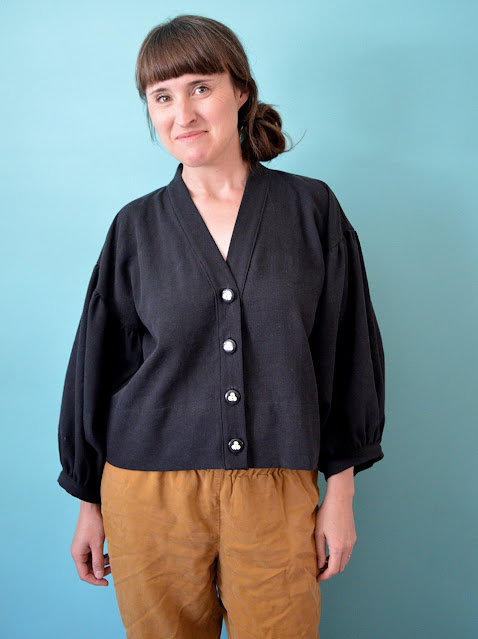
For my second attempt, I used the leftovers of the curtain I used for my recent summer dungers. One of the things I really love about this pattern is how customisable to your own preferences it is. This time I narrowed the width of the body by 5cm front and back (so 10cm all round). I also used the original length (I'd lengthened it by about 5cm for the first version) and tried a version of the long, gathered sleeve hack that is covered in the pattern instructions. For the sleeves, I effectively just used as much of the fabric that I had left and thankfully, I'm thrilled with the volume and length that came out!


I've been wearing this a whole lot since making it. It works well as a top, of course, but also as a kind of summer jacket layer when the weather is a bit changeable. It can be layered over other tops, either buttoned up or left open.  


You can't see them very clearly, but the buttons are ones I've had in my stash for over a decade. I'm pretty sure they came from a market stall when I lived in Barcelona. They have the club symbol from playing cards on them. Playing card symbols have always had a significance for me, not least because I was a croupier for a couple of years in my early twenties! The background colour of the buttons is a dark grey, which suits this fabric perfectly because the black curtain is quite a washed out shade. 


What I'm most surprised about it how soft this curtain feels to wear! I'm definitely on the look out for similar curtains for other future sewing projects. It's such a great way to get a lot of fabric for relatively little money, plus they're often 100% cotton (therefore biodegradable and easily dyed), AND it's not creating additional need for virgin textiles. 


Saturday, 29 August 2020

The Inevitable Lola Top


I loves me a top with ruffles, so obviously I fell in love the Lola top pattern by Fibre Mood as soon as I saw it. However, I've already made plenty of tops that feature ruffles, plus I'm trying to curb my sewing-related spending, so I decided not to buy it. Then I saw Kate from Time to Sew's (@timetosew) lovely versions, and my decision was overruled. And the fact that it has the same name as my daughter seemed to be further confirmation that I should make it.


Pattern:

Fibre Mood pattern magazine is sold by The Foldline, but they were out of stock when I looked for it. I then saw that the individual PDF pattern was on sale for €5 via the Fibre Mood website. (I later discovered that Fibre Mood is stocked in my local WHSmith, grrr!!!) So it would appear that with Fibre Mood, you receive a link to download the pattern files via email after purchase (as you'd expect), however, the instructions then have to be downloaded via the website (as you would not expect, perhaps). After a million attempts I just couldn't seem to log on to access the instructions though, and feeling like I was going crazy. Finally, I found out that the account you set up to make a purchase is different to the account you make to access the website and community (roll-y eye emoji). 


Anyways, this pattern intrigued me as it had a few features that were unlike other ruffle tops I've made. The back half is comprised of various panels which help create a sweet open-back section. The top is fastened with a tie at the back neck so the garment is loose enough to get on and off over your head, whilst still looking fairly fitted.


As per usual, I made a couple of changes to the pattern. Firstly, I blended between sizes, sizing up at the waist and hips. My ability to do this is the reason I could never go back to buying clothing in shops! I also pinched out 2cm from the length of the torso to account for my short-waistedness. After holding the front paper pattern piece up to my body, I chose to lower the bust dart. But after trying on the finished garment, I think this was unnecessary. 


Fabric:

I've been on a massive stash-busting kick lately, and digging deep to unearth some pieces that have been in there for many years. This fabric is some light-to-medium weight cotton sateen, and its slight reflective quality is what's making it look a bit weird in these photos I think. The fabric is a gorgeous tomato-red colour, and if I recall, it was given to me by my friend Claire at least eight years ago.


Thoughts:

Making this top was really fun, and took a bit more time and concentration than most of the projects I've undertaken recently. I found that the lower edge of the cut-out section was a bit gape-y and my bra strap was clearly visible. To combat this, I unpicked it a bit and tightened the elastic. This has helped a lot, but my strap is still visible at times (so I hear). For a future version, I would raise the height of that lower centre back panel. 


'Thanks' to semi-lockdown, I haven't found an opportunity to wear this top since I completed it. I feel that the sateen makes it a too fancy for day wear, but maybe that's just my perception and I could change it. It really feels like Autumn has kicked in now, so unless I find myself going out in the evening some time soon (unlikely!), this top may not see much wear util 2021. 

Friday, 24 July 2020

Scallop-hem Ashton Top Hack


During Me-Made-May this year I saw a lot other participants wearing lovely tops made using the Ashton Top pattern by Helen's Closet. I've always got one eye out for a great-looking woven tank pattern because they are almost as comfy to wear as a T-shirt and only require a small amount of fabric. I remembered that I already own this pattern, having been sent it for free shortly after its release (with no expectation of making or reviewing it, I may add). And with some nice pieces of woven cotton fabric in my stash itching to be used, this project was asking to be made!

(image source: Helen's Closet)

Pattern:

This pattern is a shift style, with a simple rounded neckline and hem facing. Included are two bust size options, two length options and two neck-and-armhole finishing options (bound or faced). I chose to start with the longer length and according to the size chart, my measurements made me a size 10 at the bust and size 12 at the waist and hips. 


I dutifully blended between the sizes and folded out 2cm from the length on the torso, as I always do. Because I was planning to use some fairly precious fabric, I made a quick toile (muslin). That first toile came out too big, so I started again with a size 8/10 combo which a second toile told me was much better. 


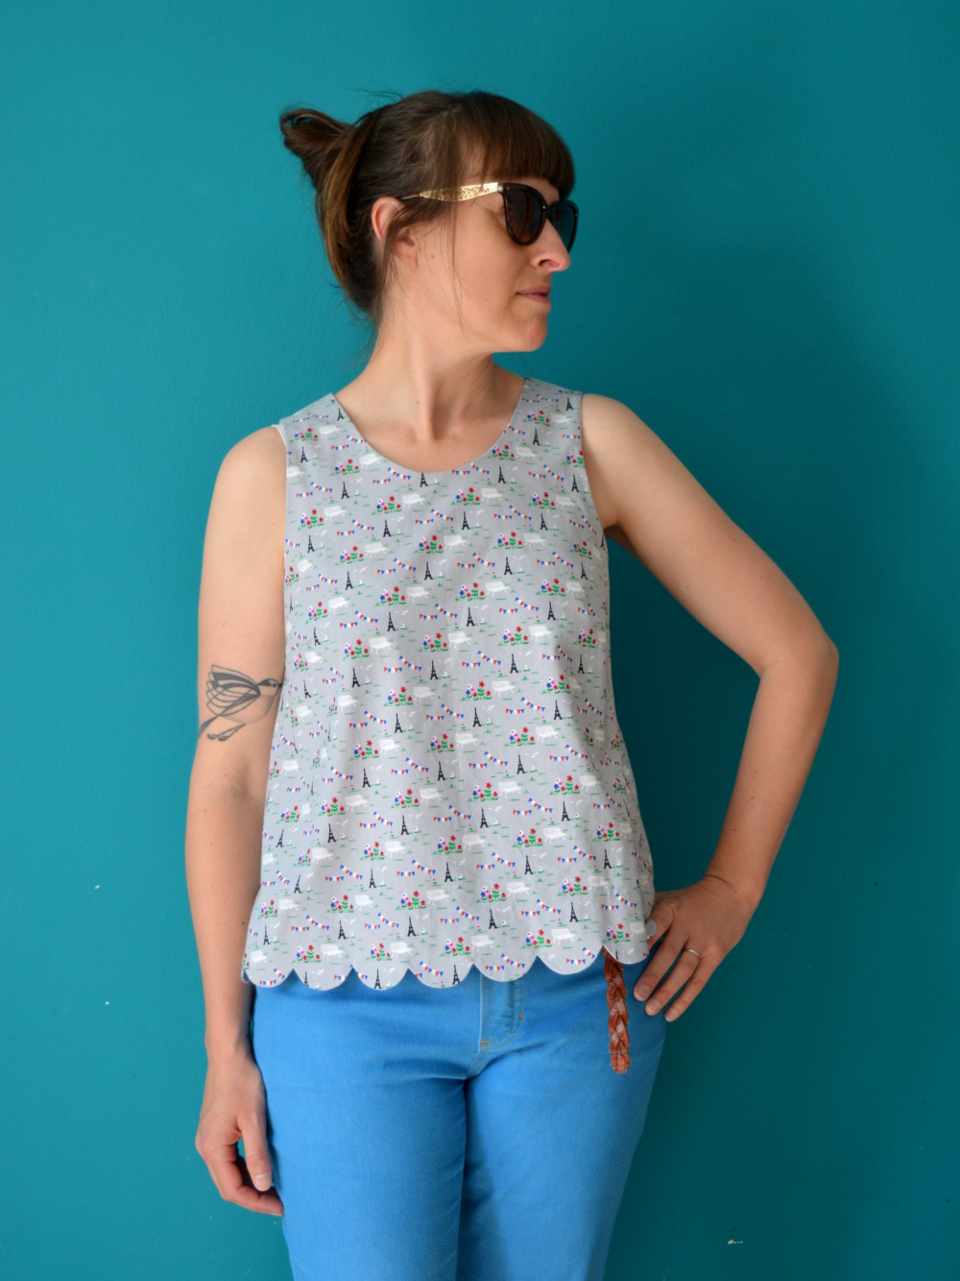
The basic pattern is lovely as it is, but I felt that it would also be a great basis for some pattern hacks. So I decided to have some fun and try making a scallop hem, which is something that I've been thinking about trying in a project for a while. To make a scallop hem, you need to create a facing, but seeing as this pattern already includes hem facings, that was one less step to take. 


I also wanted to play around with the neckline a little, so I drafted a V shape at the back (and altered my facing piece accordingly). I love the V shape detail of the Peppermint magazine peplum top, and what better way to expose a ropey, faded early-2000's star tattoo?!


Fabric:

For yonks I've been the owner of two small-ish lengths of lovely Atelier Brunette printed poplin. I put them both in my #2020makenine sewing plans (which you can see in this post) because they've been in my stash for years and really should be enjoyed out in the world. This cute little Paris print on a grey background came from M is for Make at least five years ago. I bought the end of the bolt, which I think was about 90cm. Although it's a bit cuter than anything I'd buy for myself these days, however I still really love the print and TBH I couldn't think of anything else to do with it.  


Thoughts:

I'm very pleased with how this top came out and I've worn it a couple of times since completion. Making the scallops added an extra level of challenge to the project, and I had a lot of fun working out how to make them as neat as possible (the key is A LOT of perilous clipping into the curves). I'm not sure if the V-shape is a total success: it looks nice but I'm not sure if it quite fits with the scallop hem detail. The only actual annoyance I feel with this project is that, as you can see in these pics, one of my bra straps is almost constantly visible. Next time I use this pattern, I'll probably build up that area a bit, as I'm never going to wear a strapless bra. Ultimately, it's a win. The overall fit is great and I'm so pleased I was able to find a use for this crisp poplin after so many years of hoarding it. 

Thursday, 25 June 2020

Washed Denim Petites Choses Blouse


So here is another lockdown make. I'm not sure if I'd be achieving my current state of productivity if we weren't in lock down, it's not like I have much of a social life anyway. Almost all of my recent makes involve busting my stash, but this is one of the exceptions. Read on, if you please. 


Pattern:

I cannot be accused of being an impulsive sewing pattern purchaser. Most patterns have to grow on me over time. And even if I do like something straight away, I tend to take my time before buying it, often waiting to see a number of other people's versions before I crack open the Paypal coffers. This pattern is the Petites Choses blouse and dress pattern by French pattern company, Atelier Scammit. It was produced in collaboration with a popular and talented French Instagrammer named Fanny (@petites_choses__) who posts about her gorgeous sewing creations and interior decor skillz. I saw this pattern yonks ago, probably on IG, and I finally bought it many months later when Fabric Godmother started to stock some of Atelier Scammit's patterns in paper form.  


For me, the real genius of this pattern lies in the panels and gathering around the bust and on the sleeves. The pattern includes a number of style options that can be combined to create 24 different looks. I chose to make a top with the V-neck, full back and long sleeves options. The pattern is bilingual, English and French, and the the packaging is gorgeous. The only annoying part was that the pieces needed to be traced off before you can start. The step-by-step photos could have been clearer, but generally speaking I found the construction to be fairly straight forward and fun. 


Fabric:

This pattern had been burning a hole in my stash; once I'd finally bought it, I was desperate to make it. But I just didn't have anything suitable in my stash that felt special enough for this project. I randomly ended up on the Village Haberdashery website a while ago, looking at something completely different, and I chanced upon this anchor-embroidered washed denim. It's virtually the same base cloth as the washed denim that Fabric Godmother stocks, and having used it a number of times (here, here and here, for example) I knew it would be wonderful to both sew with and wear, as well as age nicely.


The only fly in the ointment was that the useable width of the fabric limited because the embroidered anchors started and finished a little way in from the selvedges. This was further hampered by the need to make sure that the anchors were placed symmetrically on all the pieces and panels. I really had to take my time positioning the pattern pieces on the fabric before cutting, and I was left with little more than dust from the 1.5m I ordered. 


Thoughts:

My version is definitely more English-mum's-tunic-top than French-Instagrammer's-chic-and-breezy-blouse, but I'm happy with it and I know that it'll see a ton of wear. I'm confident of the latter because it's effectively an updated version of my denim Tova top that I wore almost constantly for a few years (and still trot it out to wear to the allotment). Plus it gives me the opportunity to drop a double-denim look! I can definitely imagine using the pattern again at some point. I'd love to try it in a check or stripe, with the side panels cut on the cross grain to emphasise them more as others have done before me.


Monday, 25 May 2020

Endless Summer Dorothie Blouse


A year ago I made one of my very favourite me-made garments of all time. It was a sweet little blouse made using the Dorothie Blouse pattern by Slow Sunday Paris, in some mustard viscose twill. I loved it so much and wore it a lot. But sadly it started to literally come apart at the seams along the collar/lapel in a way that was not repairable. 


Later that year I made another Dorothie blouse with longer sleeves, but it didn't work out quite how I pictured it would. My mum has that one now, after virtually remaking the whole thing because she's much smaller than me! 


Pattern:

So, third time lucky? This time, I went back to those gathered, mid-length sleeves that drew me to this pattern in the first place. I omitted the weird split, bias-finished hem of the original pattern, and hemmed the whole bottom edge with a simple double turn. I also raised the armholes by 1.5cm, which was a faff but totally worth it. I would have raised them even more but that would have risked messing with the yoke seams.


Fabric:

Oh, this fabric. I cannot properly explain how much I love it. If you could reach inside my head and pull out the most perfect fabric design for me, it would likely be something just like this. I adore the kitsch Americana, the nod to vintage postcard designs and visions of exciting road trips.  


I bought it from Fabric Godmother last summer. It also came in a navy background version, but both have long sold out. The 1.5m length had been sitting in my stash for many months whilst I tried to figure out how best to use it. 


I included it in my #2020makenine plans (which you can see in this post), because I didn't want it to become one of *those* fabrics that live in my stash so long that eventually my tastes change and I end up not being all that into it. The little red plastic buttons are vintage ones that have been in my stash forever. I was careful this time not to position them too far away from the front edge, like I did with my original mustard Dorothie. 


Thoughts:

There are definitely things I could point to on this blouse to prove its imperfection. But that would be silly, because, overall, I've made a lovely blouse and I'm very excited to wear it. Although my style is far less vintage/retro inspired these days than it used to be, this somehow still feels very 'me'. I can't wait to wear it with my Romero trousers and some sandals and go somewhere that isn't my home! 


Tuesday, 19 May 2020

Biro-Ink Pivoine Blouse


Here's a new little blouse that kind of got made by accident. I had both the fabric and the pattern sitting in my stash for over six months, and finally I made the connection that they might work well together. And by Jove, they did!


Pattern:

As I've have proclaimed many times before on this blog, I'm a big fan of Delphine et Morissette patterns. And although I'd had my eye on the Pivoine pattern for some time, it wasn't until I saw a few versions on Instagram without the collar that I was truly sold. 


In essence, it's a sweet little loose-fitting blouse. There's gathering into the yoke on the front and back, plus an interesting, sloping yoke seam that piping can be inserted into, should one desire. The armholes are finished with simple, turn-back cuffs. The original pattern includes a rounded collar, but I used bias binding to finish off the neck edge instead. 


The construction of this garment was straight-forward and enjoyable. The instructions are in French, so I copy-and-pasted chunks into Google translate to guide me through.


Fabric:

Isn't it weird how differently the colour of this fabric looks in these two sets of photographs? IRL, it's a biro-ink, navy blue: somewhere in between the two colours that have come out in my pics. The colour aside, what I can tell you is that it's a crepe, most likely viscose. It came to me in the form of a remnant without a label, just over 1m in length. Even though the pattern called for 1.5m, because I was leaving out the collar pieces, I was just about able to squeeze the blouse out of my length of fabric with basically only dust to spare. 


I'd held onto this remnant for about a year because I wasn't sure I'd even wear a top in this colour. I tend to wear dark-coloured bottoms, so I didn't think I could make a navy top work in an outfit with the rest of my clothing selection. But having recently made the fawn-coloured Harper pants, I realised that I do have something suitable now. 


I love garments with simple, contrasting buttons. I went with these basic, two-hole, plastic ones from my stash so that they'd add contrast but wouldn't effect what other colours I could wear this top with too much. 


Thoughts:

I'll admit, I haven't fully integrated this top into my wardrobe yet, and I've only worn it once so far. However, I am currently working on some more bottoms that I hope will look good with it. As for the pattern, I can definitely imagine using it again. I'd like to try it in a cotton lawn, or a double gauze perhaps. 

Thursday, 14 May 2020

Frankie Baseball Tee in Isewlation


This garment was the first thing I sewed during lockdown. That was just seven weeks ago, but emotionally speaking, it feels like a whole year may as well have passed. Seven weeks ago I was definitely in shock, but also trying hard to make the most of the situation, and had a Blitz-era, 'What would Nella Last do?' spirit about me. I decided it would be a great opportunity to tackle my fabric stash, and make what I could from the things I already owned safe from the temptations of new fabric, seeing as I wasn't going to work. Pat was still at going to work during that first week, so I had decided to carve out an hour to spend sewing each day, when I would plonk the kids in front of some CBeebies and give myself a little break.

But the following week brought a less chipper attitude about the whole lockdown/global pandemic/thousands of people dying/the world being broken situation. Plus, Pat had to start working from home, so my sewing area became a permanent 'office' set-up in the daytime, as our bedroom is the only place we can shut the door on the kids and be able to concentrate. No daytime sewing for me anymore.

I've still be working through my stash, and making some great things, but it's all been in the evenings when I'm exhausted and sadly it feels like more of a slog. Anyways, I'm soooooo lucky in so many regards. Including having this great new baseball tee! (See how I brought things round there? Pretty smooth, eh?!)

Fabric:

You may recognise this fabric from a previous creation. I used some of this amazing hands-print interlock a couple of years ago to make a Freya top, and I had a weird-shaped piece left over that was burning a hole in my stash. The interlock came from Cotton Bee, a fabric printing service based in Poland that is similar to Spoonflower. They kindly offered me a voucher to test out their process and products to help promote them amongst my readers. I had been dwelling on how best to use the funny-shaped leftovers, and it eventually dawned on me that I could combine it with something else to eek a new, adult-sized garment out of the situation. 

This black knit, also an interlock, has been lurking in my stash for sometime too. In fact, I cannot reliable tell you how it got in there, or when. It's thinner than the hands-print, which concerned me a little, but they seem to behave well together. The black interlock is particularly soft and makes this garment the very definition of 'secret pyjamas'. 


Pattern:

I can't see a baseball tee and not think of my best friend. We've both been fans of them since the 90s, and she still has one or two, I believe. However, when I first received the Stretch! book by Tilly, the Frankie baseball t-shirt (despite being one of my very favourite names!) wasn't one of the patterns that jumped out at me. Then, more recently, one of the women who attends the sewing class I teach made a couple of fantastic Frankies, and I was sold. The fit looked great, casual and comfy but flattering. It's funny that I ended up making two garments from the same fabric, both using patterns from the same sewing book. Yet they perform quite different functions in my wardrobe. The Freya looks and feels a bit more formal to wear. It works very well under pinafores. Yet the Frankie definitely wants to be paired with jeans.

To make this Frankie, I made my usual pattern alterations. I blended between sizes, going up a size for the waist and hips, and I folded out 2cm from the length of the body to account for my short-waistedness. The only other monkey-ing that this project required of me, was to create a seam in the back because because my limited fabric wouldn't allow me to cut it in one piece. You can see the join in the image above, but I doubt you would have noticed unless I pointed it out. No offence. 


Thoughts:

So this will probably always be my 'Isewlation' garment, when we were all a bit excited in the early days of lockdown about how much sewing my might possibly get to do. Although there has been, and will be other garments made during this time, this is the one that I will remember as having been made in the strangest of circumstances. Whilst I was making this top, I would have been shocked to learn that almost two months later, little has changed. Apart from having made over 150 face masks. Also from my stash! But that's another post. 

Related Posts Plugin for WordPress, Blogger...