Showing posts with label Fibre Mood. Show all posts

Thursday, 25 May 2023

Patchwork Denim Quilted Jacket


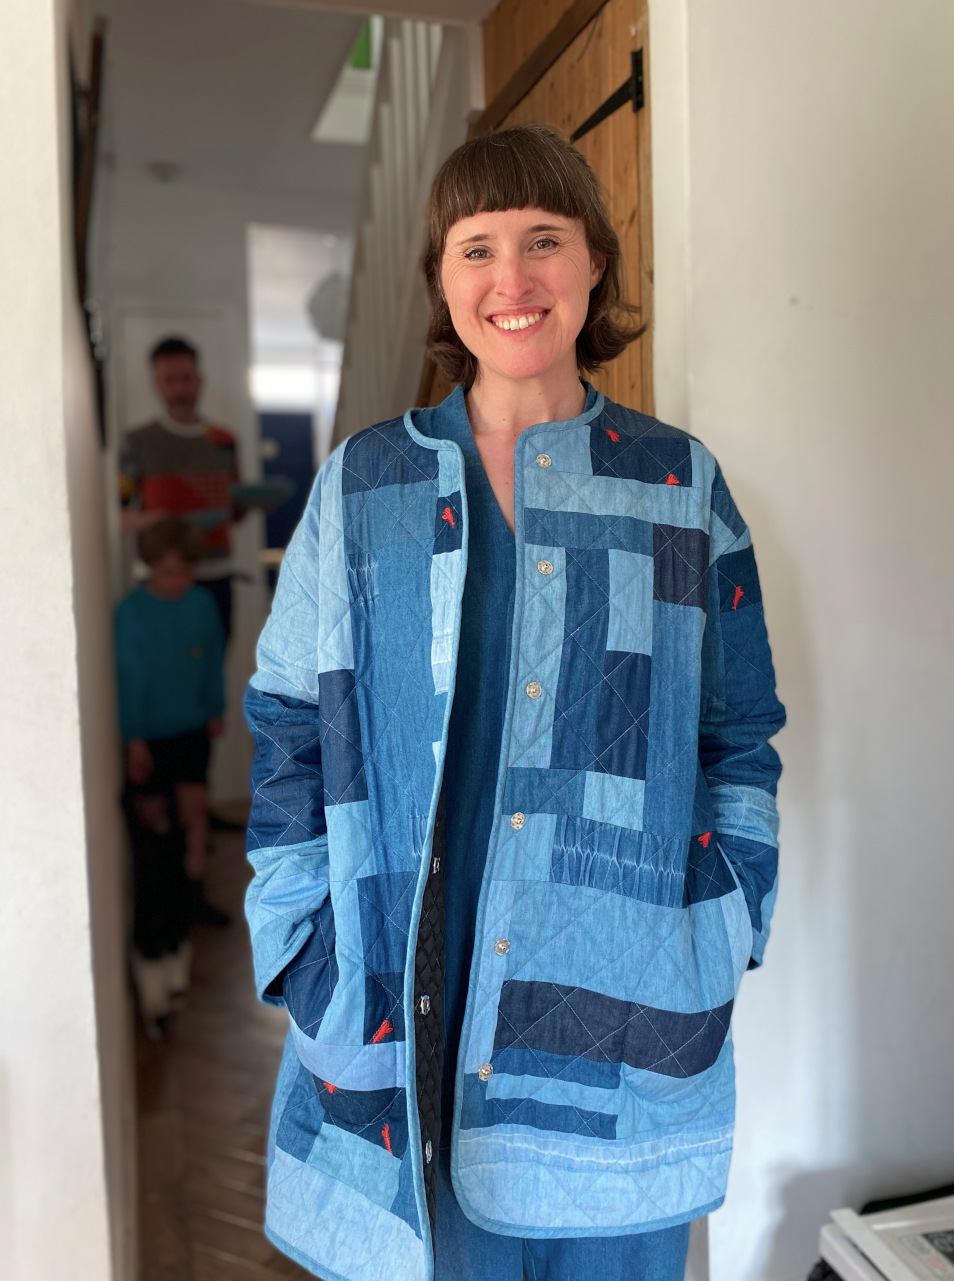
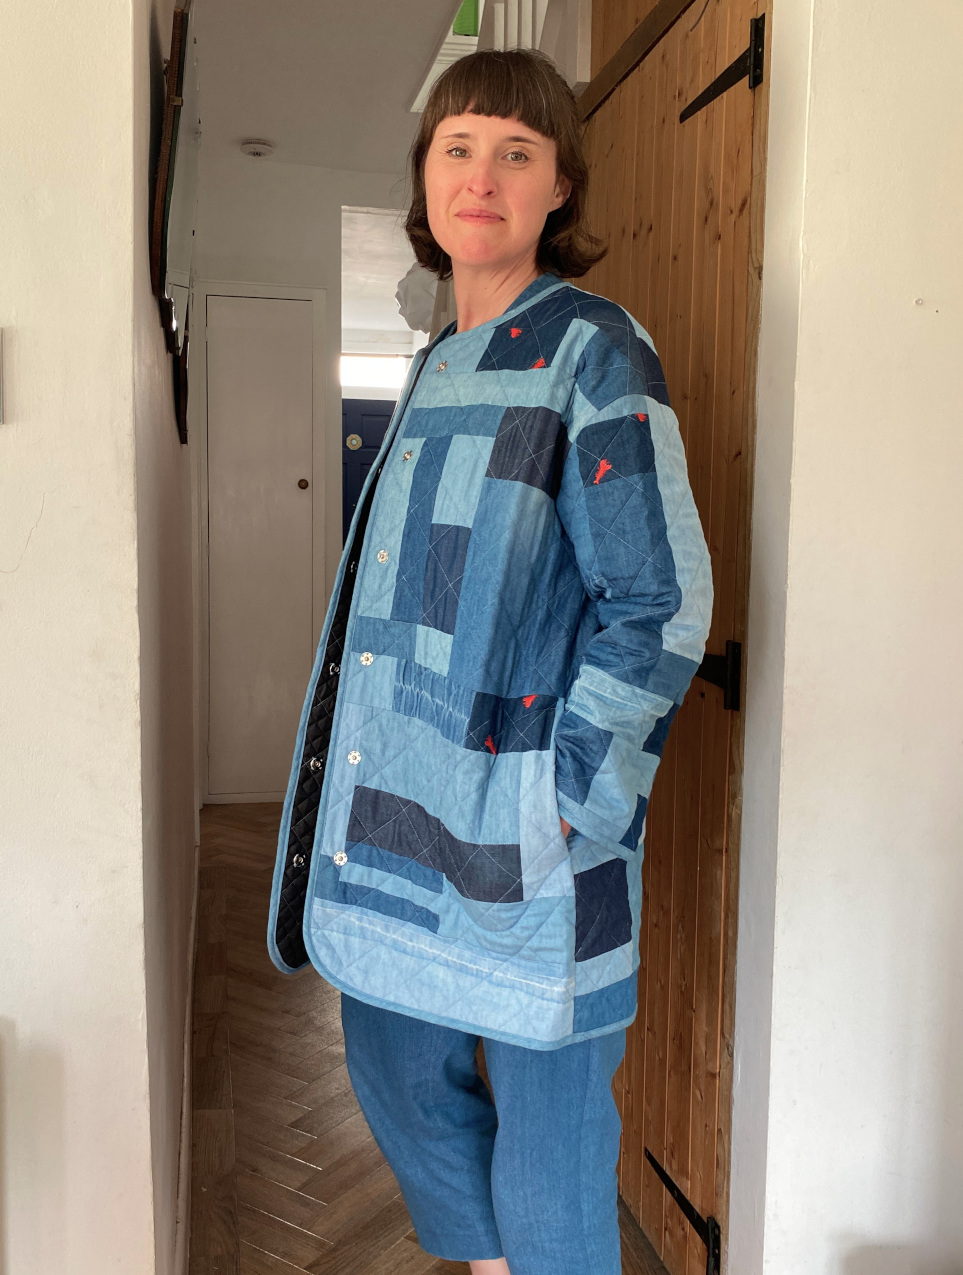
She's done! The jacket with the ridiculously long (but descriptive!) name is complete. This project has been in the works, to some degree, for about two years. That is about how long I've been consciously collecting scraps of this lightweight denim with a view to combining them somehow. 

As I've mentioned all over the place many times, I'm currently obsessed with the possibilities of combining scraps and leftovers to make clothes. Fabric scraps and leftovers from sewing projects are a fantastic resource, but they can build up so quickly. Before you know it, they are spilling out of the box you assigned them, and threaten to take over whatever sewing space you have. But pausing your garment-making activities (if, like me, that's the main thing you're into) just to bust out some little projects to use some of them up, seems like a waste of time and energy. I'm far more interested in applying creativity and resourcefulness to work them into garment projects. 


Fabric:

So I can't exactly pin-point when the idea for this specific garment was born, but when I realised that I had everything I needed to make it happen, I got started on it almost immediately. This jacket has hoovered up a large carrier bag of scraps of 4oz washed denim. Some of that 4oz denim was in the form of scraps from my previous sewing endeavours, some came from the scrap bin at work (including the washed denim with embroidered lobsters!), there were two unworn tunic-y garments, plus the legs from my daughter's woven joggers (which had, in fact, been made from another previously attempted garment projects), also all made from the same type of fabric. I just really love this soft, lightweight washed denim from Fabric Godmother (it comes in three colour ways but this is my fave), which is clear by how many previous garment projects I've made from it over the years. I'm so happy that the finished jacket includes my Tova top, which I wore A LOT during my second pregnancy (proof!). This project also sits very neatly, both in terms of  practicalities and in spirit into the Last Sewist Standing challenge. The only thing I needed to buy to make this happen was thread. 


Pattern:

I settled on the Fibre Mood Molly jacket pattern to use as the basis for this project, not least because I already own it! I chose to lengthen it so the garment would A) use up more of the denim, and B) so it would perform a slightly different function in my wardrobe than my other quilted jacket. I traced out the jacket pieces in my size, then laid them out on the remnant of pre-quilted lining that I was planning to use, and moved the pieces around to work out how much longer I could make them so they still fit. I made sure each piece would have 5cm additional space all the way round to accommodate any shrinking or distortion from the quilting process. 


Patchwork:

To create the actual patchwork, I took my scraps and leftovers and cut them into random rectangles. I took two rectangles that both had an edge a similar length, and stitched them together. Once I had a bunch of pairs, I then found another shape, or pair of shapes, to add to each pair. I kept building it up like that, until I had 'clusters' of rectangles that could be added to each other to make overall shapes that were big enough to fit the pattern pieces on. You can see some of these clusters forming in this Instagram post. At many points, I had to cut some 'custom' shapes to fill in gaps. This was where the actual garments came in particularly handy. I also made an enormous amount of bias binding from the larger of the tunic garments. I planned to bind all the seams inside, as well as round the outside edges, so I knew I'd need A LOT. Obviously I still didn't make enough initially, and had to go back and make more. 

When stitching the patchwork, I used the edge of the machine foot as the seam allowance guide, so it was probably about 7mm. I pressed all the seam allowances open so they'd sit nice and flat, but didn't bother the finish the raw edges because the were going to be hidden by the lining. 


Quilting:

As I say, the lining from my stash that I planned to use was already quilted. With the patchwork panels pinned to the roughly-cut out lining pieces, I stitched along every third row of the quilted lining, so the lining was my guide. I used a walking foot on my machine and really took my time to re-pin after every row to avoid any weirdness in the quilting. I used Gutermann rPET recycled thread for all the quilting and binding, and this project took an embarrassing number of reels to complete! I'm not super happy about that aspect of my 'more sustainable' garment project. 

Construction:

With the pieces quilted and properly cut out, I began construction of the actual garment. All seams were first stitched, then bound with my self-made binding. I also added a cute KATM label that I've been hanging onto for yonks for a special project such as this. 


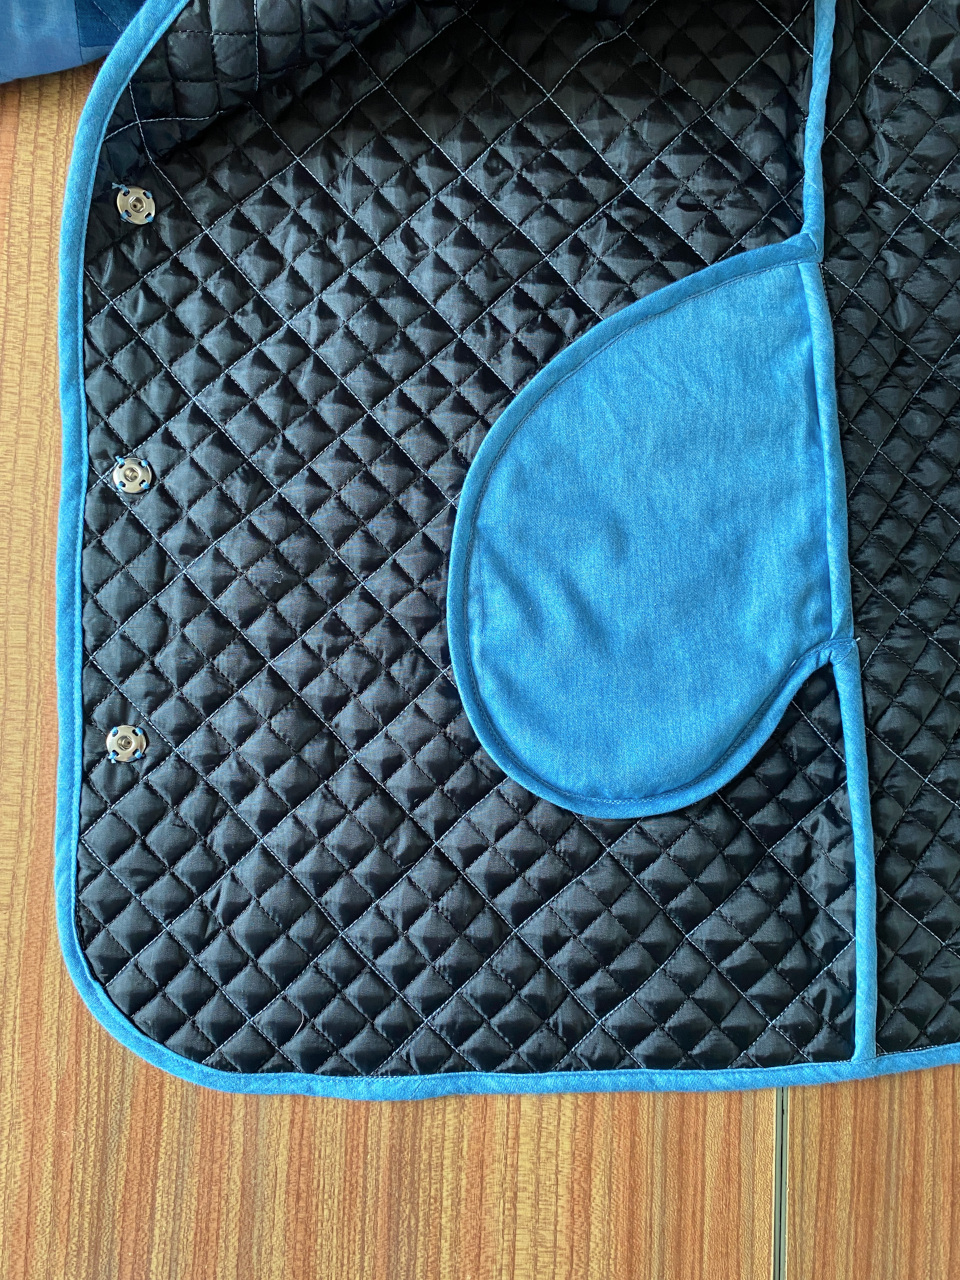
Towards the end of the jacket construction I had to make a call on pockets. The original Molly pattern has simple patch pockets, although not a particularly good-looking shape, IMO. I considered drafting and applying my own patch pockets, but I thought that might disrupt the patchwork on the front panels. Instead, I drafted in-seam pocket bags to make pockets inserted into the side seams. This was a real head-scratcher because I've never made in-seam pockets with completely bound edges before. In the end, I just went for it and it worked out pretty well. I then decided to stitch the pocket bags to the front jacket panels around the edges to keep them in place and give them more stability when in use. I really like the way their shape is visible from the outside if you know where to look. 


The last decision was about fastenings. I considered both traditional sew-on press studs and the set-in type of press studs that I used for my Tamarack jacket. An Instagram poll revealed that the majority of my followers thought the latter was the best option. However, when I went to get them out, I discovered I didn't have quite enough of the back pieces. Because I can't buy haberdashery and still remain in the heavy weight category the Last Sewist Standing challenge, I went with the traditional press studs from my stash, and I actually really like the look of the hand sewn element. 


Thoughts:

I feel triumphant having finished this project! I'm surprised by how similar the outcome is to my original vision, despite winging it the whole time. I love the look of the patchwork. It's got a real abstract, arty vibe, rather than looking like I cut up a quilt, so hopefully it won't look really dated in a year or two. The weight of the garment is also really nice: perfect for late spring and early autumn (plus any rubbish days that summer may throw at us). I also feel great about this project because it's made good use of pieces of fabric that an earlier version of me might have just chucked out. And of course I love that I didn't have to buy anything, other than thread. So. Much. Thread. 

I hope this project inspires others to have a rummage and see what scraps and leftovers they can use for garment making. Using as much of the fabric we purchase is the best way to honour the time, energy, resources and labour that went into its production. 
 

Tuesday, 1 November 2022

Ermine + Norma = A Fibre Mood Blouse Mashup


Another of my Autumn sewing plans is a wrap! I'm a big fan of a blouse. Just type 'blouse' into the search box on this blog and you'll see how many of the damn things I've made over the years! They make my usual jeans or dungarees look a bit more grownup and me generally more put together. 


Fabric:

I'd had my eye on this awesome printed viscose for well over six months before I finally gave in and bought some. I bought it from Fabric Godmother (not sponsored but I get a staff discount), but I can't link to it sadly because it has sold out now. 

I'm not a natural print wearer, I guess in part because I predict I'll get bored of a particular one before long. Prints can tie you, stylistically, to a time and place in your life in a way that solids don't seem to. And that can limit the amount of use a garment will see. Which is why I approached this fabric with caution. I had to wait to check that I really did adore it enough to want to put it on my body, rather than to just enjoy like you might a poster on your wall for a while. 

What I particularly enjoy about it the indoors theme of this print! Many prints are floral-based, but I really enjoy the domestic setting and mid-century vibes going on here. It's not dissimilar to my own home! And the design includes lots of colours that I enjoy wearing (rust, mustard, navy and possibly even emerald green). But whilst I'm suitably convinced that I won't for out of love with the design any time soon, I'm not entirely convinced the peachy-pink background colour does anything for my skin tone. 


Patterns:

As I say, I love a good blouse. Fibre Mood magazine invariably has at least one I like in every issue. I missed the availability period of the issue that included the Ermine blouse pattern, however we started to stock it at work as a standalone product. My boss, Josie, decided it was a good candidate for a Dream Wardrobe box. I made the sample garment for that month, so I got to test out the construction and even try it on before committing to making my own. 

My conclusions were: I liked the delicate gathering into the yoke, the size M was too big and the sleeves could be more exciting. So I decided to go ahead with it but made the size S and swapped Ermine's sleeve pattern for the more voluminous piece from the Norma blouse pattern (also by Fibre Mood). 
 

Conclusion:

This blouse, as with anything of course, is not perfect. I don't like how there are two green chairs on the front yoke pieces, and the neckline feels a little too wide, despite picking a size smaller than my measurements would have led me to make. And as I said above, the main colour isn't great against my skin tone. But I do really like this blouse and have enjoyed wearing it a number of times since completion. I think it's going to have a long and happy life in my wardrobe. 

Tuesday, 2 November 2021

Tadah! I Made Birthday Outfits!


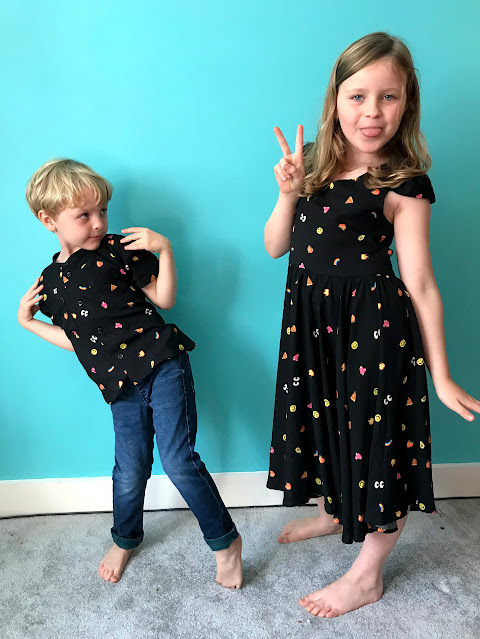
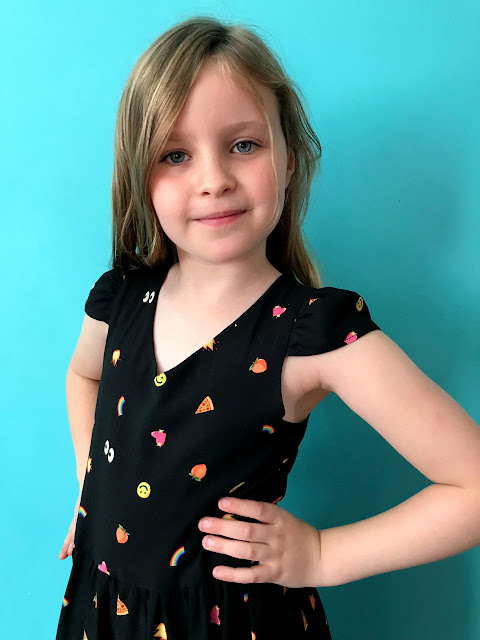
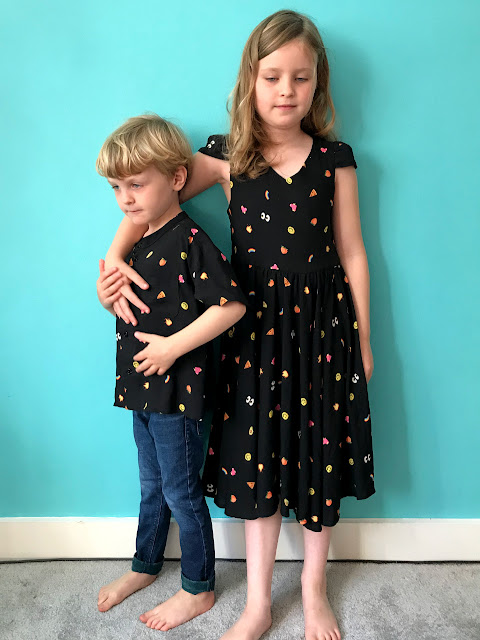
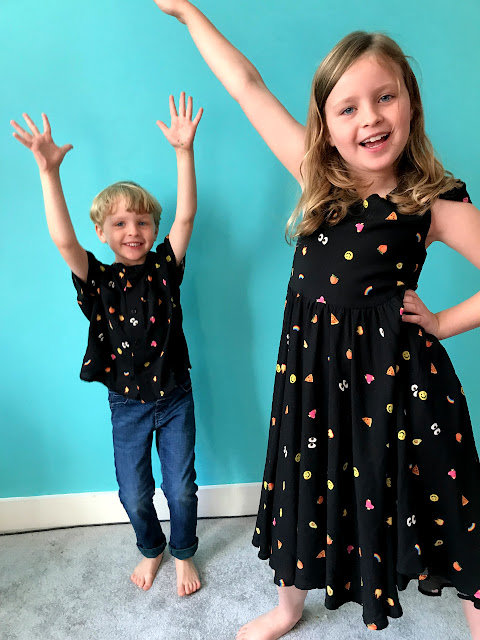
My kids' birthdays are ridiculously close together. In fact, their special days are only one day apart. To date, our family more or less treats the situation like they're twins that are three years apart, and the celebrations kind of overlap and get all smooshed together.  I guess this will change as they get bigger when their friendship groups get more defined and separate, and perhaps as soon as next year the events will be more distinct. I also feel that the clock is ticking for how long I can get away with making them matching clothes! To make the most of this fleeting opportunity, I decided to make these coordinating garments for them to wear as they turned eight and five. 


Fabric:

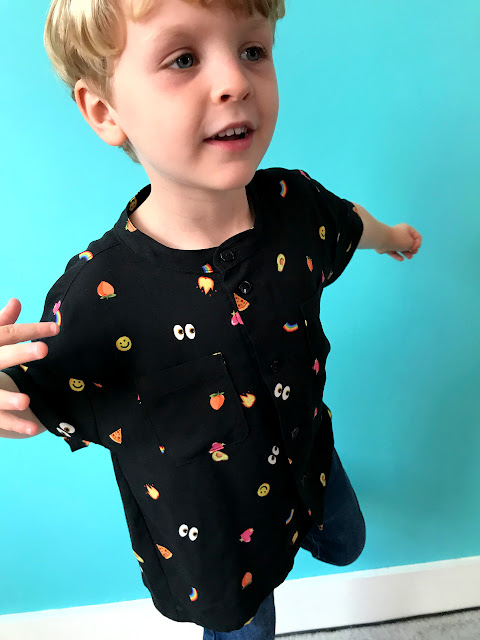
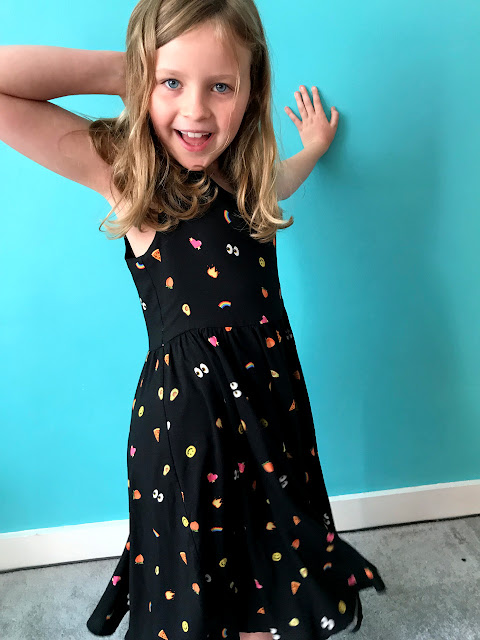
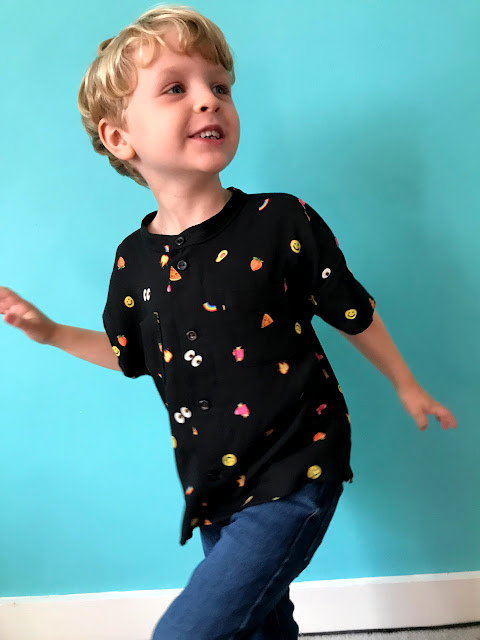
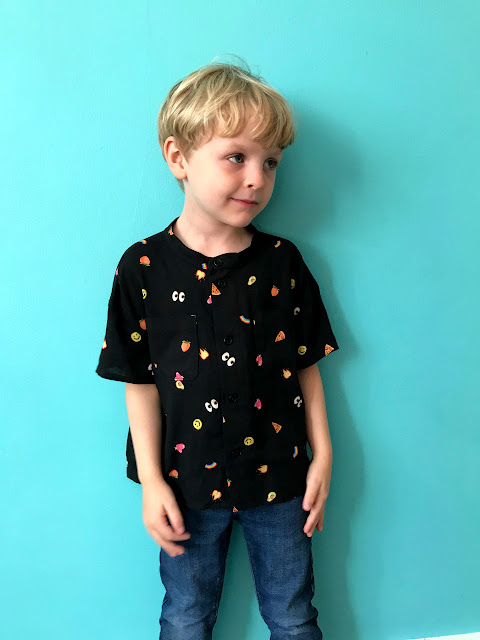
When I first laid eyes on this fun emoji print viscose lawn from Fabric Godmother, I knew I had to get some for my kids. To be honest, I rarely buy fabric to make clothes for my kids. I mainly use leftovers from other projects and fabric harvested from existing garments when making things for them, with the occasional new purchase or gifted length that's more specifically 'kiddie'. I love how this print is more subtle than a fabric designed for kids though. In fact my colleague Kerry has also bought some to make a dress for herself. Full disclosure: this is not a paid ad or freebie, I bought this fabric myself but with a staff discount.


The fabric is lovely, but as with most viscose fabrics, it's light-weight, slippery and a big fan of developing creases. Having decided to make Frankie a shirt and Lola a dress, I knew I'd be pushing the limit of fabric suitability for the styles I had in mind with this fabric selection. I think I just about got away with it though!

(image source: Tadah! Patterns)

Dress Pattern:

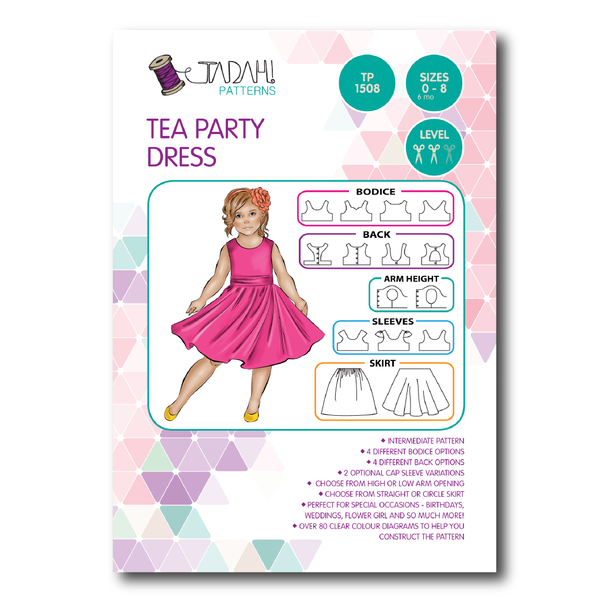
I'll start with Lola's dress. Around the time that I was gearing up to buy the fabric, I was contacted via Instagram by Sewing Gem, a UK-based online sewing shop, asking if I'd like to try out a pattern by Tadah! Patterns, an Aussie brand that they stock and were hoping to promote. It was an obligation-free offer, and the timing was just right considering I was on the hunt for a pattern to make a part dress. When I looked through their selection of Tadah! Patterns, I clocked the Tea Party Dress pattern (pictured above) straight away as one that I've had on my Pinterest board for years. 

(image source: Tadah! Patterns)

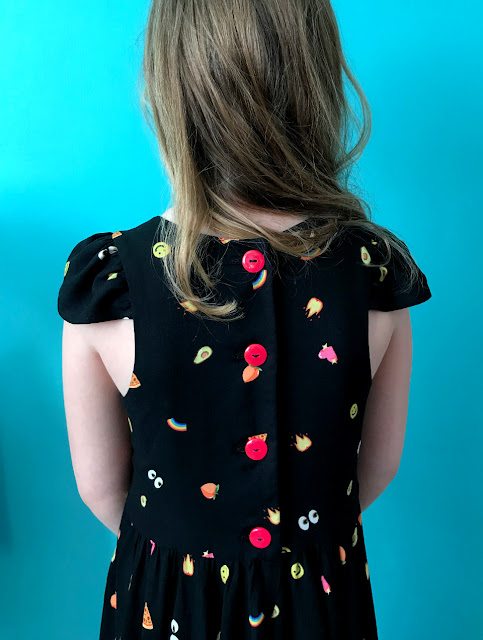
In essence, it's a fairly traditional fitted bodice-and-full skirt dress style. However, it includes a crazy amount of style options (see above). It allows you to make a ton of different looking garments all from the one pattern. I let Lola choose her own style variations. She selected the V-neck, classic back (she was going to be wearing this in October after all!), regular arm height, gathered cap sleeve and circle skirt options. 


The pattern is graded between 6-12 months to 8 years. Lola is a touch larger than the measurements that correspond with the size 8, so I lengthened both the bodice and skirt by about 5cm each (also so she'll be able to get more use from it as she gets bigger still). I also made the bodice a tiny bit wider at the centre front and back. I wish I'd had this pattern from when she was much smaller so I could have made many more garments from it over the years!


The construction was pretty simple and suitable for someone who has made a few other garments previously, particularly if you choose to make it in a more stable fabric. The bodice is fully lined and back fastens with buttons, which makes this a slightly more time consuming project, so I wouldn't recommend making it the same day your child is due to attend a party! The only part of this project that gave me pause was trying to work out whether the top edge of the circle skirt should be gathered into the bottom of the bodice, or if it should be sewn flat. The instructions mention creating gathers, however the illustrations look like it should be sewn flat with no gathers (spoiler alert: it should have gathers). 


For future versions, I would also prefer to make the bodice and skirt separately and the join them at the waist seam, instead of attaching the skirt pieces to the front and back bodice pieces and THEN stitching the side seams in one. But that's just a preference of construction order and wouldn't change the look of the finish garment particularly. 

(image source: Fibre Mood)

Shirt Pattern:

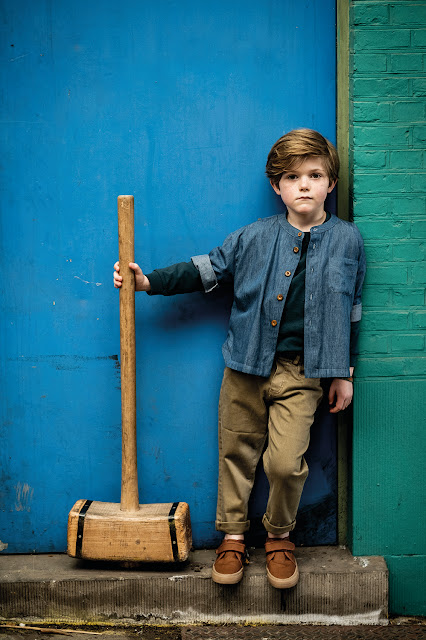
I love making shirts for Frankie, and mercifully he enjoys wearing them also! I recently made him a shirt using my regular little-boy shirt pattern with a camp collar, so I was on the look out for something different this time. I found the Rupert shirt pattern (pictured above) in Edition 14 of the Fibre Mood magazine, but you can also buy it separately here. It's got a different silhouette and collar to the others I made for Frankie so decided it was worth the tracing out for some variety! 


I ended up combining sizes for this garment to prevent it being too wide. I used the size 4 for the width and size 5 for length. I altered the sleeve pattern so it wouldn't have the turn up because I didn't want to reverse of the viscose to be visible. I also made a regular hem instead of the facing around the bottom edge because I felt the latter wouldn't be suitable for the slinky viscose. I also added two pockets to the front rather than one upon Frankie's request.


With the bottom hem facing eliminated, this shirt was pretty quick to put together. I like the look of the collarless neckline, and the wider fit is a nice variation to Frankie's current clothing selection.


Thoughts:

My main conclusion is: viscose isn't the ideal fibre for making kids clothes, but it is do-able! Both kids seem to enjoy the slinkiness of the fabric in their respective garments, even if I don't enjoy the ironing! They both chose to wear these garments multiple times over their extended birthday celebrations, and I've put them aside for a month so they'll be in decent enough condition to wear to a wedding in December. 

Saturday, 29 August 2020

The Inevitable Lola Top


I loves me a top with ruffles, so obviously I fell in love the Lola top pattern by Fibre Mood as soon as I saw it. However, I've already made plenty of tops that feature ruffles, plus I'm trying to curb my sewing-related spending, so I decided not to buy it. Then I saw Kate from Time to Sew's (@timetosew) lovely versions, and my decision was overruled. And the fact that it has the same name as my daughter seemed to be further confirmation that I should make it.


Pattern:

Fibre Mood pattern magazine is sold by The Foldline, but they were out of stock when I looked for it. I then saw that the individual PDF pattern was on sale for €5 via the Fibre Mood website. (I later discovered that Fibre Mood is stocked in my local WHSmith, grrr!!!) So it would appear that with Fibre Mood, you receive a link to download the pattern files via email after purchase (as you'd expect), however, the instructions then have to be downloaded via the website (as you would not expect, perhaps). After a million attempts I just couldn't seem to log on to access the instructions though, and feeling like I was going crazy. Finally, I found out that the account you set up to make a purchase is different to the account you make to access the website and community (roll-y eye emoji). 


Anyways, this pattern intrigued me as it had a few features that were unlike other ruffle tops I've made. The back half is comprised of various panels which help create a sweet open-back section. The top is fastened with a tie at the back neck so the garment is loose enough to get on and off over your head, whilst still looking fairly fitted.


As per usual, I made a couple of changes to the pattern. Firstly, I blended between sizes, sizing up at the waist and hips. My ability to do this is the reason I could never go back to buying clothing in shops! I also pinched out 2cm from the length of the torso to account for my short-waistedness. After holding the front paper pattern piece up to my body, I chose to lower the bust dart. But after trying on the finished garment, I think this was unnecessary. 


Fabric:

I've been on a massive stash-busting kick lately, and digging deep to unearth some pieces that have been in there for many years. This fabric is some light-to-medium weight cotton sateen, and its slight reflective quality is what's making it look a bit weird in these photos I think. The fabric is a gorgeous tomato-red colour, and if I recall, it was given to me by my friend Claire at least eight years ago.


Thoughts:

Making this top was really fun, and took a bit more time and concentration than most of the projects I've undertaken recently. I found that the lower edge of the cut-out section was a bit gape-y and my bra strap was clearly visible. To combat this, I unpicked it a bit and tightened the elastic. This has helped a lot, but my strap is still visible at times (so I hear). For a future version, I would raise the height of that lower centre back panel. 


'Thanks' to semi-lockdown, I haven't found an opportunity to wear this top since I completed it. I feel that the sateen makes it a too fancy for day wear, but maybe that's just my perception and I could change it. It really feels like Autumn has kicked in now, so unless I find myself going out in the evening some time soon (unlikely!), this top may not see much wear util 2021. 

Related Posts Plugin for WordPress, Blogger...