Showing posts with label denim. Show all posts

Friday, 1 March 2024

Free Pattern Friday: Sam Apron for Adults


Welcome to my monthly 'Free Pattern Friday' feature, where I road test a free sewing pattern or tutorial: sometimes a children's one, sometimes an adult's one. I try to publish these posts every first Friday of the month, timed to provide inspiration for those who plan to get their sew on over the weekend. I firmly believe that, if you pick your projects carefully, sewing doesn't have to be a crazy-expensive way to clothe yourself and your family. Thanks to all the amazing pattern designers who have offered up their hard work for us to enjoy for free.

To be honest, I haven't done a great job this month in actually showing you what my chosen free pattern actually looks like made up. I've omitted the pockets and created my own 'fabric' for it that makes it tricky to see what's actually going on. ANYWAY. Hopefully you will get a sense of the proportions at least, and also the versatility of this pattern as a canvas of sorts. If you want to get a clearer idea of what this pattern can look like, I'd recommend checking out Amy from Craft and Thrift's awesome versions (here and here). But what am I even talking about? Let me introduce you to the Sam Apron pattern by Helen's Closet. Thanks so much to Helen for sharing this (and a number of others) for free. There are many free apron patterns and tutorials out there on the interwebs, but I wanted to highlight this one specifically because of the interesting details and multiple sizing options. In my experience, Helen's Closet patterns also have excellent instructions. You can access the Sam Apron pattern through the webshop on their site (no payment is required).


(image source: Helen's Closet)


Pattern type:

The Sam Apron is cleverly designed to be suitable for lots of activities. I can imagine cooks, bakers, barbers, hairdressers and all manner of artists and crafts-people wearing a version of this apron. It includes chest and waist pockets, towel loops, and two strap options. But what is really unusual about this pattern over most free apron patterns is the graded size range and instructions for creating a custom fit based on your width, height and even bust size. 


Sizing info:

The apron fits sizes 0-34 (up to a 62″ / 157.5 cm hip) which has been broken down into five size bands. There are also five height options, from less than 5" to over 6". My plan was to make a cooking apron that would fit both Mr SoZo and myself. Helpfully, our hip measurements are similar so I cut the size 8-12. He's taller than me, but I don't think a cooking apron needs to be knee length anyhow, so I used the length that's shorter than both of us. Included are instructions for adjusting the bib section to accommodate a larger bust. Not something I need personally, but I appreciate that they included that for others. 


Fabric info:

The pattern recommends medium to heavy-weight woven fabrics with no stretch. Cotton broadcloth, denim, linen, cotton twill, quilting cotton and canvas are all suitable options. Waxed Canvas can also be used for a water-resistant apron. I didn't have any suitable fabric in my stash (thanks Last Sewist Standing challenge!) so I 'made' fabric by combining scraps of non-stretch denim and twill. It's basically the same technique I used for my denim patchwork dungarees. If this approach to scrap-busting is of interest to you, I have an episode of my podcast planned for next month with an accompanying downloadable guide that will talk you through using scraps for garment making. 

I used a lighter weight denim for the straps, because I thought a heavy weight fabric would be difficult to tie. You could also use twill tape, wide ribbon, braid or cord for the straps. 


Findings:

Ah I love a Helen's Closet pattern. Your hand is so thoroughly held and it feels like no detail has been overlooked. Presumably, their free patterns have been created to give potential paying customers a sneaky peek into what their patterns and instructions are like, and they deserve to get a good conversion because the quality is high.

I literally found only one thing that didn't work well. I found that the bias strip pattern piece that's used to finish the side curves was too narrow if using the 1cm seam allowance that is suggested. It would have resulted in the bias strip being too thin to cover the seam allowance when you flip the bias over to the wrong side. I used a narrower seam allowance and trimmed down the seam allowance to prevent that happening. 


The finished apron is pretty cool though. The denim is perhaps a bit thicker than necessary for a kitchen apron. And if I were to make it again, I'd add velcro to one end of the neck strap so it could be tighter but we'd still able to get it on and off with ease. 


Would I make it again?

If I ever had the need for another apron, then yep. I'd give more thought to fabric suitability depending on the intended use however. 


Monday, 17 October 2022

Denim V-Neck Jumpsuit: Adult Babygro?


For yonks I've been coveting a denim jumpsuit. A kind of 'uniform' item that I can throw on whenever I can't really be bothered, and just look put-together and casually cool. My main role at Fabric Godmother is ordering sewing patterns, so I'm well positioned to judge the merits of the various options. The question remains however: have I made the most comfy garment ever, an adult babygro, or both?!


Pattern:

After a long hard think which involved a lot of hashtag stalking, I landed on the V-neck Jumpsuit pattern by The Assembly Line to make my jumpsuit dreams a reality. I liked the modern, casual style, but I decided to make some tweaks. Like others before me, I decided to go with buttons to fasten it rather than concealed press studs. I also shortened the bodice length by about 3 or 4cm because I heard it's very long in the body/low in the crotch. I didn't make a toile, but I did muster the patience to baste/tack the main garment together (minus sleeves) before final construction to check the fit. Based on my findings, I chose to make the top part smaller, and slightly closer fitting. I also added patch pockets to the front instead of inseam side pockets to break up the expanse of fabric a bit. 


Fabric:

The fabric I chose for this project is a 9oz mid blue denim made from recycled cotton fibres from Fabric Godmother (not sponsored but I get a staff discount). It also has some stretch content to really double down on the comfort factor. I did a bit of additional top stitching here and there on this garment because I love how after laundering denim fades a bit and the ripples start to show. I absolutely love this fabric and am now eyeing it up in the other colour ways. 


Thoughts:

Yes it is comfy. Yes it looks like a giant babygro. It's not quite the sleak, modern mum-uniform I envisaged but there you go. I've still been wearing it heaps, and having fun layering it under and over other garments. 

Sunday, 15 May 2022

Leopard Print Ginger Jeans and a Realisation

It's slowly been dawning on me that I can't really wear the style of jeans that I prefer, and also feel comfortable AND have them stay on my body properly. And honestly, I think this has always been the case. What I mean by this is that, the slim/skinny legged jeans with a low-rise, hipster waistline which I love the look of just don't work for my body. I've always had a bit of a tum, even when I was in my 20s and weighed the least in my adult life. I've always found the waistline of jeans cut in to my tum uncomfortably. I got so used to undoing the top button of my jeans each time I sat down after years of doing so, but I've grown tired of that now. 

Through the power of sewing my own clothes, I tried to solve the issue by grading between two different sizes for the waist and the hips-downwards. This has never worked well because they end up too loose at the waist and often slip down a bit. 

Having gone on a journey which resulted in my workwear denim Lander pants, I came to the realisation that I need extra space around my tum only, not all around the waist. The full-tummy adjustment I did on the Lander pants worked really well, and for the first time ever I have a pair of fly-front jeans that I can sit down in without needing to undo the button of. 

Naturally, I wondered if I could apply the same magic to a slim/skinny legged pattern, seeing as that is the type of jeans I wear most often. And what I then realised it that I don't think I can make that adjustment on a low- or even medium-rise style and expect them to stay up. 

So what I ended up doing for this project was to trace the high-rise version of the Closet Core Ginger jeans pattern (which I have previously made with low- and medium-rises) as my starting point. I already own a medium rise version which are still in action, so I was able to try those on with the button and fly undone which allowed me to assess how much addition width I'd need to properly accommodate my tum, AND where the additional width should land. As I've discovered through watching videos and reading posts about full-tummy adjustments, I knew I'd also need to add some additional height at the front. 

Because the Ginger jeans pattern calls for stretch denim, I decided not to add the entire additional width it would appear I required, because the stretch content might result in them becoming too accommodating and therefore not staying up!

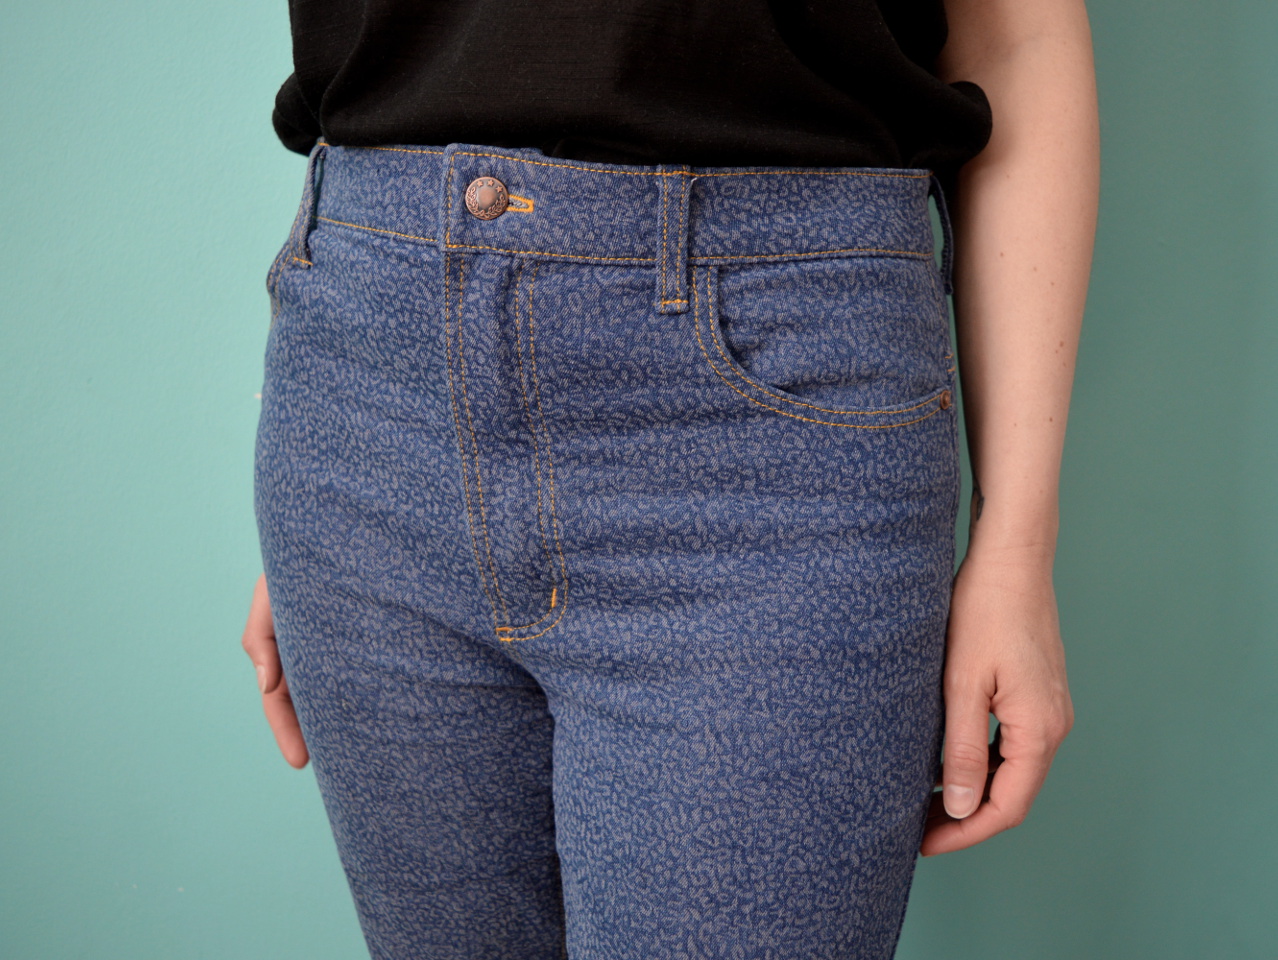
As you can see from the side view (pictured above), the side seam is pretty much in the correct position: perpendicular to the ground. That's one of the main clues that tells me this adjustment worked. The other is that I can sit down without having to undo the button!!! Woo hoo!!!!

The fabric I used was a seconds/remnant from Fabric Godmother. It's a very soft stretch denim with this super-cute leopard print pattern. I like how the jeans look like pretty standard blue jeans from afar, but the little leopard print becomes visible when you look closer. It was a remnant because a fade mark had occurred along the folded edge when the fabric was on the bolt. I was easily able to avoid the fade mark when cutting out these jeans, however. 
Although I still don't love the look or feel of high-rise jeans, I do love generally how comfortable these jeans are. I can wear them all day without wanting to take them off the second I get home. And honestly I never wear my garments tucked into my jeans as I am in the photos: I did that to show the fit of this garment around the tummy. I forgot to take a photo of these jeans shown seated, but I'm wondering if this adjustment might be of particular use to some wheelchair users who would like to wear skinny jeans but find them uncomfortable around the waist. I'm pretty evangelical about this adjustment because I don't think it's one that many sewers know about. 

Now that I have this adjusted pattern, I plan to make a couple more pairs in different colours to flesh out my wardrobe a bit. Currently I own a few tops and blouses that I love and would pair well with skinny jeans, but don't look good with the two blue pairs I know own.  

Friday, 11 March 2022

Denim Patchwork Dungarees


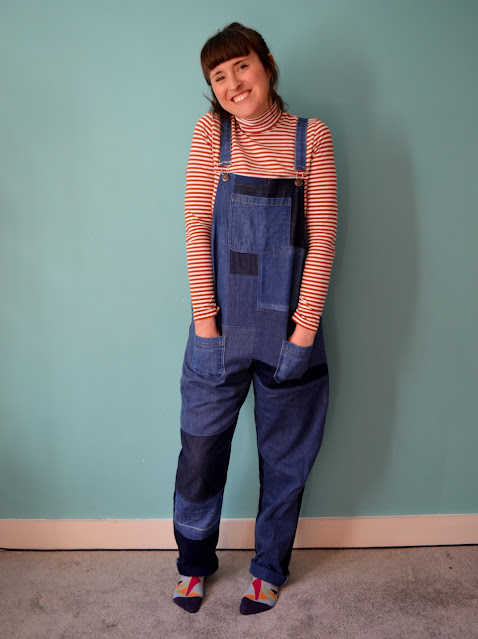
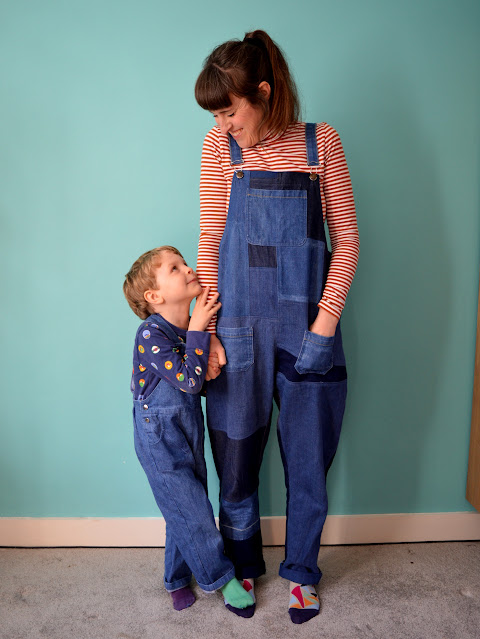
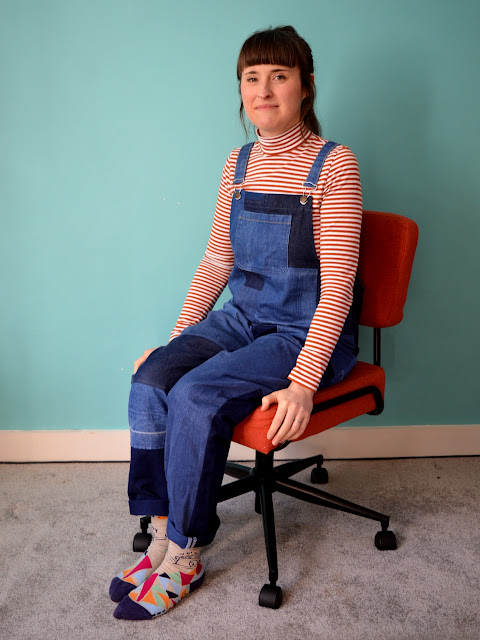
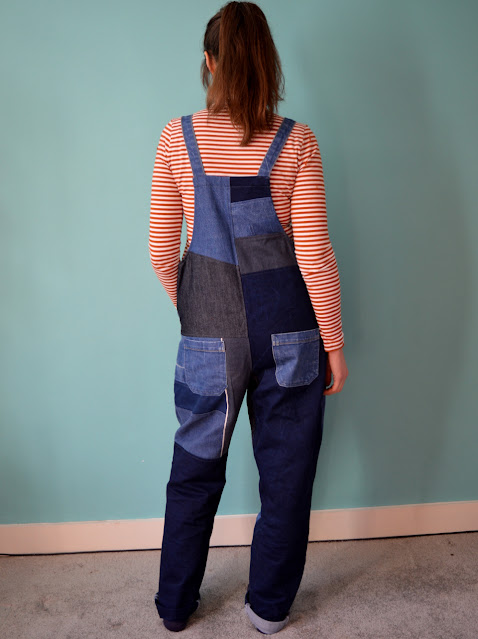
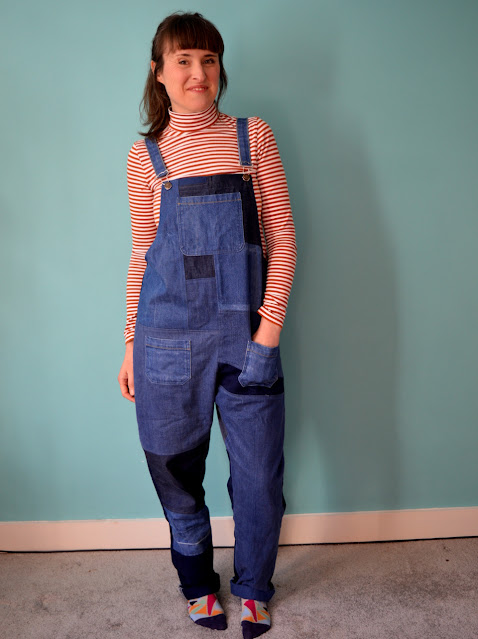
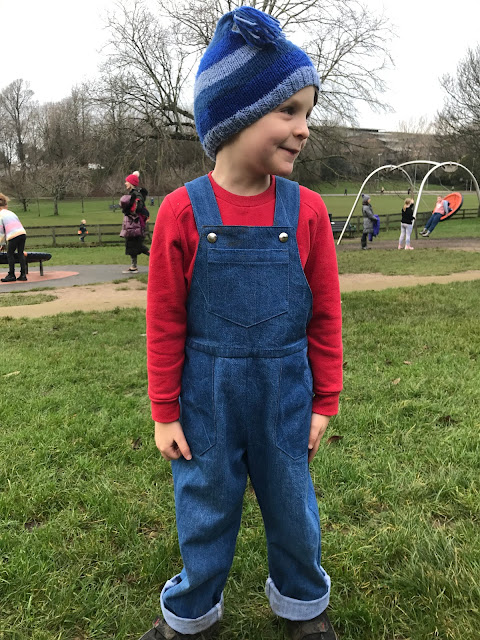
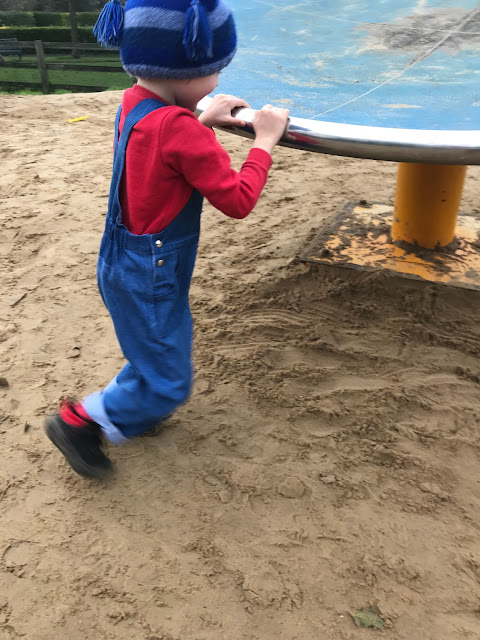
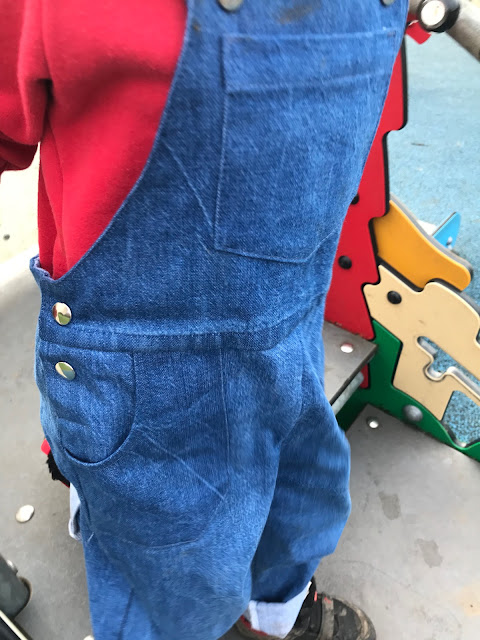
This project, as you can imagine, was not a speedy one. I've been obsessed with the idea of combining fabric scraps to make more 'fabric' for garment sewing projects for a while now. Previously, I've done this with viscose, cotton lawns and jersey fabrics. And having been left with some scraps from my son's reclaimed denim dungarees (see below), I decided to combine those with the rest of my other non-stretch denim scraps to see what could be made from them. 
 

Inspiration came from a number of conversations I'd had for my podcast Check Your Thread, and fortified by an online workshop on abstract piecing hosted by quilting legend Sherri Lynn Wood. I love how I can remember where almost every one of these pieces of denim came from. It's also allowed me to use the very last scraps of some of my absolute favourite fabrics. 


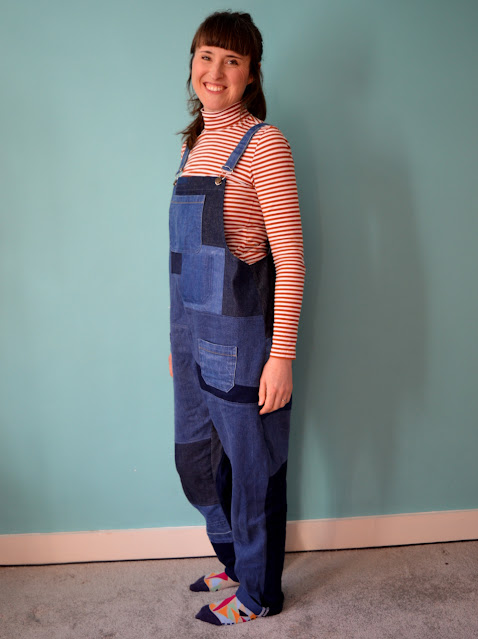
There are sections where you can see the darker denim exposed by removing pockets (#pocketshadow!). And there are fade lines that have been exploded by unpicking and letting down the hems. The dungaree straps and chest pocket were reclaimed from my Cleo pinafore, and the front and back pockets from my Lander pants, all of which were harvested when I 'decommissioned' those garments in preparation of making my son's dungarees.  


The denim pieces are combined with a 1cm seam allowance, which I then overlocked together, pressed to one side and top-stitched down. I wanted to give the denim 'fabric' as much strength as possible, but I didn't have the energy to make flat felled seams at all the joins. I also thought that flat felled seams might create too much bulk in some areas and make the eventual garment construction a bit tricky. I wanted to create sections where the pieces were quite small, and others that included larger panels for variety. 


Pattern:

Having combined the pieces into four large panels, I cut the pattern pieces from them and constructed the actual garment. I used my TNT Heyday Dungarees pattern (pattern by Waves and Wild) as the basis. This version obviously took way longer to create than my first and second version. However, reusing and applying existing pockets is soooo much easier and speedier than making new ones!


Thoughts:

How 90's do these look?! I didn't expect them to look quite so retro, but I'm ok with it! I had a lot of fun making these, and it scratched a creative itch that making something from a flat piece of virgin fabric can't always reach. 

I've worn these a lot and they've received a surprising amount of love. My friend Eve even said she wanted to lick them! I'm very excited to see how they change over time with wear and washing. I'm hoping that the seams joining the pieces will start to get some interesting fading, and that the pockets will start to blend in more. 

Thursday, 10 February 2022

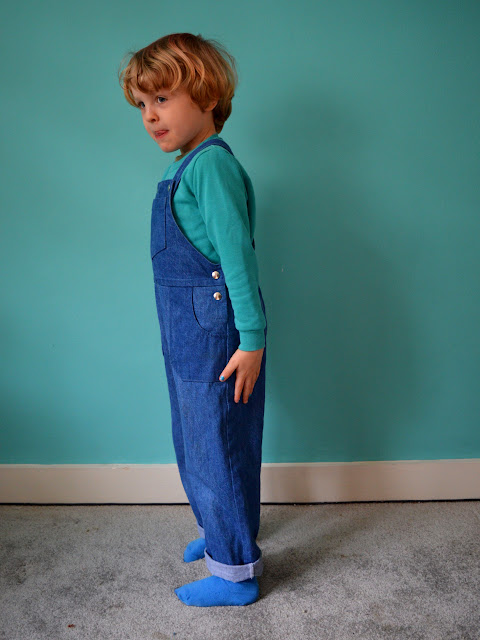
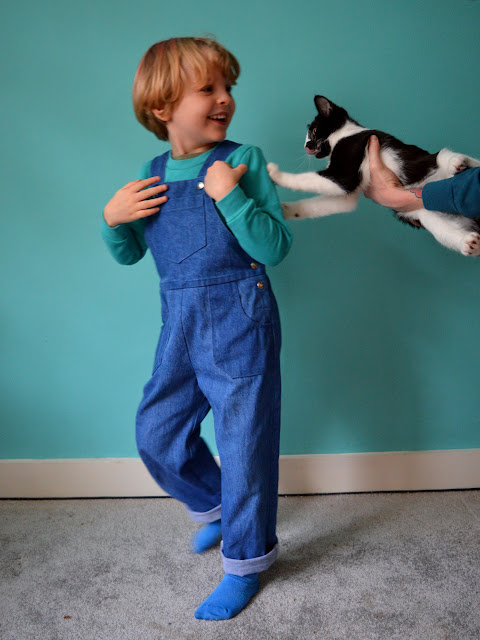
Reclaimed Denim Freddie Dungarees


I've been so inspired by many of the conversations I've had for my podcast Check Your Thread. I guess it was inevitable that inspiration would express itself in my sewing projects! Speaking to Riccardo Guido made me realise that I'm storing (hoarding?) a number of garments that I no longer wear in my wardrobe. I came to accept that I was unlikely to wear my denim Lander pants again because my body shape has changed now that I am firmly in my middle age. And the Cleo pinafore that I made with that leftover precious denim was almost never reached for, and when I did wear it, I didn't feel great. I realised that the lovely broken twill denim could be harvested and turned into something that would see much more use. 


Fabric:

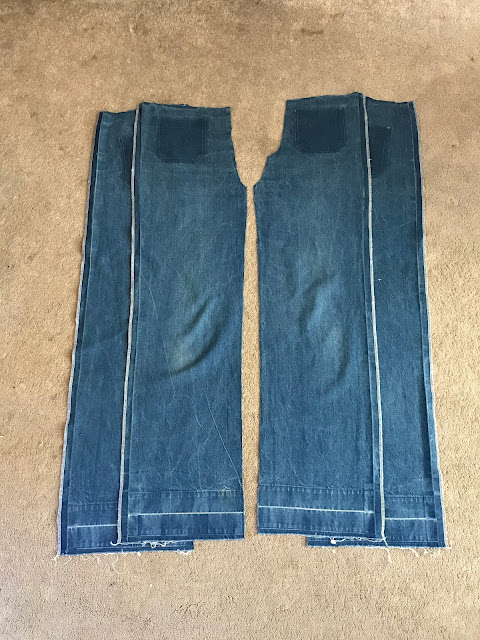
So I unpicked and cut apart both the trousers and pinafore in order to harvest as much of the original denim as possible. I carefully set aside the pockets from both garments, and the straps from the pinafore for a different, future project. As I did this, I had in mind my conversation with Guy / The Light Touch, in particular his concept of 'decommissioning clothes'. I loved hearing about how he assesses old and unworn garments, and figures out what he can salvage and reuse in new projects. 


Pattern:

Frankie had been asking for his own pair of dungarees (and a boilersuit, but that's a whole other thing!) for yonks. I decided to make some for him as part of his Christmas present. I already own the Freddie dungarees pattern by Two Stitches (pictured below), having made the pinafore version for my daughter when she was about the same age. Handily, I was able to reuse some of the pattern pieces that I traced out for that project three years ago for Lola! 


There are things I really like about this pattern, and things I don't. This time round I was able to amend some of those less pleasing elements, like increasing the pattern's scant 6mm seam allowance, and not lining the pockets. For Frankie's dungarees, I also decided to omit the back pockets and the turn-ups with tabs. I added some extra length to the legs to future proof them somewhat. I used no-sew press studs to fasten the straps to the bib, and for the side openings so they'd be easier for him to take off himself. 


Thoughts:

What is extra pleasing about this project is that I was able to take the fabric from the Landers and Cleo and keep it in use as a garment. This is what Shelly Sommer was talking about when we discussed keeping materials at their highest possible level of use. I was so into that concept that I've actually recorded another conversation to be released where I asked her to go into that concept further still. 


Although I made these dungarees before I had the pleasure of speaking with Eliu Hernandez, I can now recognise and appreciate the pocket shadow that I had to include at the top of the back legs (see above). The pocket shadow occurred when I removed the pockets from the Lander pants, but because of the size and shape of the pattern pieces, including that darker section when cutting out the Freddie dungarees was inevitable. I really like it now though: it's a nod to their origins!


Although not exactly thrilled with them when he unwrapped them on Christmas morning, Frankie has since embraced his dungarees. He is very happy to put them on if I select them as part of his outfit for the day. And because they took a comparatively long time to make, compared to the usual simple joggers and such that I make him, I want him to wear them A LOT! 


When you're in the mood, making detailed woven garments, particularly on a small scale, is really satisfying. Thankfully, I gave myself just enough time before Christmas to make these so that they didn't become a stressful rush. I'd definitely consider tracing out a larger size and making them again for him in the future, if he asked me to. 

Thursday, 25 November 2021

Denim Shirt Anthea Blouse


I'm so excited to finally share this project with you because more went into it than most of my projects. More time and more techniques, and a lot more thought. This was an idea-itch that I had to scratch, and I was more invested in manifesting my idea than the actual outcome. However, I do love the outcome also!


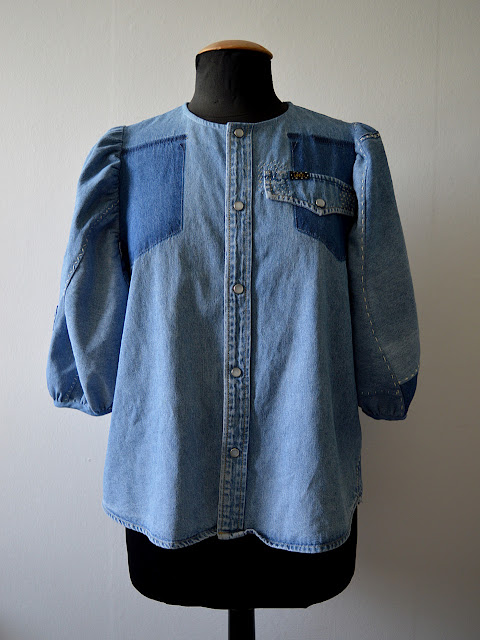
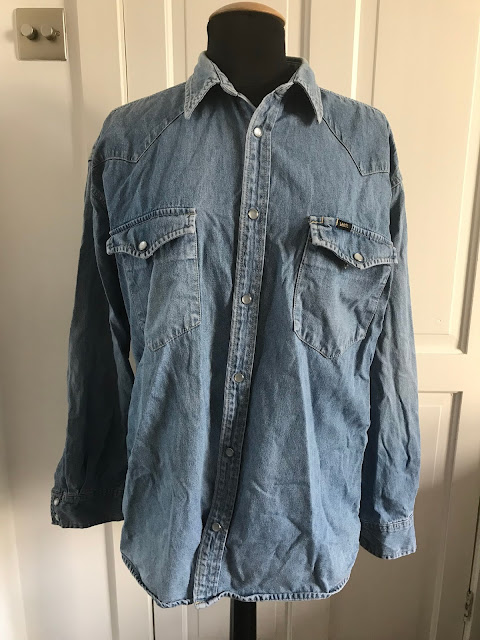
This secondhand denim shirt has been in my stash for a shameful ten years! I feel bad about that because it's possible that someone else could have been during that time. Anyhow, I was keeping it out of landfill at least! I've always loved those pearly snaps and knew that they had to be included in whatever it was to become.


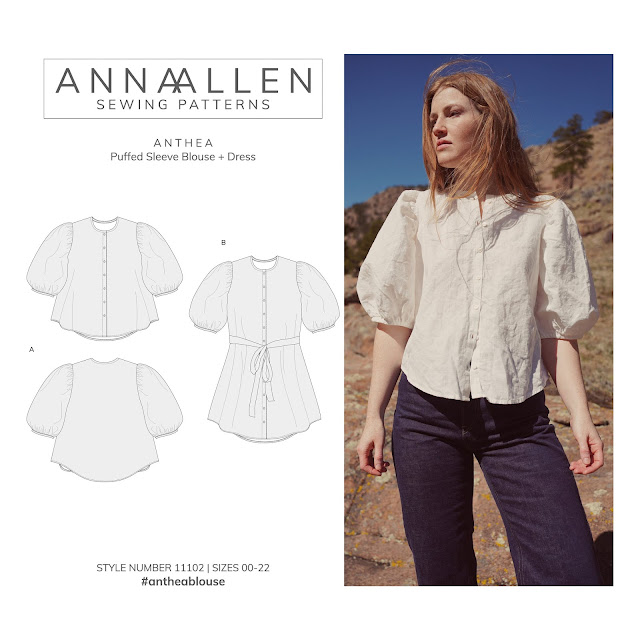
I'd had my eye on the Anthea blouse pattern by Anna Allen (pictured below) as soon as I clapped eyes on it. I have adored every single version I've seen on Instagram. And it's been a very popular pattern so there are a TON of versions to behold! 

(image source: Anna Allen)

The problem was that I didn't have any pieces of fabric in my stash suitable for the pattern, and I couldn't justify buying a new pattern AND new fabric when I already own a lot of both. I'm not exactly sure where the idea came from to use the denim shirt, but I've been having so many inspiring conversations with interesting people lately for my podcast, Check Your Thread, that my mind is kind of permanently in this kind of zone these days. 


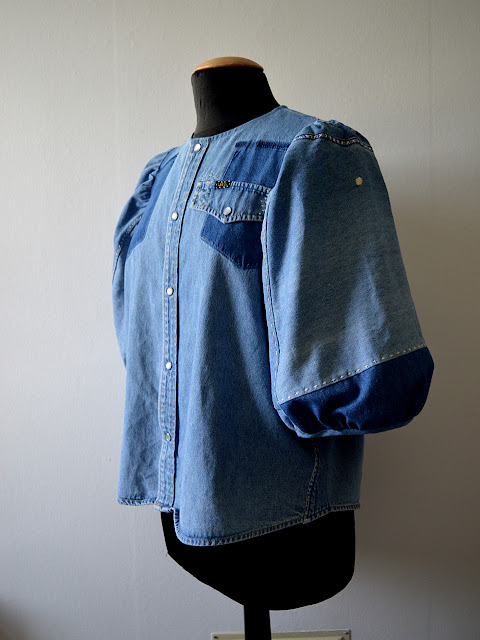
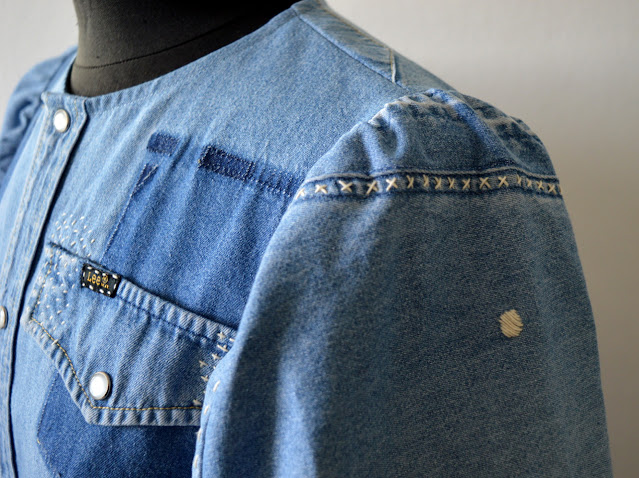
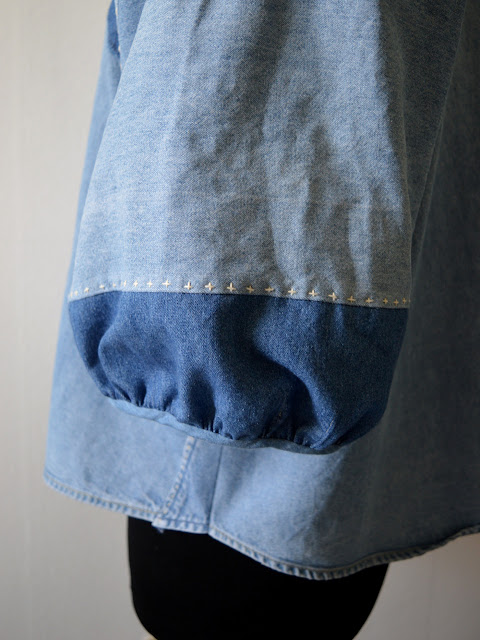
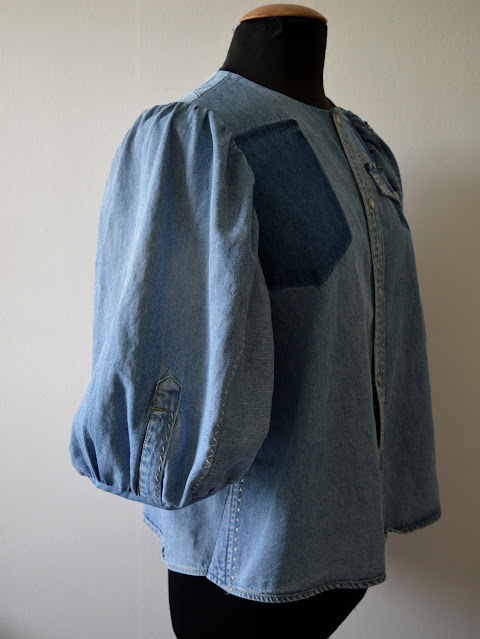
I removed the front pockets so I could fit the Anthea front pattern pieces on, and I love how a shadow of the pockets remain. I reapplied the pocket flap on one side to reference the removed pockets, and stitched it into position with random sashiko style stitching. For this I used some 'proper' sashiko thread that I bought on eBay a couple of years ago but had yet to try. That spot on the sleeve is a hole that I covered with satin stitch to stop it getting any bigger.
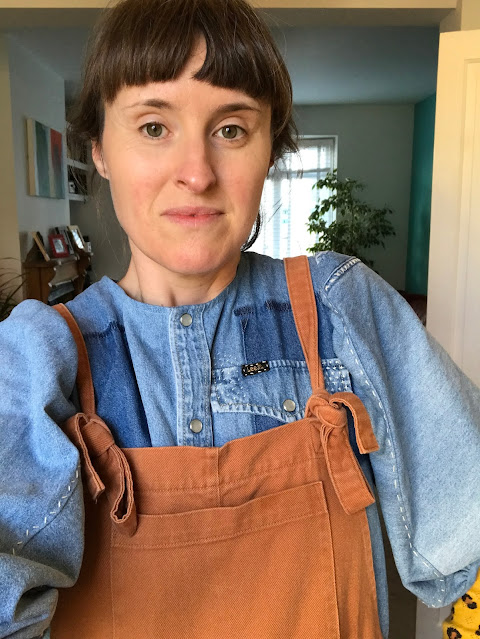

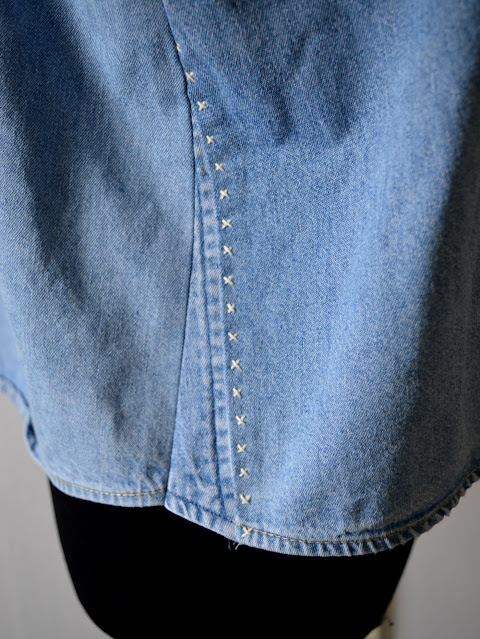
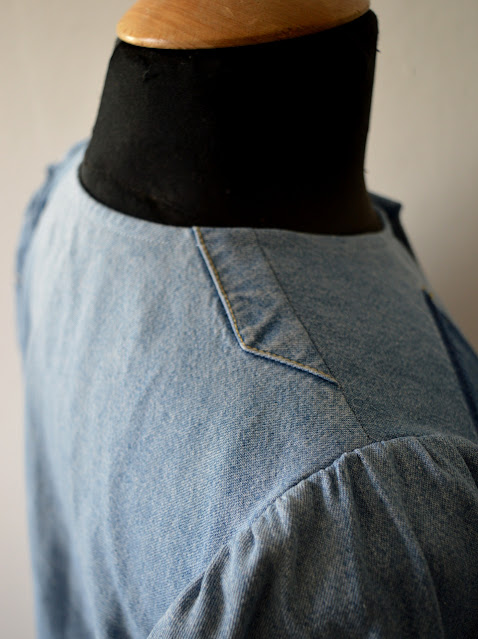
As you can probably imagine, this project was not without it's challenges, but I like how the challenges determined the aesthetic in some cases. For example, the pattern pieces for the body were wider at the hem than the original shirt. So I ended up piecing together the side seams with sections of the original collar (see above). I then decided to highlight the join with another row of sashiko-style stitching, which is a theme that I continued throughout the project.


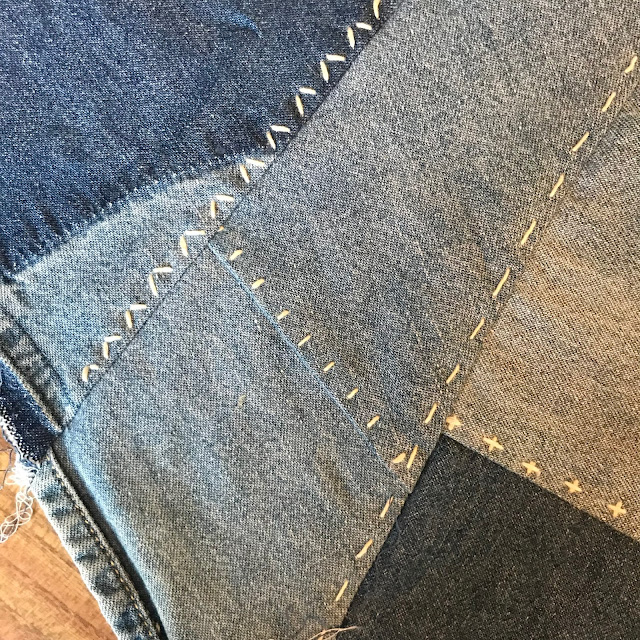
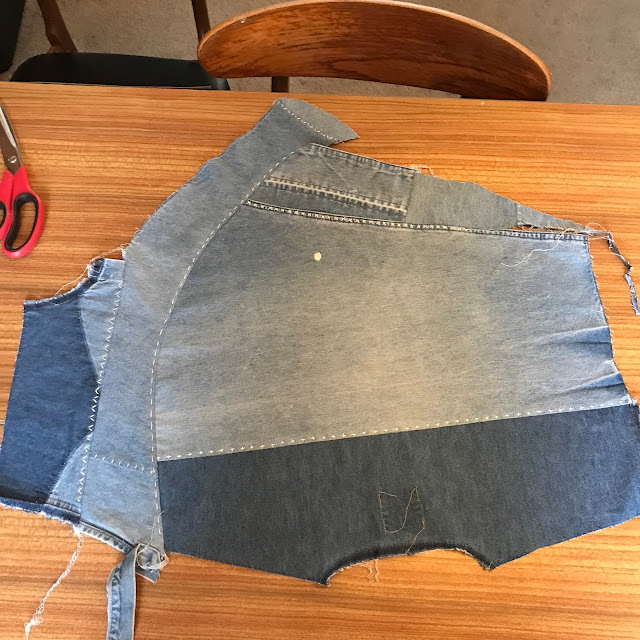
The sleeve pattern pieces on the Anthea are pretty massive, far larger than the original shirt's sleeves. So to form a sufficient area of fabric, I had to piece together pieces of the original sleeves with lots of other pieces harvested from the original garments. I didn't think about it too much, just joined the edges with my overlocker, then 'topstitched' down the seam by hand using a mixtures of stitching styles that I was totally winging. 


I really like the hints of shading and differing colours that existing in the original shirt. However, I tried to play down the patchwork vibe a little, I'm not sure if I quite hit the right balance. 


I made binding from some scraps of lightweight washed denim from my stash. That was used to finish the neckline and the sleeve hems. I don't really like the bias for the sleeve hems and I think the opening is a bit wide. I think I'll go back at some point and make cuff bands instead. 


What is incredibly pleasing is the little pile of scraps that remain from this project. I really wish that I'd weighted the original shirt, and then weighed the scraps to see if I beat the industry average of 15% of fabric wasted during the cutting process.  


The lack of available fabric meant that I couldn't really overthink the placement of various elements in this garment. That felt pretty freeing actually, and I just have to accept the outcome and find elements to enjoy. 


I haven't owned a proper denim shirt since I was a teenager, so I was very surprised by how warm it actually is. Pictured below is how I've enjoyed wearing it the most since I finished it: layered with a long sleeved thermal top underneath and dungarees on top.  

Monday, 9 August 2021

Washed Denim Nia Trousers Remake


I'm a big fan of Belgian sewing pattern brand Bel' Etoile. They have a lovely range of patterns for women and children available in Dutch and English. Previously I've bought the Isa sweatshirt pattern and used the free Siem shorts pattern (which I reviewed here), and recently I tried the Nio/Nia pattern to make these trousers for my daughter. 


Pattern:

I'd had my eye on the Nia trousers for some time because the style is very similar to a thrifted pair of trousers that Lola used to love to wear but has since grown out of. Amusingly, it's also very similar to the Helen's Closet Arden pants pattern that I'm currently working on for myself! 


(image source: Bel' Etoile)


The Nio/Nia pattern is good value because it includes a trousers/shorts pattern as well as a top pattern, both of which include a number of style options and variations for kids of all genders. I can image I'll use the bottoms pattern a lot for both my kids over the decade or so. 


Fabric:

The fabric I used for these trousers is the 4oz washed denim from Fabric Godmother, although I can't remember if it was the blue or indigo colour way because I bought it several years ago and the dye batches vary quite a lot. I used the same type of washed denim to make a Tova top and a Block Tee (formerly Kabuki tee)

About two years ago, I used this fabric in an attempt to make some 'summer jeans' using the trouser version of the Tilly and the Buttons Marigold jumpsuit pattern. I got very close to finishing, but a mid-way fitting indicated that they were going to look terrible on me, so I abandoned the project! Thankfully, I kept hold of the half-made item and was able to finally reuse it to make these. 


If you look closely, you may notice that the fabric on the inside of the pocket mouth on one side is a slightly paler colour. That's because I made a mistake when cutting the pocket pieces, so had to use another remnant of the same type of washed denim instead, which happened to be a lighter colour. I know that this fabric tends to fade with washing (in a really lovely way), so I expect the difference will be less noticeable over time. 


Thoughts:

I wasn't sure Lola would accept these trousers because her beloved pair that was a similar style was made from viscose, and she noted that these don't feel as slinky. However, she's worn them a couple of times with some light suggestion, and today I noticed that she chose to wear them without any input from me at all! If they look ok by the time Lola is done with them, I'll hold onto them for Frankie. I already have another pair planned for Lola in a printed cotton, plus a shorts version for Frankie for next year from some leftover slub linen that I'm currently working with. 

Monday, 7 June 2021

Workwear Denim Lander Pants


Those who follow me on Instagram may have seen that I've been working on perfecting the fit of the Lander pants pattern by True Bias. Two years ago I made this pair of 70s inspired Landers, and whilst they've seen heaps of wear, they just don't fit my post-lockdown-increasingly-middleaged body anymore.


I've really missed having them as an option in my wardrobe, so I decided to 'go back in' and see if I could make another pair with an improved fit for my current shape. Having finally accepted to myself that I could do with a full-tummy adjustment, I did a bunch of research on various methods and made a couple of toiles. I think I've worked out a full-tummy-adjustment-lite method that is a bit of a mish-mash of methods that seems to work for me. 


The other adjustments I made to the pattern included scooping out the front and back crotch a tiny bit, and widening the legs at the hem to create a more exaggerated flare. I used the same pocket templates that I worked out for the previous pair. The denim is some gorgeous, sturdy-but-soft workwear denim from Fabric Godmother. Annoyingly, there's some white lines that appeared after my pre-wash. I'm wondering if I could over-dye them out. I've never figured out how to avoid these, if you have figured it out, I'd be very grateful if you'd drop me a quick email!


But back to the fit for a second. Overall, I'm super happy with how these have turned out. Even though the denim has no stretch, I can actually wear these comfortably all day. Even days that I spent largely sitting down. This is a MAJOR breakthrough for me. There's still some slight pooling of fabric at the top of thae back legs under the bum still, but I wonder if these are necessary to actually bend forward or sit down properly. 


My confidence has been having a bit of a wobble recently regarding my changing body shape, and theoretically, this outfit of slim fitting top and high-waisted jeans is highlighting all the aspects of my body that I currently feel self-conscious about. However, I actually really like how I look in these pictures. yesterday I unexpectedly caught a glance of myself in a mirror whilst wearing this outfit, and again I was happy with what I saw. Are there elements pf my body that I wish were different? Of course. But generally, I'm pleasantly surprised with how I feel in this outfit. I'm guessing that a big chunk of that is that I actually feel physically comfortable, now that there's adequate room for my tum. 
 

Related Posts Plugin for WordPress, Blogger...