Showing posts with label baby/child. Show all posts

Friday, 3 April 2026

Free Pattern Friday: Petite Pegs for Babies


Welcome to my monthly 'Free Pattern Friday' feature, where I road test a free sewing pattern or tutorial: sometimes a children's one, sometimes an adult's one. I try to publish these posts every first Friday of the month, timed to provide inspiration for those who plan to get their sew on over the weekend. I firmly believe that, if you pick your projects carefully, sewing doesn't have to be a crazy-expensive way to clothe yourself and your family. Thanks to all the amazing pattern designers who have offered up their hard work for us to enjoy for free.

This wasn't the project I had planned for this month's instalment of Free Pattern Friday. However, I decided to make a last minute panic new baby project for a family we recently met, so I thought I could kill two birds with one stone. I'm out of the loop with baby sewing these days, but my Fabric Godmother colleague Phoebe reminded me of the excellent Petite Pegs pattern by Patterns for Pirates. I have absolutely downloaded and printed this one out before but, for some reason, I must have chucked most of my baby wear patterns into the recycling at some point. Anyway, huge thanks for Pattern for Pirates for sharing this great free pattern, along with the many other free patterns they have available, including more for babies

(image source: Patterns for Pirates)

Pattern type:

The website describes this pattern as 'a traditional legging with a knit waistband. They are a bit looser for baby to have growing room and a higher rise to cover diapers/nappies. They come with shorties (great for under dresses!), bike, capri and ankle length.

This pattern consists of just two pieces, the legs and the waistband. You could have a lot of fun mixing and matching prints, patterns and solid coloured jerseys. 

There is only one PDF file to contend with which includes both the instructions and the print-at-home pattern pages. 

Sizing info:

The pattern is graded into six sizes, from premmie baby to 12 months. I made the 3 month size because I wasn't sure if the family I was making these for had been swamped with new baby clothes. 

Fabric info:

In the pattern itself you are recommended to choose four way stretch jersey with at least 50% stretch horizontally and vertically with good recovery. They advise using a fabric with spandex/Lycra, which I would say is essential for making a waistband like this that isn't elasticated. I used a scrap of cotton/Lycra jersey I found in the scraps bin at work. It's a lovely blush colour with denim-blue stripes that I hope gives a gender neutral vibe. 

Findings:

This is a great little pattern that could only be improved, in my opinion, with more professional line drawings showing the style more clearly, and a different choice of typeface in the instructions. 

I like that there are lots of additional resources in the form of videos and blog posts to help beginners get to grips with using sewing patterns generally, and this one specifically. 

The only thing I'd add to the instructions is the suggestion to add a label to the back, because it's hard enough trying to dress a wriggly baby without making it clear what is the front and back. 


Would I make this again?

Absolutely! I've kept all the sizes in tact and traced off just the one size, so this will probably be my go-to baby pressie project going forwards. 

Wednesday, 5 November 2025

Emergency Free Pattern Friday (on Wednesday): Speedy Pants for Kids **UPDATED**


Welcome to my monthly 'Free Pattern Friday' feature, where I road test a free sewing pattern or tutorial: sometimes a children's one, sometimes an adult's one. I try to publish these posts every first Friday (or in this case, Wednesday) of the month, timed to provide inspiration for those who plan to get their sew on over the weekend. I firmly believe that, if you pick your projects carefully, sewing doesn't have to be a crazy-expensive way to clothe yourself and your family. Thanks to all the amazing pattern designers who have offered up their hard work for us to enjoy for free.

**UPDATE: Waves & Wild have just announced that the brand is being bought, and therefore their patterns will continue to be available. It is currently unknown if that means their free patterns will continue to be available for free going forwards. So you should probably download any you want now anyway**

Forgive the dramatic post title: I needed to catch your attention because this is time sensitive! Longer term readers of this blog might recall me posting about the excellent, free Speedy Pants pattern for kids by Waves & Wild here (and even further back, here). 

Well, W&W are set to shut up shop THIS FRIDAY! I don't know at what exact time the plug is to be pulled, but pattern purchases will cease to be an option. I believe the website will still be up for a while to give people a chance to download the files they've purchased, but the clock is ticking for any new acquisitions of their free or paid-for patterns. 

I don't know why the designer behind W&W (and formerly, Made by Jack's Mum) has decided to close up, but I wish her all the very best and send huge thanks for this phenomenal free pattern that has clad the bum of both my kids at various points for years!


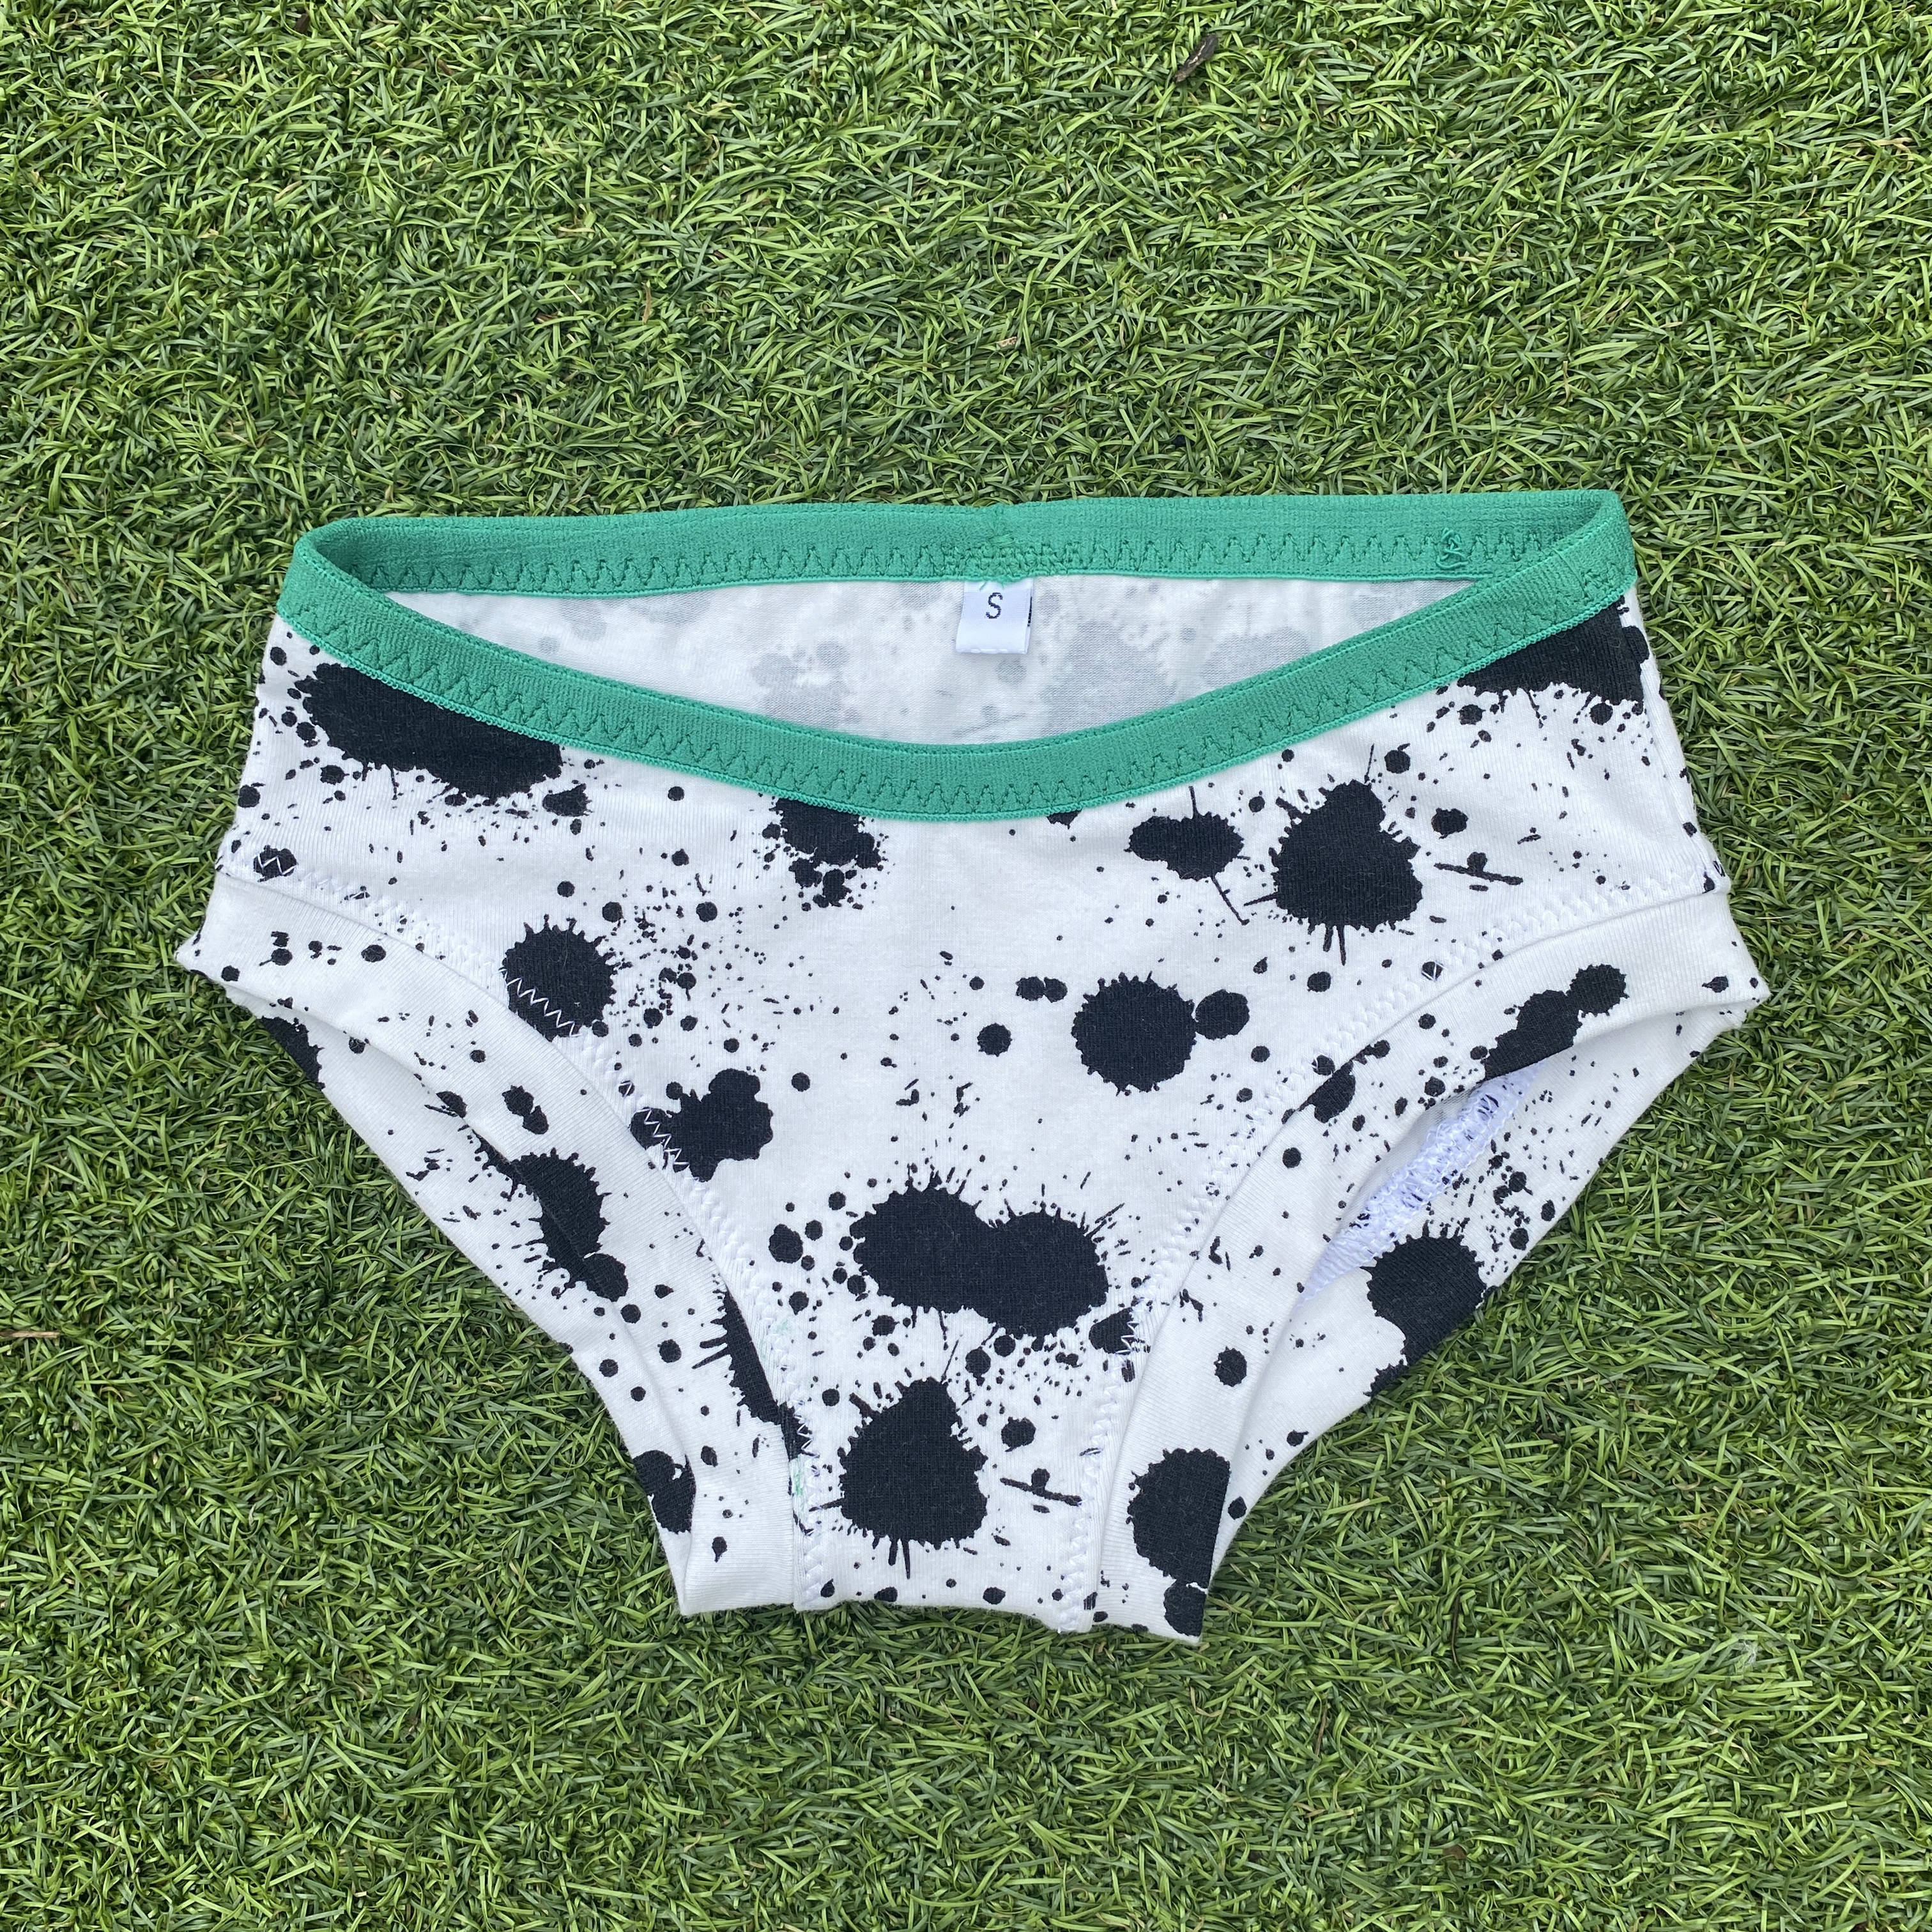
Completely coincidentally, I recently printed out the pattern again and traced off a bigger size, as my little boy is in dire need of new undies. According to the size chart, my skinny 9yo should be wearing the size 5 undies, but I cut out and made these ones in a size 7 because I want them to last for yonks. And yonks they will last, as the fabric I used (that I picked up as scraps at this fabric swap) is excellent quality and perfect for this type of garment. 

You can read my previous reviews if you wish, but I would like to emphasise that these undies can be make ENTIRELY on your overlocker. Which is a total win if you, like me, often cannot be arsed to swap between my overlocker and regular machine during a quick project such as this. 

Now, GO!!!!!!!!


Friday, 4 April 2025

Free Pattern Friday: Racerback Tank for Kids, Tweens & Teens

Welcome to my monthly 'Free Pattern Friday' feature, where I road test a free sewing pattern or tutorial: sometimes a children's one, sometimes an adult's one. I try to publish these posts every first Friday of the month, timed to provide inspiration for those who plan to get their sew on over the weekend. I firmly believe that, if you pick your projects carefully, sewing doesn't have to be a crazy-expensive way to clothe yourself and your family. Thanks to all the amazing pattern designers who have offered up their hard work for us to enjoy for free.

(image source: Life Sew Savoury)

Anyone who regularly sews for a child will have noticed that the number of pattern options for kids above ten years or so drops significantly. Of course, there are a whole bunch of companies catering for tweens and teens, and I've been meaning to collate them all in a blog post for yonks, but even so it's a small fraction compared to the offerings for younger kids. And if you're a maker who relies on free patterns here are there to make your sewing budget stretch further, the pickings are slim. That makes the Life Sew Savoury blog a valuable resource, because there are a bunch of free sewing patterns for kids, with many that span tweens and teens sizing. It seems that, as Emily's own kids get bigger, she releases patterns in bigger sizes! Thanks to Emily at Life Sew Savoury, and all pattern designers who release their work for free for us to enjoy. When my kids were small I made a load of the Life Sew Savoury tank tops, so when I came across the racerback version for older kids I was excited to give it a try...


Pattern type:

A classic, racerback tank designed for knit fabrics that includes two methods for the armhole and neck bindings. To access this pattern, you add it to your basket and go through the checkout. No payment is required but you are then automatically added to their mailing list, which is fair enough. The download includes the pattern pieces only, the instructions are shared as a blog post


Sizing info:

This pattern has been graded from approx. 4 - 18 years, which equates to 22.5" to 35" chest, or 39" to 64" tall. Going on my kid's measurements, I used the size 10/12 for the top part, grading out to the size 14/16 at the waist. 


Fabric info:

'Knit fabric' is the only specification on the blog post (with an affiliate link to an online fabric shop). I made two versions of this pattern (read on to find out why you only see one of them pictured in this post!), the first in a cotton/elastane single jersey that I harvested from an adult's rollneck top that I was no longer wearing because it was too tight in the arms. And the second I made in a 100% cotton single jersey (pictured) that was harvested from a toddler bed sheet. The fabric of the bed sheet had lost a fair bit of its mechanical stretch so probably wasn't the most suitable choice. But the print is super cute and reminds me of when my children were tiny, so it's nice to find a use for it.

You could also use a fine rib knit for this pattern I reckon, or even a thinner pointelle perhaps, which might be nice for nightwear. You cut your own strips for the bindings so the fabric you use for them does't need to have any particular percentage of stretch. Just be mindful as you apply them to not do so too tightly if the fabric doesn't have much stretch and recovery. 


Findings:

Accessing the pattern was easy, and it was simple to print out and put together. Generally speaking, I think the pattern is well drafted, but I did notice that the side seams weren't the same length, so I ended up trimming one down. As for the instructions, if you've been following this blog feature for a while, you know by now that I don't love instructions that are in the form of an ad-riddled blog post, including the extra distracting animated ads. Obviously, I understand the business model: that's one of the ways the designer makes their money, but there's also the affiliate links AND you've given them your email address to access the actual pattern. As Danny Price would say, moving on...

I did like being given two options for attaching the bindings, which they differentiate as 'bands vs bindings' (I prefer the bands method). And all in all the project was a fun, quick and satisfying sew. 

What didn't work out well, however, was the fit. My kid found the armholes to be too high in the first version, and in fact refused to wear that one at all because they found it too uncomfortable (I haven't plucked up the energy or motivation to unpick all that top stitching and overlocking yet). I lowered the armholes considerably for the second version and which worked out well and this second one has been worn to sleep in. 


Will I make this pattern again?

Possibly. There's also a question over whether or not my kid actually likes the racerback style after all (eye roll). 

Tuesday, 1 October 2024

Scrap Busting September 2024

Happy October! Did you participate in Scrap Busting September this year? The endeavour is organised by my pal Meg Grandstaff who encourages us all to explore our creativity and resourcefulness by crafting with scraps and leftovers of fabric and yarn. If you'd like to hear more, check out this recent episode of my podcast, Check Your Thread, in which I have a hilarious chat with Meg. 


Trainer socks:

I'm making this post to record the items I made using fabric scraps last month. First up, I made two pairs of trainer socks using this free sewing pattern and tutorial. The pair pictured above were made using some 100% cotton interlock with cotton/lycra jersey for the band. The pair pictured below were made using some Liberty cotton/lycra jersey entirely. Both are wearable, but the second pair are more so because I adjusted the heel dart so there's less bulk underneath my foot. I'm so excited to have a well-fitting trainer sock pattern that I can use over and over in the future. 


Kid's undies:

I continued to raid my jersey scraps tub to create a couple of pairs of undies for my son. I used a new-to-me undies pattern from an Ottobre Design magazine because it was comprised of quite a few pattern pieces that would make it easier for using with scraps. I also chose it because the leg holes were hemmed rather than finished with bands. The waist is finished with visible elastic which feels to me like they'll have more longevity than with a band of fabric like most of the previous pairs I've made him.


I had a lot of fun picking the different jerseys to go together. I have had some of these scraps for so long, it feels good to get them out of my stash. 


Kid's joggers:

Next up was a pair of joggers, also for my son. I had lots of remnants of the same speckly sweatshirt fleece from the scrap bin at work. I didn't do anything clever, simply pieced sections together and topstitched down the seam allowances to reduce bulk. I wanted these to look fairly understated so he has the option of wearing them for PE at school, but I chose a scraps of striped french terry for the back pocket and cuffs for a tiny bit of interest. 


Again, the pattern comes from an Ottobre Design magazine. Those magazines are such a great resource for basic knit garment patterns. I didn't bother with the side seam pockets however, as I find they often create visible bulk, and he doesn't really use those pockets anyhow. I combined sizes (116 width and approx. 128 length) to more closely reflect his long, thin frame. He's already been wearing and enjoying them. I had to buy elastic to finish these off. 


Kid's scrappy cardigan:

And lastly, I wanted to reduce the volume of ponte and double knit scraps in my stash, so I proposed a scrappy cardigan for my daughter. She's got a whole Goblincore thing going on these days, and over-sized scrappiness fits well in that aesthetic. 


Compared to women's patterns, and patterns for younger children, the selection available for tweens and teens is really poor. I plan to create a post that lists the pattern companies I have found that do cater to this age group at some point. However, with the selection of suitable cardigan patterns incredibly limited, I ended up tracing her school cardigan to make my own pattern. 


I got my daughter to select the scraps that most appealed to her from the tub, which produced quite a wild effect! She also chose the top stitching colour, ribbing and wooden buttons from my stash also. It's so pleasing to make an entire garment from items you already own. And the best part is that she loves it! She's worn it basically every day since I finished it up. 

Friday, 3 May 2024

Free Pattern Friday: Kid's Speedy Pants Altered


Welcome to my monthly 'Free Pattern Friday' feature, where I road test a free sewing pattern or tutorial: sometimes a children's one, sometimes an adult's one. I try to publish these posts every first Friday of the month, timed to provide inspiration for those who plan to get their sew on over the weekend. I firmly believe that, if you pick your projects carefully, sewing doesn't have to be a crazy-expensive way to clothe yourself and your family. Thanks to all the amazing pattern designers who have offered up their hard work for us to enjoy for free.


Like last month, the free pattern that I've road tested for this post is one that I've written about on here before. Think of it as my duty to remind people of the really good free patterns, in case they are now in a position in which the pattern in question would benefit them. There's also the possibility that you are a new visitor to this blog and don't have an intimate knowledge of my back catalogue of posts! 

Anyways, this excellent free pattern is the Speedy Pants pattern by Waves and Wild. I first reviewed it in 2019 after making a million pairs of the briefs version, back when Waves and Wild were called Made by Jacks Mum. Then I reviewed it two years later in 2021, including both the briefs AND the boxers versions. Today I don't have much to add to that review, but I'd like to talk about how the pattern can be used and adapted to get EVEN MORE use from it! 


(image source: Waves and Wild)


But before we start, we must take a moment to thank Waves and Wild for sharing this pattern with the sewing community for free. It really is an excellent resource for sewers-on-a-budget in particular, and has fantastic potential for using scraps and leftovers of jersey to make incredibly useful items that will see TONS of wear. My son has been using some of his pairs at least once a week for 2.5 years now... You can access this pattern via the shop/cart on their website. Whilst you're there, I also recommend checking out their PB Swim Shorties pattern


Why & how might you want to alter or adapt this pattern?:


Fabric limitations:

Both the boxers and briefs that I've made that you see here were made from fabric scraps that I picked up at a fabric swap in January. The scraps were clearly leftover from garment projects and you could see where other pattern pieces had been cut out, resulting in some weirdly-shaped remains. Neither of the bundles of scraps contained sufficient fabric to cut the long waistband. A contrast waistband cut from a different fabric was an option (as you can see here!) but I've been scrap-busting so hard that my stash no longer contains jersey scraps of sufficient dimension. Therefore, I decided to use elastic instead for the waistband. I used flat elastic for the boxer style, which I applied around the top edge using a three-step zigzag stitch. For the briefs style, I used some wide, fuzzy fold over elastic. Both elastics were already in my stash, but both had previously be purchased on eBay. 

If you're limited in fabric, another option for cutting the boxer version is to add side seams. I've done that previously and it works very well. Lots of undies have side seams anyway, so it doesn't look or feel like a weird location to have a seam.


Style preferences:

Another reason for adding elastic rather than making a fabric band to finish the waist edge might be if you're aiming for a more 'shop bought' look. My kids really aren't bothered about such things, but if yours are concerned about that, elastic will definitely look less home made. 

You might also choose to use elastic to finish the leg holes of the briefs. If you were using fold over elastic, you wouldn't need to alter the pattern at all. 


Comfort and fit:

I found the waistline on the briefs version a little 'flat'. Therefore, I added a little height at the centre back along the waistline, grading out to the original height at the side seams (incidentally, I did this for the PB Swim Shorties pattern also). 

For the boxers version, if comfort is of particular concern, I would recommend following the optional direction to top stitch down the front gusset seam allowances. And for both versions, I'd also recommend top stitching down the seam allowance of the leg bands. On previous pairs where I didn't top stitch that down, the leg bands often flip up which might be uncomfortable for some kids. 

If you're making the briefs version for girls, you might wish to narrow the gusset part of the pattern. I did that on previous pairs for my daughter and I think they fit her a bit better because of it. 


Would I make this pattern again?

Try and stop me!

Friday, 5 January 2024

Free Pattern Friday: Kid's Drawstring Backpack Tutorial


Welcome to my monthly 'Free Pattern Friday' feature, where I road test a free sewing pattern or tutorial: sometimes a children's one, sometimes an adult's one. I try to publish these posts every first Friday of the month, timed to provide inspiration for those who plan to get their sew on over the weekend. I firmly believe that, if you pick your projects carefully, sewing doesn't have to be a crazy-expensive way to clothe yourself and your family. Thanks to all the amazing pattern designers who have offered up their hard work for us to enjoy for free.


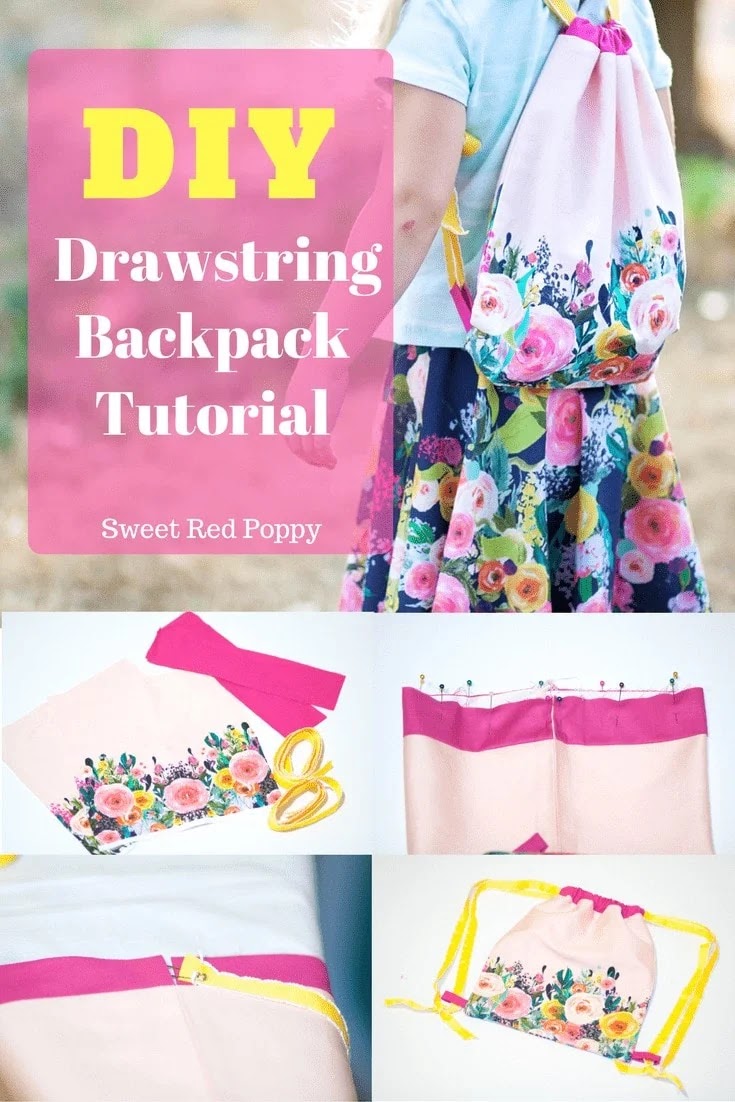
Back in the summer, just before we headed off for a little UK holiday, I realised my son didn't have a suitable bag to carry his bits and bobs in. The perfect opportunity to test a free sewing tutorial! After searching through a load of those '30 free bag tutorials' type lists, I settled on this tutorial by Sew Red Poppy. Big thanks to them for sharing their hard work for free. This tutorial is freely accessible in blog post form, no need to download or sign up to anything.

(image source: Sweet Red Poppy)

Pattern type:

This is a super basic drawstring bag, with the drawstring forming the shoulder straps. The pattern pieces are offered as dimensions, no need to print anything out. It requires you to cut out six rectangles of fabric, plus two lengths of ribbon/cord. The project is suitable for beginners and can be made entirely on a regular sewing machine, no need for an overlocker/serger. 


Sizing info:

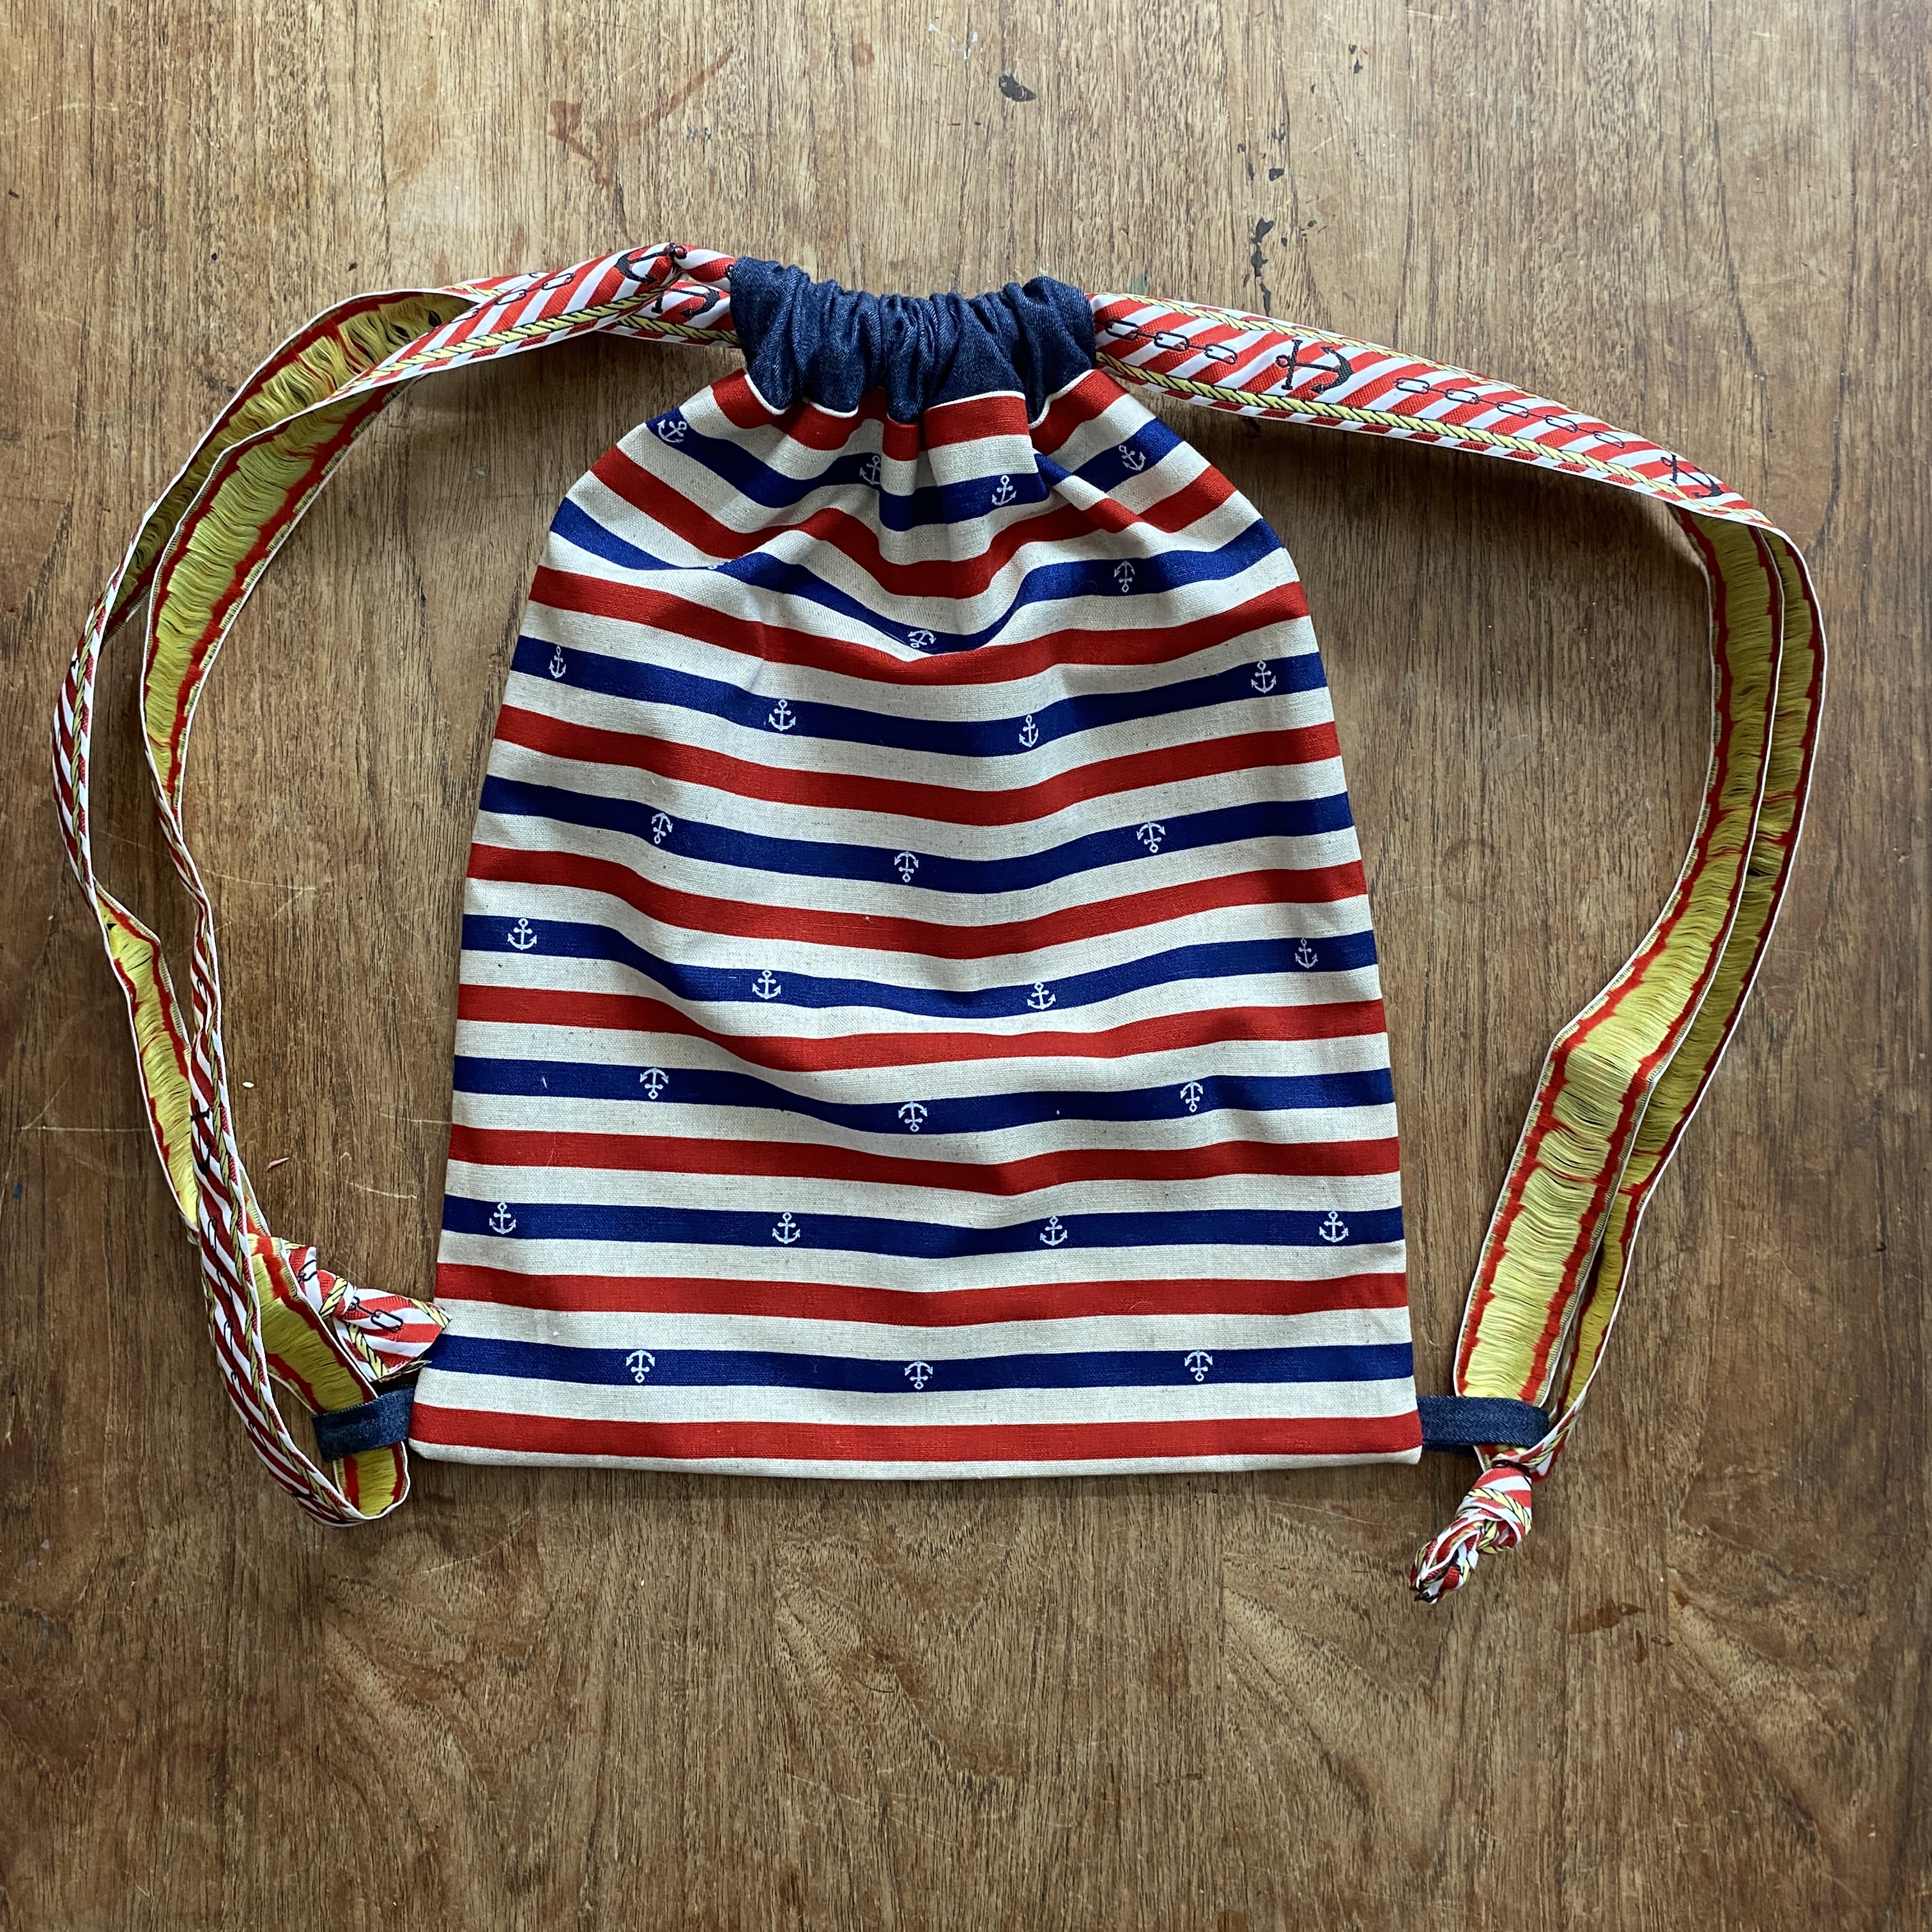
You can use the pics of my 6-nearly-7-yo son wearing the backpack to get a sense of the scale of the finished bag. That said (spoiler alert) I cut the pieces in the wrong orientation, so mine came out longer and thinner than the intended bag design. 


Fabric type:

Little guidance is given regarding fabric choice for this project, however the creator used a printed lightweight twill for the main section of their sample. I would say that sturdiness is important, but don'y go too thick or gathering the bag up might prove tricky. I used some kokka cotton that I bought on Etsy about a decade ago. I reckon you could go a step lighter in weight for the contrast fabric pieces, a chambray, poplin, shirting or quilting cotton perhaps. I used a scrap of lightweight 4oz denim. 

The tutorial uses ribbon for the drawstring/straps. It's hard to tell from the photos, but I think the ribbon is something closer to a grosgrain, as opposed to a satin ribbon. You could also use drawstring cord, of course, or twill tape. I couldn't buy any haberdashery because of my participation in the Last Sewist Standing challenge, so I had to do the best with what I had in my limited stash. I used some of this anchor design woven braid that I've had for about twelve years! It's not ideal because it doesn't slide through the channel very smoothly, however it does provide nice, wide straps that stay on the shoulders fairly well. 


Findings:

If you've read some of my Free Pattern Friday posts before, you probably already know how much I hate blogs with a million annoying ads everywhere, including animated ones. This is one such blog. I totally understand that this is the business model: that the creators can afford to spend time making tutorials and sharing them with us for free thanks to the ad revenue they earn. But I don't have to enjoy it! 

In general, the tutorial was excellent. There's a video version linked in the post also if that is a better format for you to process. The one thing I had an issue with (well, second thing, if you include the ads) is that they didn't specify which way round the the main rectangles were meant to be orientated, and it wasn't clear from the images. I guessed the wrong orientation which caused me some problems. 

The final outcome is good though, and the backpack saw a fair bit of action on holiday last summer, and a few times since. Shortly after making this backpack, my son got a very similar drawstring backpack free with a magazine. Clearly he prefers the magazine one because it's got Pokemon printed on it, and its synthetic fibres of the free one make it vaguely rain proof. However, after not much use, the Pokemon one is starting to break where the eyelets perforate the fabric at the bottom corners. It's good to be reminded that handmade items often last longer than their cheap, mass-produced counterparts!


Customisation ideas:

I'm going to leave this to you. It's kind of infinitely customisable in terms of dimensions and embellishment potential. 

Would I make this again?

Perhaps, particularly if one of my kids needed a bag to carry a PE kit or something like that. Plus I would consider making another version from a shower-proof fabric, but possibly make it a bit more capacious, for taking to the swimming pool.

Friday, 8 September 2023

Free Pattern Friday: Hat and Leggings for Babies


Welcome to my monthly 'Free Pattern Friday' feature, where I road test a free sewing pattern or tutorial: sometimes a children's one, sometimes an adult's one. I publish these posts every first Friday of the month, timed to provide inspiration for those who plan to get their sew on over the weekend. I firmly believe that, if you pick your projects carefully, sewing doesn't have to be a crazy-expensive way to clothe yourself and your family. Thanks to all the amazing pattern designers who have offered up their hard work for us to enjoy for free.


Today you've got a two free pattern reviews for the price of one! The reason why I'm posting both of these today is because they make such a sweet pairing: they can be worn together AND make a lovely set to give as a gift. If you don't have any babies in your life at this time, and no one you know is currently expecting a child or grandchild, I recommend you bookmark this post for the future. And if you're in that phase of life when it feels like everyone around you is having babies, you could make a few in advance to have on hand as gifts.

Big thanks to Sweet Red Poppy for creating the Double Top Knot Baby hat pattern for free, and to Patterns for Pirates for creating the Petite Pegs pattern for free. I really wish both of these patterns had been around when I was pregnant with my babies!


(image source: Sweet Red Poppy)


Pattern type: 

The Double Knot Baby hat pattern is ridiculously cute and consists of just two pattern pieces: the hat and the band. The Petite Pegs are a casual leggings style with knit waistband (no elastic), with a rise designed to easily cover a nappy. There are four leg lengths included: shorties, bike, capri and ankle. They also consist of two pieces: the legs and the waistband. 


(image source: Patterns For Pirates)


Sizing info:

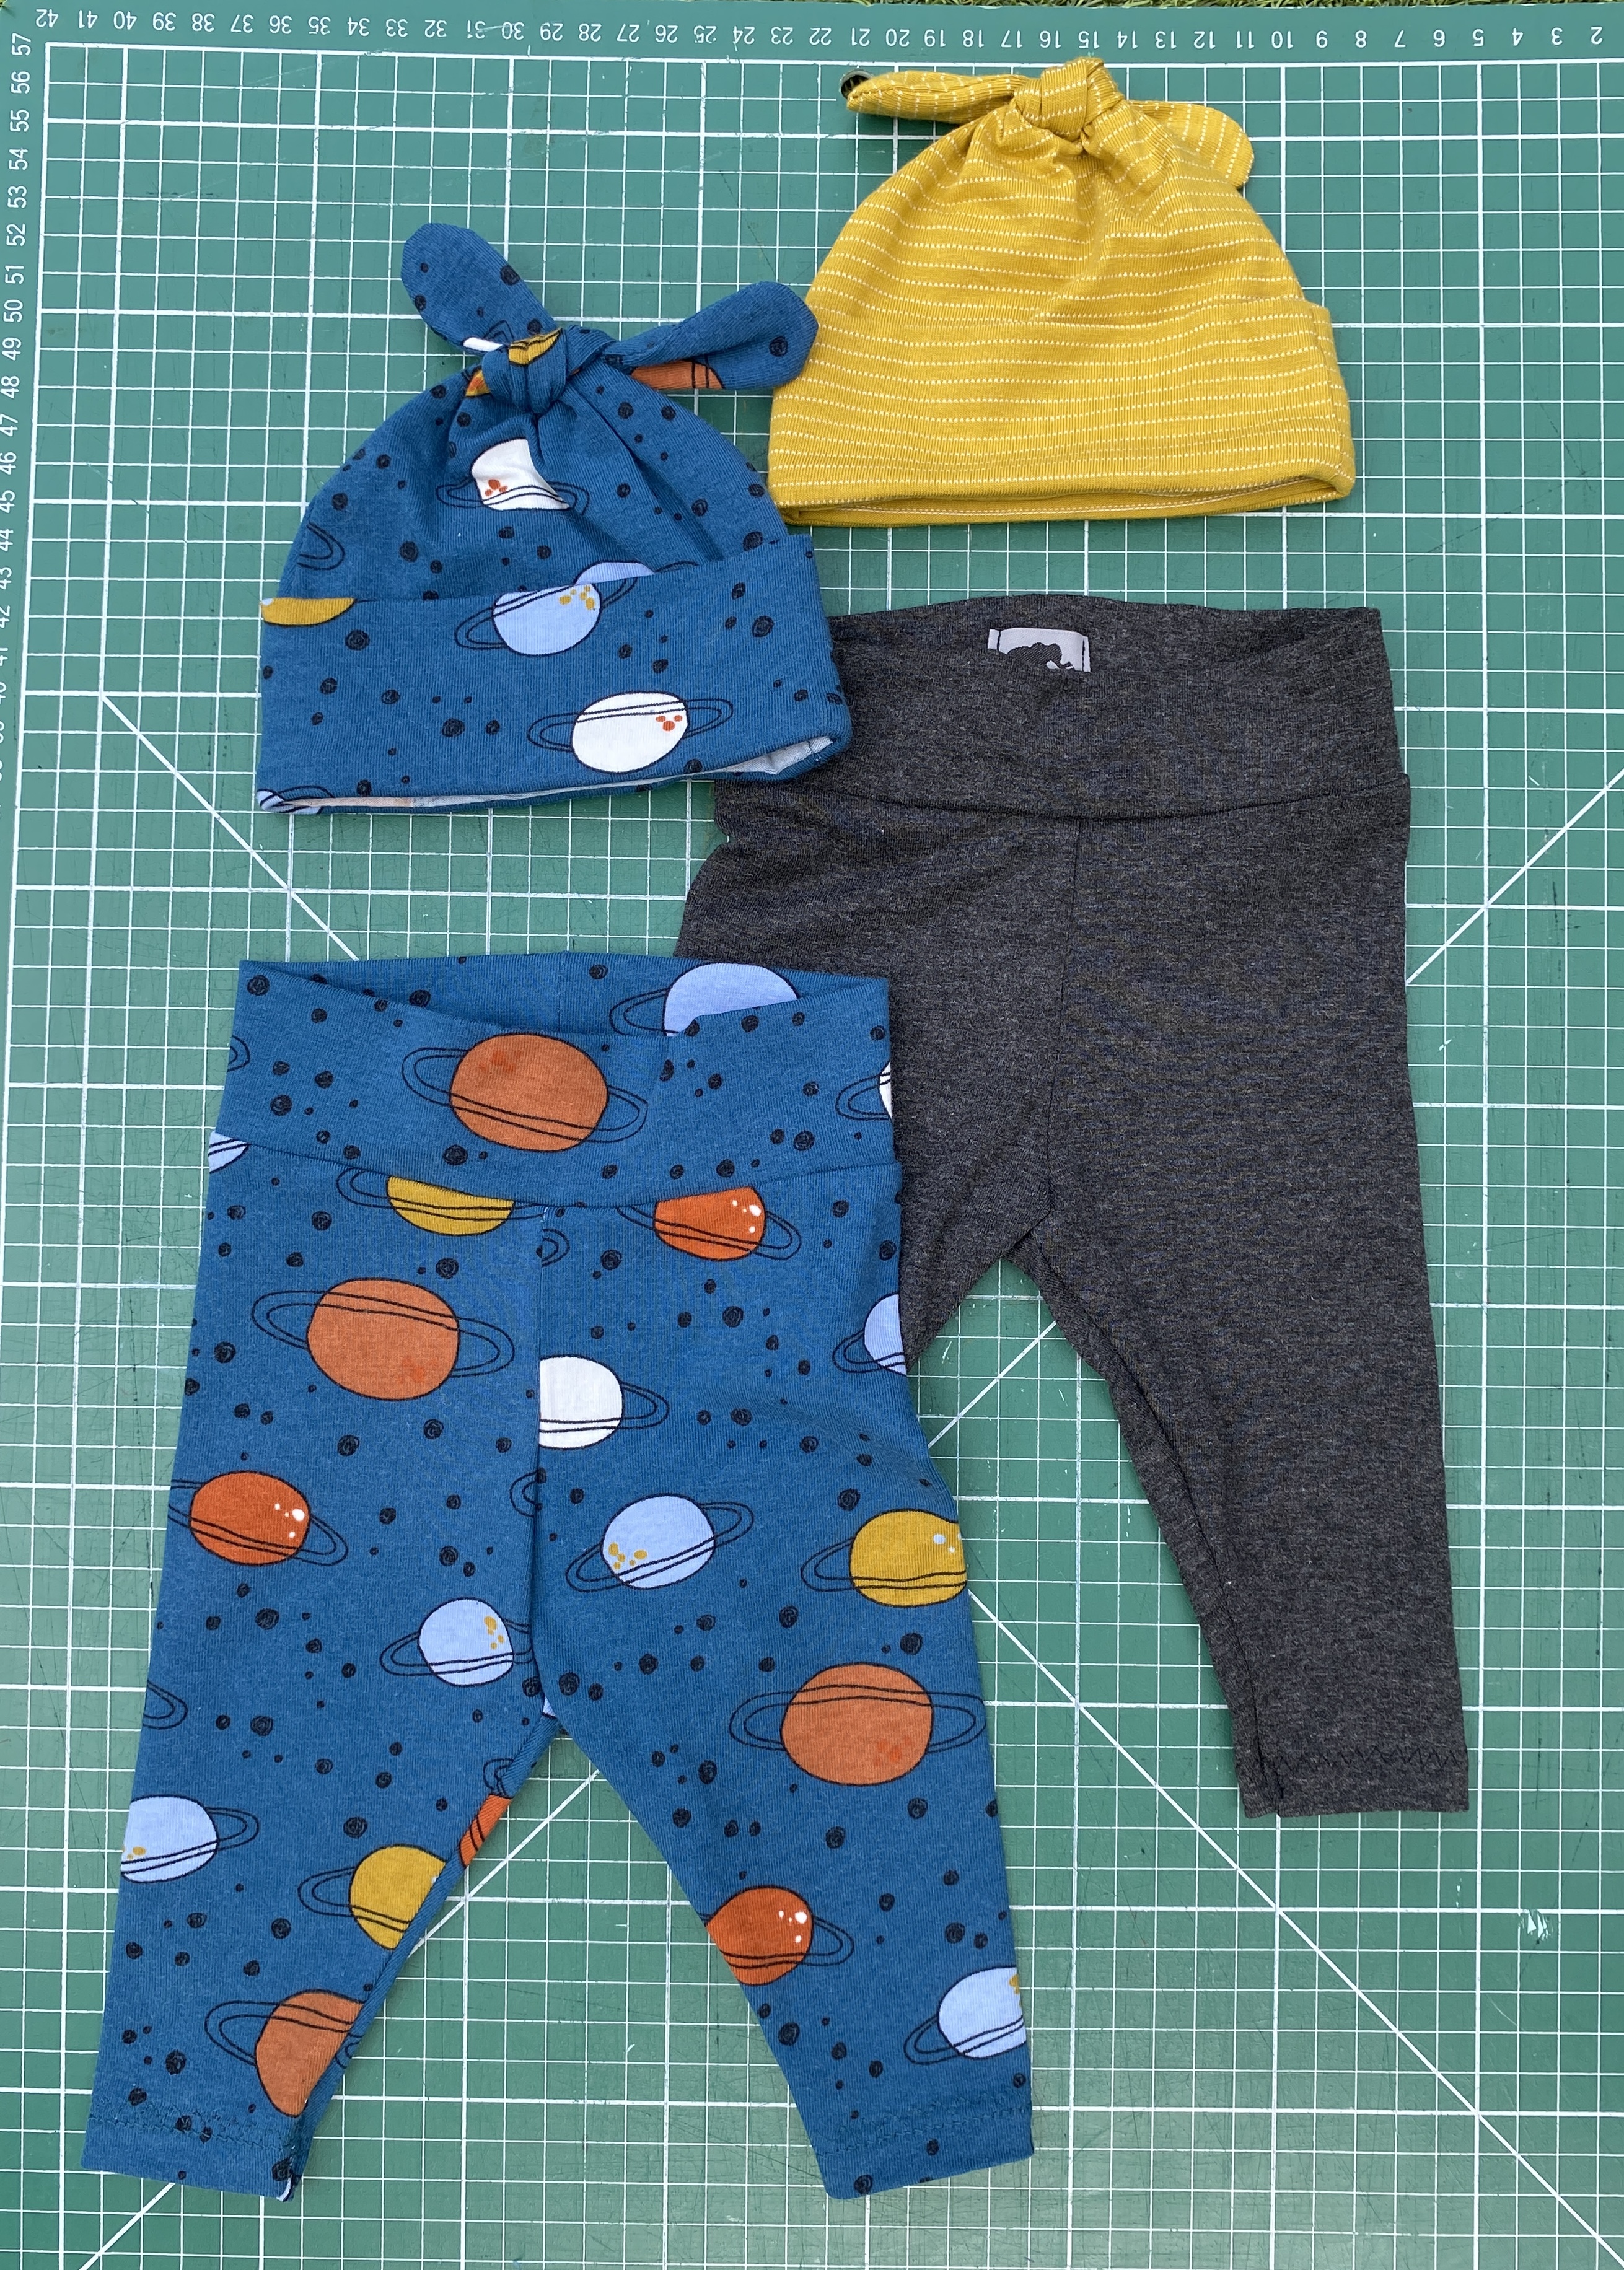
The hat pattern includes six sizes ranging from Newborn to 2Y, and the leggings from Premie to 12 months. After much debate, I created these two sets both using the 3-6 months size for the hat and Newborn for the leggings. I was scared of making the hat too small and them being useless, so I erred on the side of caution with that. I felt more confident going with the Newborn size for the leggings. As you might be able to tell from the tiny feet in the pic below, my friend's child was just a couple of weeks old, to give you a sense of the fit. 

As well as the age of the baby, you should also pick your pattern sizing in relation to the amount of stretch in your fabric: going for a smaller size for super stretch knits, or a larger size if the stretch percentage is much lower. 


Fabric info:

For the hat pattern, it is recommend that you use a medium-weight knit fabric with a content of 95% Cotton, 5% Lycra/Spandex. But then a couple of paragraphs down includes a greater list of other types of knit that could be suitable. I'd probably stick to the cotton/spandex (AKA Lycra or elastane) jerseys because I would be concerned that the other suggestions might be a touch too thick for that tight curve at the top of the knots, or quite slippery and therefore a challenge to work with. 

For the Petite Pegs pattern, they recommend a four-way stretch fabric with at least 50% stretch and good recovery. They also emphasise Lycra or spandex in the content, which is particularly important for this pattern so they stay in place and don't fall down, seeing as the pattern doesn't use elastic at the waist. 


The space print fabric (leftover from these men's PJs - another free sewing pattern!) I used here is exactly on spec for these patterns: cotton/elastane with a good four-way stretch. The mustard fabric for the second hat wasn't quite as stretchy, and more of a two-way stretch, than a true four-way. But I've also used this fabric for making undies and they hold up fine so I was confident in my choice, particularly because I wasn't making the smallest size of hat. The grey jersey I used for the second pair of leggings was probably more like a viscose/elastane jersey. I got this from a charity shop many years ago and it was unlabelled so I can't be sure. It's quite drapey and lighter in weight than the other two but it's really soft, so I knew it would feel particularly nice against the skin. 

Of course, with both of these patterns, I'm going to emphasise what excellent potential scrap busters they are! They take so little fabric, and you can play around using different constrasting fabrics for the bands and the main parts. For the leggings, you could even use two different fabrics for the two legs. And with the hat, you could use different fabrics for the front and back hat pieces. But as always with combining different fabrics, just make sure they have the same amount of stretch and a similar weight. 


Findings:

Downloading the print-at-home pattern for the hat was easy enough. The instructions are in the form of a blog post that you read directly on their site. There's also a YouTube video to support you if you'd like, but I didn't watch it. The instructions on the blog post are good, however it's one of those sites that is dripping with distracting ads. Which I accept because that how this person's business models works in order for them to offer free patterns, including this one. 

Generally speaking, I think the instructions (when you can find them between the adverts) are great. However, there's one step of the process that I did differently and I'm glad I did. The last step gets you to attach the band to the hat with the band on the right side of the hat. You then press the seam allowance up into the hat. My feeling is that the seam allowance would not stay put and probably poke out the bottom because it's not stitched in place. To prevent that, I stitched the band to the WRONG side of the hat, so when you flip the band out to the right side, the seam allowance will always be hidden. I would also recommend tacking the band in place with a few invisible stitches. 


The leggings pattern, by contrast, is accessible via the shop and cart on the Patterns for Pirates website. You have to create an account and go through more steps (you don't need to input any payment details). However, you then have a downloaded file that includes the pattern AND instructions - no ads. 

The construction process was a breeze. The only thing, and this is very minor and personal, is that I dislike a 1/2" seam allowance! It's not one I have to use very often, so I can't visually easily where to position a project on my overlocker so I'm trimming off the correct amount. Oh, and one point I'd make that I think they missed is to add some kind of tag or label so the back is easily identifiable. When parents are trying to change a wriggly baby whilst sleep deprived, they need all the help they can get! But honestly, that's it. I could make these leggings all day.


Would I make them again?

Hell yes! I've really whittled down my stash of jersey fabrics over the last couple of years, but if some more suitable fabric came my way, I'd definitely be making more of the leggings in particular. I do really like the two of these patterns together as a set, so if there are any new babies on the horizon, I'd love to do this again. 

Friday, 4 August 2023

Free Pattern Friday: Siem Shorts for Kids


Welcome to my monthly 'Free Pattern Friday' feature, where I road test a free sewing pattern or tutorial: sometimes a children's one, sometimes an adult's one. I publish these posts every first Friday of the month, timed to provide inspiration for those who plan to get their sew on over the weekend. I firmly believe that, if you pick your projects carefully, sewing doesn't have to be a crazy-expensive way to clothe yourself and your family. Thanks to all the amazing pattern designers who have offered up their hard work for us to enjoy for free.

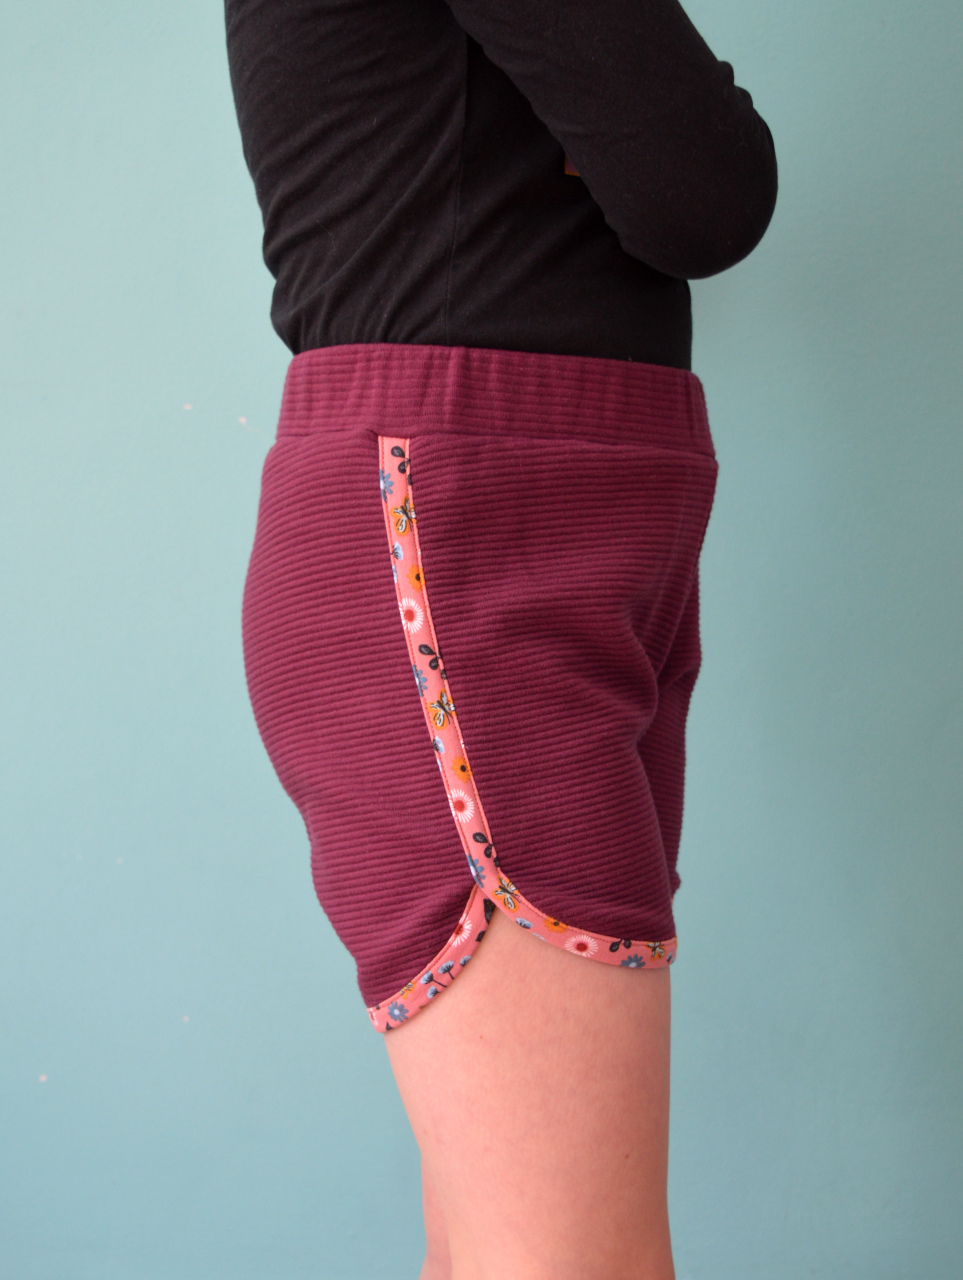
This month I'm returning to a pattern that I have made and loved previously. It's a unisex shorts pattern designed for knit fabrics called the Siem shorts pattern (pronounced 'seam') by Bel'Etoile patterns. I reviewed it two years ago, and I have been wanting to make it again ever since. I really love the retro stylings, plus it's a fantastic way to use up smaller amounts of knit fabrics that aren't suitable for undies making. Let's get into my experience this time round....
 

Pattern type: 

The Siem shorts pattern is a retro style designed for knit fabrics. The pattern consists of three pieces: front, back and waistband. Plus you need binding (preferably stretchy) to finish the edges. 

Sizing info:

This pattern is graded between a generous 98cm (approx. 3 years) and 164cm (approx. 14 years) which I really appreciate it. I made the size 152 this time, going by my daughter's hip measurement as opposed to her height, and the sizing is pretty perfect. 


Fabric info:

Fabric types that are listed as suitable for this pattern include jersey, ponte roma, french terry and sweatshirt knits. This is such a fantastic pattern for using up scraps and leftovers from other projects, so as long as the knit is pretty stable and isn't too light-weight it's probably worth a try. Last time I made and reviewed this pattern, I declared that I'd love to make these in a classic retro towelling or velour knit. My wish was granted when I found this discarded small remnant of pink velour at work. The burgundy pair are made using scraps of ponte roma that have been hanging around in my stash for a couple of years. 

The pattern calls for 'stretch bias binding' for finishing the edges. That's not a super common item to find in fabric shops or haberdashers, plus I'm still participating in the Last Sewist Standing challenge so I can't buy new sewing supplies at the moment anyway. So for the pink pair I used strips of white cotton ribbing (the kind that's sold for cuffs and neckbands). For the burgundy pair, I chanced my arm with something a bit thicker, and used a strips of printed french terry. I cut the strips along the DOGS (direction of greatest stretch) rather than on the bias.


Findings:

The pattern and the instructions come in separate PDF files. The pattern is easily obtained via the Bel-Etoile website, with no sign-ups to anything required. I was super happy to find that the pattern file includes the layers function which is great for saving ink, particularly when the pattern is graded to such a generous number of sizes. 

The instructions document was equally user-friendly. The only thing I felt was missing was some advice on making your own binding. It is an easy enough process to do, but the lack of that step in the instructions may cause a beginner sewer/sewist to have a bit of a head-scratch. This time I did remember that SEAM ALLOWANCE IS NOT INCLUDED IN THIS PATTERN. However, it did take me a while to work out that it's not necessary to add allowance to the curved edges. 


So I kind of messed the fit up a bit on these. When I made this pattern for my daughter two years ago, she found them to sit too high on her waist for her liking. This time, I made the burgundy pair as per the pattern and she experienced the same problem again. As before, she kept pulling them down to sit on her hips which resulted in a bunching of excess fabric at the front. So I unpicked the waistband and lowered the waist, particularly at the front. I made the same change to the pattern before cutting out the pink pair (see above for the pattern pieces with the new cutting line drawn in). Except now, as you can see from the picture below, that has resulted in the front rise being too short and a whole world of ugly tightness (*major eye roll*!). 

I think I've also stitched the side seam down too far on the burgundy pair as there's some tightness where the curve begins. I'll probably unpick it a bit at some point. 

But these things are my mistake! Don't let that put you off this super cute pattern. 


Customisation ideas:

Stealing my own ideas from last time:

  • Adding patch pockets to the back
  • Adding front pockets with curved pocket openings and matching bound edges like these 
  • Lengthening or shortening the legs if the wearer has a different preference
  • Applying a cute patch or decal for extra vintage coolness

Would I make it again?

YES! I have to work out how to alter where the waist of these shorts sit on her body without messing up the rise length. But I'd love to make these again in the future if she still likes the style in a year or so. 


Related Posts Plugin for WordPress, Blogger...