Showing posts with label tutorial. Show all posts

Friday, 6 September 2024

Free Pattern Friday: Meditation Cushion


Welcome to my monthly 'Free Pattern Friday' feature, where I road test a free sewing pattern or tutorial: sometimes a children's one, sometimes an adult's one. I try to publish these posts every first Friday of the month, timed to provide inspiration for those who plan to get their sew on over the weekend. I firmly believe that, if you pick your projects carefully, sewing doesn't have to be a crazy-expensive way to clothe yourself and your family. Thanks to all the amazing pattern designers who have offered up their hard work for us to enjoy for free.

This is a project that I completed a couple of months ago, but I wanted to share it with you now to coincide with #ScrapBustingSeptember, the prompt created by my pal Meg Grandstaff. Meg is encouraging us to get creative and resourceful with our scraps, and all you have to do to take part is work on a project made from, or incorporating fabric or yarn scraps! If you want to hear what Meg achieved and took away from last year's challenge, and what her plans are for this year's, check out my recent conversation with her for my podcast Check Your Thread

What is particularly awesome about these meditation cushions,is that they provide a purpose for your annoying, unusable fabric scraps. It's a great alternative to chucking them in the bin destined for landfill, or to an uncertain fate in the textiles recycling collection. You'll be amazed by how many you can fit in one of these! You can also chop up textiles such as worn out tea towels or unwearable old clothes. And even if meditation isn't your thing (it recently became mine, but I like to meditate laying down!), these can be used as extra seating for guests or as a kind of foot stall. So massive thanks to The Daily Sew for making this tutorial available for free. Plus, enormous thanks to Check Your Thread Patron Lois for sharing the tutorial with the community


(image source: The Daily Sew)

Pattern type:

This tutorial is for a circular meditation cushion, AKA a zafu. It is comprised of two circles of fabric, and one long strip of fabric that is pleated up and stitched to the edges of the circles. You create an overlap with the ends of the strip to conceal the opening. Technically, you could could stuff your cushion with all manner of materials, however I'm endorsing the use of fabric scraps! You can stitch the opening shut, or make the overlap significant enough that the contents won't come out if left unstitched. 

Sizing info:

Apparantly, most zafus are between 6" and 9" tall, however this project is incredibly customisable to your own preferences. 

Fabric info:

According to the tutorial: 'This project works best with 59″ (150 cm) wide fabric. However, you can piece together fabric if yours is not that wide. Choose a fabric that is on the heavy side like canvas, duck, denim or upholstery fabric. Many of these come 59″ wide so, bonus.' 

I used a remnant of stretch denim that had been in my stash for a while. It had a weird join along the width that made it difficult to find a project for it. I didn't have quite enough to cut the circles and strip in full pieces, so I had to make a join along the centre of the circles. If you don't have a remnant of fabric that runs across from selvedge to selvedge, you could easily piece together fabrics for that also. Lois actually makes her strips longer than the tutorial suggests by piecing them, so they don't need to be stitched closed. This means she can give them to non-sewing friends and family to stuff with their own textile waste. 


Findings:

This was SUCH a fun project! Yes, I probably could have figured out how to do something similar to this on my own, but it can be so nice and relaxing to simply follow along with some else's instructions. There's also a video version on YouTube if that's your preferred method of info transmission!

The cushion could house a surprising amount of scraps and cut up textiles. I have a feeling it might 'settle' and become a bit loose, so I gave instructions to the recipient of the cushion to carefully cut open the opening and stuff with old socks if that happens...

Would I make this again?

Absolutely! Patron Lois has been whipping heaps of these up to give out to friends and family to help them deal with their textile waste, and I might start doing the same some day.

Friday, 7 June 2024

Free Pattern Friday: Trainer/Sneaker Socks


Welcome to my monthly 'Free Pattern Friday' feature, where I road test a free sewing pattern or tutorial: sometimes a children's one, sometimes an adult's one. I try to publish these posts every first Friday of the month, timed to provide inspiration for those who plan to get their sew on over the weekend. I firmly believe that, if you pick your projects carefully, sewing doesn't have to be a crazy-expensive way to clothe yourself and your family. Thanks to all the amazing pattern designers who have offered up their hard work for us to enjoy for free.

Usually, when choosing what to post about for my Free Pattern Friday series, I find a free sewing pattern or tutorial and then decide whether or not the item would be useful for someone in my family. If it's a YES, then it goes on my list of free resources to road test. However, with this project it was different. This time a need came first. The weather had started to get warmer, two of my four pairs of trainer socks just died beyond repair, and I realised I need more. I'm trying hard to save money this year so we can get some building work done on our house, so I thought, 'I wonder if there's a free pattern for trainer socks out there...'

The answer came in the form of this YouTube tutorial with free pattern by a French-speaking creator called Nejea. Massive thanks to Nejea for sharing their work for free. I hope lots of people watch your tutorials and you get lots of ad revenue from YT. The pattern is easily accessible by clicking on the link in the caption of the YouTube video, no sign ups necessary. 


(image source: Nejea on YouTube)

Pattern type:

The pattern itself is simple and clear, consisting of two pieces plus the measurements for band are given to draft directly onto your fabric. The tutorial for construction, plus all additional information such as fabric suitability, is included in the 11 minute-long video. 


Sizing info:

The pattern has been drafted for European shoe size 38 (approx. size 5 in the UK system). However, how big or tight these trainer socks come out is going to depend a great deal on the properties of your fabric. I would really recommend making a pair and checking the fit before cutting out a whole load. And then expect the sizing to change if you use different fabrics going forwards. 

Me, I wear UK 7, approx. European 40, but I have narrow feet. So I decided to print out the pattern by adjusting the printer scale settings to about 105%. I then extended the length by an additional 1cm. Experiment with your printer settings, and possibly lengthening or shortening the pieces to tweak the fit until you get something that works for the size and width of your feet. 


Fabric info:

The tutorial recommends using jersey fabric with a four-way stretch (or bi-stretch as they refer to it in the video). However, I decided to go rogue and try this pattern using some fine knit harvested from an old RTW cardigan. I have several worn out or misshapen fine knit cardigans, and I'm always on the look out for potential uses for them! I used four-way stretch jersey for the band, however. The fine knit worked pretty well. The only real issue is that, because there doesn't seem to be any elastane/Lycra/spandex content to give some recovery, it does tend to stretch out a bit throughout the day. They're still totally wearable though. I had hoped to try this pattern in the type of knit that is actually recommended before publishing this post, but I didn't have time. So I can only assume that jersey with four-way stretch works fantastically!


Findings:

There maybe some non-French speakers who might be put off trying a pattern and tutorial that have been produced in a language they don't speak. But really they needn't be. I don't know if you have to tweak your YouTube settings, but English subtitles automatically appeared for me when watching, and the caption is written in English. The text on the pattern is in French, but seeing the creator use the pieces in the tutorial, it is clear what each piece is and how they work together. 

Despite using a fabric of questionable suitability, I love my little trainer socks! I've used them lots of times since making them. They offer great coverage of the foot: enough so they stay on easily, but not enough that they are visible when wearing trainers. At first, I was aware of the seam allowance that runs along the heel. However, I quickly got used to it and don't notice it now at all when I put these on.

My only real criticism of this tutorial is the way the band is applied to the rest of the sock. I understand that the method described is meant to reduce the amount of seam bulk that might feel annoying to some. However, I found it didn't properly cover the raw edge of the top of the socks and seemed a bit messy to me. In the future, I'll apply the band in one go, and then topstitch down the seam allowances. 


Would I make this again?

Yes, absolutely. I've pretty much given up on making ankle socks from sewn fabric, but I definitely plan to make more of these when the need arises. 


Friday, 5 January 2024

Free Pattern Friday: Kid's Drawstring Backpack Tutorial


Welcome to my monthly 'Free Pattern Friday' feature, where I road test a free sewing pattern or tutorial: sometimes a children's one, sometimes an adult's one. I try to publish these posts every first Friday of the month, timed to provide inspiration for those who plan to get their sew on over the weekend. I firmly believe that, if you pick your projects carefully, sewing doesn't have to be a crazy-expensive way to clothe yourself and your family. Thanks to all the amazing pattern designers who have offered up their hard work for us to enjoy for free.


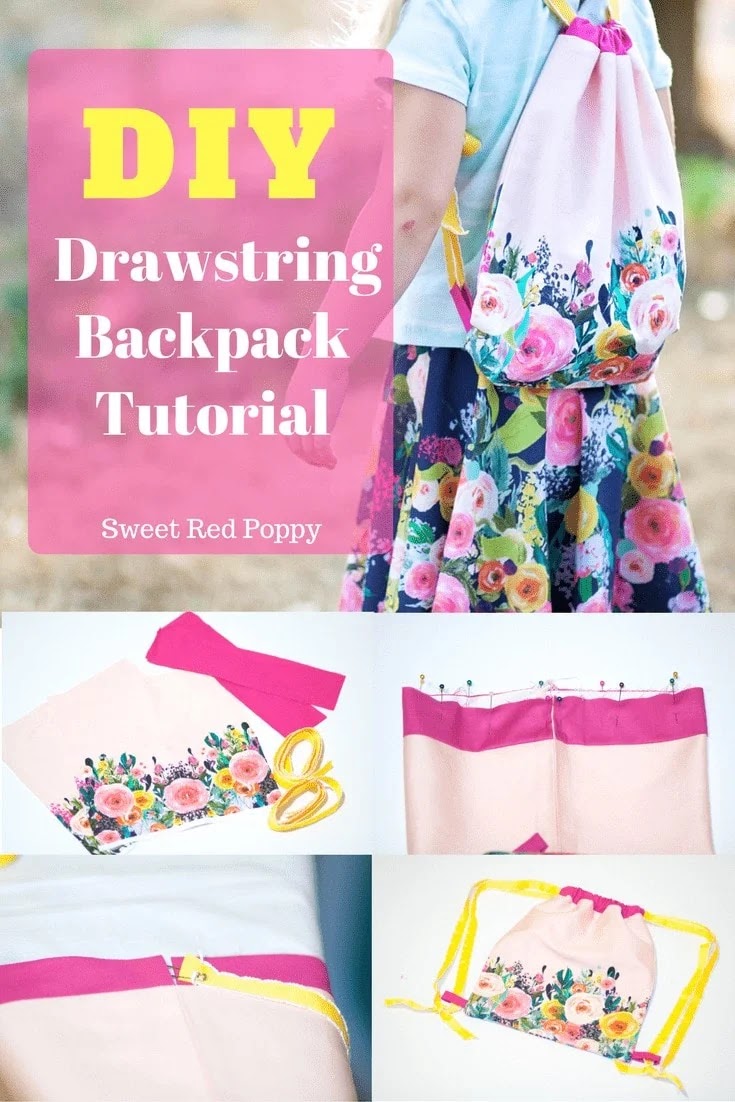
Back in the summer, just before we headed off for a little UK holiday, I realised my son didn't have a suitable bag to carry his bits and bobs in. The perfect opportunity to test a free sewing tutorial! After searching through a load of those '30 free bag tutorials' type lists, I settled on this tutorial by Sew Red Poppy. Big thanks to them for sharing their hard work for free. This tutorial is freely accessible in blog post form, no need to download or sign up to anything.

(image source: Sweet Red Poppy)

Pattern type:

This is a super basic drawstring bag, with the drawstring forming the shoulder straps. The pattern pieces are offered as dimensions, no need to print anything out. It requires you to cut out six rectangles of fabric, plus two lengths of ribbon/cord. The project is suitable for beginners and can be made entirely on a regular sewing machine, no need for an overlocker/serger. 


Sizing info:

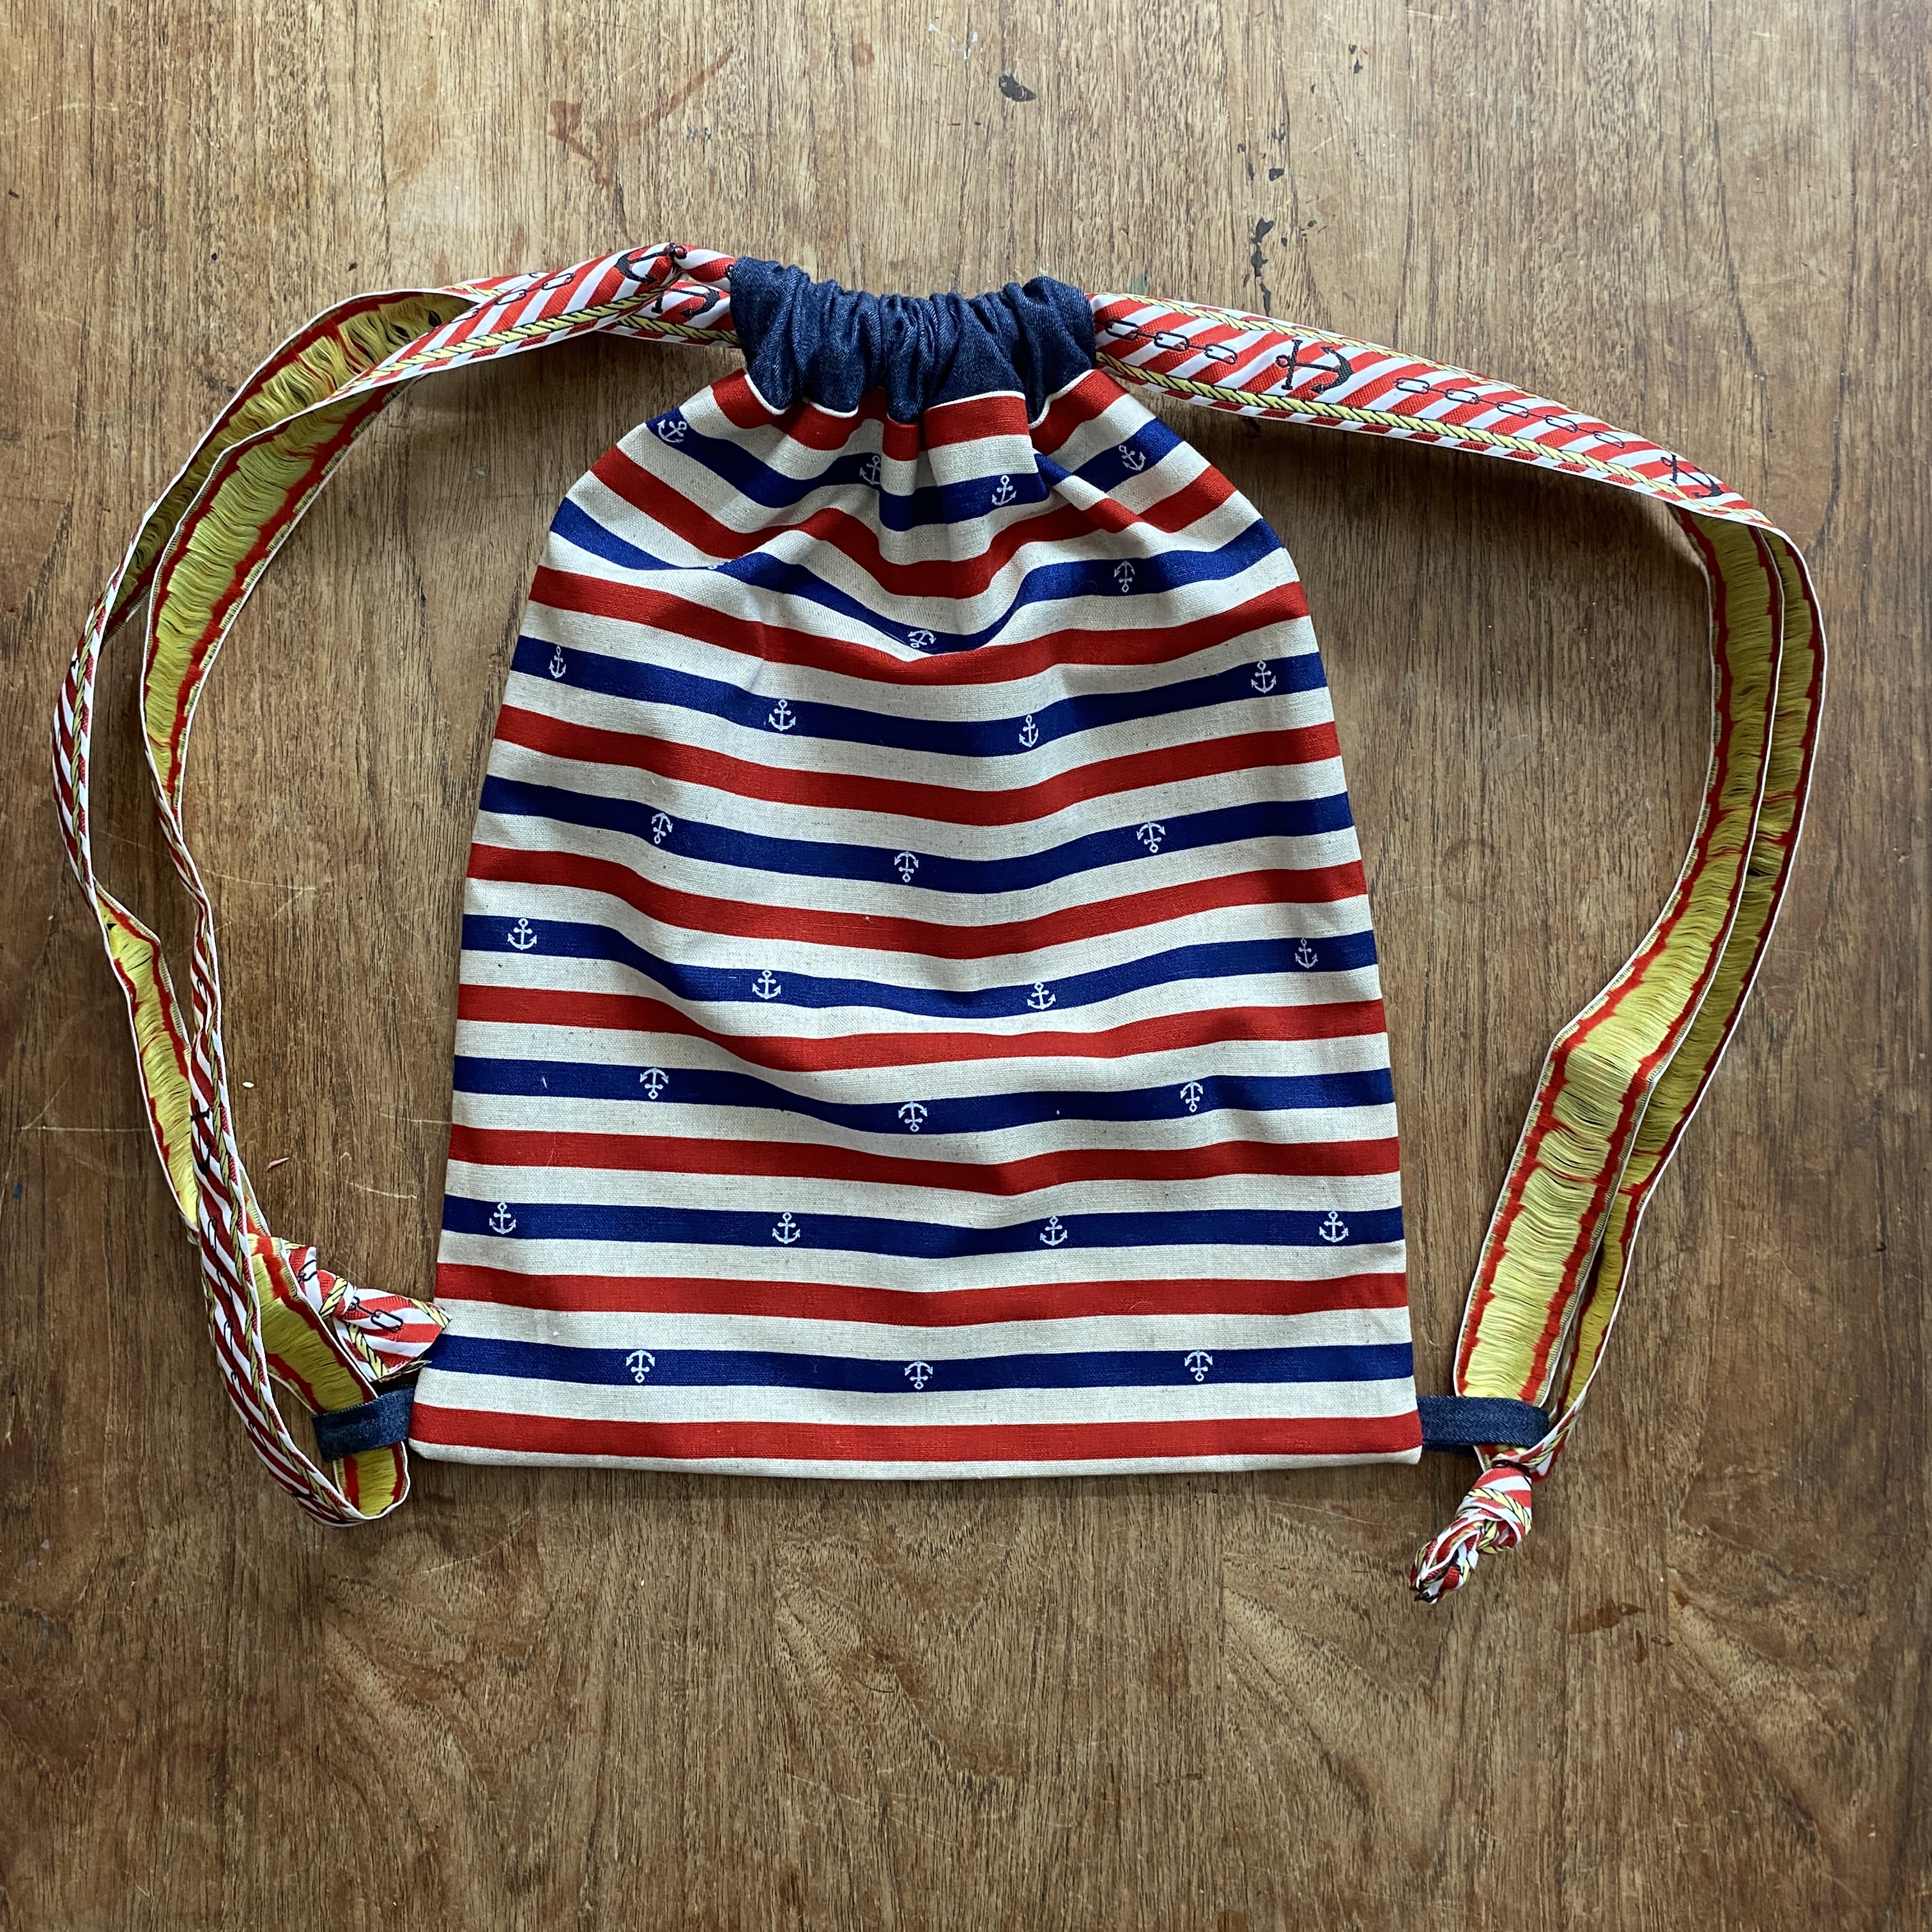
You can use the pics of my 6-nearly-7-yo son wearing the backpack to get a sense of the scale of the finished bag. That said (spoiler alert) I cut the pieces in the wrong orientation, so mine came out longer and thinner than the intended bag design. 


Fabric type:

Little guidance is given regarding fabric choice for this project, however the creator used a printed lightweight twill for the main section of their sample. I would say that sturdiness is important, but don'y go too thick or gathering the bag up might prove tricky. I used some kokka cotton that I bought on Etsy about a decade ago. I reckon you could go a step lighter in weight for the contrast fabric pieces, a chambray, poplin, shirting or quilting cotton perhaps. I used a scrap of lightweight 4oz denim. 

The tutorial uses ribbon for the drawstring/straps. It's hard to tell from the photos, but I think the ribbon is something closer to a grosgrain, as opposed to a satin ribbon. You could also use drawstring cord, of course, or twill tape. I couldn't buy any haberdashery because of my participation in the Last Sewist Standing challenge, so I had to do the best with what I had in my limited stash. I used some of this anchor design woven braid that I've had for about twelve years! It's not ideal because it doesn't slide through the channel very smoothly, however it does provide nice, wide straps that stay on the shoulders fairly well. 


Findings:

If you've read some of my Free Pattern Friday posts before, you probably already know how much I hate blogs with a million annoying ads everywhere, including animated ones. This is one such blog. I totally understand that this is the business model: that the creators can afford to spend time making tutorials and sharing them with us for free thanks to the ad revenue they earn. But I don't have to enjoy it! 

In general, the tutorial was excellent. There's a video version linked in the post also if that is a better format for you to process. The one thing I had an issue with (well, second thing, if you include the ads) is that they didn't specify which way round the the main rectangles were meant to be orientated, and it wasn't clear from the images. I guessed the wrong orientation which caused me some problems. 

The final outcome is good though, and the backpack saw a fair bit of action on holiday last summer, and a few times since. Shortly after making this backpack, my son got a very similar drawstring backpack free with a magazine. Clearly he prefers the magazine one because it's got Pokemon printed on it, and its synthetic fibres of the free one make it vaguely rain proof. However, after not much use, the Pokemon one is starting to break where the eyelets perforate the fabric at the bottom corners. It's good to be reminded that handmade items often last longer than their cheap, mass-produced counterparts!


Customisation ideas:

I'm going to leave this to you. It's kind of infinitely customisable in terms of dimensions and embellishment potential. 

Would I make this again?

Perhaps, particularly if one of my kids needed a bag to carry a PE kit or something like that. Plus I would consider making another version from a shower-proof fabric, but possibly make it a bit more capacious, for taking to the swimming pool.

Friday, 7 July 2023

Free Pattern Friday: Laminated Toiletry Bag Tutorial


Welcome to my monthly 'Free Pattern Friday' feature, where I road test a free sewing pattern or tutorial: sometimes a children's one, sometimes an adult's one . I publish these posts every first Friday of the month, timed to provide inspiration for those who plan to get their sew on over the weekend. I firmly believe that, if you pick your projects carefully, sewing doesn't have to be a crazy-expensive way to clothe yourself and your family. I also firmly believe that pattern designers deserve to be properly paid for their work, so if you enjoy using a pattern and can afford to do so, make sure you support that designer. Some designers' websites offer the option to make a donation, alternatively you can buy one of their paid-for products. If you can't afford to do so, you can support the designer by sharing your project via social media to help draw more attention to their work. Thanks to all the amazing pattern designers who have offered up their hard work for us to enjoy for free.

Yes!!! I promised that the Free Pattern Friday series would be back around the summer, time and today I'm making good on that promise. Since the last post in the series that I published back in January, I've found a number of free patterns and tutorials that I genuinely wanted to try, to make things that I genuinely think will be useful for my family. Starting with this one! 

Whilst prepping for the Travel, Sustainability and Sewing episode that I made for my podcast with return guest Shams el Din Rogers, I decided to wanted to make a couple of toiletry bags for my family to use for upcoming trips. I was inspired by some awesome bags and pouches that another podcast guest, Rachel Kirby, made earlier this year for her trip to the US. Now, I probably could have figured this out myself. But you know, sometimes you just want to be told what to do! So after some sniffing around, I found this post featuring 40+ Zip Pouch Tutorials on Polkadot Chair, which led me to the Laminated Toiletry Bag Tutorial, also by Dolkadot Chair. Big thanks to them for putting this together for free. If you've got some trips coming up and your wash bag, makeup bag, medicine pouch, or anything-else bag situation isn't looking very strong, you could quickly and easily whip yourself up a new one using fabric from your stash. 


(image source: Polkadot Chair)


Pattern type:

The tutorial is for making a simple, lined, water-resistant wash bag that closes with a zip.

Sizing info:

If you follow the measurements in the tutorial (which are in inches), the resultant bag will be about 24cm wide X 17cm tall (9 1/2" X 7"). A 12" - 14" zip is also required. This makes a small-to-medium sized wash bag, perfect for one person going away for a few nights to a week if they don't use too many products. If you're going for longer, or you want to fit a couple or a family's supplies in it, you'll want to make it bigger. It'd be super easy to change the size and dimensions by cutting the rectangles to your own specification. You can also make a subtle alteration to the dimensions when it comes to stitching the corners by altering the depth.

Fabric info:

The fabrics used in the tutorial are matte laminated cottons, which are probably A LOT softer and easier to sew than the vinyl scraps I had to hand. But sometimes scrap busters can't be choosers. I'm pretty sure mine will be more robust in the long term anyhow. I used some coated vinyl stuff, the kind that's sometimes used to cover tables when kids are around, that was leftover from my rain coat. (BTW, that raincoat was made nearly eight years ago and is still going strong.) Whilst I was hunting through my stash to find the sailboat vinyl leftovers, I unearthed this kitsch, blossom print vinyl that I bought close to twenty years ago! Which meant I was able to make two that could be easily distinguished from each other. I'm wondering if PUL might also work for the lining of these type of bags.


Findings:

If you're looking for a quick and simple tutorial to hold your hand through making a zip pouch, then this one is for you. However, if you'd like to make something a little more refined, with a more pleasing zip finish such as this, then it probably isn't. I'm not sure how viable that alternative, neater kind of zip finish is for this kind of laminated or vinyl fabric anyway, but I might trial that with some 'regular' fabric. Other options include a washbag with an extended zip tape like a lot of shop bought ones have such as this. Or if you'd like a different shape, then something like this or this might be more up your street. 

Generally speaking, the tutorial was easy and pleasant to follow. There was little-to-nothing about this tutorial that made it specific to water-resistant fabrics, other than a link to another post about sewing laminate fabrics, and a link to where you can buy laminate fabrics on Etsy. The one thing I really didn't enjoy about this tutorial, is that it's one of those websites that is dripping in distracting ads. I understand that that is the business model that allows them to offer this content for free, but it still annoys me. 

Customisation ideas:

Off the top of my head, you could:

  • add internal or external pockets to keep ear plugs or something else that's small
  • alter the size, shape and depth
  • use a non waterproof fabric on the outside, and a vinyl, laminate or PUL fabric on the inside only, particularly for a makeup case or other pouch that's less likely to sit in a pool of water!
  • add a label, name tag, decal or embroidery to personalise it or make it easier to return to its owner lost (you may have guessed that I'm thinking of my kids here)

Would I use this tutorial again?

Yes! And I have. I had some seeds that I wanted to send to a friend, so I made her a smaller version of this to put them in. For that, I used the same kitsch vinyl on the outside to keep the seeds away from moisture, but I used a scrap of gingham cotton for the lining. 

Friday, 2 December 2022

Free Pattern Friday: Bowl Cover Tutorial


Welcome to my monthly 'Free Pattern Friday' feature, where I road test a free sewing pattern or tutorial: sometimes a children's one, sometimes an adult's one. Or in today's case, something for the home. I publish these posts every first Friday of the month, timed to provide inspiration for those who plan to get their sew on over the weekend. I firmly believe that, if you pick your projects carefully, sewing doesn't have to be a crazy-expensive way to clothe yourself and your family. I also firmly believe that pattern designers deserve to be properly paid for their work, so if you enjoy using a pattern and can afford to do so, make sure you support that designer. Some designers' websites offer the option to make a donation, alternatively you can buy one of their paid-for products. If you can't afford to do so, you can support the designer by sharing your project via social media to help draw more attention to their work. Thanks to all the amazing pattern designers who have offered up their hard work for us to enjoy for free.


(image source: Hearth and Vine)

I've had my eye on this tutorial for yonks, and have mentioned it a couple of time in my podcast Check Your Thread. This project is a great potential scrap-buster (tick), quick to make (tick), could be used to make cute and useful gifts (tick tick) AND helps you to be more sustainable in your everyday life (TICK!). Bowl covers can be used instead of single-use cling film or tin foil to keep food covered in the fridge, on the table, on the kitchen counter or at picnics. You can chuck them in the washing machine and use over and over again instead of frequently adding to landfill. They obviously doesn't provide a vacuum seal, but they certainly will help to keep things fresher for longer and keep insects or animals (and perhaps even small kids!) off the contents of the bowl. I'm posting about this now in case you're on the look out for quick stocking filler/gift ideas to make for friends and family, but equally these might be lovely as a home warming gift. Thanks so much to Patti from Hearth and Vine for sharing this tutorial for free. 


Pattern type:

This tutorial shows you how to make cute, reusable, washable bowl covers to protect your food. 


Sizing info:

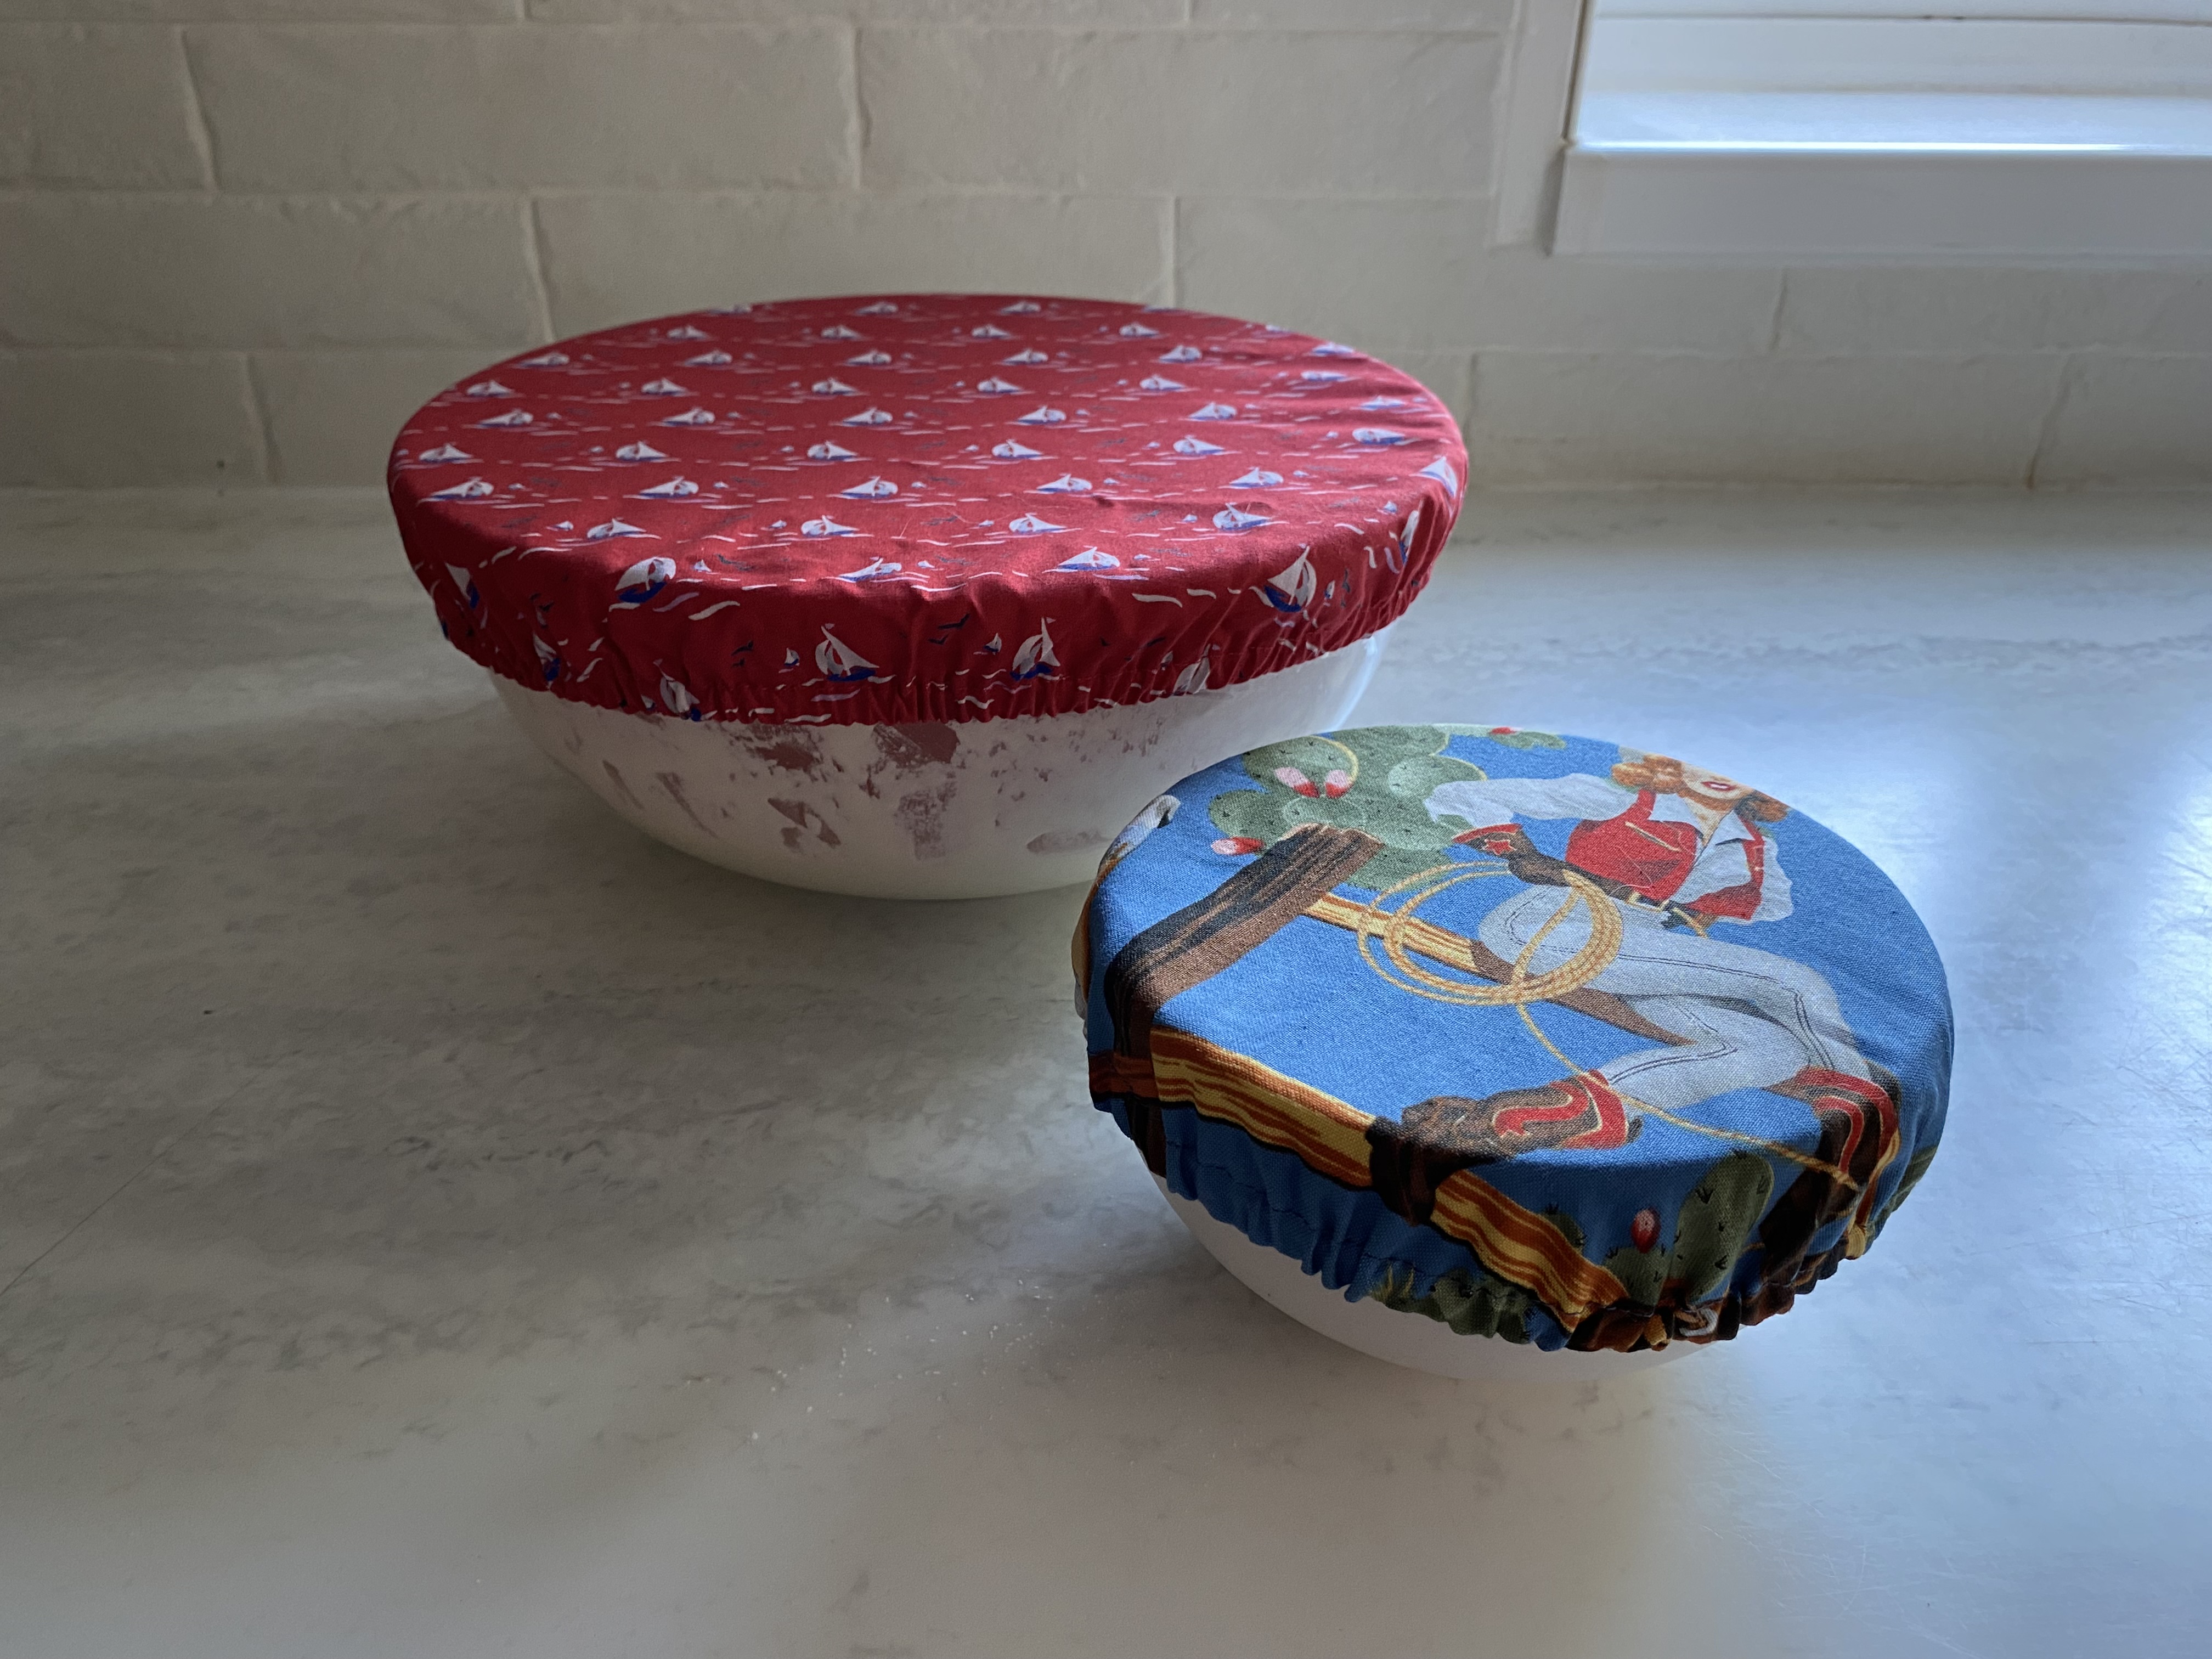
The awesome thing about this project is that you can make custom covers for the bowls you already own. I make homemade pizza dough and usually use a tea towel to cover my bowl whilst the dough is rising. However, this is a better option because I was able to make a cover to exactly fit the mixing bowl I always use. I also made a smaller one that fits the cereal-sized bowls we own to protect leftovers and such. 


Fabric info:

The tutorial recommends using quilting cotton for this project. You really want to use something with a tight weave to keep the food as fresh as possible, and that can withstand high temperatures when washing, so woven cotton is likely to be your best bet. Although, I think you could expand the recommendation to include cotton lawn, poplin and shirtings. Obviously, I'm always going to urge you to use what you already own, however, if you had nothing suitable in your stash or you really wanted to personalise the bowl covers, particularly if making them for a gift, you could buy fat quarters that represented the style of the recipient and their home. The red sailboat fabric used in these pics is a scrap of Atelier Brunette cotton poplin leftover from some pyjama shorts I made myself earlier this year. The pinup cowgirl fabric was a piece of quilting cotton I got in a fabric swap years ago. It had already been cut into a circle for making wax wraps, but I never got round to it. You will also need 1/4" elastic and making thread. 


Findings:

This was an incredibly quick and satisfying project! Within an incredibly short amount of time I had made two super useful bowl covers from fabric and elastic I already had in my possession. The explantion was clear and very easy to follow. 

The post/tutorial also includes a small Q&A section answering any queries you might have about making or using these covers. That was very helpful, however, I disagreed with one point. The tutorial recommends washing these in cold water. Cold water is not as effective at killing bacteria as hot water, so I wash mine in a 60 degree wash along with my tea towels and surface cleaning cloths, and they've held up perfectly well so far. 

My ongoing findings revolve around discovering different uses for them. For example, I was recently given a large bag of figs which I planned to make into jam (pictured above). I processed the figs, many of which were already soft and mushy, and used the bowl cover to keep the fruit flies (which my kitchen is plagued with) at bay until I had time to make the actual jam. 


Would I make these again?

Absolutely! It was a very pleasing project and the outcome is genuinely useful. 

Sunday, 9 May 2021

How to Use Fold Over Elastic (FOE)


This week, all being well, I will be re-releasing my free pants/undies/knickers pattern. It's been expanded and vastly improved, both the pattern itself and the instructions. In the latter, I include a section explaining fold over elastic and how to use it, which may be new to some sewists . I thought that it might also be useful for people if I shared that section here on this blog also to reference, whether you plan to try the free SoZo Undies pattern, another undies pattern or some other project that features fold over elastic. If you decide to use FOE (I'll be using that abbreviation going forwards) for a project with seams stitched using an overlocker/serger, you will need to use a regular sewing machine to apply the FOE. In the case of my undies pattern, it will be applied along the leg hole edges and the waist edge. But let's go back to the beginning...


What is FOE?


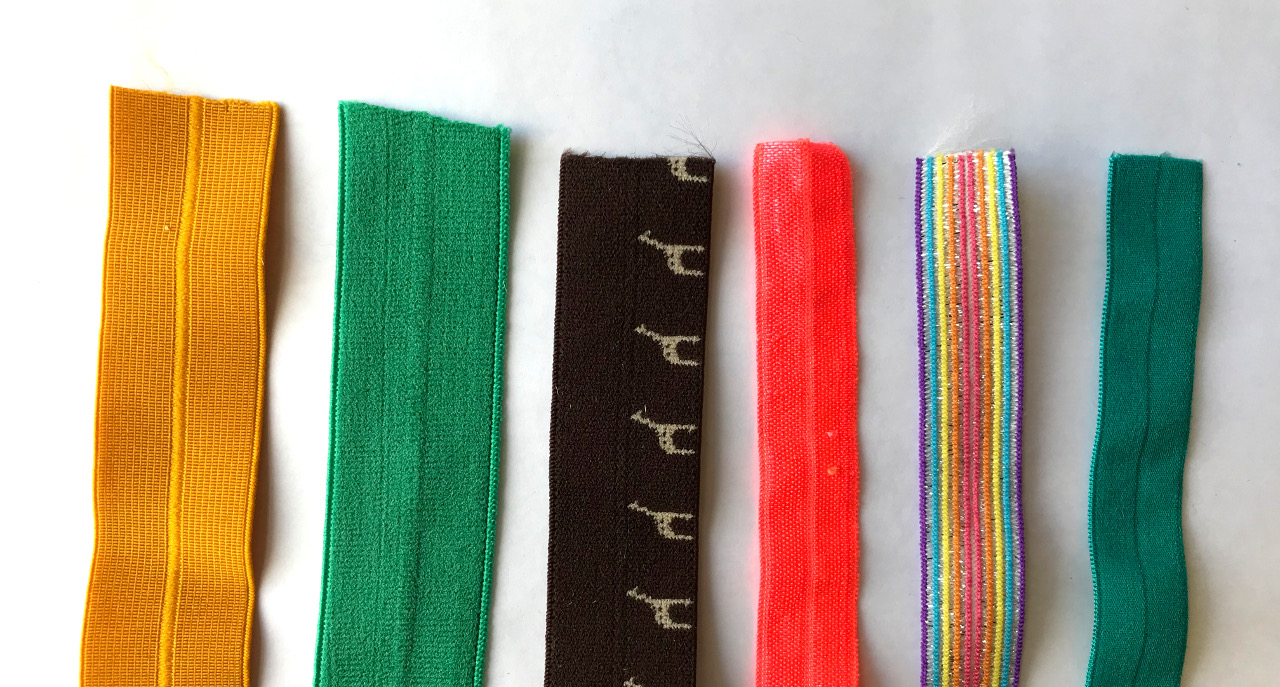
Fold over elastic is flat and has a visible line that runs down the centre to help you fold it in half. It can be found in a variety of widths. For my free undies project, I recommend using FOE that is 16mm - 20mm wide when flat. The narrower the elastic, the more fiddly it is to apply. If you are new to using it, try to buy some that is 18mm or 20mm wide and practice before using it on your undies project. 


FOE is available in a whole rainbow of gorgeous colours, shades and textures, and can even be found with patterns printed or woven in. Solid coloured FOE often has one matt and one shiny side, so you can decide which you prefer to be visible.


How to apply FOE:


**If you are new to using FOE, I STRONGLY advise that you have practise applying it to some scrap jersey fabric before working on your undies project. When buying your FOE, remember to order extra for practising if necessary.**


Place a section of FOE down on a surface laying vertically, wrong side up. Position some jersey on top of the left half of the FOE with the raw edge of the jersey sitting along the central line of the elastic. 


Fold the elastic in half so the raw edge is enclosed. You are about to sew through this sandwich to keep it in place with the fabric’s raw edge permanently enclosed. I find it easier to start off my row of stitches by sewing through elastic only before the fabric is introduced into the sandwich, so try leaving a few centimetres of elastic free at the beginning. 


Use as many pins as you feel is necessary to keep this sandwich in place, then position the whole thing under the foot of your sewing machine keeping the fabric to the left. 
You will be sewing through three layers, two elastic, one jersey, so it’s a good idea to select a stronger stretch/jersey needle than would be suitable for sewing the gusset seam/s. I usually use a 90/14 sized needle for the task of applying FOE.


To make sure the elastic and jersey remain stretchy, you need to select a stretch stitch on your machine. I recommend using the three-step zigzag stitch. This stitch is sometimes also called the tricot stitch or the serpentine stitch. It comprises three tiny straight stitches per zig and per zag. The three-step zigzag stitch is commonly used in underwear manufacture, both domestically and industrially, because it allows a lot of stretch but also provides more stability and a flatter finish than a regular zigzag stitch. The only drawback of the three-step zigzag stitch that I’ve found is that those tiny straight stitches make it a real pain to unpick if you make a mistake!


Begin by stitching through both layers of elastic, and then as you get to the jersey, through the elastic-jersey-elastic sandwich, removing the pins as you go. After every few centimetres of stitching, stop and readjust the next section of jersey and FOE as necessary before continuing. 


This is the basic technique for applying FOE. Things get a little trickier in the undies project because we will also be going round the curve of the leg holes, and giving the FOE a little stretch as we stitch. To make these undies, you will be applying FOE that is shorter in length than the measurement of the leg hole edges and waist edge that you’re stitching it to. I will show you how to pin the elastic evenly to the edges. Then you will need to give the FOE a little tug with your right hand as you stitch through the three layers to get a neat result. But get the hang of the basic application technique described above and you’ll be ready to tackle this project!


Why can I buy FOE?


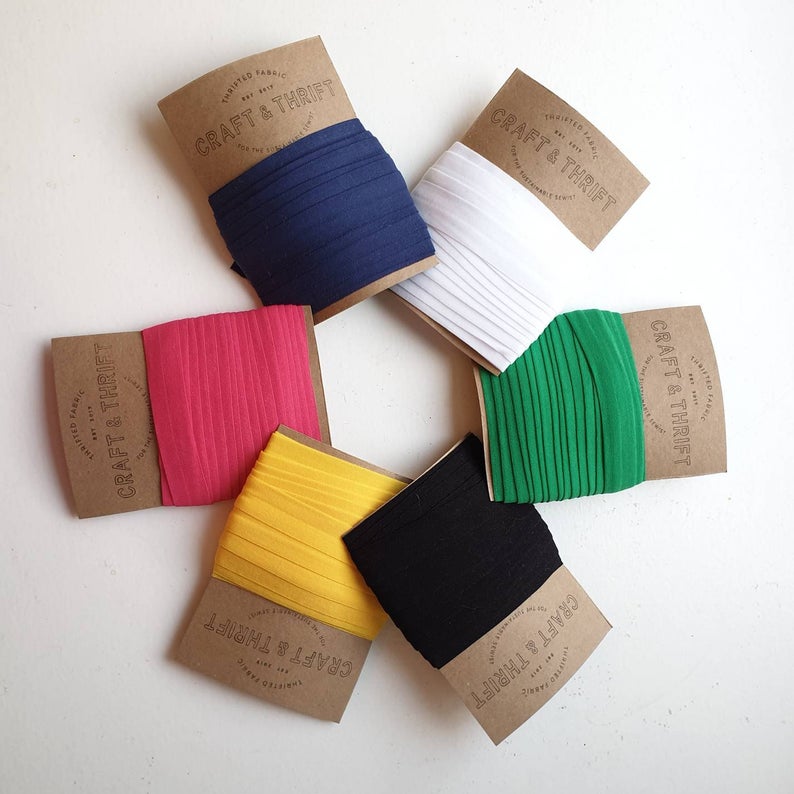
FOE is wildly available at many/most sewing shops and haberdashers. Recently I have used FOE from Craft and Thrift and Plush Addict (both based in UK).


Tuesday, 22 November 2016

Oliver + S Hopscotch Skirt Pattern Hack Tutorial


Here's a super-easy pattern hack tutorial that was previously published over at The Village Haberdashery's Daily Stitch blog back in September. Thanks to them for allowing me to repost it over here. It features the second of my creations for the summer instalment of Kid's Clothes Week, donchaknow

If your interested in sewing clothing for little girls and haven’t come across the Oliver + S Hopscotch pattern, then allow me to introduce you! The skirt, in particular, is a wonderful, timeless garment that has perfect proportions and great details. However, it only really works in solid fabrics or prints with a small-scale design. The skirt’s button placket and clever pleated pockets would most likely chew up a larger design of print. But wait! I have the answer: an incredibly simple pattern hack that turns the Hopscotch skirt pattern into the ideal canvas for fabric with a bold print. We’re going to ignore the pockets and omit the button stand.


In fact, I may be cheeky even alluding to this as a pattern hack. Because we’re not actually going to alter the pattern pieces at all: we’re just going to use them slightly differently and alter the construction method a tad. Aside from being able to now use this pattern for a wider range of fabric designs, it also pretty much halves the construction time. Which may appeal to you, whether you’re creating wardrobe staples for your little girl, or whipping up a cute gift for someone else’s!

You will need: 
Trace the pattern pieces in the size that you require to preserve the other sizes for future projects. For this hacked version of the pattern, you will only need the front skirt piece, back skirt piece and front waistband piece.


When positioning the pieces on your fabric, ignore the ‘cut 2’ direction on the front skirt piece and front waistband piece. Instead, position these two pieces on a fold (like the back skirt piece) as pictured above. You’ll need to trust me on this: the dimensions of these pattern pieces mean that, even though you are using them on the fold and omitting the button stand, the measurements of the finished skirt will remain the same as if you made the regular version of this skirt pattern.

Once you have cut out the pieces, snip a tiny notch at the centre fold on the bottom edge of the front waistband piece, and another tiny notch at the centre front fold at the top edge of the front skirt piece. These notches will be matched up during construction.


The main difference in the construction of this hacked version is that you will now be making one front skirt panel (see above), rather than two. Gather the top edge of the front skirt piece and apply it to the front waistband piece, and continue the construction as per the rest of the instructions.


Congratulations! You have made the ideal gathered skirt, AND saved yourself some precious sewing time. Now, stop being so selfless and get back to making something for you!
Related Posts Plugin for WordPress, Blogger...