Showing posts with label knit. Show all posts

Friday, 3 October 2025

Free Pattern Friday: Noelle Underwear for Women


Welcome to my monthly 'Free Pattern Friday' feature, where I road test a free sewing pattern or tutorial: sometimes a children's one, sometimes an adult's one. I try to publish these posts every first Friday of the month, timed to provide inspiration for those who plan to get their sew on over the weekend. I firmly believe that, if you pick your projects carefully, sewing doesn't have to be a crazy-expensive way to clothe yourself and your family. Thanks to all the amazing pattern designers who have offered up their hard work for us to enjoy for free.

Ok, so elephant in the room: yes, I am posting pics of myself in my pants on my blog. Now we've got that out the way. So I've fallen down a Pinterest underwear inspiration rabbit hole recently, in advance of trying to make myself some nice sets of undies that actually fit and feel supportive. If you're interested, you can see my board here. Although Pinterest has made it virtually impossible to tell which pins I've added and which they've suggested. ANYWAY. A lot of the undies I've been pinning are what can only be described as Big Pants. Now, I'm usually a committed hipster undies wearer, but I thought it'd be fun to experiment with a different style. Enter: the Noelle pattern by undies designer Madalynne

I first discovered this pattern when searching for free patterns to suggest to the Patrons of my podcast, Check Your Thread, when I was planning an online undies sew-together session. Thanks, as always, to all designers, including Madalynne, who offer some of their hard work up to the sewing community for free. Onward...

(image source: Madalynne)

Pattern type:

What I would describe as Big Pants, the website would describe as 'feminine, everyday high waisted underwear'. The waist and leg holes are meant to be finished with picot elastic. 

Sizing info:

The pattern isn't the most size inclusive, covering natural waist 23" - 41" and hip sizes 33" - 50", which is divided into sizing XS - 3XL. I made the size M, as per my measurements which I felt was the correct choice. That said, the stretchiness of your fabric will effect the fit greatly. 


Fabric info:

This pattern seems to have been designed mainly for stretch lace with a power mesh/net lining. However, the list of suitable outer fabrics does include jersey or any fabric with a 4-15% spandex content resulting in a 30%-40% stretch. I prefer cotton jersey with Lycra content for undies, so I used a scrap of such a fabric that has a little less stretch than perhaps would be ideal, but ultimately was fine for this project. I chose not to line these undies because honestly who lines undies?

Findings:

The biggest surprise for me, aside from that I quite like wearing Big Pants, is that this pattern doesn't include any instructions! From what I understand, this pattern appears in Madalynne's book, 'Sew Lingerie: Make Size-Inclusive Bras, Panties, Swimwear & More; Everything You Need to Know', which, I assume, tells you how to make them. The instructions can also be accessed in the form of a Creativebug online class, which currently costs $9.95. Aside from those definitely not-free options, you're on your own. 

That said, if you've ever made undies before, you will be able to figure out the construction easily enough. The head-scratching occurs, or at least it did for me, with trying to work out how long to cut the elastic. In the end, I did some maths to work out the percentage difference between the leg holes and waistline, and the lengths of elastic required on my own free undies pattern, and then measured the leg holes and waistline of the Noelle pattern to which I applied the same percentage difference. This worked out well for the leg holes, but I feel the elastic at the waist should have been a tiny bit tighter.  

There's a bit of faff involved in actually obtaining the pattern pieces: you go through the online shop to access a download that is actually just a page from which to then access a document that includes the pattern pieces and some info on supplies and cutting. The pattern consists of a front piece and back piece, with a shaded area on the front piece to show the shape from which to cut the crotch lining piece. Rather than tracing that crotch lining piece off the front piece, I just printed out the lower part of the front piece twice.  


The pattern pieces came together easily, using only my regular sewing machine because I couldn't be arsed to rethread my overlocker for what I was hoping would be, at best, a wearable toile. My fabric wasn't the greatest quality, but they've definitely come out wearable. That said, because I was using fold over elastic, rather than the suggested picot elastic, the crotch has turned out a bit wide. If I were using FOE again, I'd narrow the crotch area. 

I also found them to be too high, particularly at the back. Even with my highest waist jeans, they peek out over the top! For future pairs, I'd skim off about 2cm from the waist edge, but leave the waist elastic the same length or even tighten it a bit as that came out a smidge loose. 

Would I make this again?

With the adjustments stated above, I can DEFINITELY see myself using this pattern again with some nicer fabric. I'll even bother to thread up my overlocker to make the seams on the inside neater. I'd also like to play around with creating seam lines and panels with different fabrics. This pattern is a great canvas for all sorts of potential undies making. 

Friday, 6 June 2025

Free Pattern Friday: Women's T-shirt. Again

Welcome to my monthly 'Free Pattern Friday' feature, where I road test a free sewing pattern or tutorial: sometimes a children's one, sometimes an adult's one. I try to publish these posts every first Friday of the month, timed to provide inspiration for those who plan to get their sew on over the weekend. I firmly believe that, if you pick your projects carefully, sewing doesn't have to be a crazy-expensive way to clothe yourself and your family. Thanks to all the amazing pattern designers who have offered up their hard work for us to enjoy for free.

As you may have noticed if you've checked out my blog previously, sometimes I re-road test and re-review a free pattern or tutorial. Hopefully, this shows you which patterns I really think are worth your time! And the Free T-Shirt pattern by Closet Core Patterns is one such pattern. The first version I made using this pattern has been worn an absolute TON. The fit is ideal for wearing underneath dungarees and strappy dresses. It's become one of those garments that I really miss when it's in the wash, so I felt it made sense to use this pattern to make another in different fabric. I also took the opportunity to road test the fancy back neck and shoulder seam finishing that I didn't try last time. So, again, big thanks to Closet Core for sharing this pattern with the world for free. 


(image source: Closet Core Patterns)


Pattern type:

The Closet Core T-shirt is a standard crew neck style with set in sleeves. The fit is gently boxy, if that's a thing. View A is a slightly cropped length with short sleeves, and View B is hip-length with 3/4 length sleeves. Throw in a patch pocket piece, and with these options you can mix and match to your heart's content. The pattern files are split into two size ranges, and the larger range features a bust dart. 

Sizing info:

This pattern includes an impressive range of sizes, from 31" to 60" bust. Sizes 0-20 (full bust 31" - 46") are grouped together and sizes 14-32 (full bust 42" - 60") are grouped in together with the addition of a bust dart. 

Based on the size chart cross-referenced with the finished measurements charts, I decided to make a size 8 at the top, blended to a size 10 for my waist downwards. This worked perfectly in my first version, however, in this heavily and drape-y knit, I ended up having to skim quite a lot away from the side seams to achieve a similar fit. 

Previously I made the cropped version and wanted to make a longer one this time. However, due to my fabric limitations, I had to settle for a length almost dead in between the cropped and hip length. 


Fabric info:

As per the listing: 'This pattern can be made in a variety of knit fabrics with at least 30% crosswise stretch. For a more structured look, choose 100% cotton interlock and jersey. For a drapier effect, choose cotton/spandex blends, ribbed or rayon knits.' Basically, you have quite a bit of leeway with your choice of knits, but bear in mind that it will effect the fit (and somehow possibly also the size!) of your finished garment.   

About six years ago, my boss donated me a stripe-y RTW knit dress. I love stripes but rarely wear dresses, so it's stayed in my stash all this time with a view to using the fabric at some point. It's a heavier knit with viscose, polyester and elastane content. The dress had some inseam pockets that were positioned towards the front rather than a regular side seam position, making it a bit challenging to fit the pattern pieces out of it. With a bit of tweaking, I was able to cut out this top.

Findings:

As you suspect from a major, well-established indie pattern brand, this pattern was a dream to work with. The downloads included A4/letter sized as well as A0/copyshop pattern files. I treated myself to some A0 printing because my home printer is close to death, and was able to specify which size layers I wanted. That saved the printers some ink and sparing me from loads of confusing, unnecessary lines. 

The instructions include diagrams to illustrate the steps. Unlike last time, I followed the instructions to bind the back neck and shoulder seam, which is a feature I've always like on RTW garments. Because my knit was pretty thick, I didn't end up with the cleanest of finishes, but I think it looks ok. It also makes it super easy to tell which is the back! 


Customisation ideas:
  • use a different colour or printed fabric for the front, or for the sleeves, or for each piece
  • cut the backneck/shoulder stabilising band from contrast fabric
  • create seamlines and colourblock using scraps and leftovers of jersey
  • cut the neckband from a contrast colour to the rest of the garment for a 90s indie-kid look
  • shorten the length of the body for an exaggerated crop, or lengthen the top to create a tunic length garment, or even a dress
  • shorten the sleeves for a cap sleeve look, or lengthened them for full length sleeves

Would I make this again?

Absolutely! Next time I'd like to try the long sleeved version. 

Friday, 7 June 2024

Free Pattern Friday: Trainer/Sneaker Socks


Welcome to my monthly 'Free Pattern Friday' feature, where I road test a free sewing pattern or tutorial: sometimes a children's one, sometimes an adult's one. I try to publish these posts every first Friday of the month, timed to provide inspiration for those who plan to get their sew on over the weekend. I firmly believe that, if you pick your projects carefully, sewing doesn't have to be a crazy-expensive way to clothe yourself and your family. Thanks to all the amazing pattern designers who have offered up their hard work for us to enjoy for free.

Usually, when choosing what to post about for my Free Pattern Friday series, I find a free sewing pattern or tutorial and then decide whether or not the item would be useful for someone in my family. If it's a YES, then it goes on my list of free resources to road test. However, with this project it was different. This time a need came first. The weather had started to get warmer, two of my four pairs of trainer socks just died beyond repair, and I realised I need more. I'm trying hard to save money this year so we can get some building work done on our house, so I thought, 'I wonder if there's a free pattern for trainer socks out there...'

The answer came in the form of this YouTube tutorial with free pattern by a French-speaking creator called Nejea. Massive thanks to Nejea for sharing their work for free. I hope lots of people watch your tutorials and you get lots of ad revenue from YT. The pattern is easily accessible by clicking on the link in the caption of the YouTube video, no sign ups necessary. 


(image source: Nejea on YouTube)

Pattern type:

The pattern itself is simple and clear, consisting of two pieces plus the measurements for band are given to draft directly onto your fabric. The tutorial for construction, plus all additional information such as fabric suitability, is included in the 11 minute-long video. 


Sizing info:

The pattern has been drafted for European shoe size 38 (approx. size 5 in the UK system). However, how big or tight these trainer socks come out is going to depend a great deal on the properties of your fabric. I would really recommend making a pair and checking the fit before cutting out a whole load. And then expect the sizing to change if you use different fabrics going forwards. 

Me, I wear UK 7, approx. European 40, but I have narrow feet. So I decided to print out the pattern by adjusting the printer scale settings to about 105%. I then extended the length by an additional 1cm. Experiment with your printer settings, and possibly lengthening or shortening the pieces to tweak the fit until you get something that works for the size and width of your feet. 


Fabric info:

The tutorial recommends using jersey fabric with a four-way stretch (or bi-stretch as they refer to it in the video). However, I decided to go rogue and try this pattern using some fine knit harvested from an old RTW cardigan. I have several worn out or misshapen fine knit cardigans, and I'm always on the look out for potential uses for them! I used four-way stretch jersey for the band, however. The fine knit worked pretty well. The only real issue is that, because there doesn't seem to be any elastane/Lycra/spandex content to give some recovery, it does tend to stretch out a bit throughout the day. They're still totally wearable though. I had hoped to try this pattern in the type of knit that is actually recommended before publishing this post, but I didn't have time. So I can only assume that jersey with four-way stretch works fantastically!


Findings:

There maybe some non-French speakers who might be put off trying a pattern and tutorial that have been produced in a language they don't speak. But really they needn't be. I don't know if you have to tweak your YouTube settings, but English subtitles automatically appeared for me when watching, and the caption is written in English. The text on the pattern is in French, but seeing the creator use the pieces in the tutorial, it is clear what each piece is and how they work together. 

Despite using a fabric of questionable suitability, I love my little trainer socks! I've used them lots of times since making them. They offer great coverage of the foot: enough so they stay on easily, but not enough that they are visible when wearing trainers. At first, I was aware of the seam allowance that runs along the heel. However, I quickly got used to it and don't notice it now at all when I put these on.

My only real criticism of this tutorial is the way the band is applied to the rest of the sock. I understand that the method described is meant to reduce the amount of seam bulk that might feel annoying to some. However, I found it didn't properly cover the raw edge of the top of the socks and seemed a bit messy to me. In the future, I'll apply the band in one go, and then topstitch down the seam allowances. 


Would I make this again?

Yes, absolutely. I've pretty much given up on making ankle socks from sewn fabric, but I definitely plan to make more of these when the need arises. 


Friday, 2 February 2024

Free Pattern Friday: Women's T-shirt


Welcome to my monthly 'Free Pattern Friday' feature, where I road test a free sewing pattern or tutorial: sometimes a children's one, sometimes an adult's one. I try to publish these posts every first Friday of the month, timed to provide inspiration for those who plan to get their sew on over the weekend. I firmly believe that, if you pick your projects carefully, sewing doesn't have to be a crazy-expensive way to clothe yourself and your family. Thanks to all the amazing pattern designers who have offered up their hard work for us to enjoy for free.

If you've been a reader of the Free Pattern Friday posts for a while, it'll be clear to you that I only ever review patterns for items that my family has a genuine use for. That means the patterns I pick won't always have mass appeal. So I'm happy to have found one for today that it both useful to me AND probably a lot of other people! It's the Free T-Shirt pattern by Closet Core Patterns. A useful basic with some cute options that's graded to a wide size range, woo hoo! To access it, you will need to sign up to their newsletter, but you can unsubscribe at any time. Big thanks to Closet Core for sharing this pattern with the world for free. 


(image source: Closet Core Patterns)


Pattern type:

The Closet Core T-shirt is a standard crew neck style with set in sleeves. The fit is gently boxy, if that's a thing. View A is a slightly cropped length with short sleeves, and View B is hip-length with 3/4 length sleeves. Throw in a patch pocket piece, and with these options you can mix and match to your heart's content. The pattern files are split into two size ranges, and the larger range features a bust dart. 

Sizing info:

One of the reasons I'm super happy to be shining a light on this pattern is because it includes an impressive range of sizes, from 31" to 60" bust. Sizes 0-20 (full bust 31" - 46") are grouped together and sizes 14-32 (full bust 42" - 60") are grouped in together with the addition of a bust dart. 

Based on the size chart cross-referenced with the finished measurements charts, I decided to make a size 8 at the top, blended to a size 10 for my waist downwards. I made the cropped version, so I didn't need to worry too much about the hip measurement. My fabric is very drape-y which obviously effects the fit, but I think my decision on sizing was good. I'd be interested to see what it looks like in a more stable knit. 


Fabric info:

As per the listing: 'This pattern can be made in a variety of knit fabrics with at least 30% crosswise stretch. For a more structured look, choose 100% cotton interlock and jersey. For a drapier effect, choose cotton/spandex blends, ribbed or rayon knits.' I have nothing to add to that in regards to suitable fabrics. 

My fabric is a lightweight, slightly sheer, slubby jersey of unknown fibres (although I suspect it's a poly-blend of some type). It was leftover from this Lou Box Top kit that was given to me by Amy from Craft and Thrift, back when she sold deadstock fabric. I wear that black Lou Box top ALL THE TIME during the summer, so I'm pleased to have another option that will feel similarly slinky, but with a different silhouette and garment pairing suitability!

Findings:

As you suspect from a major, well-established indie pattern brand, this pattern was a dream to work with. The downloads included A4/letter sized as well as A0/copyshop pattern files. I treated myself to some A0 printing because my home printer is close to death, and was able to specify which size layers I wanted. That saved the printers some ink and sparing me from loads of confusing, unnecessary lines. 

The instructions include diagrams to illustrate the steps. I liked the option they included to bind and reinforce the shoulder and back neck seam. I chose not to do it for this version because my fabric was so thin, but I would definitely include that as a cute, contrast feature in future versions. 

The fit of the finished item is exactly how they described. It's a great basic that I can image using heaps in warmer months with high waist trousers and shorts.  


Customisation ideas:
  • use a different colour or printed fabric for the front, or for the sleeves, or for each piece
  • cut the backneck/shoulder stabilising band from contrast fabric
  • create seamlines and colourblock scraps and leftovers of jersey
  • cut the neckband from a contrast colour to the rest of the garment for a 90s indie-kid look
  • shorten the length of the body for an exaggerated crop, or lengthen the top to create a tunic length garment
  • shorten the sleeves for a cap sleeve look, or lengthened them for full length sleeves

Would I make this again?

Absolutely! I will definitely keep this pattern in my arsenal for when I come across a suitable length of nice jersey. I'd like to try it in a more stable cotton or cotton/elastane jersey or interlock. 

Tuesday, 28 March 2023

Autumnal Scrappy Apollon Sweatshirt

 
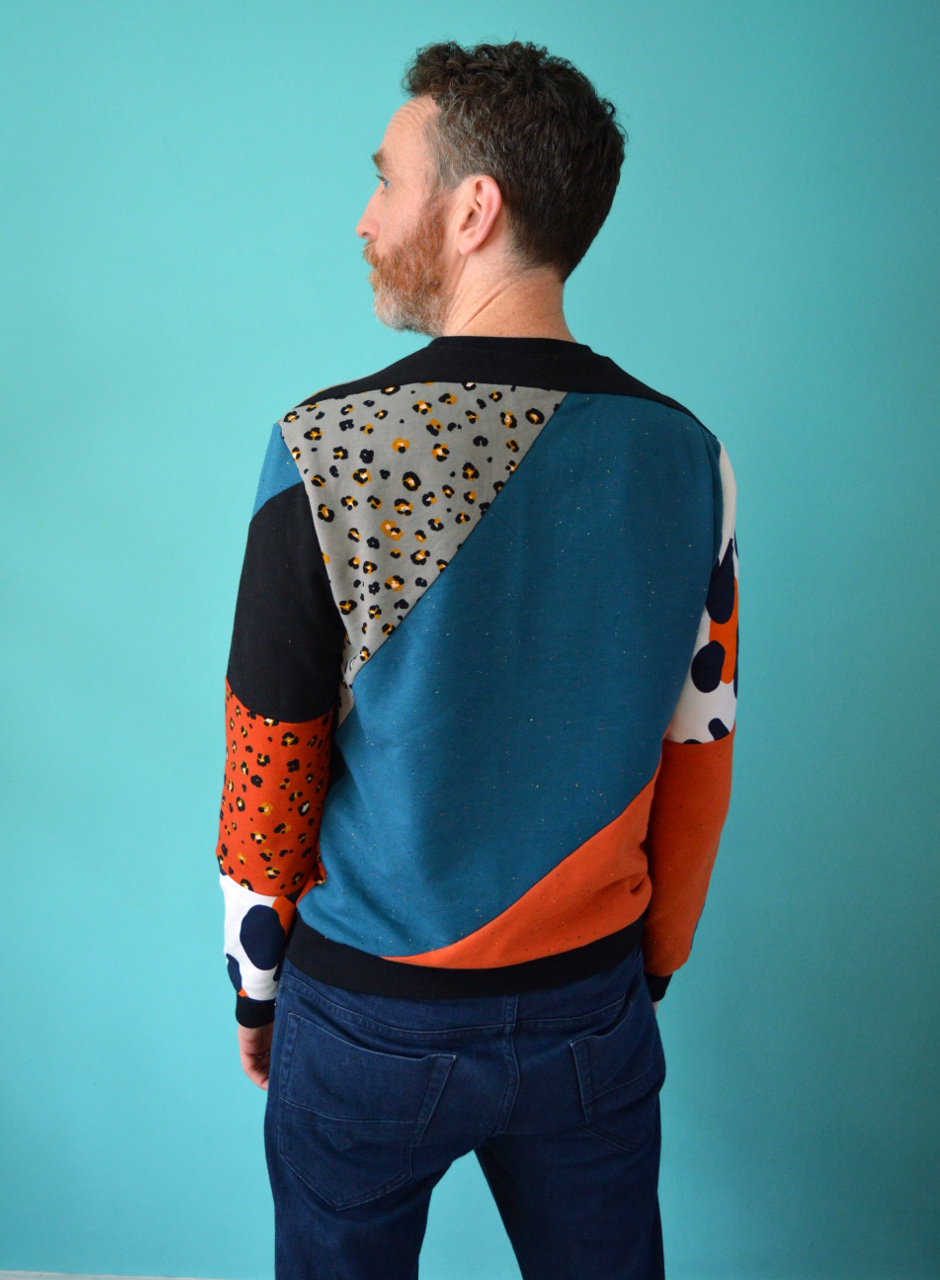
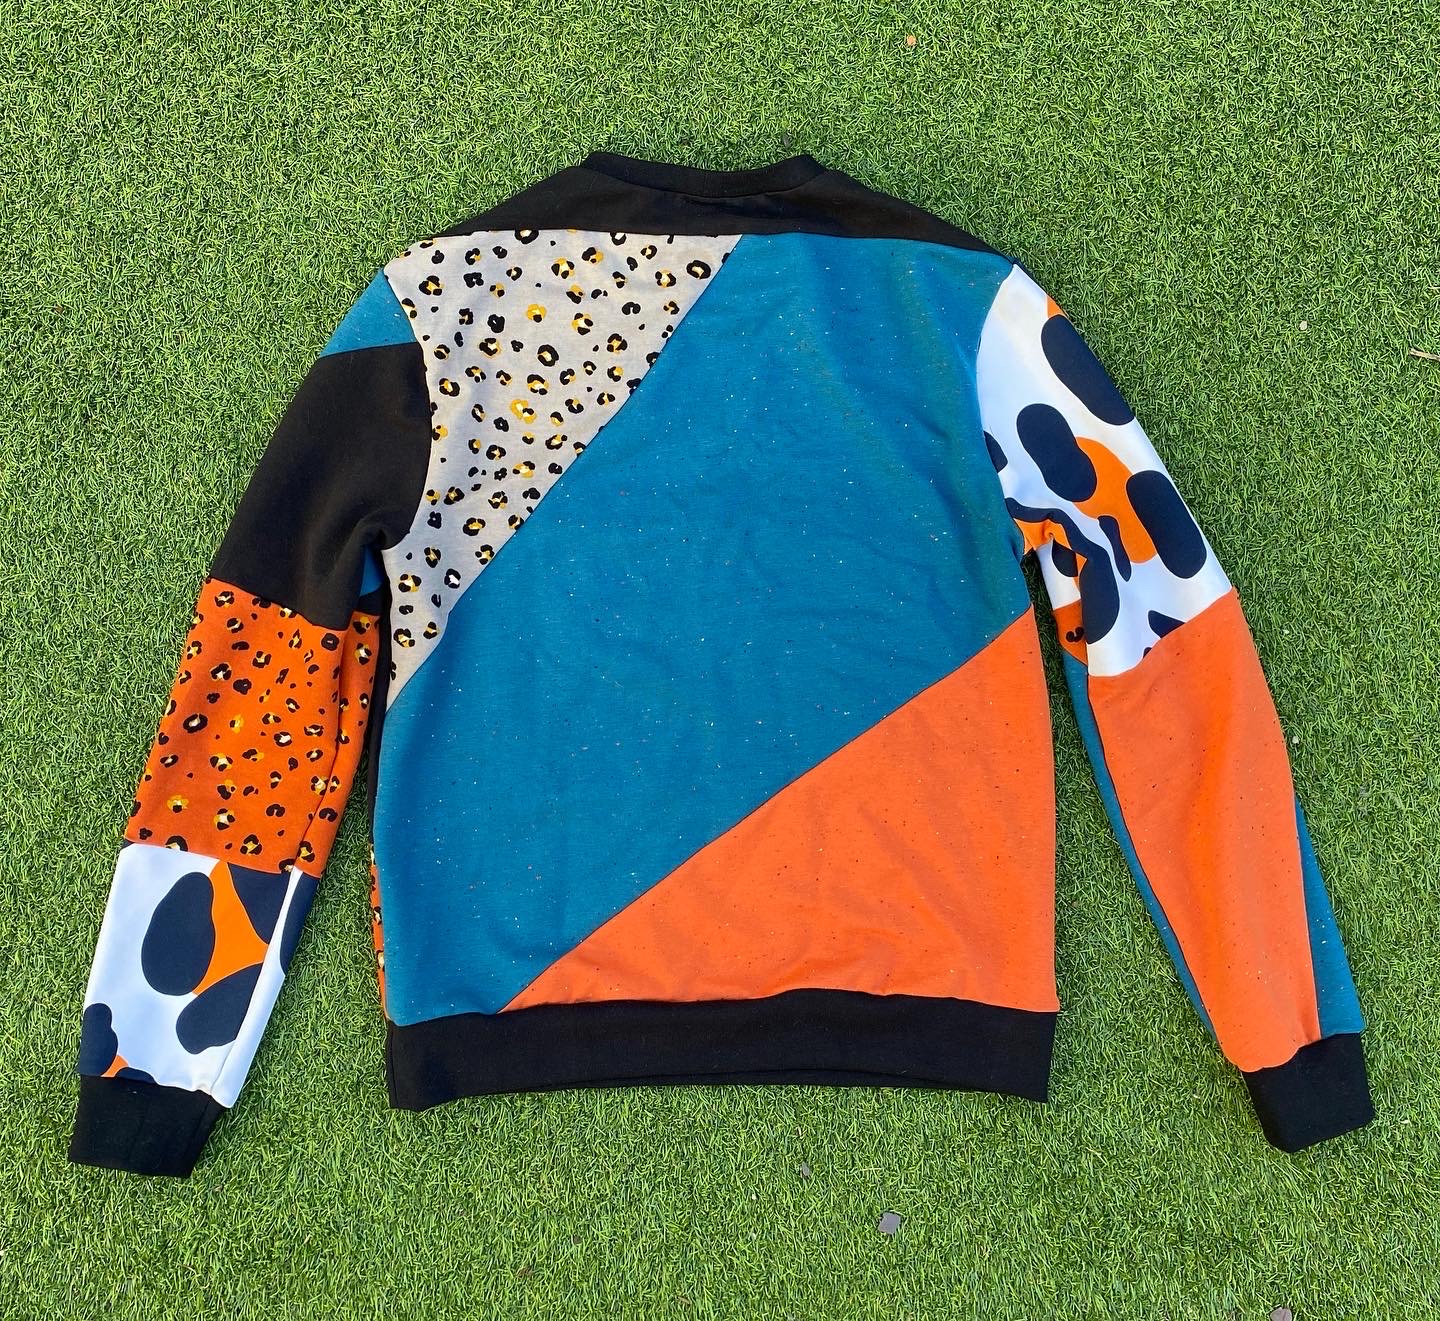
Towards the end of last year, I made Mr SoZo a sweatshirt out of scraps and leftovers. It was pretty wild, and despite his insistence that he liked it, I wondered exactly how much he'd wear it. Around the house only perhaps. Well, turns out, he wears it almost every single day, in all the places!


It has received a lot of compliments also, which can only have bolstered his confidence in wearing what he terms as 'post-apocalyptic chic'. Anyway, he's started to worry that it is going to look tatty very soon due to the amount of wear it receives. We only wash garments when they actually need it round these parts, however, it will start to look faded before long, so it made sense to make hime another. 


I've been going through all my fabric scraps and leftovers lately due to my participation in the Last Sewist Standing challenge. For that challenge, I have pledged to try and not buy any new fabric for a year, starting Valentine's Day 2023. I truly believe that scraps and leftovers are a wonderful resource for garments sewers, although the speed at which they build up can be alarming, and it is easy to feel overwhelmed by them. Part of my motivation for taking part in the challenge was the push it'd give me to get my scraps under control, and turn many of them into awesome, useful items. 


So having sorted through all my sweatshirt scraps recently, I was able to quickly pull some out that I didn't have plans for and create this fairly pleasing colour palette. I like the autumnal vibes it's giving me, which also suit his colouring well. I took the same approach as I did with the previous sweatshirt, piecing the scraps together on my overlocker until I had shapes big enough to cut the pattern pieces from. 

The only issue I encountered was with the ribbing. My original plan was to use black ribbing for the neckband, waistband and cuffs to create a 'frame' around the mishmash of prints and colours within. I think using a single colour for these makes the whole thing look more intentional and considered. Except, I didn't have enough black ribbing in my stash, and to buy some would send me into the lightweight division of the Last Sewist Standing challenge, which I'm desperate to avoid. I searched through my scraps of Ponte Roma and other double knits, in the hope of finding something solid black that I could substitute for ribbing to make the waistband, but to no avail. During my hunt, however, I discovered a small amount of ivory ribbing that I didn't know I had. There was just enough for this project, phew! 


Monday, 16 January 2023

Scrappy Knit Cardigan


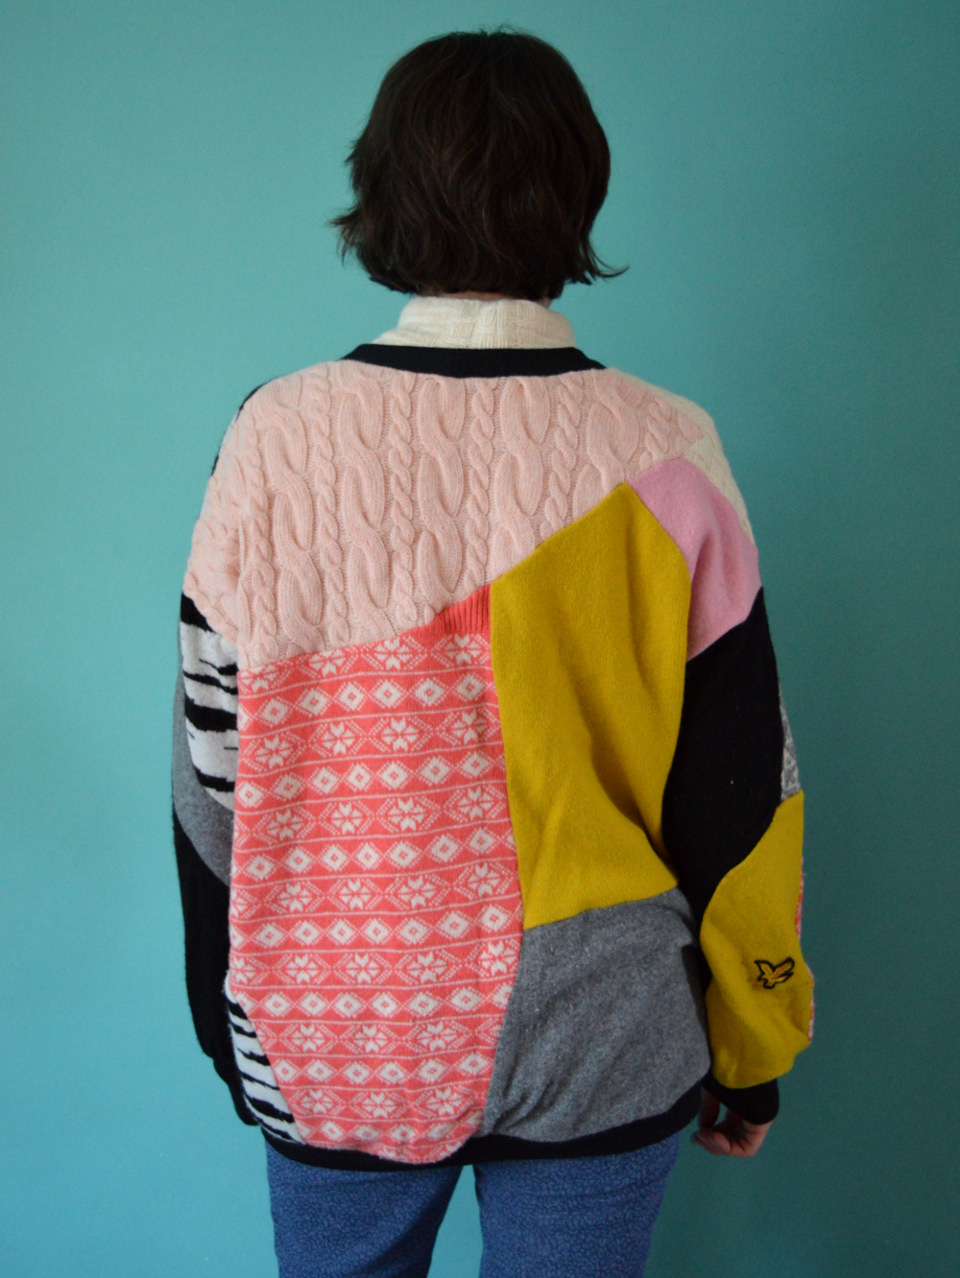
This is a recently completed project that is the result of an idea that I just couldn't shake. Inspired by the success of Pat's scrap busting Apollon sweatshirt (which in turn was inspired by the success of these scrap busting jersey tops) the thought popped into my brain that I could apply the same idea to actual knit fabric.     I am very interested in clever ways to reuse old garments, and am always looking to bulk out my chilly-weather clothing selection, which is pretty limited. So I cleared the decks of other projects and decided to have a play. 


I have a big bag of old knitwear garments and scraps: items that are moth eaten, felted, misshapen or badly pilled, plus scraps of knit fabric that can be bought by the metre. Some of the knit garments I've had in my stash for over a decade, that I've harvested bits from for other projects, mainly mittens over the years. I was keen to reduce the volume of my knit stash and claw back some space in my airing cupboard. 

I started out my selecting pieces that made a fairly pleasing colour palette. The chartreuse colour is my favourite. I previously used some of that moth-eaten jumper to make myself some mittens. I made sure to use include every last scrap of that garment in this project. There's quite a lot of pink in this project, which is NOT a colour I ever usually wear, but with the other bold colours, I think it looks ok and the over all effect is graphic and fun. 


As for the piecing, part of my goal was to try to be as economic with each piece as possible and be left with very few unusable scraps. I cut along the seam lines of some of the knit garments to access as much of the fabric as possible. I let the resultant shapes guide the forms and I jigsawed them together over the course of a few evenings until I had sections large enough to fit my pattern pieces on. 


The pattern I used at the base of this projects was the Jamie cardigan by Ready to Sew, which I adapted slightly to my preferences. I used some black Ponte Roma for the neck band, and black ribbing for the cuffs and waistband. I like how the solid black of these pieces creates a kind of frame for the colours and patterns within. 

As you may have noticed, this cardigan features some basket weave type knit that I also used to make the polo neck top I'm wearing here. I'm enjoying the 'alternative twin set' look! It's also nice to have a bold, fun garment to wear when the weather is freezing. Any addition of colour in the winter is welcome. 

Friday, 6 January 2023

Free Pattern Friday: Kids' Movie Night Pajamas


Welcome to my monthly 'Free Pattern Friday' feature, where I road test a free sewing pattern or tutorial: sometimes a children's one, sometimes an adult's one . I publish these posts every first Friday of the month, timed to provide inspiration for those who plan to get their sew on over the weekend. I firmly believe that, if you pick your projects carefully, sewing doesn't have to be a crazy-expensive way to clothe yourself and your family. I also firmly believe that pattern designers deserve to be properly paid for their work, so if you enjoy using a pattern and can afford to do so, make sure you support that designer. Some designers' websites offer the option to make a donation, alternatively you can buy one of their paid-for products. If you can't afford to do so, you can support the designer by sharing your project via social media to help draw more attention to their work. Thanks to all the amazing pattern designers who have offered up their hard work for us to enjoy for free.


Hello and Happy New Year!!!! This is the first blog post of 2023, which will see this blog's 15th birthday! Wild, eh?! This Free Pattern Friday blog feature has also been running for a fair while. I just counted and I've written 54 blog posts road testing free sewing patterns and tutorials, starting in the Autumn of 2017. Phew! I've actually decided to put this feature on pause for a few months. I never want to be sewing for the sake of it. Up until recently, I've had a backlog of free sewing patterns and tutorials that I want to try that I believe will be genuinely useful for myself, my kids or my home. But right now, there aren't any that I can say with honesty we could really do with right now. And with my sewing time being very limited, it seems pointless, not to mention unsustainable, to make things for the sake of having something to post about. I'm definitely going to return to this feature and post more road tests towards the summer. However, for now, this'll be the last for a while. Good job this pattern is a good one! 

Nearly a year ago I road tested and posted about the men's version of the free Movie Night Pajamas pattern by Sew A Little Seam. Today I'm posted about the kid's version of this truly excellent pattern. There's also women's version and all three versions are available for free by joining their Facebook group. That will give you access to a code that you can use at the checkout on their site. If you don't have a Facebook account, or wish to support Sew A Little Seam with a purchase, this pattern is only $5. As always, massive thanks to Sew A Little Seam, and all designers, who make their work available for free.


(image source: Sew a Little Seam)

Pattern type:

The Movie Night pyjamas are a close-fitting set designed for knit fabrics. There are lots of style options. There's long and short sleeves for the top, plus long, Capri or short versions of the bottoms, so it's a great pattern for all seasons. You can personalise them further with the other style options included: gathered sleeve, neckline placket and yoga or elasticated waistbands. That's a lot of options. 


Sizing info:

These pyjamas are graded to fit 12 months to 12 years, by which point your kid might start fitting into the smaller sizes of the adult versions! I made the size 10 for my 9yo who is on the large side, and the fit is great. I think I also added a few extra centimetres to the length of the bottoms for extra room for growth. 


Fabric info:

The pattern recommends cotton/spandex (AKA Lycra or elastane), rib knits or thermal. For this pair I used a cotton pointelle that I picked up at the Ukraine fundraiser fabric swap I organised in 2022, which may or may not be what they refer to as 'thermal'. I also used ribbing for the neckband and cuffs. If you're being critical, you might say the the rib I used was a shade too thick for this pointelle, but it functions well enough. 


Findings:

As with the men's version, this pattern was a joy to work with. It includes both A0 and print-at-home versions of the PDF files, both with layers which I really appreciate. And there's a projector file too, if that's your jam. The instructions are clear, and include photos of the steps to help you along. 

The PJs themselves have come out really well. I was working with limited fabric and I wanted to squeeze out a vest as well (using this pattern), so I had to add a centre back seam to the top. To prevent the seam allowance feeling annoying, I added a back neck facing, which gives some nice solidity to a project anyhow. 


Customisation ideas:

There are heaps of customisation options included in this pattern already, but there is a distinct lack of pockets! 


Would I make this pattern again?

I'm sure I will, now that I have downloaded it. You could get a similar look to these, however, by using a leggings or slim joggers pattern and a basic T-shirt pattern if you already had some in the correct size. I'm not sure I like the feeling on these slim fit PJ bottoms, but I might use the top of the women's pattern for myself at some point in the future. 

Sunday, 18 December 2022

Scrap Busting Apollon Sweatshirt

I can't remember precisely where the idea for this project came from, but it has served to solve two issues. The first was Mr SoZo running low on clothes, and the second was my own excess of sweatshirt scraps. In many ways, it's an extension of the scrap busting jersey T-shirts I made for him and our daughter last year. This project follows the same principles and largely the same technique. 

I was becoming aware that my collection of sweatshirt scraps was taking up a sizeable chunk of space in my fabric stash. I started out by getting all my sweatshirt scraps and remnants out and getting Mr SoZo to pick out any that particularly appealed to him. We then messed around with combinations until we had developed a pleasing colour palette. Some of the scraps came from sweatshirts I'd made for him previously, so were already within his existing wardrobe colour scheme. However, having made him the very wild scrap T-shirt that he is happy to wear, I knew I could push the combination further than many people might be comfortable with!

Here's some things I've learned about scrappy garment projects:

  • Make sure you're using a TNT pattern. You need to know that the fit will be spot on: now is not the time to try something new that may require tweaks. The pattern I used for this is the Apollon sweatshirt for men by I Am Patterns that I have used at least six times for him previously.
  • Limit your colour palette, unless you're really doubling down on the scrappy look.
  • Keeping the scraps large results in a bold look, reduces the amount potentially-annoying seams in the inside, and makes the process of piecing MUCH quicker.
  • For this project I kept an eye on the direction of the grain line of each piece, and tried to keep them vaguely in line with each other. However, with sweatshirt fabric you can probably get away with ignoring grain lines altogether.
  • Keep joining scraps until you have shapes large enough to fit your pattern pieces on. Keep your pattern pieces to hand so you can keep checking. 
  • Be aware that the additional seams create additional bulky bits inside. It doesn't bother Mr SoZo at all, but when I made a pieced sweatshirt fabric cardigan for my daughter, she refused to wear it because she found the seam allowances on the inside uncomfortable. If making tighter fitting garments, or garments for kids or sensitive folk, top stitch down the seam allowances as you go to reduce the bulk. 
  • When you have made sections large enough to fit your pattern pieces on, try flipping them 180 degrees to see which way looks best. I tried this and found the upside down version of what I'd been creating looked way cooler. 
  • If your combination of scraps is pretty bold, using one colour for any neckbands, cuffs and waistbands can create a nice 'frame' and make the whole garment look more intentional. 


If you're interested in creating something along similar lines, I hope these pointers helped. And above all, have fun!!!!! Pieced fabric garment projects are more time consuming than 'regular' sewing projects that use a length of virgin fabric, but can be so much more creatively fulfilling. 
Friday, 4 November 2022

Free Pattern Friday: Kid's Raglan Hoodie


Welcome to my monthly 'Free Pattern Friday' feature, where I road test a free sewing pattern or tutorial: sometimes a children's one, sometimes an adult's one . I publish these posts every first Friday of the month, timed to provide inspiration for those who plan to get their sew on over the weekend. I firmly believe that, if you pick your projects carefully, sewing doesn't have to be a crazy-expensive way to clothe yourself and your family. I also firmly believe that pattern designers deserve to be properly paid for their work, so if you enjoy using a pattern and can afford to do so, make sure you support that designer. Some designers' websites offer the option to make a donation, alternatively you can buy one of their paid-for products. If you can't afford to do so, you can support the designer by sharing your project via social media to help draw more attention to their work. Thanks to all the amazing pattern designers who have offered up their hard work for us to enjoy for free.


This is a pattern that I've been harping on about a lot lately whilst making the Sewing and Saving mini series of podcast episode (in particular Sewing on a Budget and Sewing to Keep Warm). This pattern is a fantastic resource to have if you want to sew some cosy layers for kids. I first reviewed this pattern for the Free Pattern Friday series when my little boy was just a year old. And before that I posted about it when my daughter was equally tiny. But since then, Brindille & Twig have started producing patterns for larger kids and with that have released a larger version of this pattern for free download also. I was looking for a pattern to make for my son for his birthday, so I decided to give this new, larger version a whirl and test out its new hood option as well. Massive thanks to Melissa from Brindille & Twig for sharing her hard work for free.


(image source: Brindille & Twig)


Pattern type:

A classic, gender neutral, raglan sleeved, hooded sweatshirt style with front kangaroo pocket and two hood types (scuba and crossover). 


Sizing info:

The original, smaller version of this pattern (with only one style of hood) is sized between 0 months and 6 years. This version is sized between 6 and 14 years. I usually find that B&T patterns come up a bit large, so I'd really recommend going by the height measurements when selecting which size to make, particularly if you need it for immediate use. My son has just turned 6, but I knew the 6-7 years size would be too big for him. I probably could have used the largest size of the smaller version of the pattern, however I really wanted to try the new crossover hood variation. Subsequently, I printed out the size 6-7 but changed to scale to about 95% as opposed to 100%. 


Fabric info:

B&T suggest medium weight jersey, interlock or stretchy French Terry for the main fabric, but warn that using regular sweatshirt fleece may make it difficult to get over head. The hood and pocket can be lined in jersey, and and the cuff and waistbands require ribbing. 
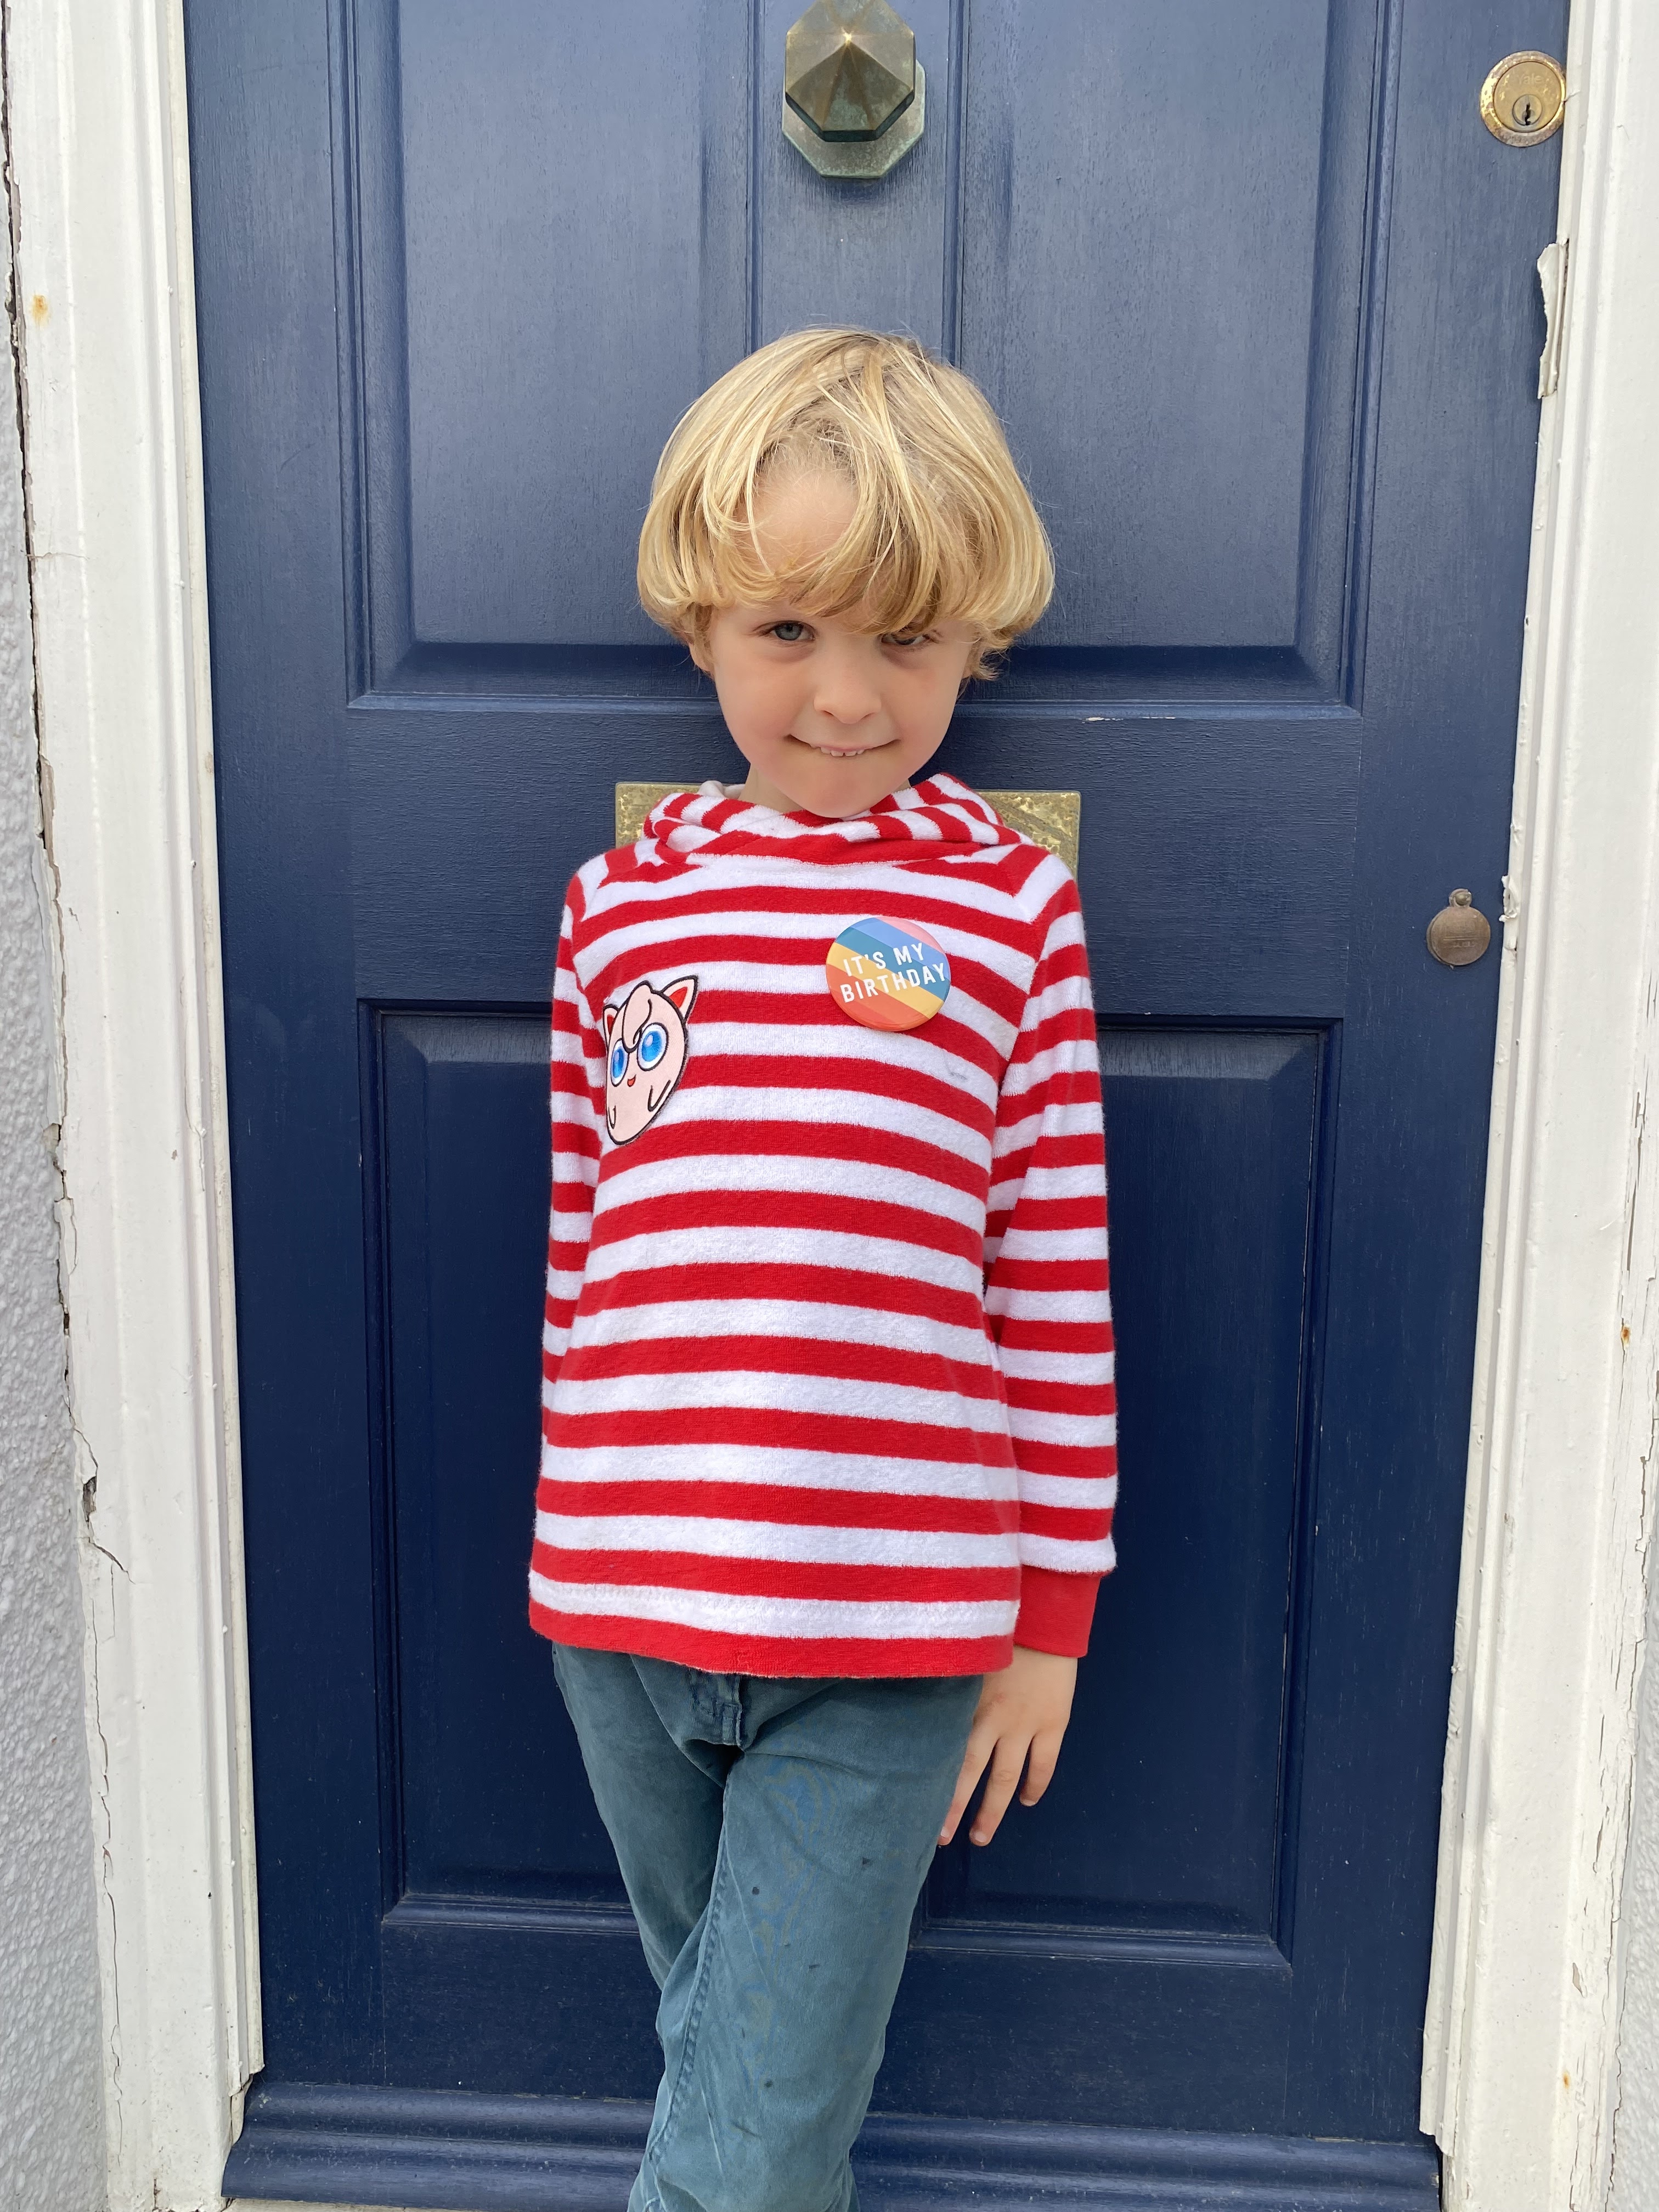
For Frankie's birthday version, I used some stretchy towelling that was donated to me years ago after a sewing friend had a destash. I used some scraps of ribbing for the cuffs, but didn't have enough for a waistband also so left that off. The hood is lined with very lightweight slubby single jersey. It might look better if it were more opaque, but at least it doesn't weigh the hood down too much. 


Findings:

As ever, this B&T was a great pattern to use. There's a really simplicity and clarity to their patterns that make them very user, including beginner, friendly. Also, I love the layers function so you're not printing out heaps of unnecessary lines in particular. 

The instructions are pretty good. The only real flaw I found was that many of the images of garments with the crossover hood show that the hood has been lined, however, the instructions show how to make it unlined only. It's not a big deal of course, but it did throw me off a little. 

The finished garment came out just as I'd hoped. I'd left off the pocket which made construction quicker, choosing to add a Pokemon patch (Frankie's current obsession) instead. As mentioned before, I also left off the waistband and simply hemmed the bottom edge instead. The length of the body was sufficient to not need to add addition length. If I make another version in the future that includes a waistband, I'll consider shortening the body a bit. 


Customisation ideas:

There are a number of customaisation ideas shown in the images on their website, but they are not explicitly mentioned as far as I can tell. Here are their's and some of mine:
  • add eyelets or button holes and thread a drawstring through the front edge of the hood
  • leave the edges of the kangaroo pocket raw 
  • leave off the waistband and simply hem
  • lengthened the sleeves a bit, then leave off the cuffs and hem instead
  • insert piping into the sleeve seams
  • use contrasting fabrics for each pattern piece, or for just the sleeves
  • add patches, embroidery, decals, prints or appliqué designs to the front
  • insert triangles of fabric into the central hood seam, and possibly down the back, to make a dinosaur hoodie
  • lengthen the whole hoodie to make a hoodie dress
  • make in a lighter weight fabric and shorten the sleeves for a warmer weather version


Would I make this pattern again?

Most definitely. In fact, I'm quite enamoured with some of the customisation ideas above so I might give them a try! I'm so happy that they have created this pattern in a larger size so that I can continue to make hoodies for my kids for many years to come. 

Related Posts Plugin for WordPress, Blogger...