Showing posts with label Rockabilly. Show all posts

Friday, 19 June 2015

Refashion Friday: Remade Leopard Print Agnes Top


After the success of my first TATB Agnes top, I knew that it wouldn't be long before another sprang forth from my machine! This time round, I've really explored this pattern's trashier, Rockabilly possibilities. 


Pattern:

I used the same pattern as my previous version, which graded from the Size 3 at the shoulders and bust out the Size 4 for the waist and hips. The only change I did make was to implement what I learnt from the stripy version: that I needed to grade out to a Size 4 around the upper arm part of the sleeves. I fannied about applying, unpicking and the re-applying elastic for the front neckline gathering detail. However, I ended up unpicking it for good as the print is so busy on this fabric that the gathering kind of got lost. 


Fabric:

I bought this humungous, nasty-synthetic leopard print top (pictured above) from a charity a few months ago. Amusingly, the garment label tried to claim a hefty cotton content in the fibre composition. If that is the case, then I can legitimately claim to be 75% inuit. I intended to make some baby trousers from it but ended up finding something else instead which was more suitable. So this top had been knocking about in my sewing corner clogging up the place for months, until inspiration struck.  


Refashion/Remake:

I cut along the original top's seam lines to harvest as much fabric from it as possible. When laying down the Agnes top pattern pieces on to the fabric, I positioned the bottom edges 2 cm lower (see above) so I could use the original top's existing hem on the front, back and sleeve pieces. By eliminating the need to hem, this became a really quick make. I used my overlocker for everything except for topstitching down the neck seam allowance. I did that with the twin needle that came with my regular sewing machine (see below). It's my most successful attempt to use a twin needle so far! 


Thoughts:

This top is awesome, in a trashy diva kind of way. I'm wearing it in these pictures with my denim high waist bow skirt, but I'd love to make some stretchy black capri pants to wear it with. Although I don't like to think what I'd smell like after a day in that synthetic substance! 

I have plans for one more Agnes top project in the near future, then that's my Agnes-appropriate stash busted and I'll have to move on. I'm going to try the poofy sleeve version next, I'm excited to give that feature a try. Have you sewn the Agnes top pattern yet? Or do you have plans to? Which is your favourite combo of features? 

Wednesday, 29 May 2013

The Cowboy Comedy Shirt


It may surprise you to learn that there's actually been a fair amount of selfless sewing (i.e. not for me) going on up in here recently. I'll get round to blogging them all eventually, but I'd like to start with showing you this shirt I made for Patty (AKA Mr So Zo) which I finished last week. 

You may or may not know that I endeavour to make Pat one garment each year we're together. First there was the Brokeback Balcony shirt, then came the Book Launch shirt (both of which were made whilst we were living in Barcelona). Third up was a Rockabilly Bowling shirt I made him for Christmas 2011, and last year I made his waistcoat that he wore for our wedding. Seeing as we'll be mighty busy with a new little person in four short months time, I thought I'd get on his fifth item before everything else gets put on the back-burner. 


Pattern:

I picked up this vintage Western shirt pattern (Simplicity 6693) some time ago from eBay (pictured below) with an eye to expanding the Western shirt section of his wardrobe (don't all dudes have a Western shirt section?!). Published in 1974, this pattern is actually a 'teen-boy' pattern, which is handy because Pat is a slender chap. I Frankensteined this Simplicity pattern with the my adapted version of the Burdastyle Jakob shirt pattern that I've been slowly tweaking and perfecting the fit of each time I make Pat a shirt.  


Fabric Choice:

I knew from the offset that contrast yoke sections, pocket flaps and cuff facings had to be made in this awesome Dia de los Muertos dancing skeleton print quilting cotton that I'd bought half a metre of yonks ago. The obvious complimentary colour for the main body of the shirt would have been black, but Pat has quite a few black Western style shirts now, so I thought I'd find something a bit less obvious. In the end the rest of the shirt was made from a fine teal cotton (it's actually more teal and less blue in real life but my camera has a problem accurately depicting jade/teal/emerald/turquoise shades) that I picked up at a fabric swap in Walthamstow towards the beginning of the year. The colour really suits his gingery/browny/peachy colouring. I was a bit concerned about how such a fine cotton would work alongside the thicker quilting fabric, but with the application of fusible interfacing on all relevant parts made the teal fabric suitably stable where it needed to be. 


Detailing:

I had quite a bit of hassle with the topstitching on this shirt because my new-to-me sewing machine hasn't quite got the same secure foot pressure that my last machine had, resulting in a fair bit of slipping about and therefore unpicking! At least I wasn't going for a contrast topstitching effect like with the BrokeBack Balcony shirt, I'm not sure my machine will be up for any of that lark. 

No Western style shirt would be complete without pearly snap fastenings. I bought the four-piece snap things from eBay and messed about with the pliers-like contraption required to fit them that I was surprised to learn I already owned from my uni days. 


The occasion:

My aim was to get this garment finished before Pat's third and final performance at the Brighton Fringe festival last Friday. At this point I should probably explain that Pat has recently taken to being a stand-up comedian having completed a stand-up comedy course I bought him a couple of months ago. The 'look' he is cultivating for his stage persona involves a Western shirt and puffing out his hair into an enviable 'fro! Apologies for the crappy i-phone pictures, but above is him wearing his shirt on stage, and below is in the bar after his performance. If you are interested, you can see his first ever performance on YouTube here

Friday, 11 January 2013

Refashion Friday: My Tattoo Applique Sweatshirt Remakes


Yes, it's more remade sweatshirts. That's what I'm showing you today. You may well be bored of my mens-to-womens sweatshirt remakes by now, but I'm a massive fan of these two because they have been keeping me toasty since I made them last year and because they have a personal dimension to their design. 


Created in the same manner as the remade lace yoke sweatshirt remake, lace stripes sweatshirt and the moustache appliqué jumper, both of these original garments I started with were deconstructed, recut, and then had their details applied before being stitched back together. Unlike my previous remade sweatshirt projects, these both have long sleeves. I much prefer to wear either of these on chilly days than the 3/4 length, 1/2 length or short puff sleeve versions I've made. 


You never can tell beforehand, but thankfully both of these have stood up well to laundering and the leather appliqués look fine. I really enjoyed machine appliqué, having to be super careful to stitch close to the edges. Any unpicking will show up previous puncture holes, so you kind of only get one shot. 

Before stitching, I stuck the leather shapes down with prit stick (normally I'd use copydex but I'd run out and it's really expensive!). I used my normal sewing machine foot when stitching them down, but I did squirt a little sewing machine lubrication spray (don't ask me why I had access to that... randomly the one I used smells of lemons!) which helped the machine foot move over the leather rather than sticking to it. 


So, aside from extreme comfort and obvious cuteness, why are these swallow and anchor appliqué sweatshirts my favourites? Because both where inspired by my wrist tattoos!

Monday, 24 December 2012

Giveaway: Eliza M's Vintage-Inspired Sewing Patterns!!!

**PLEASE NOTE: THIS GIVEAWAY IS NOW CLOSED. THANKS FOR ENTERING**


So, dear sewers, have you heard of Eliza M's vintage style sewing patterns (website pictured above)? Due to time constraints I don't get to spend as much time surfing the online-sewing community as I'd like, but I have to admit that I hadn't heard of them myself until last week. But I am very pleased that I now have! Based in Manchester, UK, they have recently relaunched themselves and I recommend you to head over and see what they've got on offer. 


If, like me, you're into sewing vintage-y/retro-y garments but find all the sizing-confusion and redrafting of vintage patterns a bit of a drag, their range is definitely worth a look. I've just received my copy of the Pussy Galore blouse (pictured above paired with the Hop and Swing pants) and the packaging looks great. I'm really excited to get cracking on it early in the new year, after which I'll of course post a full review. 

In the meantime, the Eliza M team are offering up a free pattern for three of my lovely blog readers so you can give them a whirl yourself for nowt. Consider it a Christmas present you'll really want to receive! And what better way to kick start your New Year's sewing, with more than enough time to create a nice addition to your self-made wardrobe for 2013's Me-Made-May?!


Excitingly, entrants to this giveaway can pick their favourite pattern to win. So whether it's the 40's inspired swing style Grace dress (pictured above), early 60's style Ruby Wiggle dress (pictured below), or any of the others in their ample collection, there's probably something that could become your next party outfit or daywear addition.  


Eliza M patterns are like genuine vintage patterns in the respect that they are single sized, so you'll need to let me know which pattern AND which size you require when entering. So let me know those two things in the comment section below, and whilst you're at it, let me know what fabric you'd possibly make your pattern in if you're successful in winning it (just because I'm nosey!). 

If I can't access your email address within two clicks of the mouse, please include it in your entry comment. Email addresses will not be used for anything other than to contact you if you are one of the three lucky winners of this giveaway. This giveaway is open internationally and the winners will receive their choice of sewing pattern completely free of charge. The giveaway entries will close at midnight GMT Sunday 6th January 2013 and the three winners will be chosen by random number generator and contacted Monday 7th January. Good luck, my pattern-loving friends!

Monday, 5 November 2012

Giveaway Monday: Me-Made Rockabilly Swallow Skirts!!

** UPDATE: THIS GIVEAWAY IS NOW CLOSED**


A bunch of time ago I made a range of cute skirts to sell. First I tried to sell them on a market stall in London, with little success. Then I tried to sell them on Etsy, also with little success but I did nothing to promote or re-list them so that was not very surprising. Then when I started to organise a Brighton-based craft market, I sold some of them there. And finally I stocked the remainder in the awesome Handmade Co-op shop in Brighton (RIP) with much more success. Hurrah!


Right now our little one bedroom flat is stuffed to the gunnels with (my) stuff and I've been having a hunt for items that can be given a new home. During this hunt I found the final few pieces from my skirt range and thought maybes some of my lovely blog readers would like them, rather than stuffing them back in the cupboard!


Today's giveaway is for the final two Rockabilly Swallow A-line mini-skirts. I've got one left in each of the colour ways I made them in: a rich, tomato-y red and a dove grey. Both are a 'Medium', but in reality that's pretty freakin' small. 

The waists measure 33.5", so if the level you like to wear your skirts at measures a bit smaller than that, then these should fit you (or whoever you'd like to give one of these to) just fine. They measure 13" from waistline to hem, pretty damn short! 


They are made from a poly-cotton blend and have contrast cotton gingham facings. They fasten with a concealed side zip. The swallows are leather appliqués, I'd recommend a gentle hand wash in case the leather dye leaks. Some of these skirts have been washed many many times with no problems, but a couple have released dye when machine-washed. What can I say? You're getting these for free!


To enter the giveaway to get one of these skirts, just leave a comment in the comments section of this post telling me which colour you'd prefer and what you'd do with it if you won (e.g, you'd give it to a loved one; you'd wear it with some killer platforms, etc... not for any particular reason, I'm just nosey). If I can't access your email address within two clicks, please include it in your entry comment. Email addresses will not be used for anything other than to contact you if you are one of the two lucky winners of this giveaway. This giveaway is open internationally and the winners will receive the skirt completely free of charge. The giveaway entries will close at midnight GMT Sunday 11th November and the winners will be chosen by random number generator and contacted Monday 12th November October. Good luck, my skirt-wearing friends!


Monday, 15 October 2012

My Wedding Dress!


Ok peops, here it is! The most important, most photographed and most stressful garment I'll ever make: my wedding dress! Thank you to everyone who expressed a desire to see the pictures, here you are.

Style:

Those of you who have read my previous posts on the planning of my dress will know that I was always going for a mid-century retro look. By the time I'd narrowed down my research, I was definitely erring towards a wiggle silhouette made from a separate skirt and bodice and lots of shoulder/decolletage on show. Above all else, this dress had to make me feel special, so it didn't seem like a time to hold back on the sexiness or glamour! Pat's Best Man told me on the night 'a bride's job is to make other men feel sad you're no longer on the market'! Apparently.


Pattern:

I chose the Burdastyle bustier/bombshell dress pattern (pictured below) as my basis because it had the general wiggle silhouette, waist seam and tight fitting bodice I knew I wanted. I ignored the cups sections and proceeded with toiling the bodice (with frequent fitting help from the ever-amazing Rehanon) again and again until we achieved a really good fit. Instead of the faceted bust of the original pattern, I wanted to recreate a draped, gathered bust effect something like the white Modcloth dress pictured below (underneath the next paragraph).


For that I knew I'd have to attempt some draping using my own body as the mannequin. With lots of encouragement and pin-passing from Rehanon, I finally got a good shape for the bust panels. It was very scary deconstructing my draped bodice toile to make a the bust piece pattern, I can tell you!


As for the skirt, I was initially going for a draped effect like Gertie's bombshell version of this pattern, but it kind of, umm, evolved in a different direction. What I mean to say is that the gathered skirt toile to look very good and I felt unsure how to approach getting a nicer effect. Time for completing this dress was getting tight, especially with all the other elements planning a DIY wedding entailed, so I decided to go for a straight wiggle skirt. As soon as I took that headache away, I breathed a sigh of relief and knew I'd done the right thing. I love the sleek, straight skirt in these pictures, and I think it allows the gathered bust design to really stand out.

Fabric and colour:

My mum and I planned to buy the fabric for my dress and my best mate's bridesmaid dress in one of the fancy-fabric purveyors on Berwick Street in London, knowing that if we drew a blank, we still had all of Goldhawk Road to plunder. For my dress I went with an open mind, but knew it needed to have some structure, be a bit special (AKA, shiny or something) and red. I also had one eye out for a nice brocade. In one of the silk shops I was drawn to some fantastic red silk that had a vintage-y embroidered flower motif but it was very narrow and a squillion pounds per metre. The search continued...


In Borovick Fabrics, I found the most perfect red acetate duchess satin stuff (its official name escapes me) at about £30 a metre. Hurrah! I thought. I glanced at the other colours it came in and was instantly drawn to an incredible peacock colour that really shone out. The sales guy was really helpful and pulled   a long length of each colour of the rolls and held it up to me so I could see in the mirror which worked best with my colouring. He even dimmed to lights to create for me a night time effect, bless him! Both looked great, so he cut a swatch of each and we went off to have some lunch and a margarita to deliberate. Rather wonderfully, whilst my mum and I were staring at menus in the windows of potential lunch venues, I spotted Kat, the editor of the only wedding website I allowed myself to read: Rock n Roll Bride!

We thought and ate, chatted and drank, and although Mum was on 'Team Red' at the beginning of the meal, she'd switched over to 'Team Peacock' by the end. Uncharacteristically, I felt pretty relaxed about having to choose between them. I think it was because I thought both were so lovely, I knew whichever I picked would have looked fantastic. The peacock won because it was just so vibrant and special.


Construction:

My goodness this dress took some work. For example, the bodice is underlined in calico to give extra support and structure, and there was so much hand-stitching, including a belt section that I eventually removed. Following Gertie's Bombshell Dress class, I added boning to the lining, effectively making an inbuilt corset.

I made the whole thing in secret away from Pat because I didn't want to see it before our wedding day. I didn't even want him to know that I'd gone for a different coloured fabric than the red he (and almost everyone else) was expecting. I had planned to make this dress at work, but when the TRAIDremade studio closed down, I had to make it in our bedroom on my own with the door closed! I wish I had a pound for every time I said to Pat, 'Don't go in there'! I repeatedly vacuum the carpets and went around picking up tiny threads because the raw edges fray constantly.


Accessories and extras:

Early on in our engagement, I went to a posh vintage dress shop to try on some of their stock (even though I had absolutely no intention of buying anything) to get some idea. I saw an amazing head piece thing that was apparently called a 'bubble veil' which was basically some netting which covered most of the face only attached to a small fascinator/hat base. Then after attending a vintage-themed wedding fair in Hove back in the Spring with my friend Kirstin where we saw another, she declared she would make me one! She ordered heaps of supplied from Etsy and started playing about figuring out how to get the right look.

When I bought the peacock fabric instead of red, it was back to the drawing board a bit, because Kirstin had initially bought red netting because we thought it would show up well against my dark hair. She got some black netting and requested some of the fabric to cover the base, and she made me the most awesome veil that clipped onto my hair with a big hair clip.


I decided very early in in the wedding planning that I would do my own hair and makeup. Getting someone else to do those things seemed like an unnecessary expense when we were trying to keep to a small budget, plus I just didn't trust anyone else to get the kind of look I've spent years practising and feel most 'myself' with.

For my hair, I had to consider the placement of the hat/veil above anything else. I even got my fringe cut twice to get it to look correct with the veil. On one side at the top I made a victory roll, and on the other side I pinned the side of my hair up and towards the back so my veil had something to be clipped on to. The length of my hair was left to hang loose having mastered heated rollers to get relaxed, vintage-y curls.

My makeup was a variation of my usual 'going out' look, but with recently acquired additions of mac highlighter for the inside corners of my eyes and on the brow bone, greyish-brown shadow on my eye lids and a light tinted moisturiser/foundation to give a more even skin tone.


For jewellery, I'd wanted some vintage costume diamante pieces but my Etsy and Ebay hunts just weren't unearthing the right things. I thought a swallow brooch would be nice, but all the ones I found online were either too new and trashy looking, or old and beyond wearable. It was incredibly serendipitous that I found the perfect 1950's diamante swallow brooch at a local street fair in August!

I knew I wanted some dangly diamante earrings, but all the ones I'd found online had screw or clip-on backs. I wanted some for pierced ears but that didn't seem to be an option with the vintage earrings. New diamante earrings seemed to look quite tacky or were really expensive, so I was delighted when my friend Sarah leant me the perfect pair of dangly earrings for pierced ears. Hurrah!!!

I wore a pair of black heels that I love, are vaguely comfortable, and suited the style of dress really well. I wore them with some Pamela Mann love-seamed tights:


So there you go my friends! That's the low-down on my wedding outfit. Please keep your eyes peeled over the next few weeks for more wedding-related posts, there are lots of other handmade elements that made my wedding wonderful that I'd like to share with you all.

Thursday, 13 September 2012

Leopard Print Clover Capri Pants


I know, I know, with my wedding dress not yet complete and the actual wedding only two weeks away, I probably shouldn't have been making capri pants. And yet... I now have LEOPARD CAPRI PANTS (or clam diggers/pedal pushers/cropped trousers/whatever you prefer). I did say in my post-wedding sewing plans post that I may not be able to wait to get these babies made. 


After the success of my navy cropped trousers and the incredibly fortuitous acquisition of some second hand leopard print sateen, my desire to create a version of the above style was just too strong. I love this kitschy retro-y Rockabilly look. When my version are teamed with my plain black batwing jersey top (as shown in these photos), I think it's a wearable day or evening look that references the original inspiration whilst being a little more modest and comfortable. I must also mention that Suzy also created a kick-ass pair of Rock Chick trousers using the same Colette Patterns Clover style. Check them out, hers are truly awesome.


As for the pattern, I did a fair bit of tweaking to get a good fit. I'd already made quite a few changes to the pattern for my original navy pair, but that pair had come out quite big and had required a chunk taking out of the side seams. I love those navy ones, they are very comfortable and I wear them all the time, but I knew I wanted a tighter silhouette for this pair. So I went back to the original pattern, traced a size smaller this time, and then made the same adjustments. Those adjustments, if memory serves, included increasing the back rise by about 2cms, increasing the front rise by about 1.5cms and widening the waist measurement and reshaping the top side seams and waistbands to accommodate that new measurement.   


The fit of these is great. The one issue that a perfectionist (or my former employer when I used to pattern cut for him) would have a problem with, is that the top of the waistband sits lower on my waist at the back than at the front. It's not a massive discrepancy but I did clock it. But personally, I feel life is too short to worry about that.  


The tighter fit and slightly less stretchy fabric means that I doubt they'll get as much wear as the navy ones. However, I'm excited about donning them with some heels and red lipstick and hunting down a cocktail or two, maybe even on our honeymoon in a couple of weeks!

Tuesday, 11 September 2012

Style Inspiration: Pulp Fiction Divas


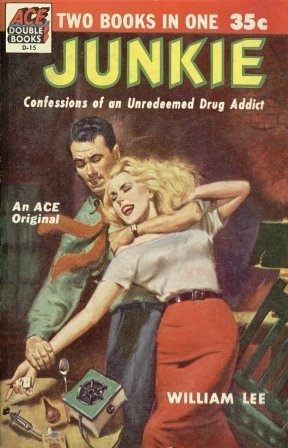
In a bid to understand my own personal style a bit better, I've recently been thinking quite a bit about the looks, eras and themes that inspire me. One particular inspiration source that I keep coming back to is the illustrated covers of pulp fiction novels. I love the trashy drama and dark sexiness of them. The women are all decolletage and hourglass curves, shiny hair and pristine lipstick with a wicked, passion-filled glint in their eye.

Now I'm obviously not lusting after, or even vaguely condoning, an image of womanhood in which women only have their sexuality to help them to attain what they want or need. Plus a world in which people, in particular women, are usually categorised as 'bad' or 'good' (of morals) is clearly a ridiculous one. However, these intellectual considerations do not dispel my enjoyment of their kitsch, lusty imagery, nor do they rid me of my desire to create some pulp fiction inspired looks. When I want to access my inner vamp, it is often these type of images that my imagination accesses. So how to go about creating these looks...


It seems quite clear from the top two illustrated covers that the staple garment in a pulp fiction vixen's wardrobe is the slinky pencil skirt. Demure in length but so tight it looks sprayed on, the wiggle/pencil skirt is key. For comfort and ease during a particularly rushed getaway/chase, I'd recommend using fabric with a decent elastane/lycra content. A metre of shiny black sateen and a skirt pattern like the vintage Advance 8761 pictured below, and you could have an amazing evening wear pencil skirt like the bewitching brunette's picture above in about half a day's sewing! 


Basic pencil skirt patterns are easy to find, a quick scan on ebay and I found a squillion vintage ones in a variety of sizes. There are heaps of great modern basic pencil skirt patterns too. If you wanted to really nail the look, you may need to tweak the proportions a little. The waist band really needs to sit the smallest point of your torso and the hem needs to hit below the knee. 


My goodness, these good-time gals do dress to be noticed, don't they?! This blonde bombshell confirmed my suspicion that I could use a yellow pencil skirt in my arsenal. The cheeky side split showing a touch of thigh is an interesting deter from the standard pencil skirt style. This pencil skirt pattern (pictured below) available on Burdastyle has princess seam lines which make it very easy to convert into the side split style of the yellow skirt in the illustration above. 
These are Queens of the separates: when pulp fiction divas aren't rocking a pencil skirt they are often portrayed in capri pants/clam diggers/pedal-pushers. Sitting equally high on the natural waist-line, we are not allowed to forget those hips for a minute!


I'm a massive fan of capri pants at the minute, and will continue to wear mine until the weather breaks and Autumn comes crashing in. The image above is doing nothing to calm my desire for a red pair, but with equal nautical potential are pale blue ones like the picture below.


Vintage capri pant sewing patterns in the appropriate sizes are not quite a easy to come by as vintage pencil skirt patterns, but they are out there for the hunting. The pattern below shows some cute options for the side hem area other than the standard split. A couple of contrast or covered buttons or little self-fabric bows might also be nice. Not that we are focussing on 'nice-girl' looks today!


An option that is far simpler to obtain might be the Clover pattern by Colette Patterns. This pattern dictates that you use fabric with a decent stretch content, which would be great for creating the tight mid-century look. 


Ok, so we've got the bottom half sorted. What are we going to pair all these fabulous wiggle-inducing pencil skirts and hip-hugging capri's with? The white top in the very first image and the black top on the cover of 'On The Road' pictured above both seem to have grown-on/kimono/dolman sleeves like the pattern below. This is a feature I LOVE, as you may have noticed in the post I wrote for the Colette Patterns blog many moons ago. The vintage Butterick 7490 pattern pictured below is wonderful because it gives a slash-neck/bateau AND a V-neck options plus variations of sleeve-length. 


Another fabulous separates option is a cute little button-up blouse. Awesome in a rainbow of solid colours or in stripes, polka dots or prints, the prim preppiness of these blouses is a great counter-point to the hour-glass silhouette they are helping create. 


When darkness falls, often the mix and match separates will apparently just no longer get you where you need to go. It may be time to pull out the stops and head straight to bombshell-ville.   


Burdastyle's Bombshell dress pattern (pictured below) could form the ideal mid-century pin-up look. Now, where to source second-hand red and gold striped fabric......   
An equally divine option is this stunning vintage evening sheath pattern pictured below. 


There does seem to be a hangover of the full-skirted 1950's silhouette in some of the pulp fiction cover illustrations. The rule seems to be that as long as the shoulders and collar bone and are exposed and the bodice is fitted, all is well! The Advance 9077 pattern pictured below in a solid colour might work if trying to recreate the green dress in 'The Lion House' pictured above.


One final strappy sheath dress for you:


Enjoy, vixens!
Related Posts Plugin for WordPress, Blogger...