Thursday, 15 December 2016

Dolores Maternity Dress Pattern: On Sale Now!!!!


Woo hoo!!! Here's my latest PDF sewing pattern: the Dolores maternity dress pattern! As I mentioned in this post, I decided to create a re-working of my popular Dolores batwing pattern specifically for the third trimester of pregnancy. Like the non-maternity Dolores, this pattern is a casual batwing style with two sleeve options, and is easy and quick to make. Unlike the non-maternity Dolores, this pattern can help you get dressed during the part of pregnancy when pretty much every else in your wardrobe no longer fits! I had three versions of this dress during the third trimester of my recent pregnancy and wore them on rotation.


This sewing pattern comes in a digital format. When you buy the Dolores maternity dress pattern, you will receive both print-at-home and copy shop versions of the pattern, as well as detailed instructions on all aspects of how to use this pattern and make the garment. It includes tips for sewing with knit fabrics if that is new to you, PLUS a condensed-single-page version of the instructions for confident sewists, or once you have already made one Dolores maternity dress. 


Visit this page for more information on the Dolores maternity dress pattern, including how to purchase it! Enormous thanks to Claire for her help creating this pattern, for Cordelia for fit and photo modelling, and my fantastic and generous pattern testers.

Tuesday, 22 November 2016

Oliver + S Hopscotch Skirt Pattern Hack Tutorial


Here's a super-easy pattern hack tutorial that was previously published over at The Village Haberdashery's Daily Stitch blog back in September. Thanks to them for allowing me to repost it over here. It features the second of my creations for the summer instalment of Kid's Clothes Week, donchaknow

If your interested in sewing clothing for little girls and haven’t come across the Oliver + S Hopscotch pattern, then allow me to introduce you! The skirt, in particular, is a wonderful, timeless garment that has perfect proportions and great details. However, it only really works in solid fabrics or prints with a small-scale design. The skirt’s button placket and clever pleated pockets would most likely chew up a larger design of print. But wait! I have the answer: an incredibly simple pattern hack that turns the Hopscotch skirt pattern into the ideal canvas for fabric with a bold print. We’re going to ignore the pockets and omit the button stand.


In fact, I may be cheeky even alluding to this as a pattern hack. Because we’re not actually going to alter the pattern pieces at all: we’re just going to use them slightly differently and alter the construction method a tad. Aside from being able to now use this pattern for a wider range of fabric designs, it also pretty much halves the construction time. Which may appeal to you, whether you’re creating wardrobe staples for your little girl, or whipping up a cute gift for someone else’s!

You will need: 
Trace the pattern pieces in the size that you require to preserve the other sizes for future projects. For this hacked version of the pattern, you will only need the front skirt piece, back skirt piece and front waistband piece.


When positioning the pieces on your fabric, ignore the ‘cut 2’ direction on the front skirt piece and front waistband piece. Instead, position these two pieces on a fold (like the back skirt piece) as pictured above. You’ll need to trust me on this: the dimensions of these pattern pieces mean that, even though you are using them on the fold and omitting the button stand, the measurements of the finished skirt will remain the same as if you made the regular version of this skirt pattern.

Once you have cut out the pieces, snip a tiny notch at the centre fold on the bottom edge of the front waistband piece, and another tiny notch at the centre front fold at the top edge of the front skirt piece. These notches will be matched up during construction.


The main difference in the construction of this hacked version is that you will now be making one front skirt panel (see above), rather than two. Gather the top edge of the front skirt piece and apply it to the front waistband piece, and continue the construction as per the rest of the instructions.


Congratulations! You have made the ideal gathered skirt, AND saved yourself some precious sewing time. Now, stop being so selfless and get back to making something for you!

Thursday, 27 October 2016

Other People's Anya Shoulder Bags

(vibrant Anya shoulder bag by Instagram user abi_norman)

Nearly a year ago I released the Anya shoulder bag PDF sewing pattern. Since then, some seriously lovely versions have been popping up on the interwebs that I've been dying to share with you. I find it very exciting to see how different the pattern looks when made up in a variety of fabrics, and what kind of looks can be achieved through fabric selection. Possibly one of my favourite fabric choices for an Anya shoulder bag was the Melody Miller amazingness pictured above, created by one of my favourite sewers in the whole world, Abi Norman (abi_norman on Instagram). 


(denim Anya shoulder bag by Handmade Jane)

Kind of on the other end of the spectrum is this gorgeous dark denim version made by the very lovely Handmade Jane. She has omitted the optional button tab for a super sleek look. I'm struggling to think of an outfit that this bag wouldn't work with! 


(Vicki Rowe's lovely and practical denim-and-owl-print Anya)

Vicki Rowe also made a lovely dark denim Anya bag (with awesome owl print lining!). The bag pattern has pleats in the bag body which secretly make it pretty voluminous. I'd like to thank Vicki for sending me the picture above of all the things she can fit inside hers!


(Joke's ditsy floral Anya with additional ribbon detail)

Joke from Brugge made the super cute ditsy floral corduroy Anya pictured above. Note how her simple but clever addition of satin ribbon on the yoke really draws the eye! 


(mixed fabric Anya with bronze piping by Prolific Project Starter)

Speaking of customisation, check this one out. For the Prolific Project Starter's third Anya, she not only used an clever mix of fabrics, but she also deployed some lovely bronze piping. I'm bowled over by how neatly she has applied it, such an incredible make this one. 


(blue and white printed fabric Anya by knitwitsowls

This delightful Anya has been made by Frankie (AKA knitwitsowls on Instagram), and has something of a Japanese kind of vibe to it (or is that just me?). A clever use of an interesting print that makes me want to rethink what I may have lurking in my stash....  


(IKEA fabric Anya bag made by Alex's Adventures in Fabric)

And finally, Alex gives a reminder of how good the Anya shoulder bag pattern looks in a bold, retro-y print. This IKEA furnishing/curtaining fabric is the perfect weight to give structure to this shape. 

Thanks everyone who has bought the pattern, made and shared their Anya shoulder bags! If you'd like to see more versions of this pattern, check out this Pinterest board

Tuesday, 18 October 2016

He's here!!!!! Introducing....


Frankie!!! Two weeks ago, at over 41 weeks pregnant, I got induced with oxytocin and I pushed out this little darling! Except, at 9lbs 11oz he wasn't that little, and I failed to receive the epidural I'd requested so was just working with gas and air, but that's another story...


As you can imagine, it's been a crazy couple of weeks of adapting to being a family of four rather than a family of three. As well as juggling sleep deprivation, sore boobs, recovering from the birth and Dolores's 'challenging' response to the upheaval. But in all areas we are improving and I'm so thrilled to be the mum of this adorable little boy. 


Needless to say, there'll be a hellofalot more pictures of this little guy in the months and years going forward, but here are a few of his early photographic debuts by way of an introduction. I love you little guy!


Thursday, 13 October 2016

Hearts and Stripes Sally Dress


Two months after the fact, I'm finally getting a chance to share the details of my summer Kid's Clothes Week creations that I made back in August. I guess it makes sense to wait to post about these projects because I can now accurately report on how popular (or not) each of the three garments have been with Ms Thang. 


Pattern:

Thanks to my existing stash of kid's sewing patterns and my seven issues of Ottobre Design magazine, I'm not short of options for things to make. However, I thought I'd start the challenge by splashing out, supporting an independent pattern designer and trying something new. 


The Sally dress pattern by Very Shannon came onto my radar via Pinterest (which is how most things do, let's be honest). At first glance it looks like a fairly standard bodice-and-gathered-skirt dress style, however it's got some interesting details that made me feel like it would be fun to try. Unlike my favourite kid's dress pattern, Made by Rae's Geranium dress, the Sally dress pattern has sleeves which makes this garment suitable for parts of the year that aren't roasting hot. The wider, square neckline looked really pretty and the massive pockets a great opportunity for using contrasting fabric. And potentially the best bit? No fastenings! Which makes this not only easier to sew, but easier to wrestle onto a wriggling toddler.   


The Sally dress is graded from sizes 2 to 8. I chose to make the size 3, expecting it to be a little big. However, probably thanks to Dolores's recently reignited interest in food, the fit is pretty spot on. The construction method suggested was different to other bodice-and-skirt dress patterns I've tried. In the interest of experimentation I followed the suggested method, deviating only to avoid hand stitching the lining round the armholes (I finished both outer and lining armhole seam allowances as one with my overlocker) and using the Geranium dress method of attaching the bodice and bodice lining to the skirt because I think it results in a cleaner finish than how the Sally dress instructions would have ended up. 


Fabric:

The best thing about this make, for me, was that it finally made use of some fabric that has been in my stash for almost ten years! I remember buying a couple of metres of this striped cotton in Bath on a weekend break with an ex boyfriend. It's got little hearts woven into the red stripes, and the red is pale enough for me to reclassify it as 'pink' for Dolores's sake. 


Thoughts:

Sometimes I forget how long children's woven garments, especially lined ones like this, can take to make. They usually involve just as many processes as an adult's garment, and sometimes their smallness makes them more fiddly and time-consuming. Thankfully, it only took a few days of offering this dress as one of two outfit options for the day before Dolores chose it to wear. Personally, I really love it. It's got a classic, slightly old fashioned vibe, but the massive pockets keep it interesting and more contemporary. I definitely see more of these being made in the future.

Cost:

Pattern: $9.95 (approx. £7.62) available here
Fabric: I have no idea as I bought it so long ago, but I'll estimate that it was £5 per metre because I've never been a big spender on fabric, and I used about 1m for this project
Lining: from my stash, and I didn't pay for it in the first place
Total: £12.62 (although that cost will be reduced when I use this pattern again)

Wednesday, 5 October 2016

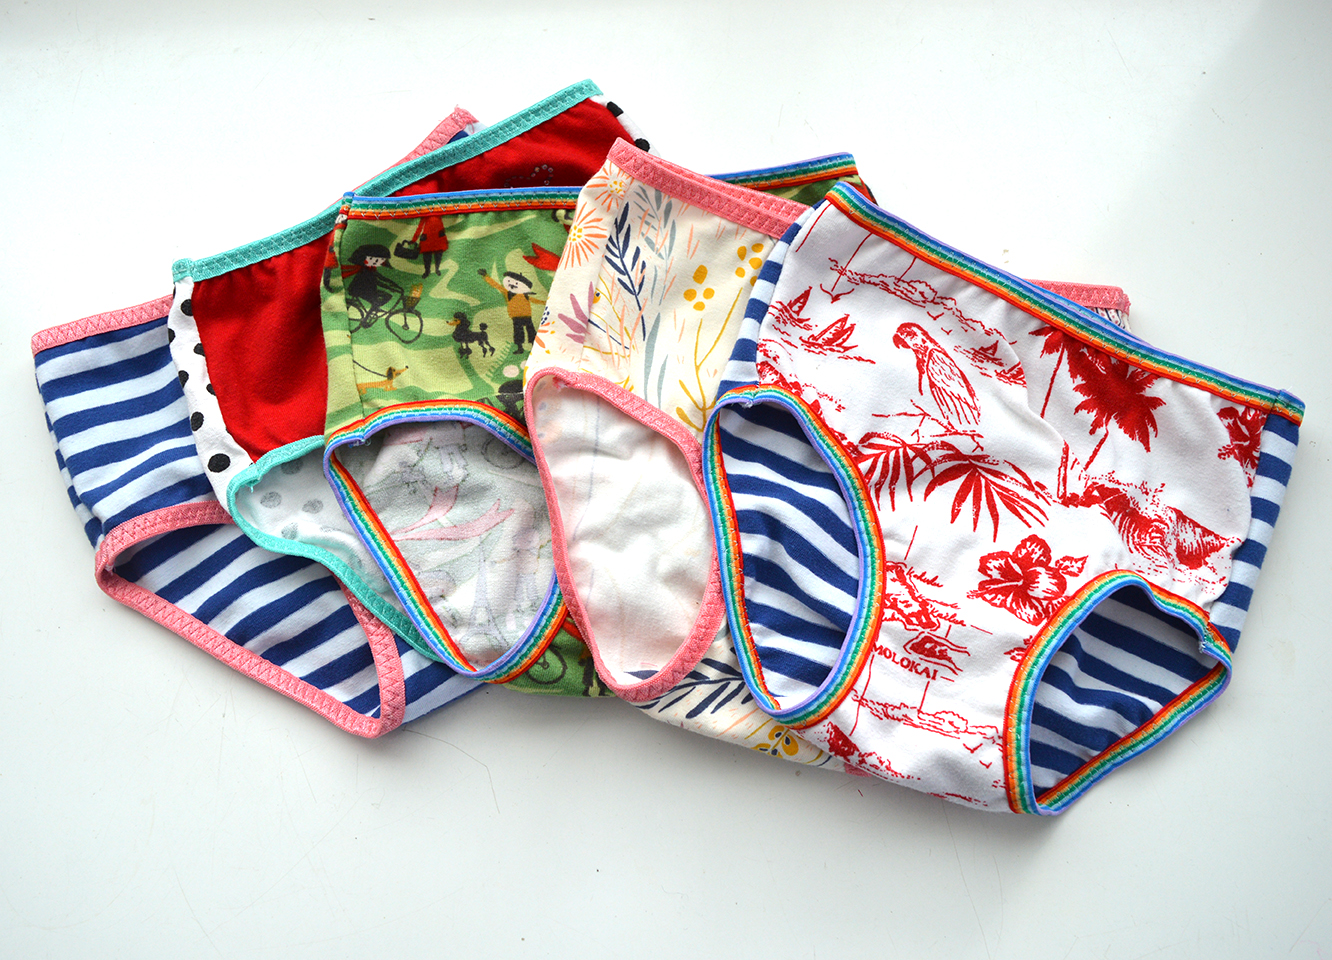
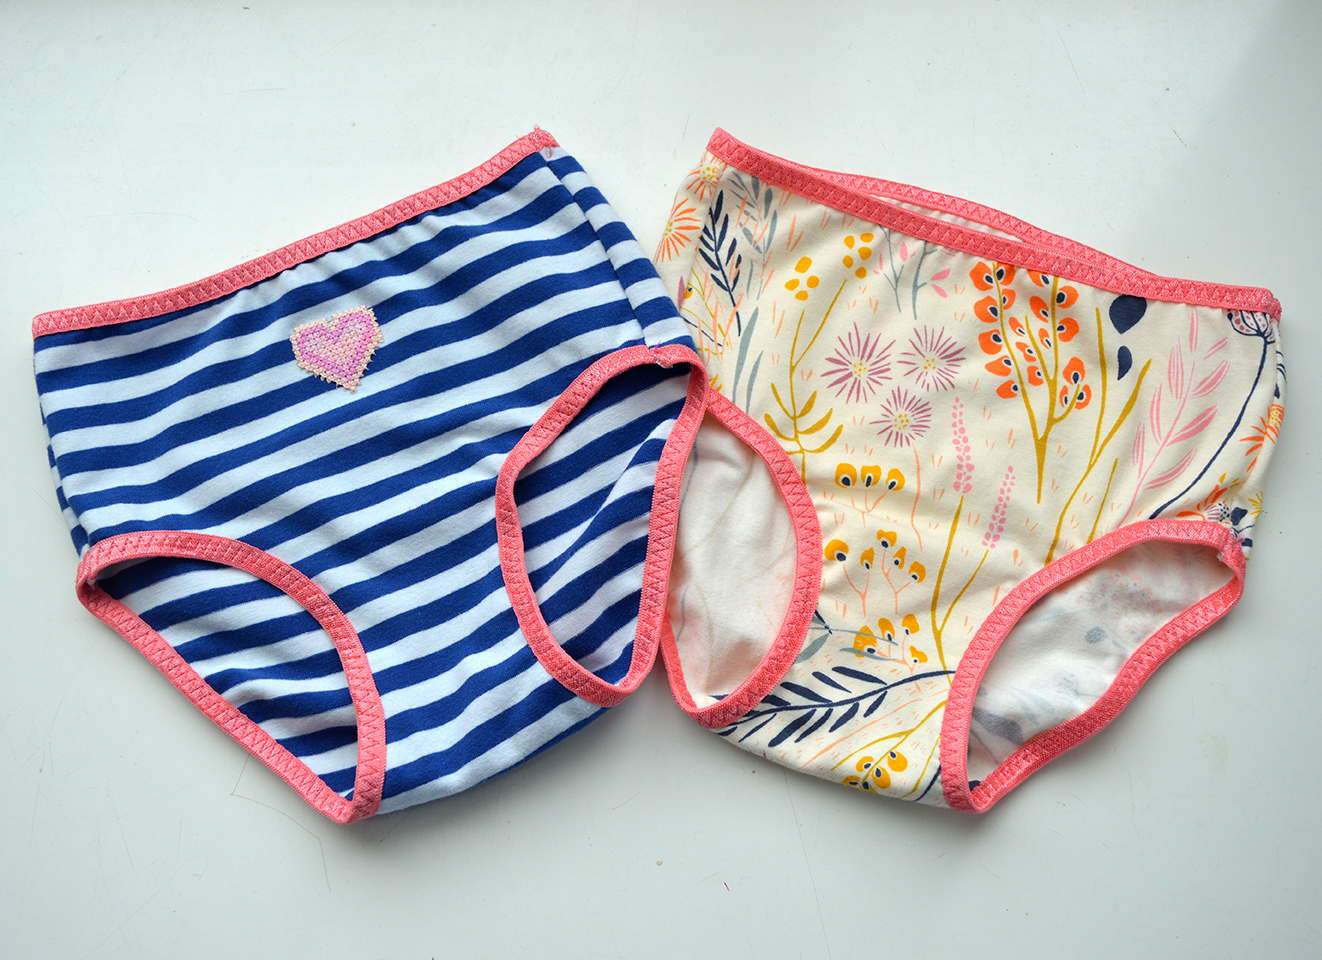
Scrap-busting Toddler Undies


Now I totally understand that many of you may be thinking 'Life is WAYYY too short to make kids' undies'. And it's very likely that if you actually have a toddler, you'll probably have less time and energy to make toddler undies than someone who doesn't have a toddler knocking about. But as I've mentioned previously, I have a real interest in seeing how much of my children's clothing needs I can meet using my own sewing skillz (with a healthy dose of hand-me-downs and secondhand). And with potty training looming, it was time for me to get making...


Pattern:

The same issue of Ottobre design magazine that featured the scrap-busting vest pattern handily also included a simple little pants/knickers/undies pattern. Indeed, Winter 6/2013 is one of the best issues, IMO, there's heaps of patterns in there that I hope to get round to trying at some point. 


My initially thoughts were to trace the size 92 which would correspond to her current height, but after comparing some of the shop-bought pants I'd already bought Dolores in a pre-potty training panic, I decided to go for the 98. The pattern suggests using either picot elastic or making binding strips for the leg openings. I planned to use fold over elastic because I have plenty of suitably narrow FOE in my stash. I also wanted to use it round the waist edge, rather than regular elastic as indicated in the magazine, so I reduced the height of the front and back pieces to omit the elastic casing.  


Fabric and elastic:

Here's where the real fun began! Hunting through all my knit scraps (of which I have two large tubs), I was able to find lots of small pieces of t-shirt-weight knit to use up. I love the idea of turning these little space-wasting scraps into useful items and eeking every last bit of value out of the initial cost of the fabric. And making my daughter's undies out of bits I already have lying about has got to have a lower (although far from zero, sadly) environmental impact than buying packs of new mass-manufactured undies from a shop. 


I've talked a lot about fold over elastic before, the most comprehensive of my posts being 'Fold Over Elastic: What the Hell is it, Exactly?', where I mentioned that FOE can be bought in a range of widths, although typically is about 2cm wide. Recently, Claire found and kindly sent me some packs of narrower (about 16mm) FOE in pastel shades in a Tiger shop, which I thought would be pretty perfect for the task. I also had some of this awesome rainbow FOE in my stash but I can't remember for the life of me where I bought it. On a couple of the pairs of undies I also used some little iron-on decals that I've had in my stash for over a decade.  


Thoughts:

Although I think this batch of toddler undies look really cute, there are a few problems with them. The main issue is that, whilst I usually find Ottobre pattern sizing to be spot on or eversoslightly too big, these pants came out a bit small. In fact, after a recent growth spurt they are a bit too tight and another batch is required. She's been wearing 'big girl pants' for a couple of months now, these five pairs plus three pairs of shop-bought ones, but I was kind of hoping my efforts would see more use. My fault, I guess, for getting carried away and making five pairs instead of one and assessing the fit before I carried on.

I also found them to be super high-waisted, the leg openings are a bit small and the crotch area is too wide. In the near future (like, when I finish writing this post), I'm going to trace the size 110, lower the height of the waist by 2cm at the back and 3cm at the front, then narrow the crotch by about 1.5cm in total, which will simultaneously make the leg openings wider. I'll apply the FOE (or I may try picot) a little more loosely, and with all these things combined I'll hopefully end up with toddler pants that are slightly too big and therefore should have months of wear in them.

Thursday, 29 September 2016

Podcast / Audio Post #5: Life Vs Sewing with Miss Demeanour


 "Many would pay millions in bitcoin to get up close and personal with Miss Demeanour. SoZo has her on speed dial. Catch up with the hardest working woman in the field of promoting animal prints in home sewing - the legendary Rehanon Mackenzie. 
If you haven't had the pleasure then you're in luck. You're about to dive into the world of Miss Demeanour. Redirect your calls. Pour a large wine. And listen to this..."

Related Posts Plugin for WordPress, Blogger...