Showing posts with label vest. Show all posts

Friday, 4 February 2022

Free Pattern Friday: SoZo Undies and SoZo Vest for Adults


Welcome to my monthly 'Free Pattern Friday' feature, where I road test a free sewing pattern or tutorial: sometimes a children's one, sometimes an adult's one . I publish these posts every first Friday of the month, timed to provide inspiration for those who plan to get their sew on over the weekend. I firmly believe that, if you pick your projects carefully, sewing doesn't have to be a crazy-expensive way to clothe yourself and your family. I also firmly believe that pattern designers deserve to be properly paid for their work, so if you enjoy using a pattern and can afford to do so, make sure you support that designer. Some designers' websites offer the option to make a donation, alternatively you can buy one of their paid-for products. If you can't afford to do so, you can support the designer by sharing your project via social media to help draw more attention to their work. Thanks to all the amazing pattern designers who have offered up their hard work for us to enjoy for free.

Ok. I'll admit it. I'm cheating a bit this month. I recently used both my free sewing patterns to use up some leftover jersey to make the set pictured above. Therefore I'm posting (again) about my own free undies pattern! I am, at least, also posting about my free vest/camisole/singlet pattern which I haven't mentioned on this blog for YEARS. I've got some exciting, new-to-me, free pattern road tests in the works, but they weren't ready to post about this month, so look out for those. 

As you may know, I gave the free undies pattern a massive update last year. I extended the sizing greatly and it now includes 32" to 50" hip. I added another version so there are two pattern piece and construction options. One is quicker to make so might be more suitable for less experienced and/or time poor sewers. The other requires smaller pieces of fabric so might be better for those trying to bust their scraps and leftovers. Plus, I gave the instructions a major overhaul to include heaps more detail, tips and information, as well as clearer step-by-step photos. You can find the pattern here, with more details in this post. 

The reason why I don't mention the vest/camisole/singlet pattern is because I released it over ten years ago and it really shows! I haven't given it any kind of update since then, it is what it is. It's available in very limited sizing with pretty basic instructions. Since drafting and sharing my vest pattern, I have seen heaps of effectively identical versions spring up to buy, so there doesn't seem like a lot of point spending my very limited time on going over that one. With my undies pattern, I feel that the fit is different to the other undies patterns I've seen out there, either to buy or for free. Therefore I feel like I'm offering the sewing community something slightly different, but I no longer feel that with the vest pattern. However, if you happen to fit within the sizing, or fancy making it for someone how does, it is also available on this page

Please remember that peops gotta eat and stay caffeinated, so if you do download either of the patterns and enjoy using them, please consider buying me a coffee via the link on the Free Sewing Patterns page

Friday, 7 June 2019

Free Pattern Friday: Women's Super Basic Tank Top


Welcome to my monthly 'Free Pattern Friday' feature, where I road test a free sewing pattern or tutorial: sometimes a children's one, sometimes a women's one. I publish these posts every first Friday of the month, timed to provide inspiration for those who plan to get their sew on over the weekend. I firmly believe that, if you pick your projects carefully, sewing doesn't have to be a crazy-expensive way to clothe yourself and your family. Thanks to all the amazing pattern designers who have offered up their hard work for us to enjoy for free.

For as long as I can remember, my hot-weather-clothing game has been weak. Even when I lived in Spain, I owned very little suitable clothing for when it all got hot and sticky. Last year I made some real improvements in this area, but there was still a gap where some knit tanks should have been. Twice previously I've tried to fill this gap with free sewing patterns (here and here), but neither of those patterns quite hit the spot. Well, today I can finally announce that the spot has been hit and the gap has been filled! This Super Basic Tank Top pattern by Halfmoon Atelier, free when you sign up to their monthly newsletter, is exactly what I needed all along. Thanks to Meghann for sharing her hard work for free. 


Pattern type: 

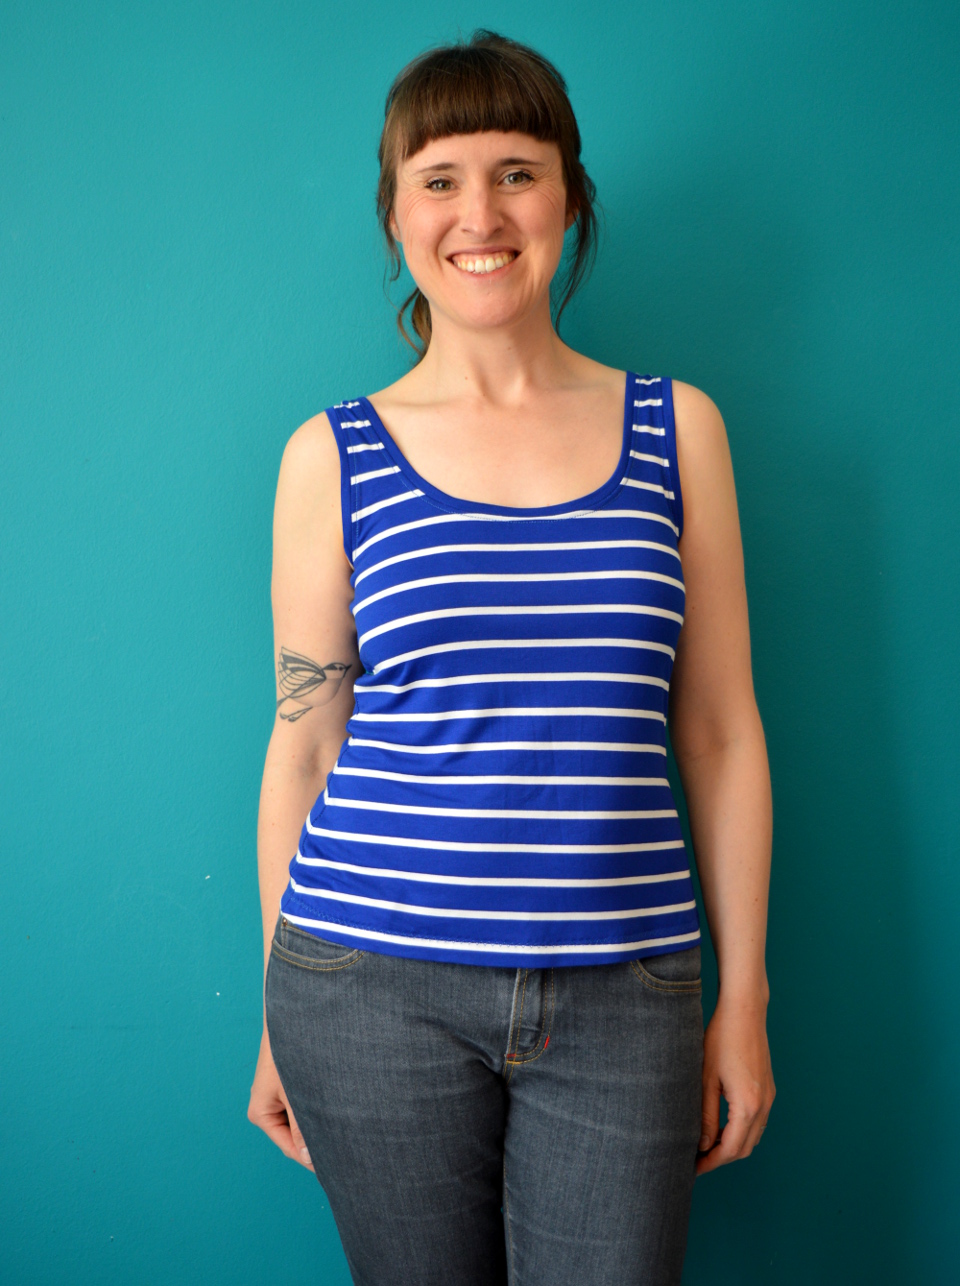
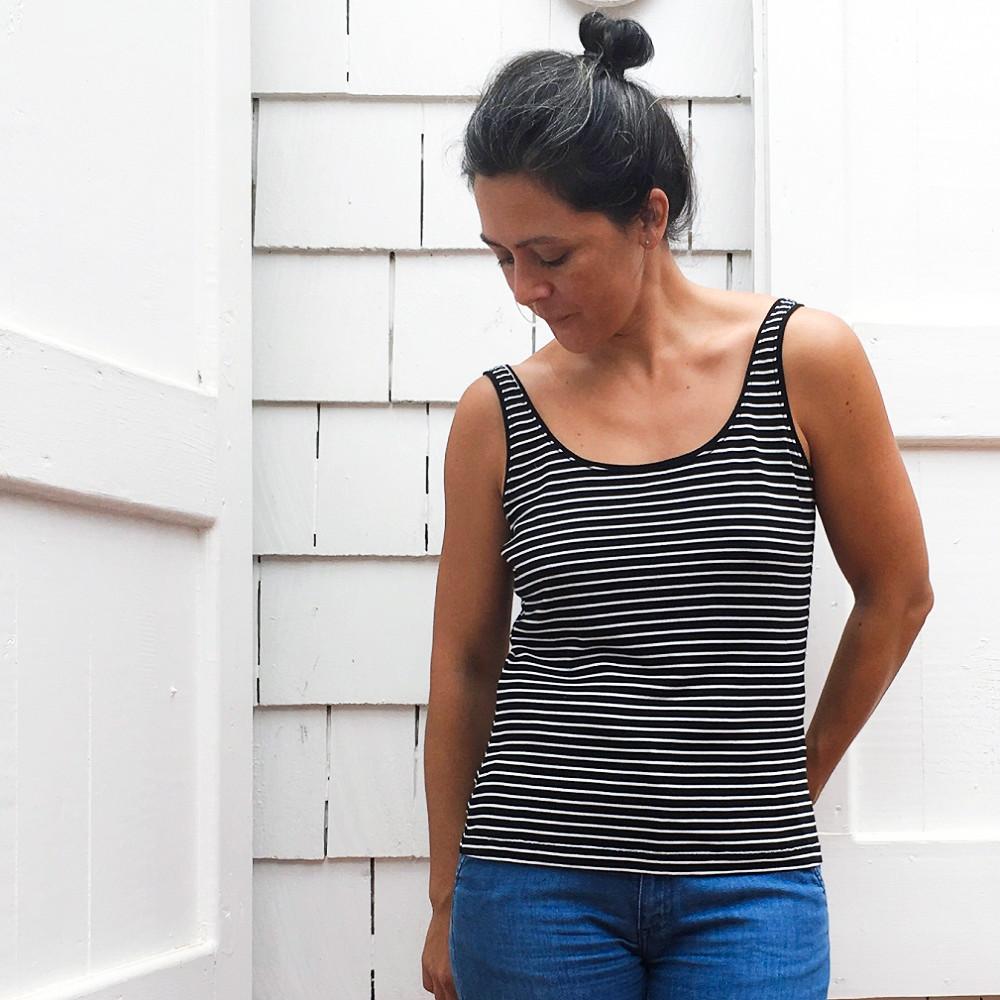
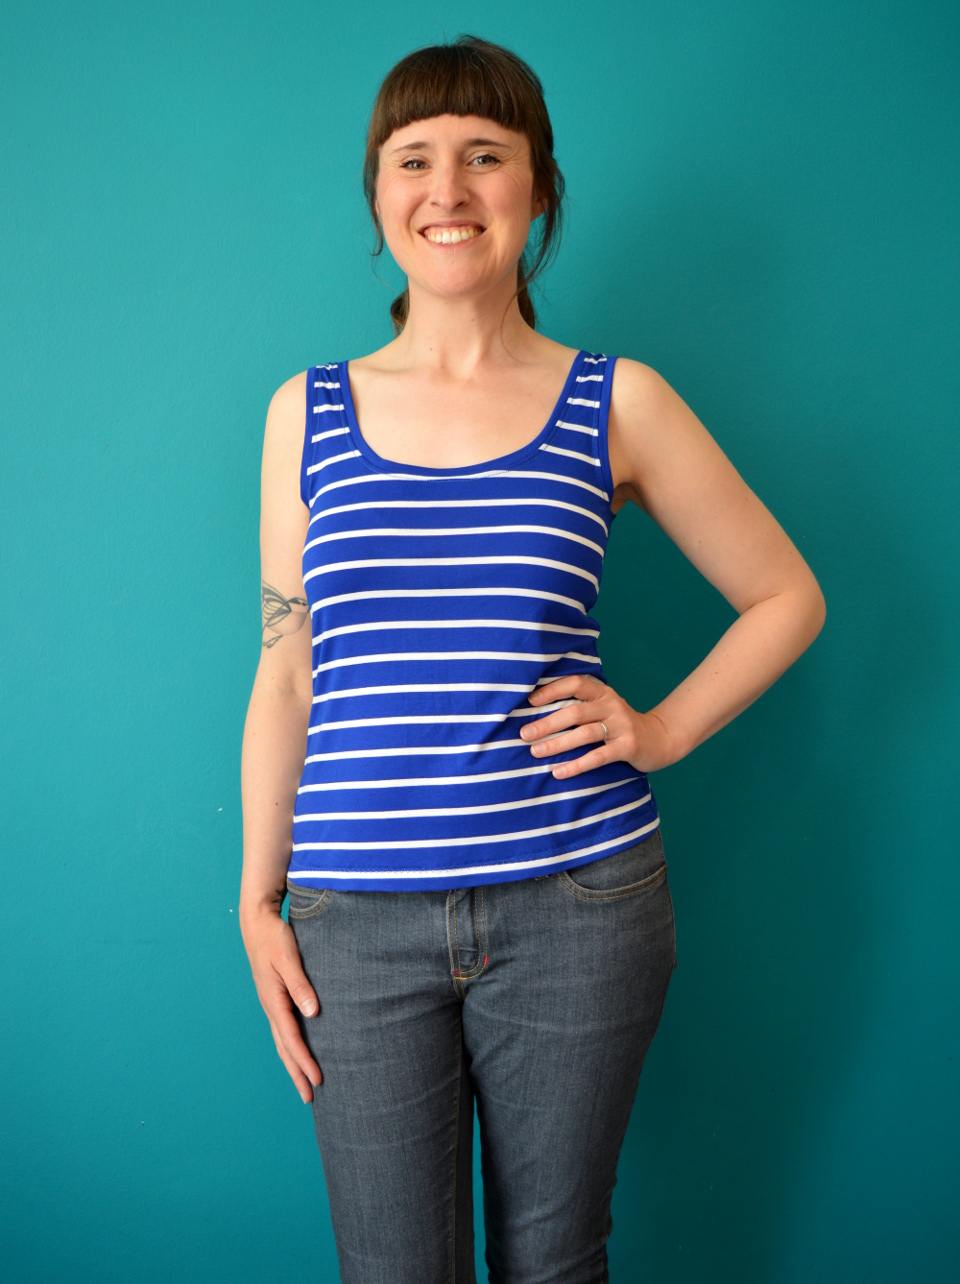
Super basic tank top by name, super basic tank top by nature. The scoop neck, skinny fit style is great as standard, warm-weather wear, but is equally handy for layering under jumpers when it's cold. The arm and neck holes are finished with bands of fabric, and the straps are wide enough to cover your bras straps. 

(image source: Halfmoon Atelier)

Sizing info: 

This pattern has been graded to ten sizes, which cover 30" to 44" busts. For my first version (the blue and white striped one) I followed the pattern's measurement chart to the letter, using a size 4 at the bust, grading out to the size 5 for my waist and hips. If you don't know how to grade between sizes, information on how to do so is included in the instructions for this pattern. 

I also pinched out 2cm from the length of the waist at the shorten/lengthen line, which is a standard alteration for me to account for my short-waistedness. The sizing and fit turned out perfectly so I made no additional alterations for my second version. 

It is also worth noting that this pattern includes not one, but two methods for making a full bust adjustment on this pattern (depending on how much bust you need to accommodate). 


Fabric info:

Light- to medium-weight knits like jersey, rib knit and interlock with a 4-way stretch work best for this pattern. Details on ideal percentage of stretch are included, as are some suggestions of suitable fibre types. Personally, I wouldn't like to use a knit that didn't have a lycra/elastane/spandex content. 

For my first version, I used a thrifted knit maxi dress that I bought at least a year ago because it had so much re-useable fabric. Ironically, this tank has ended up looking very much how the top part of the original dress did anyhow! 


For my second version, I wanted to use this secondhand New York Dolls T-shirt that had been in my stash for over five years. Although the original T-shirt it looked like a standard rock T-shirt, the fabric it was made from wasn't the regular 100% cotton you'd expect, and had a decent elastane content. Annoyingly, it was too narrow around the hips for me to cut both the front and back from the same T-shirt, so I used some black regular cotton/spandex knit from Girl Charlee UK that I had lurking in my stash for the back and the bands. It's hardly noticeable, but on this version, I made the arm and neck hole bands a smidge wider. 


Findings:

The pattern PDF and the instructions for this pattern cannot be faulted. Most of my sewing these days involves PDFs rather than paper patterns, and I appreciate the layers function if present (as is is here) to save on printer ink. The detail and info included in the instructions goes above and beyond what you'd expect for a basic tank pattern, and the level of both make this an ideal pattern for those new to, and nervous about, sewing with knits.  

As I'm sure you've guessed by now, I'm more than pleased with the finished garments. I like the shape and proportions of the front and back neck scoops, and the skinny-but-not-too-skinny fit through the body is just what I was looking for. From the images on the Halfmoon Atelier website it wasn't clear if it was designed to be worn bra-less, but I was relieved to find that the width and positioning of the tank straps covers my bra straps with zero tweaks required.  

The only thing I wasn't wild about, was how the lightning flash stitch looked where I'd topstitched down the seam allowances of the bindings on the blue and white version. I've decided that that tank will most likely be used for wearing down the allotment in the summer. I used a small, regular zigzag stitch on the black version to a more pleasing effect. 


Customisation ideas:
  • Try contrast coloured bindings round the neck and arm holes (solid bindings on a printed knit tank would look great)
  • I'm not sure if it's exactly my style, but I'm tempted to use some stretch lace on the back with a solid or print opaque knit on the front
  • You could break up the front and back pieces to create a scrap-busting colour blocked effect
  • If, unlike me, you can use a twin-needle successfully on your machine, or you have a coverstitch machine, you could use contrast thread to stitch down the arm and neck hole bindings and  hem the bottom edge. 


Would I make it again?

Absolutely! If the right knit falls into my stash, I'd definitely make more for wearing in hot weather. If I didn't already have a ton of vests made from my free vest/camisole/singlet pattern, I'd most likely make a stack of these super basic tanks for wearing in bed and under jumpers in colder months too.

Friday, 1 December 2017

Free Pattern Friday: Women's Durango Tank


This is my monthly feature where I road test a free sewing pattern or tutorial: sometimes a children's one, sometimes a women's one. I publish these posts every first Friday of the month, timed to provide inspiration for those of you who plan to get your sew-on over the weekend. I firmly believe that, if you pick your projects carefully, sewing doesn't have to be a crazy-expensive pass time. Thanks to all the amazing pattern designers who have offered up their hard work for us to enjoy for free. 

Last summer taught me that my hot-weather game is weak. And with winter approaching fast, I realise that my cold-weather game is much the same. (I've nailed spring and autumn though.) So in the interests of making comfy clothing that will see masses of wear (as per the discussions in my recent post about trying to make sewing more sustainable), I'm in the market for a decent knit tank (vest) pattern. Something easy and comfy to wear in the summer, that can be scrunched up in a suitcase when travelling to warm places, but that can also be worn as a foundation layer in winter, and maybe even used to sleep in. Thanks heaps to Gillian from Crafting a Rainbow for bringing this pattern to my attention at just the right time, and to Hey June for releasing this free Durango tank pattern

(image source: Hey June Patterns)

Pattern type:

According to the Hey June site, the Durango Tank is a casual sleeveless shirt with a centre back seam (to make sway-back alterations easier) and a longer flared hem. The higher neckline and high-cut shoulders give it a vintage summer concert tee vibe. The Durango is fitted at the shoulder and bust and loose through the waist and hip for an easy fit. It is not meant to cover bra straps, unless you're wearing a racer-back bra.


Sizing info:

This multi-sized pattern has been graded from size 2 to 22, which looks equivalent to US dress sizes. Taking my measurements and following their size info, I cut a size 8 around the shoulders and bust, grading out to a size 10 for the waist and hips. I also folded out 2cm of length just under the bust to account for my short-waisted-ness. Size-wise, I think it's pretty spot on. 


Fabric info:

I couldn't find any fabric suggestions on the website or the pattern PDF, so I went with a light-to-medium weight cotton/elastane single jersey, this one from Girl Charlee in fact. The quality of this fabric is really lovely, with a great stretch and recovery. It was perfect for this project, however I was a little disappointed that the 'gold' sparkles advertised on the GC website are actually a lot more yellow in the flesh. I reckon you could also use a baby rib for this pattern, and perhaps a interlock for a thicker tank.  


Findings:

First, I must say that I found this pattern a real pleasure to use. Both the digitised pattern and the instructions are really well produced and very easy to follow. The instructions include clear diagrams to illustrate the construction steps, and the Durango tank would be a great project for a less experienced sewer, or someone new to working with knit. Based on my experience of this pattern, I would definitely go ahead and buy a Hey June pattern if one caught my eye. 


However, through no fault of the pattern's, I don't think the Durango tank is the tank pattern for me. Personally, I would prefer a lower neckline, less carved away armholes so my bra straps were covered, a little more shaping in the side seams, and neck and armhole bindings that are the same width as each other. If you search the #durangotank hashtag, you'll see heaps of other people's versions, many of which look really fantastic on the wearer. I think this style suits some people's figures (like Gillan herself) more than others, and that I'm not one of the lucky ones. I do, however, like a number of elements of this tank, including the fit around the bust, the curved hem, and the method of construction. 


Customisation ideas:

The Durango tank is a great basic pattern, but some ways that you could get even more use from it might include:
  • contrast neck and/or armhole bindings (perhaps in rib)
  • add seam lines for colour blocking
  • solid coloured front and a print or stretch lace back
  • redraw the armholes for a more defined racer back look
  • lengthen into a dress
  • as the website suggests, you could apply iron-on transfers or decals
  • add applique

Would I make it again?

No disrespect to this pattern, but I don't think I'll make it again for myself as it is. It's just not the shape of garment I'm looking for. I plan to lower and rebind the neckline on this garment to use as a sleeping top for hot weather, and I may use this pattern as a basis for drafting a different shaped tank because I'm happy with the sizing. 

Friday, 24 March 2017

Refashion Friday: Quintet of Quick'uns


My theory is this: sometimes you sew something predominantly because you've had a great idea for a project, and other times you sew something predominantly because you actually really need the item. Like, you need it now. And the need for a specific item always seems to come when you're short on time, doesn't it? I usually find that refashioning and remaking existing garments is a good way to get what you need quicker than starting with a piece of pure, unadulterated fabric. I also get a massive buzz from creating something that will see heaps of wear from a garment that already had a previous life. Here are five things I've made over the last few months that begun life as a different garment. 


The photo at the top of this post is proof that the jumper remake pictured above has gone into immediate wardrobe rotation. At the start of each winter I am swiftly reminded that, for someone who lives in the UK, I really should own more warm tops. I am committed to and passionate about making as many of my own clothes as possible, but I'm not a knitter so it can be hard to fill this particular gap. So when I saw this rather shapeless leopard print Topshop jumper in a charity shop, I thought BINGO! Using a self-drafted sweatshirt pattern as a starting point, I recut and reconstructed this jumper using my overlocker into something much closer to the fit that I prefer. As the knit is looser than sweatshirt fabric, I ended up 'carving away' at the side and sleeve seams until I got the fit I was looking for. Obviously, drafting the sweatshirt pattern took me some time a few years ago (thanks past-Zoe), but aside from that, this project took about an hour.


It's hard to tell in the above photo but this fine knit navy and white polka dot jumper was a maternity item. I didn't get to wear it in my last pregnancy because it was summer when I was at my largest. Like the leopard jumper, I was able to retain the original neckline. However, unlike the leopard jumper, the shoulders and sleeves of this one already fit me well. Therefore it was a quicker remake, taking perhaps 20mins in total to get the length and shape I was after. 


I made this Peter Pan batwing top during my first pregnancy and wore it heaps during both. I could have nipped it in at the side seams for post-pregnancy use, but that statement oversized collar isn't really my bag any more. Plus, I was getting pretty desperate for some vests to keep my belly covered when I yank up my tops to breastfeed, so I decided to rework the batwing top using my free vest pattern instead. Reusing a well-worn top for an under vest had the added benefit that the fabric is already really soft from lots of wear and laundering. I added a twist to the basic vest pattern by pinching and then stitching over a section at the centre. It's created a pleasing sweetheart neckline and a cool graphic effect thanks to the bold stripes. 


Dolores has outgrown the smaller and less stretchy of the clutch of vests I made for her this time last year. What is up with that?! You think you've nailed your kid's particular lack of clothing or shoes crisis and then they go and get bigger all over again! Well I found this horrendously Barbie-pink T-shirt in my stash of refashionable garments, with absolutely no idea where I came from, and I knew it would be just the shade to appeal to my little girl. When recutting I had to choose to include the existing hem or the button detail. I went with the latter but didn't do it very effectively, so sadly only one of the original buttons got saved. The turquoise FOE and iron-on diamante heart kind of steal your attention away anyway. 


Since deciding that the only skirts I'm interested in wearing are a basic knit pencil style, I made a black and white striped onea solid navy one, a faux denim one, a solid black one and a spotty one. The only thing missing, as far as I could tell, would be a leopard print one (I'm pretty convinced that leopard print can be classed as a neutral!). After making all these knit skirts, I've tweaked the pattern so that I'm really happy with the fit, so I've been scouring the charity shops for a leopard print skirt or dress suitable to make it in. On a recent trip back to Hastings I finally scored this dress in the Oxfam shop for £3.50. It's a light-weight jersey, so this skirt will be more for summer use. As suggested in Gertie Sews Vintage Casual, where the basis for this pattern from, I tacked the skirt together first to check the fit before I stitched the side seams, which is something I almost never do. It's amazing how different knits can produce such different fits, and this light jersey needed to be taken in a lot to achieve a fit similar to that of my ponte de roma versions. 

What about you? Have you done any refashioning or remaking recently? What do you like and dislike about it, as opposed to starting a project with a piece of fabric?

Monday, 25 July 2016

Cordelia Maternity Camisole Pattern: On Sale Now!!!!


It's here! My latest PDF sewing pattern which has been designed to help women who are in one of the trickiest points in their lives to dress for: the third trimester of pregnancy! The Cordelia maternity camisole is a potentially invaluable addition to a maternity wardrobe. Suitable for wear in hot weather, as a layer in cooler weather, to sleep in or to wear to pregnancy yoga, this simple strappy top accommodates your bump with side gathers but feels super secure with a snug hem band. AND the pattern includes an optional bust support panel!


As a pregnant lady currently in the third trimester, I know first-hand how useful these camisoles are! During the heat wave the UK is having at the moment, a Cordelia camisole is pretty much the only thing I can stand to wear. In fact, I'm wearing one as I type this.


This sewing pattern comes in a digital format. When you buy the Cordelia maternity camisole pattern, you will receive both print-at-home and copy shop versions of the pattern, the print-at-home version consisting of just 14 pages, as well as detailed instructions on all aspects of how to use this pattern and make the garment.


The Cordelia maternity camisole pattern is suitable for almost all levels of sewing experience. It is recommended that you have a couple of garment projects under your belt already, however the clear instructions include lots of tips for using both knit fabric and fold over elastic (which is used for the straps and binding the top edges) if those elements are new to you. A handy single-page version of the instructions has also been included for those with a lot of sewing experience, or as a reminder for when you make your second and third etc. versions. For further information, including how to purchase it, please head to the Cordelia Maternity Camisole page!


Enormous thanks to Claire for all her help making this pattern into a product, both Cordelia and Sian for fit-modelling, and Cordelia for final product modelling also, a host of amazing pattern testers, and to Girl Charlee for sending me fabric to make samples from. I used their white stitched arrow on blue jersey (pictured above) and red and blue triangle stag jersey (pictured below).

Wednesday, 16 March 2016

Scrap-busting Toddler Vests


I'm not sure all my recent scrap-busting projects are having much of an impact on the overall volume of scraps and small fabric pieces in my possession, but it must be helping a bit. Plus, I'm really enjoying the challenge of trying to make nice and genuinely useful things from what some might perceive as waste. Oh, and these projects are working out really cheap! Let's look at my latest obsession...


Pattern:

Whilst trawling through the contents of my Ottobre magazine stash for inspiration, this simple vest/camisole pattern from the 6/2013 edition seemed like the perfect candidate for useful scrap-busting projects. Dolores has almost grown out of the largest size you can get of those vests/onesies with the envelope neck holes that fasten with poppers under the bum. I've sourced her a few hand-me-down regular vests, but more are required as there's always a couple in the laundry at any one time. Enter, the Peppi camisole pattern...


I went for the less fancy version of the pattern which consists of just one front and one back pattern piece. Having compared her current vests to the graded pattern pieces, I decided to trace the size 92, which is ever-so-slightly bigger than she requires at the moment. Ottobre magazine patterns are like Burdastyle ones in that, having traced them off, you need to add your preferred seam allowances. I added some allowance to the neck edge and arm holes (as the magazine advises), to allow for the edges to be folded over and top-stitched when the picot elastic is applied in two steps. 


My first two versions (pictured above) have the elastic applied in the way. Can you tell which was my first attempt at applying the picot?! For my second two vests (which are the next size up, size 98), I ended up cutting away the neck and armhole allowances that I'd added to the pattern pieces so that I could use fold-over-elastic instead of picot. Fold-over-elastic (AKA FOE) is applied in one step, flush to and enclosing the raw edge, so does not require extra allowance added to where you intend to use it.
 

Fabric:

The fabrics I used for these vests come from all over the place. My first attempt used up a scrap of luxuriously soft organic cream interlock that was given to me by Offset Warehouse (also used here and here). The fine floral jersey was a small sample that I got from a previous job. The turquoise knit (which might be a fine rib) was from a second-hand men's Uniqlo t-shirt that I was donated. And the fish print knit with a heavy lycra content (which I previously used for toddler leggings and undies for me) was given to me by a friend who had bought it with the intension of sewing for her daughter, but could never quite find the energy. They all have fairly different properties, and it was fun to see how each behaved as I worked with it, and as a finished item.

The sparkly star iron-on detail on the cream vest came from a stash that I received whilst at university (in 2000!) and the cute bear iron-on transfer on the turquoise vest was given to me with a number of other woodland-themed transfers by the lovely and very awesome Kathryn from Kathryn's Busytown. I am now officially obsessed with applying iron-on transfers to things to make them more exciting. Dolores is obsessed with trying to pick the sparkles off the star one.


Thoughts:

So. Much. Fun. I've come to realise that a key element in what I consider a fun project these days, is speed. And these are quick, both to prepare and to sew up. If I ever end up with some knit that isn't big enough for adult vest and pants, toddler/child vests is probably what it will become. I also like that it works with both picot and FOE (now that I've figured out a successful picot application!), so that means I'll have more options for making good fabric and elastic combos. Although I didn't do a great job with the pink picot, it lies much flatter when actually worn and is still a perfectly functional garment, although it won't be winning any awards.

I was intending these to be worn layered underneath other garments, but now I think about it, I think the fish print one at least may work well in hot weather too. Although at the, what my husband refers to as 'the fag-end of winter', it's so hard to imagine a time when my family may require no-sleeved garments!

Cost:

Pattern: Ottobre magazine £9.99 (however, I have also used a leggings patterns from this edition twice and it has a little girl's knickers pattern which I also plan to use a thousand times once potty training is underway)
Fabric: £0 all donated and reclaimed
Elastic: about £3's worth (the pink picot was part of a secret santa present, the lilac picot was given to me by Textile Garden but sadly doesn't seem to be on their site anymore so I can't cost it, and the FOE probably came from Walthamstow market for less than £1 a metre)
Iron-on transfers: £0
Total: approx. £2.66 each, however I plan to use this pattern soooo many more times.
Related Posts Plugin for WordPress, Blogger...