Showing posts with label sustainable sewing. Show all posts

Wednesday, 30 August 2023

Viscose Scraps Patchwork Trousers


Hello! First up, apologies for these terrible, dark photos. We tried to take some pics just before we went on holiday but clearly the light levels were too gloomy. So even after some editing you still can't see what's going on too well. Anyway! 

I tend to find my projects largely fall into one of two camps: 
  1. A garment or accessory I really want to wear or use
  2. An idea or thought experiment or that I want to see come to fruition 
This project was definitely from the second camp. In my experience, when it comes to working with scraps, slinky woven fabrics such as viscose and Tencel are the hardest to find uses for. I've tried piecing them together to make a garment from previously, but it didn't hold up very well because of my choice of seam finishing, plus I wasn't in love with the outcome stylistically. So I wanted to see if I would have more success by using a similar piecing technique to the one I adopted for my patchwork quilted denim jacket project. 


Piecing:

I started by getting all my slinky woven scraps out and selecting some that formed a nice colour palette. As you can tell, I'm really into autumnal shades such as mustard, rust, teal and forest green. It's fun seeing my previous garment projects represented in this selection! There's leftovers here from a dress that I still wear a fair bit, a Vali top that I love, a rust coloured tank that didn't work for me that I gave to a friend, my slinky Luna pants, plus a couple of bits from the scraps bin at work. 


The next step was to dissect larger scraps and trim everything up into rectangles. I find my rotary cutter, cutting mat and set square make this part of the process pretty quick. Then with the rectangles laid out, I started to find a pair that each have an edge about the same length. I pined, stitched and overlocked them together, then pressed the seam allowances to one side (I do this in batches to save time and energy). 

I would then add another shape to that joined pair, or another pair of shapes, with an edge a similar length and so on. The shapes then started to come together to make larger 'islands' of fabric. You'll often get to a point where you need to cut some 'custom' shapes to make the design work, so I kept some of the original scraps back for that. The main piece of advice is to not overthink the piecing process. It's super easy to spend too long questioning the position of each rectangle in relation to the rest and drive yourself insane!


Pattern:

It took quite a long time to eventually land on what I was actually going to make from these pieced together scraps. At first I thought a top, then I realised that I'm in far shorter supply of bottoms and I thought a wide-legged pair of culottes might look good. Then I realised I had enough scraps to make full-length, palazzo-style trousers, so I went with that plan. The pattern I created for this project is a hybrid of two other patterns. I used the top part of the trouser section from the Peppermint magazine/Ready to Sew Valley jumpsuit (then lengthened the rise in both the front and back). Plus I used the leg width and shape of the Wide-leg jumpsuit pattern by The Assembly Line, but eliminated the side seam as per the Valley jumpsuit. Having no side seam was going to result in less waste and fewer awkward shapes of pieced fabric at the side seams. 


Construction:

The 'fabric' I was creating by piecing scraps together slowly continued to grow until I could see that it had become big enough to fit the pattern piece on top. Obviously, I needed two of these large shapes of fabric. Then I cut out a pair of the pattern piece and constructed then garment as if I had cut it out of a flat piece of virgin fabric. The waist is elasticated, the channel constructed by simply turning down the top edge twice and edge stitching. 


Thoughts:

I LOVE that I managed to make an entire garment from leftovers from other projects, the scraps that would so often just go into the bin. I'm not sure if I'm super into the finished look, but I'm certainly into how they feel! Tencel and viscose fabrics usually have a wonderful drape to them anyhow, but all the additional seaming on this project has given the fabric some extra weight and made them somehow feel extra luxe. I do notice the seams on the reverse side a little against my skin, but I wouldn't describe it as unpleasant or annoying. 

I really hope that more sewers/sewists develop the habit of saving their scraps and leftovers where possible to use for other things. It's a good way to extract more value from the natural resources and the financial costs that went into the fabric in the first place, and it can keep textiles out of landfill for a bit longer. 


Wednesday, 26 January 2022

Zero Waste Cap Sleeved Tee for Kids


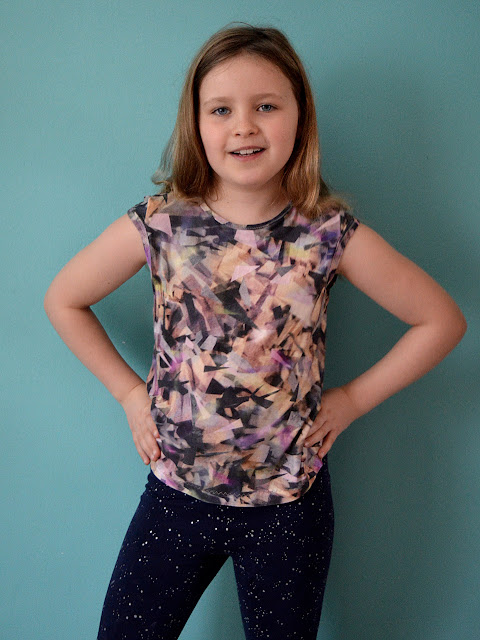
I'm really into the idea of zero waste sewing patterns and had a lot of fun preparing an episode about them for my podcast, Check Your Thread, a couple of months ago. I'd experimented with Birgitta's Helmersson's Cropped Shirt pattern which I had a lot of fun with, and I was keen to try more zero and low waste patterns. Thread Faction Studio is a Australia-based sewing pattern company that has a range of ZW patterns for children, and as far as I'm aware they are the only ones experimenting with zero and low waste patterns on a little scale (i.e. for kids). I've bought a couple of them and decided to start with the ZW cap sleeved tee pattern (pictured below) for my daughter because it looks like such a useful style.

(image source: Thread Faction)

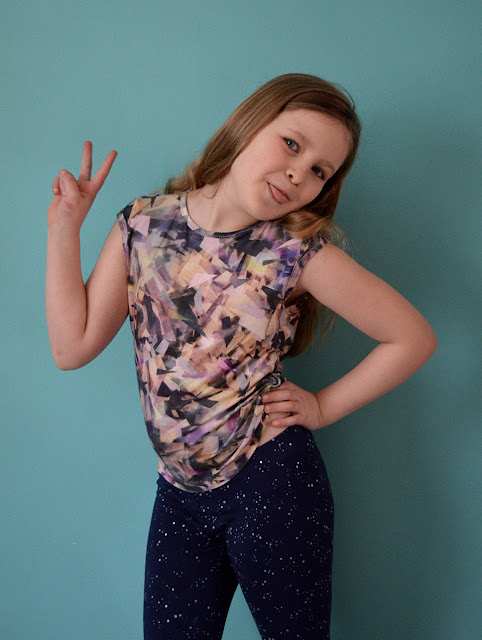
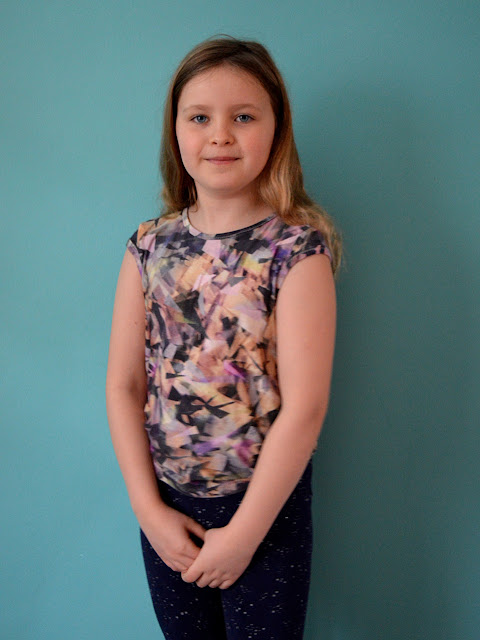
I was also keen to try this one because it requires a really small amount of fabric! It's potentially a great way to make wearable pieces from strips of leftover jersey. The pattern can be oriented either along or across the grain, depending on what you have to hand, as long as the fabric has a four-way stretch. I cut this tee across the grain (so perpendicular to the usually way you'd position T-shirt pattern pieces), and it only required about 55cm of fabric for the size 8. As well as requiring a four-way stretch for this to work, you also have to keep in mind any print design, otherwise the resultant garment might look a bit odd. The fabric I chose for my daughter's top was a piece of slinky jersey with an abstract print design so I could get away with the alternative pattern positioning. 


The pattern actually more of a low rather than true zero waste pattern because the neckband strip isn't part of the tessellated layout of the other pieces. It's also unlikely that your fabric would be the exact width, but I can't see how a true zero waste pattern could be created whilst also offering a wide range of sizes (this pattern runs from ages 2-14). 

The only change I made was to cut the neckband deeper than the pattern called for. And because it's not part of the main rectangle formed by the other pattern pieces, you could easily cut it from a scrap of contrast jersey or ribbing from your stash, or even from the neckband harvested from an unwanted T-shirt. Putting the garment together was very fun, but also pretty fiddly. I made the size 8 and I wouldn't have enjoyed trying to stitch the neck or sleeve bands on a smaller size. 


My daughter wasn't thrilled about my plans when I showed her the pattern and fabric. However, she didn't outright veto it so I pushed on regardless. Now that it is complete, it has actually had quite a lot of wear already, and we're still in winter. I think she actually enjoys the feel of the slinky jersey, and the colours work pretty well when paired with a number of other garments. I'll definitely keep this pattern in mind when I'm next in possession of a suitable piece of fabric. 

Thursday, 26 November 2020

Mend it, Wear it, Love it: I WROTE A BOOK!!!!!

So, funny story: I WROTE A BOOK!!!! An actual, IRL, paper-and-ink, honest-to-goodness book! I know, I can barely believe it either.

Towards the beginning of Lockdown 1.0 DK publishers approached me to write a beginner-friendly book that will help people make their clothes last longer. After explaining why this is important, it covers simple mending techniques for common garment mishaps, ideas and how-tos for altering the fit and style of your garments, as well as loads of info on how to care for your clothes properly. The book is called ‘Mend it, Wear it, Love it’ and will be available from 4th Feb 2021. It’s currently available for pre-order, and if you’re in the U.K., please may I recommend checking out Bookshop.org to support indie bookshops if you’re thinking of ordering a copy (it’s really reasonable, BTW).


Truth be told, when DK contacted me, I was feeling incredibly overwhelmed by the new reality of life in lockdown. I had to think hard about whether or not taking this on was the right thing to do, but writing it ended up being a truly wonderful, if frantic, experience. And now that I have a copy in my possession, I could not be more proud to have been part of its creation. The design team have done an amazing job, and I genuinely think that content is really useful for those wanting to make their wardrobe more sustainable.


DK has a rep for producing very clear, user-friendly, practical guides. So whilst being pretty, I’m also confident that ‘Mend it, Wear it, Love it’ sufficiently supports beginners through all the mending, refitting and altering techniques, even if you’re completely new to the sewing game. As I was writing the steps for each technique, I drew sketches for each step that the fantastic illustrator Steven Marsden then made actually recognisable!


For me, the parts of the book that I’m most proud of tho, are the sections where the problems of today’s clothing industry are linked to the practical steps in this book. My aim was to help the reader feel empowered and emboldened to give the techniques a try, including the embracing of imperfection. We also managed to make the topic of laundry and garment care interesting hahaha!


‘Any repair that extends the life of a garment by even one more wear is a major success’ - me!

Thursday, 27 June 2019

Sustainable Sewing: Zero-Waste Product Swaps


For the last six months or so I've been seeking out swaps I can make around the home, switching our usual products for non-disposable versions. There are, of course, heaps of fancy-looking, eco-products now available in ethical shops and online to help with this. But I've been relieved to find that a basic level of sewing ability and the reinterpretation of textiles we already own has saved me a stack, even if my versions aren't so pretty! I know that a lot of people are trying to make similar changes, so in the hope of providing inspiration, here's what I've been making:


1) Dish scrubbers. There was a surprisingly involved discussion in the comments section of my IG post about possible alternatives for what to use to when washing up. I bought a couple of VERY cute, fruit-themed, crocheted pads from Etsy, however they disintegrated pretty rapidly when they were put to the task of actually washing up multiple times a day. I finally landed on making these towelling circles for washing up, instead of the disposable, synthetic, sponge scrubbers we were using. I cut up an old, 100% cotton towel that was already pretty abbrasive, and overlocked/serged two layers together. You could even stuff them with scraps if you wanted to make them bulkier and possibly easier to grip. I made three so that I could chuck them in the wash regularly, and after six months of intense use, I can report that they are only just starting to develop a couple of holes. I don't think this is bad going, considering we don't have a dish washer and therefore do A LOT of washing up. And because these are 100% cotton, I feel much happier about eventually chucking them in the textile recycling bank (which may actually mean landfill because sadly who knows where it all actually goes).


2) Surface wiping cloths. Instead of using the same synthetic sponge scrubbers that we used to use to wash up with, or those foam-y sponge cloths that eventually disintegrate, I cut up yet more of that sacrificial towel (which we got via Freecycle about 10 years ago) and simply overlocked around the edges. Pat actually prefers these to wash up with as well; I think I made the circle ones a bit small for him. Anyways, these have been great.


3) Hands/face cloths. A former baby towel that got too ratty for bath-time got cut up into squares and the edges overlocked. We use them dampened for dealing with sticky toddler hands and faces after meals times. I'm not proud to admit that we used to keep a pack of disposable wet wipes/baby wipes on the dining table for this purpose. Marilla Walker recently shared on IG that she'd made some far more attractive ones of these using scraps of vintage towelling, but whatever works!


4) Nappy changing wipes. When we emerged from the 'milky and puke-y' stage of babyhood, we were left with a mountain of muslin cloths. I've still got some on hand for mopping up spills and covering the table when it's painting time, however, I've given a couple of the softest muslins the old cut-into-squares-and-overlock-around-the-edges treatment. I've been using these to further reduce the amount of disposable wet wipes/baby wipes we get through by dampening one before a nappy change to use if it's just a wee-based situation. I then chuck the used wipe directly into the washing machine to be washed in the next round of laundry. I still use regular wet wipes for dealing with pooey nappy changes, but these muslin squares alternative have meant we are buying the disposable kind far less frequently. I'm kicking myself for not doing this when my daughter was a baby/toddler too; I shudder to think how many of those things, plus the plastic packets, we've sent to landfill.


5) Handkerchiefs. I wrote about my foray into making fabric hankies to use instead of paper tissues here, but they have since been embraced by the whole family, so we needed MORE. This batch are bigger, 'man-sized' hankies (45cm x 45cm before hemming) made from a soft, old, bed sheet. I've discovered that when choosing suitable fabric for making them, softness really is the most important factor. Even though we have this new stack in addition to the previous ones, we still don't have enough if one of us has a cold or a bout of hay fever, so more are on the way. Plus Dolores has lost most of hers at school. 


6) Menstrual pads/Panty liners. Last year I made a batch of menstrual pads/panty liners, and I'm pleased to report that they are still going strong. I have not bought any panty liners since making these, which is a total win.


7) Wash mitt. I made a basic wash mitt for myself from yet more of the sacrificial towel. I zigzagged two layers of towelling together that I'd cut into the shape of a mitt. I used some leftover bias binding to finish the edge of the hole where your hand goes in, and some grosgrain to make a hanging loop, although I never actually hang it up. Picture an oven mitt made from an old towel. It didn't warrant a photo, but it does gets used everyday.


8) Cotton pads. I don't use cotton wool pads very often because I prefer to remove my make up with a foaming face wash, rather than specific make up remover. However, when my current stash of cotton wool pads runs out, I plan to make some like these from the Helen's Closet blog for taking off nail varnish.


So what about you? Are there any product swaps you've made that have been made easier and/or cheaper because you have a sewing machine and stash of textiles? Have you made any alternatives to products not listed above? I'm always looking for new ideas!

Related Posts Plugin for WordPress, Blogger...