Showing posts with label Ponte de Roma. Show all posts

Friday, 14 February 2020

Leopard Print Cardi: So Very Neutral


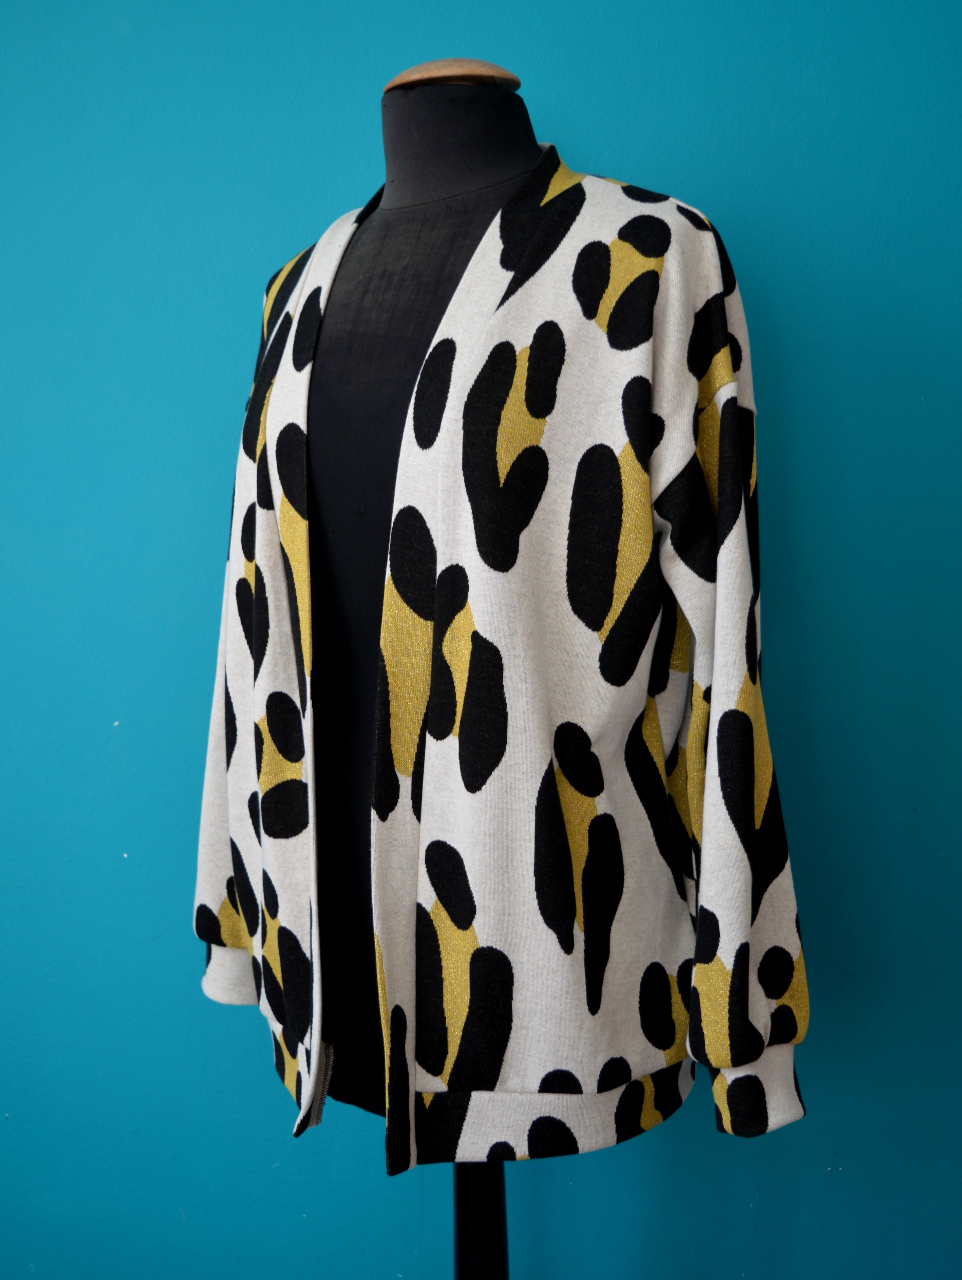
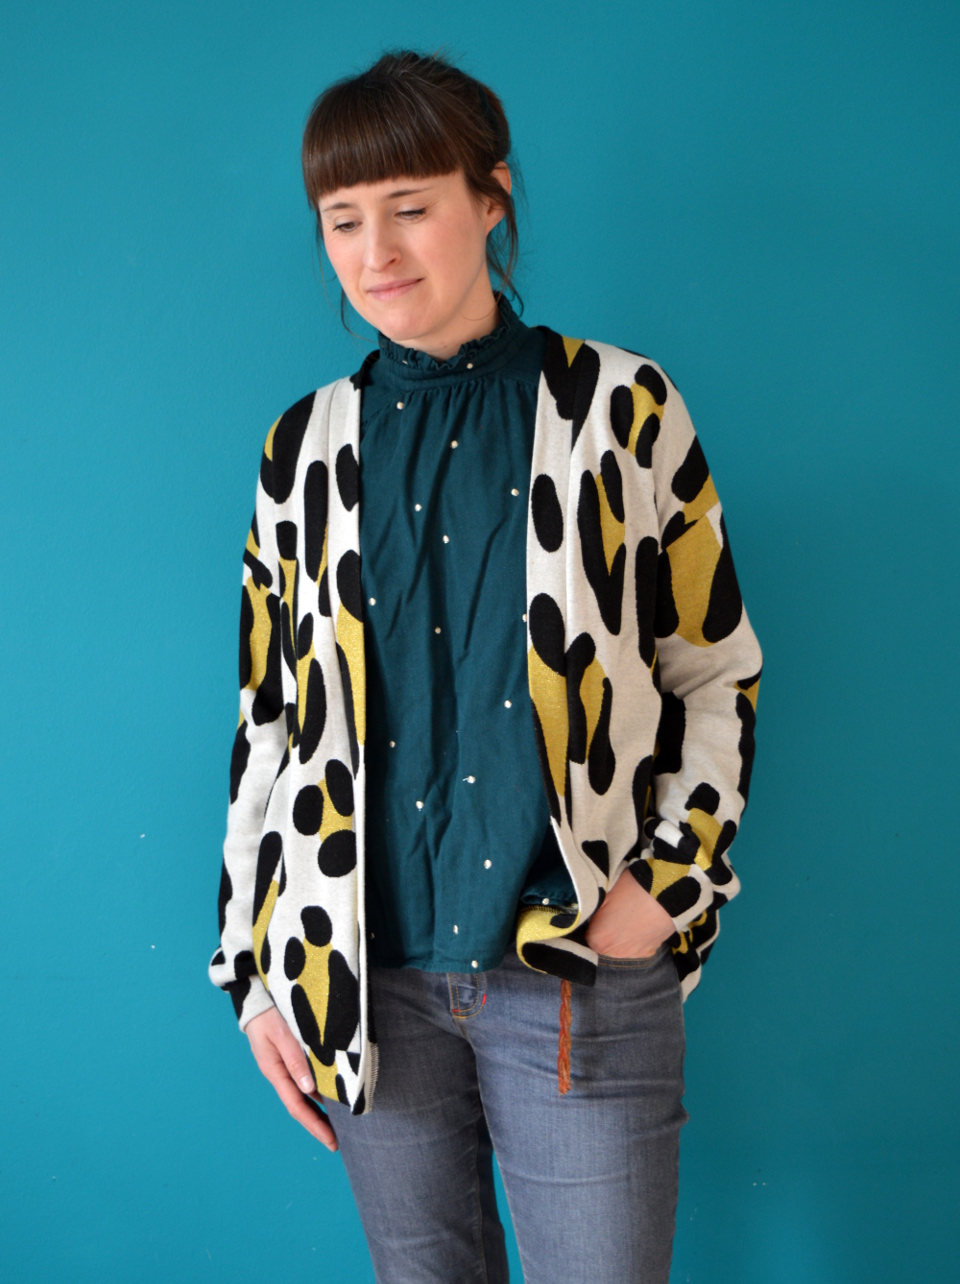
Here is the result of a recent experiment. I've been testing the limits of the popular theory that leopard print in a neutral. What could blend in to a wardrobe more easily than a simple, leopard print cardigan? See? I bet you hardly even noticed it in these photos!

Fabric:

So I've been regularly working part-time at Fabric Godmother for about a year and a half now (before that I would occasionally help out at their open days, plus I taught some classes there when they were running those). During the first year of the regular gig, being in close proximity to all the lovely fabric (plus access to a generous staff discount) meant that I bought more pieces of fabric that I'm entirely comfortable admitting to. Not a wild amount, but neither did I wait until I used each piece before I bought another. But then I got ahold of myself and put the breaks on. At the end of that first year, I vowed only to buy something if it is truly special, and when this leopard print ponte di Roma came along, I knew at a glance that it definitely fell into that category. 


This fabric is produced by German fabric company Albstoffe, who have a GOTS certification, meaning that their cotton fibres are grown organically and the fabric production passes a series of sustainable, ethical and fair trade requirements. It is also A-MAZING quality and (for some, including me) eye-wateringly expensive without the aforementioned staff discount.

So having bagged myself 1.5m of this special fabric, I really wanted to do it justice. How to turn it into a garment that would show off its attributes well, and also see a lot of use? One part of me envisioned some sort of awesome sweatshirt style top, with or without a ruffle thrown in to the plans. But ultimately, knowing how I like to dress, I decided a cardigan would get way more use. 


Pattern:

So having landed on a cardigan as my chosen garment style, I mulled over the question of what attributes the cardigan should have. I wanted something fairly loose that would fit over a variety of blouses, tops and dresses. There's a lot I love about Wendy Ward's Kinder cardigan pattern, likewise with the Ready to Sew Jamie cardigan pattern. But there are also a couple of things that I don't love about both. So I set about drafting my own cardigan pattern, that took inspiration from both, but ultimately had its own proportions and volume. Kind of like the Kinder and Jamie had a baby, if you will. 


Having finished the drafting process, I made a (hopefully) wearable toile in some ponte from my stash, so I could test out my design before cutting into the precious. I was so happy with the outcome that I decided zero tweaks to the pattern needed to be made. I'm going to send the wearable toile to a friend who loves a good cardi almost as much as I do!

Thoughts:

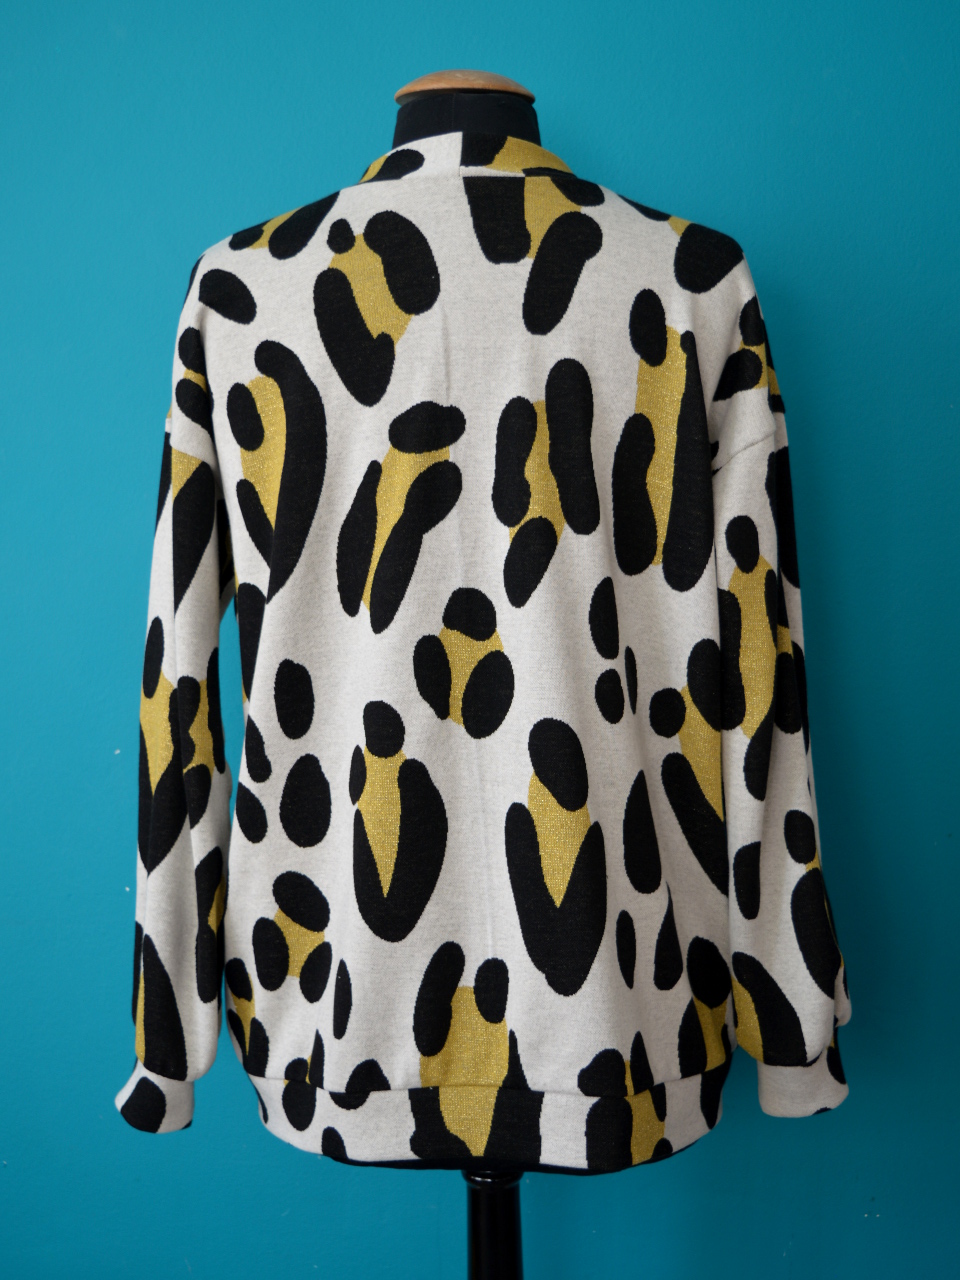
I'm soooo glad that I took the time to allow plans for this fabric to fully formulate. I love the final shape and style of this cardigan; it's exactly the type of garment I want to wear right now. I think it shows the crazy leopard print design off well; I deliberately chose to avoid patch pockets so as not to disrupt it too much. And the fabric feels sooooo nice to wear. My only hurdle now is to work out how to incorporate it into some outfits that don't always involve pairing it with a black top....

Thursday, 12 July 2018

Retro Cardigans Revisted


When I'm reading blogs or catching up on my Instagram feed, I'm fascinated to see which patterns sewers return to and make multiple times. Some people may feel reluctant to post projects made with TNT patterns, instead of some completely fresh new pattern/project perhaps, maybe thinking that their readers don't want to see a repeat, or not knowing what fresh thing to say about it. As a reader/follower/viewer though, I feel the opposite; I really want to see which garments clearly got so much use IRL that more versions were called for, and therefore which patterns other sewers have found to be excellent value for money.


Pattern:

Having recently posted (again!) about the Made by Rae Geranium dress pattern, today I'm going to share another kids' pattern that I've posted about previously that had another outing on to my sewing table. So, tell me, who doesn't love a cardigan?! They're a useful layer all year round; they give extra warmth when it's cold and are a jacket substitute in the summer. The Retro cardigan pattern by Brindille & Twig is such an easy project and can be made in a variety of fabrics. I went on this particular cardigan making binge in the spring to hoover up some fabric scraps that were floating around in my stash, and turned them into useful garments for both Frankie and Dolores.


As I've mentioned before, I've found that B&T patterns come up large if you use the age to pick a size. If you use their height guidelines instead, or just pick a size/age smaller, I personally find you get a more successful fit (e.g. in the picture at the top of the post Frankie is 18 months old but wearing the size 12-18 months).

As for alterations to the pattern, after the first four I made (the three from the previous post and Dolores's anchor cardigan in this post), I decided to make the cuffs and waistband deeper. Whilst making the last of this batch of four (Frankie's anchor cardigan pictured above), I decided to make the curve of the front piece where it joins the neckband less exaggerated, and the result is a neckband that sits much flatter than the others (check out Dolores's anchor cardigan above that one for a comparison). I'll definitely make this small alteration a permanent one going forwards.


Fabrics:

As I say, these cardigans can be made in a variety of knits to create garments with different degrees of warmth. The fleece backed sweatshirt fabric version I previously made Frankie was great for winter, and the lighter interlock (like a thick jersey) provided a great layer for milder weather. Ponte de Roma hits the spot in between. When I 'accidentally' ended up with both the navy and white colour ways of the anchor ponte that I used to make this Cabernet cardigan, these joggers and this Freya top, the leftovers were screaming out to be combined into one garment. I pieced together Dolores's cardigan (the version with the white sleeves) and used some gold buttons from my stash. Shortly after, I realised I could squeeze another Frankie-sized one out of the remains-of-the-remains if I used some solid navy ponte (also from my scraps tub) for the sleeves and back piece. I love that these two garments are similar but not exactly the same. Much like the kids themselves!


I made the black version pictured above (apols for the blurry image) using the size 5-6 (proving my point about this pattern's age-based sizing coming up large!) for Dolores to wear in a year or two's time. It's made from the leftovers of my quilted/embossed ponte Kinder cardigan, which I've found to be very snuggly and soft. I hate buying buttons for projects when I have such a large button stash already. I picked out this set of red fabric-covered buttons, but I may change them in the future if something better shows up.  


And the final version I have to share with you started life as this mint green, faux-wrap, loop-back French terry top I bought in a charity shop for 50p (pictured above). The colour IRL looks in between the above pic and the finished cardigan pictured below. I bought this top because the fabric felt incredibly soft, and had excellent stretch and recovery. I wished I'd smoothed off the curve of the front piece (as described above) on this version, because, as you can see, the neckband doesn't sit very flat when it's buttoned up. I had to cut-n-shut the sleeves together because of the restricted fabric I could harvest from the original garment. However, I like the additional seams on the sleeves. I think it gives the garment a sportier vibe, although I never would have thought to add the extra seams unless I was creating a colour blocking effect. It may not surprise you to learn that Dolores helped pick out the buttons and the unicorn patch from my stash. 


Thoughts:

These projects have made me so happy because A) they were almost free in terms of financial cost, B) they used up some leftover fabric that I might have otherwise have chucked in the textile recycling bin (better to reuse than recycle), and C) they have already seen a lot of wear, keeping my babies warm without restricting their movement at all. 

What are your favourite patterns for kids that you have made multiple times? Have you discovered any that are also useful scrap busters, either woven or knits? Spill the beans...

Saturday, 31 March 2018

'A Beginner's Guide to Sewing with Knitted Fabrics' Blog Tour: The Kinder Cardigan


Pack your bags, grab your passport and ask your neighbour to feed the cat; we're going on a blog tour! Wendy Ward (my IRL boss, FYI), has written another fabulous sewing book, this time all about sewing with knit fabrics. As well as MASSES of information about choosing and working with knit fabrics, this book includes graded sewing patterns to make 6 basic projects with heaps of additional variations. The pattern pieces are printed on the three double-sided pattern sheets at the back of the book.

Pattern:

It didn't take me long to decide on the Kinder cardigan pattern to try out. The weather can vary a lot during one day in the UK, plus I'm usually feeling cold anyway, therefore I have a deep appreciation for a good cardigan for layering up. The kimono-style Kinder cardigan pattern includes three lengths (short-, mid-length and full-length), two sleeve lengths, optional cuffs for the long sleeve length, AND optional pockets for the mid- and long-length cardigans. Having chosen the design elements you want, you then need to trace the pattern pieces off the pattern sheets. 


Tracing the pattern pieces off was probably the most time consuming part of this project. Because most of the Kinder cardigan pattern pieces are larger than the pattern sheets included in the book, most of them are extended over a couple of sheets. It was a bit annoying that all the cardigan pattern pieces were spread over all six sides of the pattern sheets, rather than all located on one sheet, but I'm sure there was a spacial/financial reason for designing the pattern sheets in this way.

Confession time: I messed up the tracing. I was aiming for the mid-length cardigan, rather than the short length that you see here. I got confused and read the 'hip line' that is marked on the pattern as the hip-length hem line (duh), and didn't realise what I'd done until I started construction so ended up making the short length instead. Entirely my fault. Anyways, after that blip, this cardigan came together in the blink of an eye. It would be an excellent confidence-building pattern for a beginner sewer/sewist, and a satisfyingly quick make for a more experienced one. 


Fabric:

For this review, I was lucky enough to be able to choose what fabric I wanted to make it in from the massive selection on the Minerva Crafts website. Queue: hours upon hours searching through their site. Eventually I requested some Atelier Brunette sweatshirting, annoyingly I can no longer find it on their site so I'm guessing they've sold out, but they do have this slightly different design in alternative colour-ways in the same weight. 

I've seen these Atelier Brunette sweatshirt fabrics used on blogs and Instagram many times before but couldn't really justify shelling out £20+ a metre for sweatshirt fabric myself. But now I have had the opportunity to feel, work with and wear it, I can totally see what all the fuss is about and why it is so special. My goodness it is soft and lovely, and washes really well without the sparkles coming off. 


So after making and loving my first version, I knew I wanted to make another, and fast. I found this lovely quilted/embossed ponte de Roma at Fabric Godmother at their recent open day, and I can't recommend it enough for making a snuggly cardigan like this. Having found the right fabric, I then went back and traced the *ahem* correct length pattern pieces for the mid-length cardigan, and two evening sewing sessions later (one for cutting, one for construction), my new favourite garment was complete. 


Thoughts:

This is exactly the style of cardigan that I feel my wardrobe needs right now. My style has moved away from the retro/rockabilly look that befits little, round-necked, vintage-y type cardis, and my  jeggings-and-tops Mum uniform that I'm permanently found in these days works so much better with this looser, open front cardigan style. I've also found that the sleeves of this pattern are the perfect width: wide enough to be worn with ease over all my long sleeved tops but narrow enough to also fit under my jackets and coats. I've been layering my Kinders over fine knit jumpers during the horrible, chilly weather we've been having recently, and I can't wait to use them as jackets over short sleeved tops and T-shirts once the weather warms up. Oh, and I have at least two more Kinder cardigans planned...


Blog tour and discount code: 

This post is the first stop on the 'A Beginner's Guide to Sewing with Knitted Fabrics' blog tour, and there's some other fabulous sewers lined up along the way. I have been provided with the handy image below (handy for me because it means I don't need to type them all out) to show you when and where else you can see Wendy's new knit patterns in action. If you like what you see and fancy snapping up a copy of this book, then MAKEetc.com are offering a sizeable 25% off the price by typing in the code BLOG25 at the check out until 21st April.


Monday, 25 January 2016

My Perfect Knit Skirts


Now, these are not the most exciting garments you'll probably see on a blog today, but in my opinion, they may be the best! These are stealth garments: not attention grabbers (well, maybe the spotty version is a bit), they're just quietly doing their job really well. They are the result of my penultimate nippy weather sewing plan. Please read on...


Pattern:

The pattern I used for both of these is the third (and possibly final) incarnation of the easy knit pencil skirt from Gertie Sews Vintage Casual book (pictured above). If you recall, a navy Ponte de Roma skirt was my first attempt, and I made some tweaks to the height of the waist, hem length and side seam shaping as I went. My second version (the faux denim skirt) was improved further still. And for these two I made one more adjustment by lowering the waistline even more so that the waist elastic sits below my belly button rather than on it. 

I stitched the side seams using my overlocker (having basted them together first to check the fit, every knit fabric behaves differently), then finished the top and bottom edges with my overlocker also. Next, I used the lightning flash stitch on my regular machine to hem them and make the elastic casings. 


Fabrics and notions:

The black skirt, although nothing to write home about, is actually super soft and feels quite luxurious. It's made from a small piece of black Ponte de Roma that's been in my stash for years. I think it was probably a sample piece that I got whilst working for TRAIDremade, however this jersey Roma from Fabric Godmother looks pretty much the same, and Girl Charlee has some really fun printed Ponte de Roma's here that would also work well. 


The spotty Ponte de Roma was something I actually bought with my own money specifically for this purpose. I first saw it at the Fabric Godmother's open day last August when I went to help out. Josie was very generous in offering me some fabric for my troubles, but I picked the light weight denim and faux stretch denim instead. I kept thinking about the spotty stuff though, and when I went to visit her before Christmas, I bought about 70cm which was the perfect amount for this skirt. 


I utterly adore this fabric! It's not a solid black, you can see some of the white showing through the black which gives it a lovely textural look. It's bobbled a bit after a few wears and washes, but it's still my favourite skirt to date. 

Finally, I added a couple of cute labels so that I could easily identify the fronts from the backs. I'd already started doing this for Dolores's clothes, and it makes sense to do it for my own as well when it would be useful. These woven ribbons come from my blog sponsor Textile Garden which have a superb and adorable selection. I stole this idea from Marilla Walker who swears that she in turn stole it from someone else! If you haven't started doing this yet, feel free to steal it from all of us! 


Thoughts:

I now own four of the best and most useful basic skirts in the history of (my) skirts. I love the simple, close-fitting silhouette, but the elasticity of the fabrics and the elastic waistbands mean they are also as comfy as can be. My levels of comfort when wearing these skirts are now entirely governed by the tights I wear with them, as I can bearly feel the skirts themselves at all! I don't think I'll need to make any more for a number of years, however that could all change if I came across some leopard print Ponte de Roma! Oh, and I'd also like to try this pattern with an unwanted men's wool jumper (a bit like this). So maybe I'm not done with this pattern at all. 


Cost:

Pattern: £0 (I received the book for free in exchange for an honest review, however it can currently be purchased here for £17.94)
Fabrics: black = £0, Spotty Ponte de Roma = £10.49
Ribbon for labels: £0 (I was given them by Textile Garden, however you can find their selection here with prices starting at just £1.25 per metre, which would make A LOT of labels!)
Elastic and thread: £0 (from my stash)
Total: £0 for the black skirt, £10.49 for the spotty one.

Friday, 28 August 2015

The Comfiest Skirt Ever


These pictures are rubbish. They do not convey the awesomeness that has landed in my wardrobe. This is the third and final garment I have to post about that was created from my haul of free fabric from Girl Charlee. If you have yet to enter the free fabric giveaway and live in Europe, then you still have a few days to do so. Maybe this post will sway you towards picking the Ponte de Roma...


Pattern:

So, I need to back up a bit. Back at the very beginning of this year, I decided to try wearing a knit skirt in the hope that I could combine the look of wearing a pencil skirt with the comfiness of wearing jeggings (bliss?!). I bought and tried the Colette Patterns Mabel skirt pattern (take one and take two), but there were things that I disliked about it. Despite its flaws however, I wore the second attempt quite a lot during Me-Made-May'15 so I felt that I was on the right track.

Lynn from Tialys blog left a helpful comment on my Mabel skirt take two post mentioning Gertie's easy knit skirt pattern from her Gertie Sews Vintage Casual book (pictured above). As luck would have it, I received a copy of the book last Christmas but I hadn't tried any of the patterns from it. The easy knit skirt pattern (pictured below) was potentially just the ticket: pencil skirt shaped with elasticated waist. I decided it was worth a punt.


I have to mention this skirt pattern's major selling point: it consists of just one pattern piece. You cut one on the fold for the front, and one on the fold for the back. BOOM. According to the book's size chart, my measurements corresponded with one size for the hips and the next size up for the waist (although I can't remember exactly which sizes, and I am currently exiled upstairs in order to get this post done and the book is downstairs...) so I blended between the sizes which worked perfectly. 

The instructions in the book recommended basting the side seams together and then popping the skirt on to see how the fit is going. I basted the seams together with a long straight stitch on my regular sewing machine, then having decided that I needed to pinch out 1cm from each side seam evenly all the way down (so removing 4cm of width in total) I restitched the side seams with my overlocker. 


Apologies for the ugliest/most boring picture ever above! The elastic is stitched into a loop, then attached to the top raw edge of the skirt (I did this with a three-step zigzag stitch on my regular sewing machine because I didn't want to risk cutting the elastic by using my overlocker) and then simple turned under so it is out of view. Having done that I then tried the skirt on again but decided the waistline was a bit too high for my liking. Instead of unpicking, I just turned the elastic under again and topstitching it in place with my twin needle, which I also used for the hem (which I made 3cm shorter than the pattern, BTW). The finish on the outside looks great, but the extra bulk I created by turning the waistband under makes the whole waistband slightly more visible through certain tops than I would have preferred. I'm over it though. 

Fabric:

I've already talked briefly and at length about this navy Ponte de Roma, so I have little to add about it here, other than to point out that 2m gives you enough to make a Jenna cardi AND a pencil skirt. Which is pretty great, IMO. 


Thoughts:

The title of this post may have given away how I feel about the finished garment. The pattern is exactly what I was hoping for from a knit skirt pattern, and it works really well in this lovely, soft, inky-blue knit. What I didn't expect, though, was just how much movement I have in this skirt; it's the leggings of the skirt world. There's enough movement for me to run about playgrounds, it's comfy enough around the waist to take long train rides and eat large dinners, AND it is long enough to pick stuff and children up off the floor without concern for my decency. Although it doesn't make for super-exciting photos, it is the Girl Charlee creation that I have worn the most, in fact I have barely taken this skirt off since finishing it. Expect more of these knits skirts coming soon...
Related Posts Plugin for WordPress, Blogger...