Showing posts with label Made By Jack's Mum. Show all posts

Friday, 1 January 2021

Free Pattern Friday: T-shirt and Leggings PJs for Kids


Welcome to my monthly 'Free Pattern Friday' feature, where I road test a free sewing pattern or tutorial: sometimes a children's one, sometimes an adult's one. I publish these posts every first Friday of the month, timed to provide inspiration for those who plan to get their sew on over the weekend. I firmly believe that, if you pick your projects carefully, sewing doesn't have to be a crazy-expensive way to clothe yourself and your family. Thanks to all the amazing pattern designers who have offered up their hard work for us to enjoy for free.

Happy New Year to you!! I hope that 2021 has many wonderful things in store for us all. Let's start the new year by reviewing some free sewing patterns shall we? A good a plan as any I feel.

Right, so I've made a decision. Going forwards, some of my Free Pattern road tests will feature patterns that I've posted about before. There are a few reasons for this. Firstly, some free patterns are so good and so useful that I end up using them again and again. Obviously it's not always clear during the initial road test if a pattern will become a TNT, and I think it's beneficial for readers to hear which ones over time I've found to be real winners. Secondly, I don't expect that everyone that reads a post on my blog or IG will have viewed my whole back catalogue and seen all the patterns I have tested previously! Crazy, I know. And finally, it's pointless and unsustainable for me to sew up a new free sewing pattern each month just so I'll have something to post about. If there is a free pattern that interests me, I'll try it, but I'm not going to sew something for the sake of content creation if it's not what I really want to be making right now. All that to say: I've posted about the patterns in this post on this blog before. However, I hope you appreciate that I'm reusing not one but TWO free patterns, and showing a different way of using them! 
My first review of the Brindille and Twig Ringer Tee pattern from three years ago can be found here. It is easily accessed by adding it to your cart and going through the checkout on the B&T website (no payment required). The Made by Jacks Mum Lightning leggings pattern review was from earlier this year. To access this pattern, you can join the MBJM Sewing Group on Facebook, or you can get it through their site. If you do the latter and are in UK or EU, the transaction goes through Etsy so you will pay a small fee. 

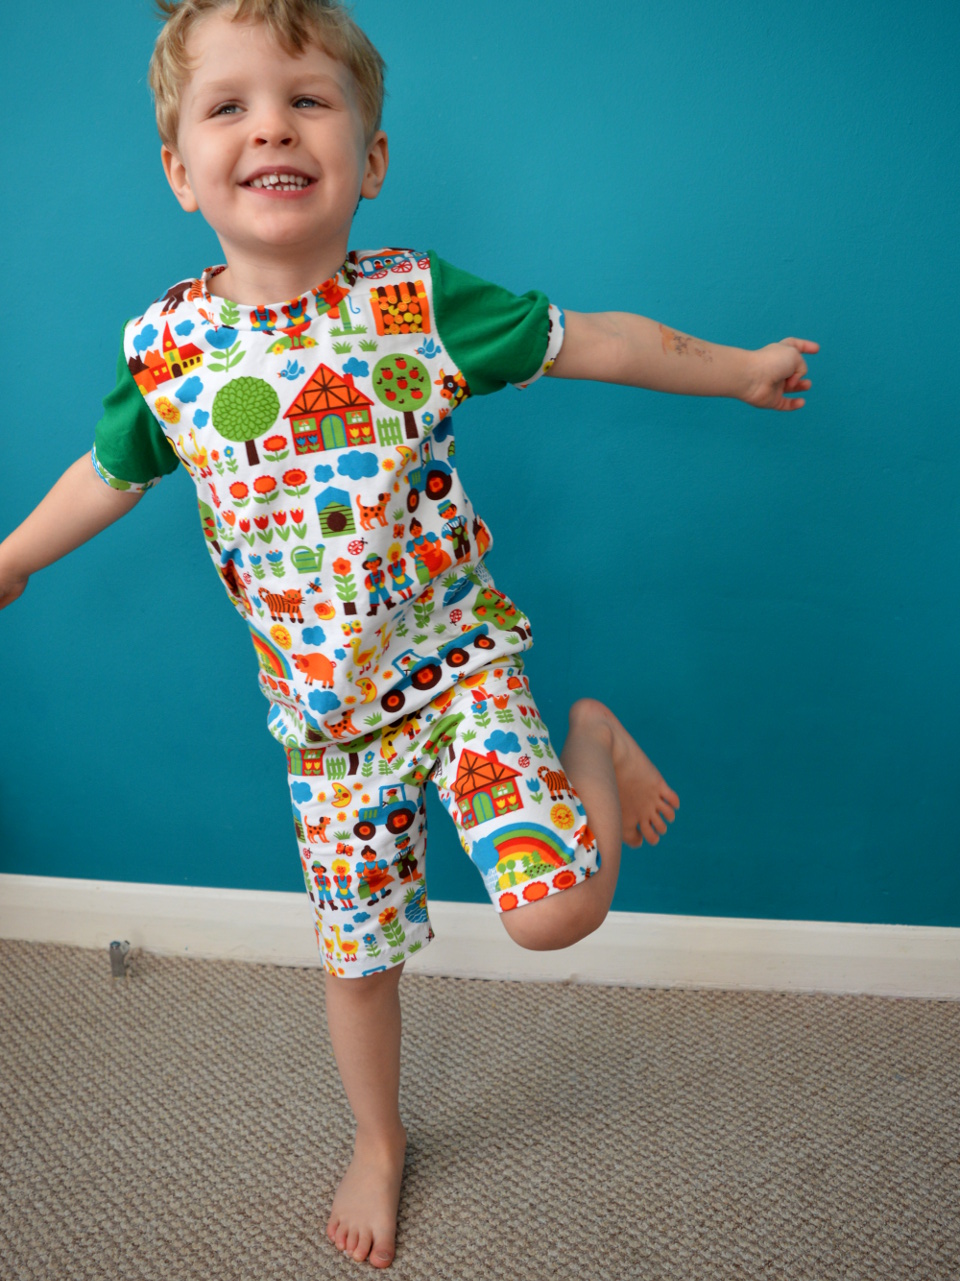
Both patterns are fantastic for making everyday garments, and today I want to highlight that they can also be combined to make knit pyjama sets. As you can see, I've made one summer set with short sleeves and short legs, and one for the rest of the year with the long options. There are other free knit pyjama patterns for kids out there, but to reduce paper and printer ink use, I love that these are multi functional and include various options. Check out the individual posts for more info on each pattern, however I'm including all the most relevant details again here. Massive thanks for both designers for sharing their hard work for free. 

Pattern type:

The Ringer tee is a banded T-shirt pattern that includes both long and short sleeved options. The Lightning leggings pattern includes relaxed and slim fit options, both of which can be made in three lengths, with elasticated or band-finished waists AND hemmed or band-finished hems. Another version of the smaller sizes of both leg fits has also been drafted to accommodate reusable nappies. With all these style elements to choose from, take care to read what pages you'll need before you start so you're not printing out a bunch of unnecessary pages. 


Sizing info:

Whilst the Ringer tee pattern has been graded to include 0m-3m to 5-6T, I've found that B&T sizing runs at least one size bigger, so go by the height rather than the age when selecting which size to make. I wanted these sets to come up big as Frankie (currently aged 4 and about 103 cm tall) doesn't really need them right now, so I made the 4-5T (that I would expect to fit a 5 year old). As expected, they have come out at least one size too big, and I'm guessing he'll get two year's worth of use from the tees. 

The Lightning leggings are graded to a larger size range: from premie/small newborn, up to 12 years. I've made a stack of these leggings as this point, as well as few other MBJM patterns, and I always find the sizing to be very accurate. If your child tends towards a stockier or skinnier frame than the 'average', you can easily combine sizes as you need to to get a better fit than most shop-bought leggings. I made the size 5 relaxed fit option (one full length and one shorts length) for both these pairs for Frankie. I expect he'll only get one or one-and-a-half-year's worth of use from these, compared to a good two years from the Ringer tees.

Fabric info:

The Ringer tee pattern requires knit fabric for the body and sleeves and it suggests to use ribbing for the bands. I feel that cotton/Lycra single jersey or cotton interlock would work best for the main fabric, although I have also had success using a very stretchy, lighter-weight French terry. I must admit that I've always used the self-fabric for the bands rather than ribbing, but haven't had any problems. 

The Lightning leggings pattern recommends that knit fabrics with good stretch and recovery are used, for example cotton/Lycra jersey. If you're making the slim fit, I'd recommend that you check your jersey isn't too thin. My daughter has bust through a couple of her pairs because the fabric I chose was too thin and was probably better suited to T-shirts. The relaxed leg style option might also work with a lighter-weight French terry that has an elastane/Lycra/spandex content for more of a joggers style garment.

For both the pyjamas sets pictured here, I've used cotton/Lycra jersey. The grey arrow print jersey came from a friend's destash, but originally from Little Miss Sew n Sew I believe. The farm print jersey was sent to me for free from By Graziela. Both fabrics are excellent quality: soft and with excellent recovery. 

Findings:

The Ringer tee pattern is really nice to use. The layers function has been included so you can print out just the size you require, and it's easy to see which pieces you need to cut out depending on your choice of sleeve options. I do find that, as well as coming up at least one size larger than the age it's marked as, the pattern also comes up pretty long in the body. I shortened the pattern by a few centimetres for both the tees pictured here. You could easily make this tee by omitting the hem band entirely, and turning up the bottom edge and hemming instead.

For the Lightning leggings pattern, I'm literally going to copy and paste my original post's findings:

I really like how MBJM's patterns are produced. The information conveyed is very clear and user friendly, without heaps of unnecessary blurb or frou frou. This is particularly important when a designer is trying to guide you through a pattern that contains heaps of options, such as this. Literally the only thing I can think of that is missing but would have been helpful, is a clear, technical spec drawing of the garments. In fact, now I come to think of it, I don't recall seeing a spec drawing for any of MBJM's patterns. I find those can help you get to the bones of a pattern style, without fabric choice, model's pose etc. distracting you.

You might think that, what with all the style options and choices included, that the actual PDF pattern pages would be a Burda-magazine-style web of confusion. However, I am able to report that I found them very well laid out and easy to figure out, despite all the various pieces and cutting lines. In the instructions there is a handy guide to help work out which pages to print for the combo of options you're going for. Plus, both the A4 and A0 copy shop files offer the layers function; yet another way to prevent wasting precious printer paper and ink. If you think you're likely to reach for this pattern again and again as the child you sew for grows, it might be worth getting the A0 file printed at the copy shop with all the sizes (excluding the sizes that they are already too big for). Then you can trace off the size you need onto pattern paper (or wrapping paper/wall paper/whatever you've got to hand that) as and when you need it, to save on ink (and getting your printer out and finding all the relevant wires, amirite?!) further down the line. 

As for the finished garments, I'm really pleased with them. The overall fit of the slim leg option is exactly what you'd hope for in a regular leggings pattern. And the relaxed leg option is a nice, modern alternative that is suitable for any kid who may not wish to wear tight leggings (yeah, I'm trying to find a woke way of referring to 'most boys'!).

Would I make these again?

Clearly, yes!!! I imagine I'll be using both of these patterns until both my kids grow out of the size ranges for both patterns.

Friday, 1 May 2020

Free Pattern Friday: Kids' Lightning Leggings


Welcome to my monthly 'Free Pattern Friday' feature, where I road test a free sewing pattern or tutorial: sometimes a children's one, sometimes a women's one. I publish these posts every first Friday of the month, timed to provide inspiration for those who plan to get their sew on over the weekend. I firmly believe that, if you pick your projects carefully, sewing doesn't have to be a crazy-expensive way to clothe yourself and your family. Thanks to all the amazing pattern designers who have offered up their hard work for us to enjoy for free.

As you may know, I try to alternate between women's and children's pattern for my Free Pattern Friday review posts. When it's time for a children's one, I especially love being able to shine a light on the super-useful ones, by which I mean patterns that span a wide size range, are (fairly) unisex in style, might work for a variety of climates and even offer some design options. Well today's free pattern ticks each and every one of those boxes. It's the Lightning leggings pattern by Made By Jack's Mum; massive thanks to her for sharing this amazing pattern for free. Please note: to access this pattern, you can join the MBJM Sewing Group on Facebook, or you can get it through her site. If you do the latter and are in UK or EU, the transaction goes through Etsy so you will pay a small fee.   

I'm also very happy to have found this pattern, because my former fave free kid's leggings pattern, as reviewed here, is no longer available. So, shall we begin?


Pattern type:

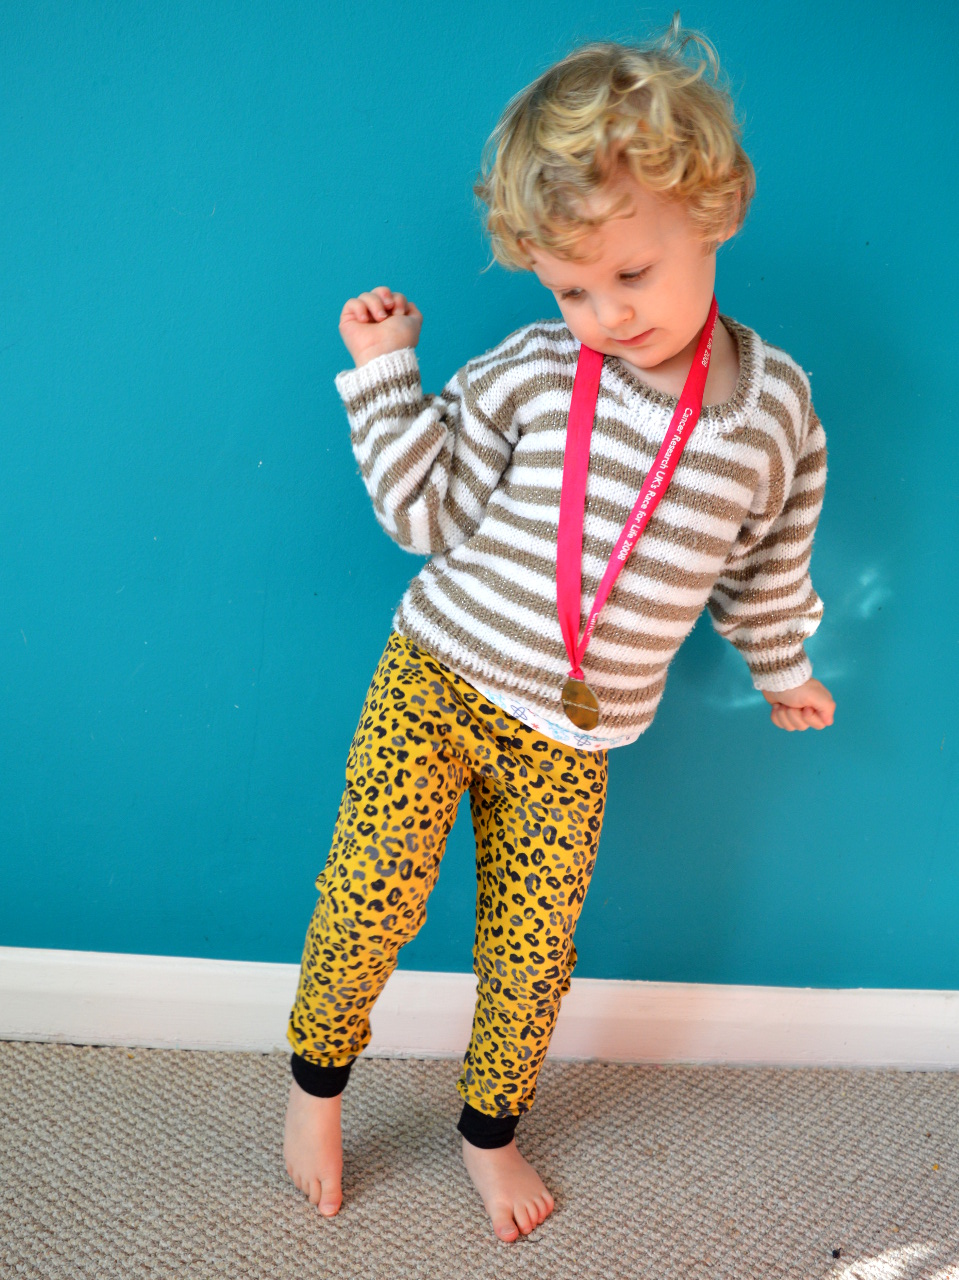
The amount of options included in this pattern is almost ridiculous! You can choose from a slim leg option (which I used for Dolores's pink cat leggings pictured in this post) or a (slightly) relaxed leg option (which I used for Frankie's leopard leggings pictured here). Both leg options then come with a choice of ankle, capri or knee lengths, ALL OF WHICH can be simply hemmed (as per the cat leggings) or finished with cuff bands (as per the leopard leggings). PLUS, both can have elastic applied at the waist, OR have a fabric waistband. Is that it? NO!!!!! BOTH leg style options also come with a cloth nappy-suitable fit option up to 4 years. Damn. I'm exhausted. 

(image source: knee length with cuff hem options via MBJM)

Sizing info:

This pattern goes all the way from premie/small newborn, up to 12 years. With some kids' pattern companies, I find that you always have to automatically size down one size or so. I've made a few MBJM patterns now, however, and I always find the sizing to be very accurate, no sizing down needed. 

Dolores is currently six years old, but basically the height and size of a 7yo. Therefore, I made her cat leggings a size 7 with an additional 2cm in length (hence the slight bunching at the ankle) because I wanted them to last for a couple of years. Frankie is three and average in height and size, and I made the size 3 with no changes because I wanted them to fit him straight away. 

One point I would mention here is that I found the suggested length measurements for the waist elastic to be too short. I would heartily recommend measuring the waist of the child you are sewing for to gauge the correct length, rather than blindly going by the length suggestions in the pattern. If you are making them for a child that you are unable to measure at this time, I'd suggest making the fabric waistband option. 


Fabric info:

The Lightning leggings patterns is recommend that knit fabrics with good stretch and recovery are used, for example cotton/lycra jersey. Both the cat jersey (a different colour way of this one) and leopard jersey used here are cotton/lycra jersey. The relaxed leg style option might also work with a lighter-weight French terry that has an elastane/Lycra/spandex content such as this modal/elastane French terry. BTW, that's not a sponsored link in anyway, I just happen to have used this fabric a couple of times for other projects, and think it would work well with this pattern for a slightly thicker leggings option. 


Findings:

I really like how MBJM's patterns are produced. The information conveyed is very clear and user friendly, without heaps of unnecessary blurb or frou frou. This is particularly important when a designer is trying to guide you through a pattern that contains heaps of options, such as this. Literally the only thing I can think of that is missing but would have been helpful, is a clear, technical spec drawing of the garments. In fact, now I come to think of it, I don't recall seeing a spec drawing for any of MBJM's patterns. I find those can help you get to the bones of a pattern style, without fabric choice, model's pose etc. distracting you.

You might think that, what with all the style options and choices included, that the actual PDF pattern pages would be a Burda-magazine-style web of confusion. However, I am able to report that I found them very well laid out and easy to figure out, despite all the various pieces and cutting lines. In the instructions there is a handy guide to help work out which pages to print for the combo of options you're going for. Plus, both the A4 and A0 copy shop files offer the layers function; yet another way to prevent wasting precious printer paper and ink. If you think you're likely to reach for this pattern again and again as the child you sew for grows, it might be worth getting the A0 file printed at the copy shop with all the sizes (excluding the sizes that they are already too big for). Then you can trace off the size you need onto pattern paper (or wrapping paper/wall paper/whatever you've got to hand that) as and when you need it, to save on ink (and getting your printer out and finding all the relevant wires, amirite?!) further down the line. 

As for the finished garments, I'm really pleased with them. The overall fit of the slim leg option is exactly what you'd hope for in a regular leggings pattern. And the relaxed leg option is a nice, modern alternative that is suitable for any kid who may not wish to wear tight leggings (yeah, I'm trying to find a woke way of referring to 'most boys'!).


Customisation ideas:

If you are looking for even more options for creating a unique garment, other than those included, here's some ideas:
  • Add some seam lines for scrap busting/colour blocking the leg pieces
  • Add a side seam if it'll help you squeeze them out of a smaller or odd-shaped piece of fabric
  • Apply knee patches (think traditional ovals or cute cat head/apples/dinosaur/etc shapes) to reinforce those areas that are vulnerable to holes. 
  • Make a matching set using the free Ester & Ebbe top or Rowan tee patterns, perhaps by cutting the T-shirt sleeves from the same fabric you used for the leggings


Would I make it again?

Yes, yes and thrice yes. I'm very pleased to have this in my arsenal for whenever some awesome printed jersey appears on my radar and the scamps have done some growing. Dolores will only wear leggings or skirts, or at a push, joggers (NOT woven trousers, jeans or even jeggings) so I'm super pleased to have this pattern on hand for the future. I'm also really happy that I can use it for making lighter-weight bottoms for Frankie for warm-but-not-hot weather: for garments that land in between thick joggers and summer shorts. 

This might also be a particularly useful pattern to have right now if your family is in lockdown. If, like mine, the kids you sew for refuse to stop growing despite the quarantine, and you've got some jersey in your stash, whipping up a couple of quick pairs of leggings might help to pad out their clothing options for a while. 


Tuesday, 14 January 2020

More Heyday Dungarees of Dreams


I don't know why I'm looking so moody in these pics. Clearly I've forgotten that I'm wearing the bestest dungarees! I made this pair a few months ago, but getting photos has been a challenge. But now that I have, let me flood your screen with pics of them.  


Fabric:

I saw a couple of projects on Instagram made from this rust coloured twill, and my 'want' alarm went off VERY loudly. I found that it was this Ventana cotton twill by Robert Kaufman, stocked by Sew Me Sunshine. I've been trying to slow my fabric buying fabric right down lately, but this was so perfect and ticked so many of my boxes that I decided I could justify getting some. It took a while because it was out of stock for ages, but when it arrived I was not disappointed. It's the nicest quality and the perfect shade of brick/orange/rust. 


Pattern:

Before the fabric arrived, I had planned to use it to make the Republique du Chiffon Danielle dungarees pattern, which I have in my stash. However, upon arrival I discovered that the fabric was a lighter weight IRL than I feel would be suitable for the Danielle pattern. So instead I reached for the Made by Jack's Mum Heyday dungarees pattern that I made previously in black linen twill and have worn to near-death.  


As with my lack version, I used the pattern's bib and back pocket pieces, but used my own self-drafted pocket shape for the front hip pockets. I added a cute little piece of woven ribbon from Textile Garden to create a little label/tab for an extra personalised detail. 


The only other difference between this pair and my black ones, was to make two fabric loops rather than buttonholes to thread the straps through. The loops make this pair look more like Lucy & Yak dungarees I realise, and in general my dungers have ended up very similar to theirs (see below). It's a resemblance I'm more than happy with!

Lucy & Yak Dungarees Organic 'Umi' Cotton Dungarees in Rust Orange
(image source: Lucy & Yak)

Thoughts:

These are the best, most comfy dungarees and I'm in love with them. Today I'm wearing them with this wool top underneath because it's pretty chilly out (and in my work place), but I can't wait for warmer days so I can comfortably wear them with lighter tops and different footwear. 


Friday, 4 October 2019

Free Pattern Friday: Kids' Speedy Pants


Welcome to my monthly 'Free Pattern Friday' feature, where I road test a free sewing pattern or tutorial: sometimes a children's one, sometimes a women's one. I publish these posts every first Friday of the month, timed to provide inspiration for those who plan to get their sew on over the weekend. I firmly believe that, if you pick your projects carefully, sewing doesn't have to be a crazy-expensive way to clothe yourself and your family. Thanks to all the amazing pattern designers who have offered up their hard work for us to enjoy for free.

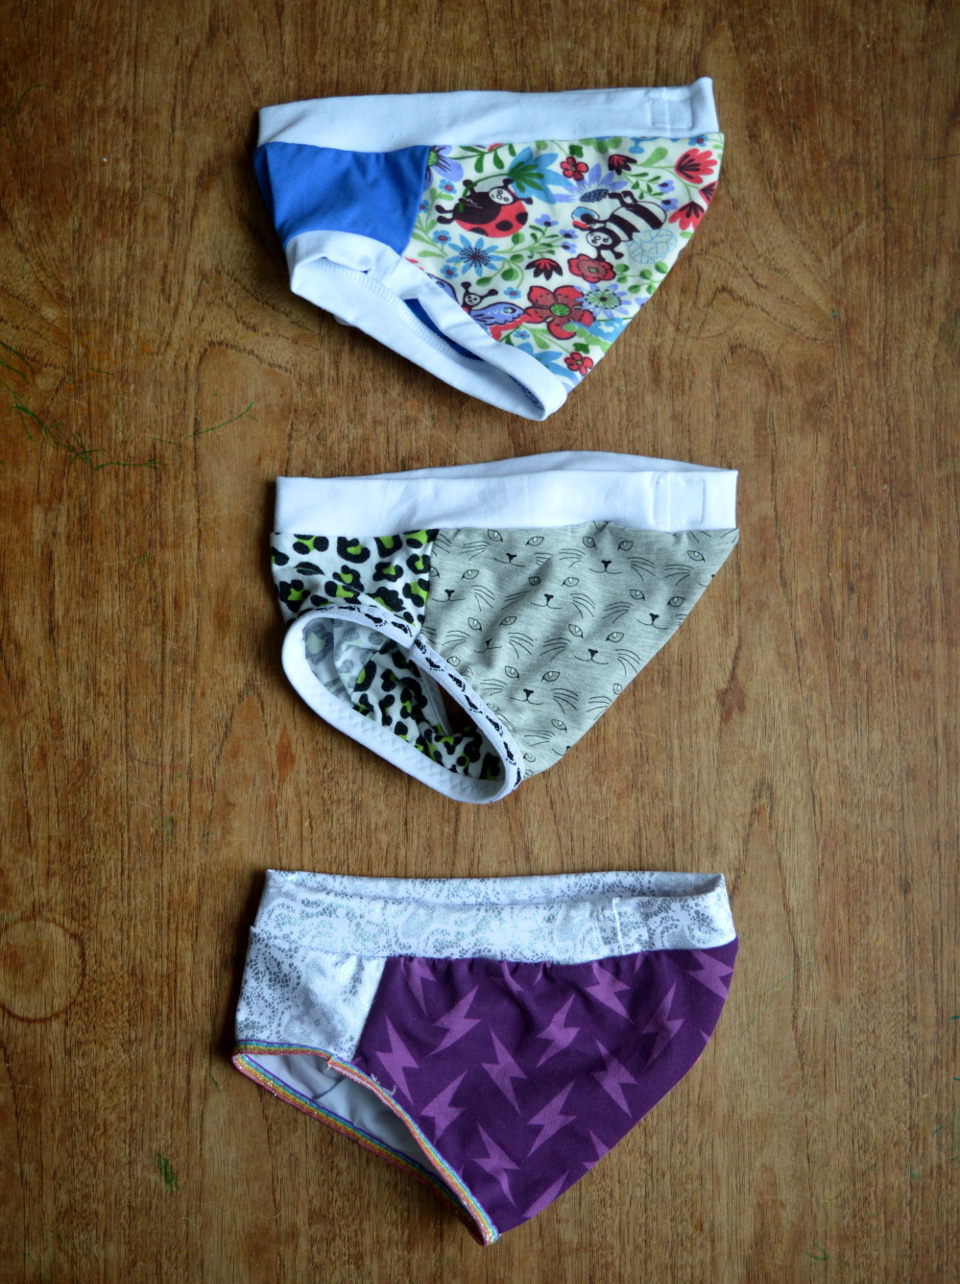
There are, no doubt, many people who believe that life is too short to sew their kids' underwear. Clearly, I am not one of them. My argument for doing so is threefold: 1) kids' pants are an excellent scrap buster for jersey scraps leftover from other projects, and even really small pieces can be used, 2) if you have the pattern prepped already, you can easily cut out and make a pair in half an hour, which is wonderful if you want come away from a short sewing session with a completed item, and 3) your investment of sewing time and effort will be well rewarded by the hundreds of wears the finished item will get. 

My little girl has grown out of the pants pattern I previously used for her, so I was thrilled to discover the Speedy Pants pattern by Made by Jack's Mum, which is free when you sign up for their monthly newsletter. With boxers AND briefs styles included, this may be the only pants pattern you will ever need for your kids. Thanks so much to Made by Jack's Mum for sharing their hard work for free. 

(image source: Made by Jack's Mum)

Pattern type:

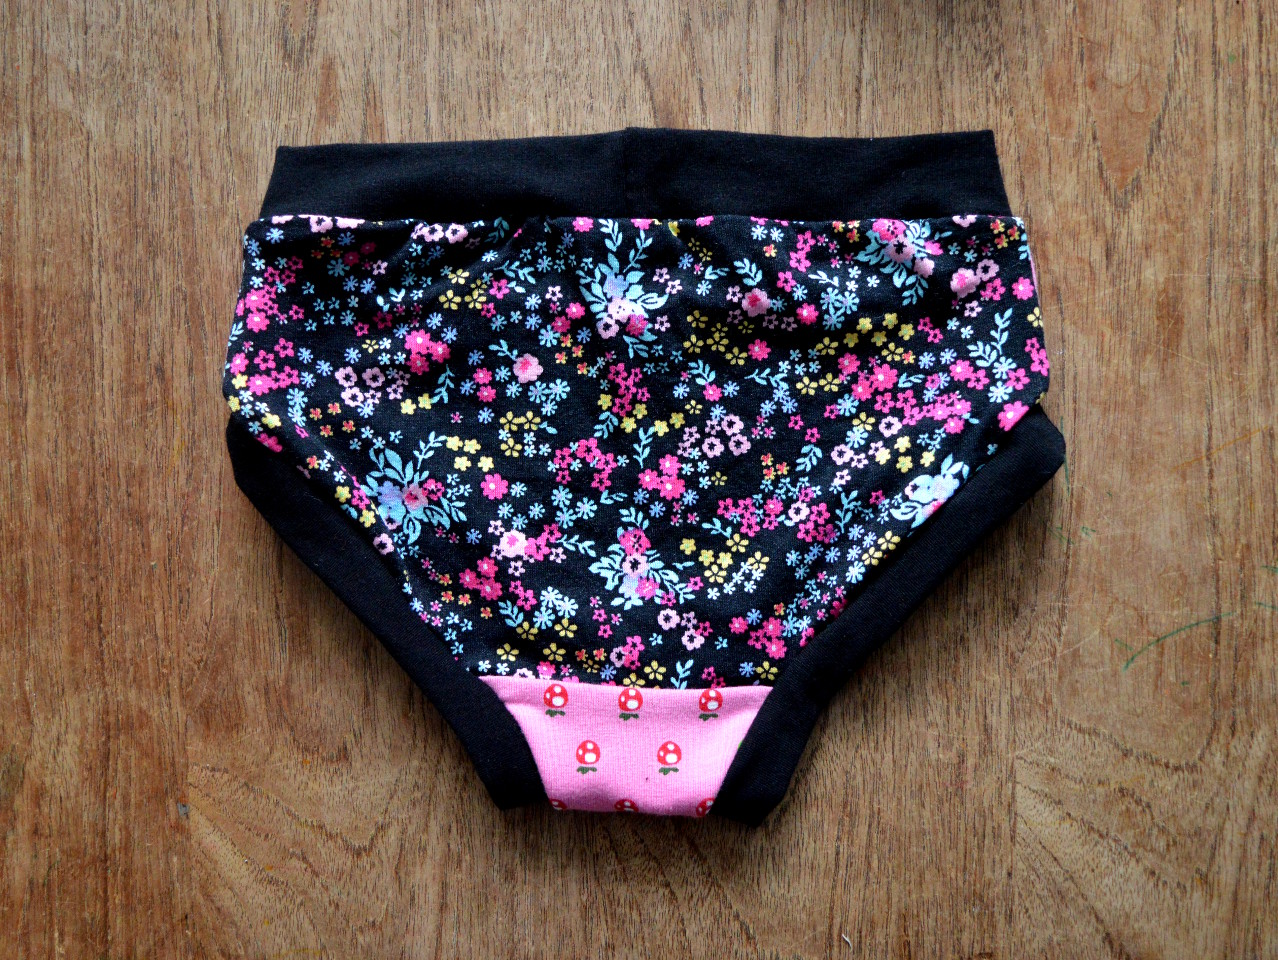
As previously stated, the Speedy Pants pattern download includes briefs and boxers styles. Both styles are finished with strips of fabric which form the waist and leg bands: no elastic required. Each pair could be made entirely on an overlocker, however instructions for using a regular sewing machine are also included. As you can tell, I only made up the briefs pattern, so that's what I'll be reviewing here today. The briefs pattern consists of a front piece, a back piece, a gusset, plus the dimensions to draft your waistband and leg band pieces. 


Sizing info:

Both styles are graded to a generous size range of 6-12 months to 12 years. The pattern file includes the layers function, which I always really appreciate, so you can select just the size you require which saves on printer ink. I tried making the size 2 and size 3 for Frankie (who will turn 3 tomorrow at time of writing!), and the 3 definitely fit him better. He's not potty trained yet, but we did have a day where he wore these during which I was able to assess the fit. Dolores (who turned 6 today!) fits the size 6 perfectly with room to grow. 


Fabric info:

The fabric suggestion for this pattern is 4-way stretch jersey. I'd go further and say that a decent elastane/Lycra/spandex content is essential for the bands so that they hold their shape over a number of wears, and generally advisable for the other pieces too for maximum comfort. 

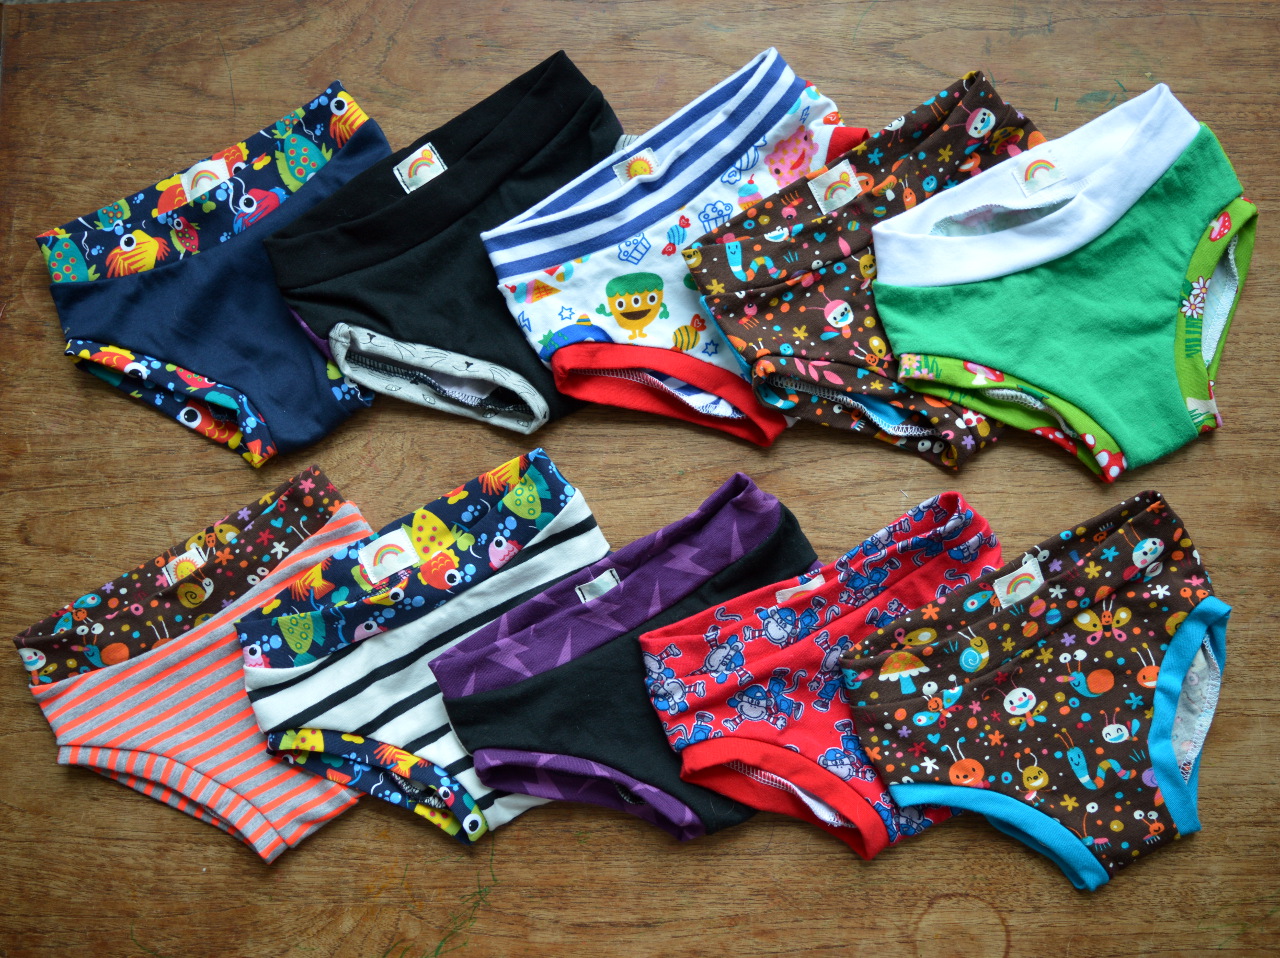
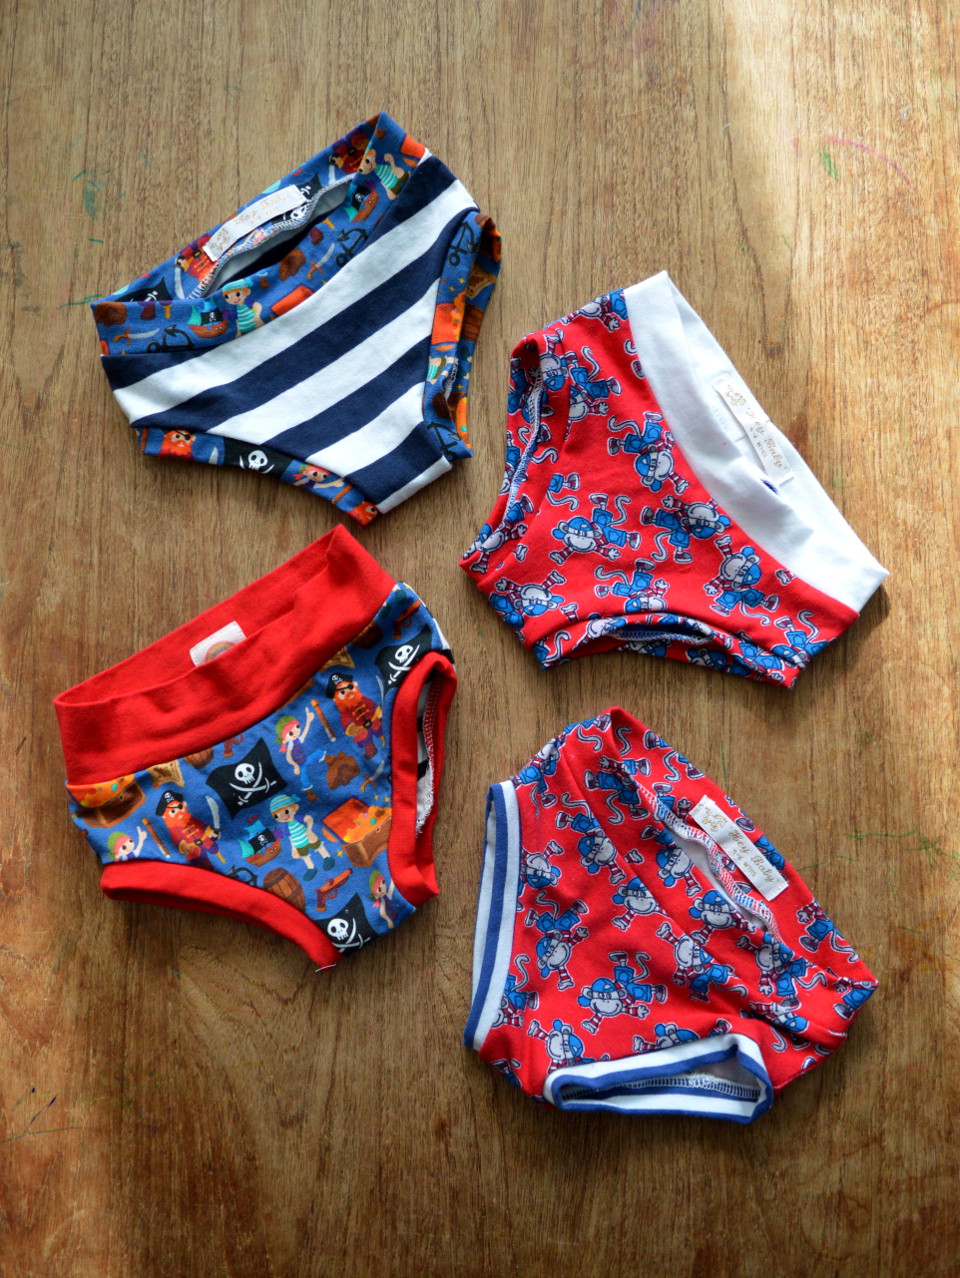
I really like it when pattern designers encourage people to use scraps to make their patterns from, and this is the perfect pattern to do that with. As you can see, I went to town busting my scraps! I've made many pairs of pants for my daughter previously from a very similar pattern to this, so I've been able to do plenty of experimenting and collecting of data to see how different jerseys behave (or don't) over time. By now I think I've got a fairly good idea of what's going to work well have have a long life. I have an embarrassingly large tub of jersey scraps, so I began by dividing it into three piles: 1) good quality jersey (mostly cotton/elastane blends) that I know will be perfect for these pants, the band pieces HAVE to be made from this category, 2) other jerseys that will be ok for the fronts, backs and gusset, especially if they're combined with fabrics from the first pile, and 3) all the jerseys that were too thin and drape-y, or with poor stretch and recovery that are NOT suitable for this project. I then had a lot of fun making crazy fabric combos. 


Findings:

As you can probably tell, I'm so happy to have found this pattern! The wide size range should see most kids through to when they start to wear adult sizes (Made by Jack's Mum also sells adult versions of both the boxer and briefs style patterns). So if you have a big enough jersey scraps bin, plus sufficient will and patience, you may never need to look elsewhere for kids' pants again. Clearly, making these pants is addictive, but I must admit to getting fed up by the end! Pinning tiny leg bands into tiny leg holes can definitely start to get old. Therefore I advise against making a whole year's worth of pants for two kids within a week. 

The pattern itself is well produced, and the instructions are illustrated with step-by-step photos and easy to follow. I did end up making a couple of tweaks to the fit, however. For both Frankie and Dolores, I ended up raising the waistline at the centre back fold by 1cm, blending the curve down to the original waistline by the side seam. And for Dolores, I found that the gusset area was too wide: there was just too much fabric there. To amend this, I narrowed the front and gusset pieces by 0.75cm-ish where it was needed, therefore narrowing it by 1.5cm-ish in total. I found for Frankie that this wasn't necessary. 

As you can see, for a few of Dolores's pairs, I tried using fold over elastic instead of fabric bands for the leg holes. However, only one of those pairs has found their way into regular rotation, the others she's declared too uncomfortable. I found the patience to replace the FOE with fabric bands on one of the pairs during #alteritaugust. The only other point I'd just to add is to include some kind of label or loop of ribbon so they can identify the back quickly. 


Customisation ideas:

I don't have much for you today with this pattern, however:
  • Try adding seams to the front piece so you can include panels of super-tiny, awesome fabrics (I tried that with the black pair pictured above so I could include a teensy sample of vegetable print jersey)
  • I'm wondering if these patterns could be used with swimwear Lycra to make swimming bottoms?
  • If you have some thin and soft enough (see 'Findings' above), replace the leg hole bands on the briefs version with fold over elastic or special undies elastic


Would I make it again?

YESSSSS. I have already printed out the size 4 and size 7 briefs pattern pieces and stuck them down on cardboard so I can start making undies for both my kids in their future sizes. I'm hoping that if I can keep on top of making a couple of pairs every few weeks, I'll make even more of a dent in my jersey scraps tub. 

I gave Frankie the choice of which style I would make him. He chose the briefs, probably because he recognised that style as being the most similar to what his big sister wears. However, I'm hoping he'll let me try the boxer style for him too some day so I can have fun experimenting with that pattern too. If I do, I will of course report back. 

Wednesday, 7 November 2018

Heyday Dungarees of my Dreams


This exact outfit is all I'm interested in wearing at the moment. It's my mumiform, and the rest of my wardrobe may as well go on holiday. You've seen my stripy Gable top many times before, so let me introduce you to the new element.

(image source: Beaton Linen)

So it went down like this... Frankie and I are regulars at a playgroup that is also attended by this cool mama called Seonid (pronounced Shona). She made me aware of the overalls by Beaton Linen (pictured above and below) via Instagram after seeing me rock my Burnside bibs, thinking I'd appreciate them. She wasn't wrong, and I couldn't stop thinking about them. 

(image source: Beaton Linen)

Pattern:

Shortly after discovering the Beaton Linen overalls, I received an email from the Made by Jack's Mum pattern company announcing the release of their new women's 'Heyday' dungarees pattern. They were even offering a 20% discount for the first week or so after it dropped. Despite the discount and their obvs similarity to my inspiration source, I hesitated for a couple of days. I feared that they'd make me look a bit too ceramics-evening-class-tutor. As I have discussed before, my style seems to be travelling towards Art Teacher chic, and I was concerned that this garment would seal that fate. But, ultimately, the pull of linen dungers was too strong and the purchase was made. 


The sizing range of this pattern is very generous, running from XXS to 5XL. The size chart put me as a Small which I wasn't entirely convinced about, so I added an additional 1cm to the side seams in case I wanted to adjust the fit (I wasn't making a toile). The seam allowance of this pattern is 1cm, which I enjoy sewing with, but wouldn't have left me enough wiggle room to take them out. I did end up giving myself slightly more room by letting them out at the side seams around the hip/bum area. 


Aside from adjusting the fit slightly for my booty, the only deviation I made from the pattern was to draft new front hip pockets. The pattern includes two pocket pattern pieces; one larger pocket for the bib, and four smaller pockets (two for the bum, two for the front hip). I wanted a slightly different look at the front, so I used the hip pocket piece I drafted for my black denim Cleo pinafore, but folded the bottom corner in to reflect the shape of the other pockets on the dungarees. Unlike with my Cleo, this time I remembered to apply some twill tape to the pocket opening so I can shove my hands in these ones as often as I like without fear that they'll stretch out. 


Fabric:

I fell in love with this linen twill from Fabric Godmother after sewing with and wearing it as my York pinafore. The weight, feel, movement and even how it fades slightly made it my number one choice this dungarees project, and I don't regret a thing.


Thoughts:

As I already said at the top of this post, I adore these dungarees. After the minor tweaking, I think the fit is bang on, and they are so comfortable that I don't even want to change out of them into some 'lounge wear' for relaxing in the evening, which I normally always do. I even think that I prefer them to the Beaton Linen ones, which look a bit too short and wide towards the bottom of the legs for my liking. Which is handy, because those Beaton ones are $270 a pop. I definitely plan to make another pair in a cotton/linen mix next spring.

Related Posts Plugin for WordPress, Blogger...