Showing posts with label guest post. Show all posts

Sunday, 28 March 2021

The Joy of Sewing for Children: Guest Post on Moonbow Fabrics

I recently wrote a guest blog post for online fabric shop, Moonbow Fabrics, all about why I love to sew kids' clothes. In the post, I discuss the joys of creating with jersey, and the advantages of handmade clothing. If you're on the look out for some fantastic fabric that will appeal to kids of all ages, then visit Moonbow Fabric's site. The donate one item of food to their local foodbank for every order they receive. My current favourite is their exclusive finger puppets print cotton/Lycra jersey. And if you'd like to hear more about my love of sewing kids' clothes, please read on...


I’ve been sewing most of my own clothes and blogging about it for about 13 years now. I had

my daughter seven years ago, and then a little boy a few years after that.

I LOVE sewing clothes for them, as well as for me, and although sewing processes are the

same, no matter the size of the garment, I find that the rewards are slightly different.


Sewing Satisfaction


Watching your kids running around and playing, completely care-free, whilst wearing clothes

that you’ve made, is a really wonderful feeling. I’m not exactly sure why it brings so much

satisfaction and joy, but it does.

The kids don’t even need to be your own. I’ve received just as much satisfaction from

making something for someone else’s child, as long as the garment was appreciated and

actually worn.


Making, Re-using, Recycling


These days, it’s very unlikely that those of us with kids who like to sew for them will make

all of our children’s clothes. My children have always been dressed in a combination of hand-

me-downs, charity shop finds and mum-made garments.

There are times when you fall into the slipstream of another family with an older child, and

the hand-me-down clothes flow steadily in your child’s direction.


However, when that flow slows down or dries up, and gaps in your child’s wardrobe appear,

adding some handmade items can be really pleasing. 


Advantages of Knit Fabrics


Most of the garments I make for my children are from knit fabrics. Comfort and lack of

restriction are my priorities when it comes to their clothing.

Luckily, the kids’ garments that receive the most use/abuse, and are therefore harder to come

by second-hand (I’m looking at you T-shirts, leggings, joggers) take relatively little time and

energy to sew.

I love that there are so many fantastic, fun prints available on kid-friendly base cloths such as

Jersey, French Terry and Sweatshirting.

With a handful of tried-and-tested basic patterns in your arsenal, you can whip up a fabulous-

looking new garment in the space of a nap time or evening. 

And if, like me, your sewing budget is limited and/or you like to consider the environmental

impact of buying new fabric, it’s good to remember that a little can go a long way.

Combining fun printed fabrics with plain/solid fabric within the same project can give a

really cool, unique finished item.

I also often harvest fabric from unwanted adult garments and use up my leftover jersey from

other sewing projects when making kid’s clothes too.


Home-sewn vs Shop Bought


Unlike for previous generations, affordable, mass-produced, children’s clothes are easy to

come by these days. But I invariably find that my handmade contributions, made with care

from good quality fabric, tend to look better for longer.

The fabrics I use don’t rapidly become brittle and scratchy, or start to pill as quickly. Neither

do the colours fade after just a couple of washes. My home-sewn leg and sleeve seams don’t

twist as readily as their factory-made counterparts tend to either.   


Sizing and Fit


And whilst we’re on the topic of comparing shop-bought to handmade, I can’t avoid

mentioning sizing.

My experiences of mass-manufactured kids’ clothes sizing range from confusing to

maddening. What is written on the label frequently bears little resemblance to the actual size

the garment will fit.

Many garment manufacturers seem set on labelling all their products at least one size smaller

than they actually are, and who has the strength or patience to get their kid to try something

on before buying it?!

When we make clothes for our kids, we can take their measurements in the comfort of our

own home (when they are distracted by Peppa Pig perhaps).

By comparing their measurements to the pattern size charts, we have a much clearer idea of

how that garment is going to fit. 


Custom Fitting


Plus once we have their measurements, we can easily combine sizes as necessary for a

custom fit, just as so many adult-garment sewers have to.

For those dressing children with a skinnier or stockier frame than the ‘average’, this can be a

game changer.

When my daughter was a toddler, she was very long and thin. I was able to combine different

sizes for the width and length, thus making her leggings and joggers that both fit properly at

the waist and reached her ankles AT THE SAME TIME. 


Developing Personal Style


My final and favourite reason for sewing my children’s clothing is so I can make things that

align with my children’s personalities and preferences.

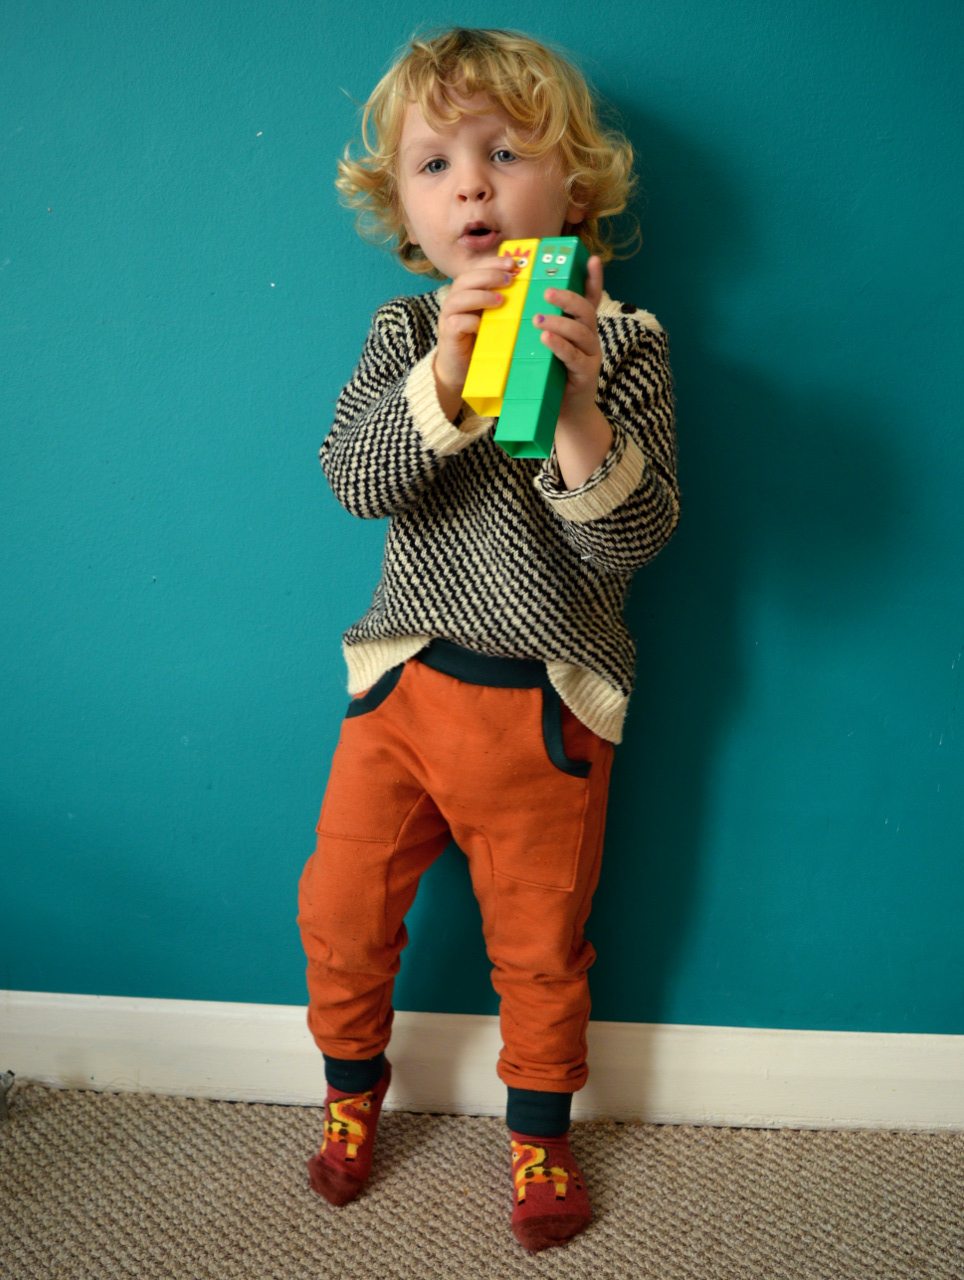
For my four-year-old son, that currently means just keeping the fabric within the orange-and-

red spectrum.

However, my seven-year-old daughter already has VERY clear ideas on personal style. These

days, garment projects for her are more of a collaborative effort.

While I must admit that relinquishing complete control of the decisions was hard at first, I am

the first to acknowledge the benefits of bringing kids on-board.

For one, garments are less likely to be rejected when kids get a say in what we make for

them. And secondly, by allowing them choice in the way their clothes turn out, we are

helping them to see themselves as designers, not merely consumers.

I hope that by the time my children become adults, they will be finding fun, escapism, joy

and value in the process of making, whatever form that takes… although sewing is best!

Thursday, 24 March 2016

Five Genuinely Useful New Baby Makes #3: Drawstring Bag

(image source: The Village Haberdashery)

Hi everyone! I’m a little late in my monthly instalment of my 'Five Genuinely Useful New Baby Makes' series of posts (originally published on the Village Haberdashery's beautiful blog 'The Daily Stitch').  But fear not, I'm back to state my case for another genuinely useful new-baby sewing project. 

This one, at first glance, may not scream ‘new baby’ to you, but hear me out. When my daughter was almost brand new, a friend (blogger Handmade Jane, to be precise) gave us a drawstring bag similar to this that she had made. We have used it, in one way or another, almost every day since she gave it to us. Almost every day for two years! That’s a lot of days. Nothing we were given or bought for Dolores has been used so consistently, which is why I suggest you make one the next time someone you know reproduces.


‘Well, how is a drawstring bag useful for a baby then?’ you may be asking. Well, from my experience, the use of ours has changed a bit, as Dolores has got older. This next sentence requires a graphic description warning: when babies are tiny, they do lots of wees and runny poos, which oftentimes leak onto their clothes. A parent attempting to leave the house with their baby for more than an hour without at least one entire outfit change is, quite frankly, a fool. We used to keep our drawstring bag loaded with a change of clothing at all times. It was useful to keep the change of clothing in a separate bag, as the changing kit would sometimes get transferred between the main changing bag that lived on the pushchair and her dad’s backpack for when more outward bound type travels were being attempted.


Now that Dolores is a toddler, the drawstring bag is still useful for changes of clothes that are, thankfully, these days usually required due to mud or food-based mess. It is also really useful for chucking in just a nappy, pack of wipes, a drink and snack for mini trips out.


Convinced of their worth as a new-baby sewing project?! Good! Well, I guess the next question is how to make one. For this one, I decided on what the final dimensions should be and kind of made it up as I went along. I was pretty pleased with my efforts because all the seam allowances are enclosed which gives a nice neat finish. But there are heaps of tutorials and how-to’s out there each with their own variation. This tutorial by Quilting Bees looks like a good contender, IMO, but a simple Google search for ‘lined drawstring bag tutorial’ will bring up heaps of other options.


Perhaps even more so than the baby trousers or baby shoes, with this project you can really go to town with your fabric choices. We used some 100% organic Cloud9 cotton called Whimsical Wood  from the Sweet Autumn collection, which was complimented by some solid lilac cotton for the lining. And you needn’t hold back with the trims either, as the simple addition of a row of ribbon, ricrac or braid like this neon pom pom trim used here, are easy to apply and can really make your project pop. I’ve seen some fantastic garments and craft projects via Pinterest recently that combine delicate ditsy floral fabrics with a POW! of neon, which was the inspiration behind this bag. What fabric and trims would you pick?


Saturday, 6 February 2016

Five Genuinely Useful New Baby Makes #2: Elastic-back Shoes


Hello! If you’ll indulge me, it’s time to have a look at my second monthly suggestion for something to make for a new baby that will actually get used. Massive thanks again to the Village Haberdashery for allowing me to repost this that was originally posted on The Daily Stitch.


Let’s face it: there are few things cuter on this earth than a pair of baby shoes. No doubt, the new parents will be given a clutch of baby shoes (what is the collective noun for shoes, anyway?), but if you heed my advice, yours make will stand out from the rest. How so? Because the ones you make actually have a chance in hell of staying on the little feet they were made for!


The thing I never realized about babies until I had one is that, when they are awake, babies are NEVER still. Those little arms and legs are always moving. In fact, they even move a fair bit whilst the baby is asleep as well. Any slip-on type shoes will slip right off again, and after a couple of attempts to put them on their baby, the parents will give up and consign those shoes back to the drawer for good. To make sure your pair of shoes stays on (and therefore gets used) my advice is to choose a style that is either elasticated or tied on around the ankle. Hopefully then the baby will wear those shoes for longer than it takes to get a photo!


There are literally hundreds of sewing patterns for baby shoes/slippes/booties/footies available, but the one I used here is a free one via www.poopockets.com (!) that can be found here. It is graded for two sizes, 0-3 months and 3-6 months. It consists of three pattern pieces and you’ll need two types of fabric (outer and lining) plus a small length of elastic. I changed the construction method slightly by choosing to line the back heel section too, plus I used 3/8” wide elastic rather than 1/8” wide as the pattern suggests.


Most of the fun here lies in choosing awesome fabric to make them in (as with all sewing projects, let’s face it!). With the outer fabric, you really can go to town. They can be as cute, kitsch, contemporary, classic or bizarre as you want! We went ‘subtle contemporary’ by picking some gorgeous 100% organic Cloud9 First Light flannel/brushed cotton in turquoise by Eloise Renouf. You only need about 30cm of fabric, so why not pick something really special?


As with the outer fabric, your lining fabric options are pretty broad but make sure that whatever you choose is soft. For this pair, I used a scrap of white felt from my stash, but toweling/terry cloth, sweatshirting, or velour would be great too.


We let the fabric do the talking on this pair, but there’s nothing stopping you from customising your baby shoes with ribbon, braid, ricrac, (very securely stitched-on) buttons, or whatever else your heart desires!

Monday, 11 January 2016

Five Genuinely Useful New Baby Makes #1: Trousers/Nappy Covers


I've been writing a little series of posts for the Village Haberdashery's blog, The Daily Stitch, which they have kindly allowed me to also share here on my own blog. I'll be dropping them once a month, please read on for part 1...

If you are craftily inclined, the birth of a new baby can often inspire the desire to get making. Unless they are crazy, the parents will certainly appreciate receiving a handmade gift over another pack of shop-bought onesies, but embarking on the right baby-sewing project will ensure that your hard work actually gets used! I’ve compiled this mini-series of blog posts that will give you some ideas for items you can make for a new baby that won’t languish at the bottom of a drawer. ‘Well, what qualifies you, Zoe, to write such a ground-breaking series of posts?’ you are no doubt asking. Well, my daughter is nearly two years old now, so exactly which gifts we found useful and which never got used is still pretty fresh in my memory, but the fog of new parenthood and sleep deprivation has cleared sufficiently for me to string two sentences together.

So first up, may I recommend making some baby trousers or nappy covers? To first-time parents, it is genuinely shocking to discover that their tiny new person may require more outfit changes in one day than Britney Spears did during her last tour. Whether you choose to make trousers that cover the legs, or nappy covers that (as the name suggests) are pants designed to cover the nappy, you should be guided by what season the baby will be wearing them in. The season can also give you direction on what type of fabric to use for the project. It is frustrating to be given something lovely for your beautiful baba to wear but it doesn’t get used because the weather is too warm or cold for it to be appropriate. I know it is obvious to say, but babies grow super quick so it’s very likely that if you put a garment aside for suitable weather, it won’t fit them anymore. Sad face.


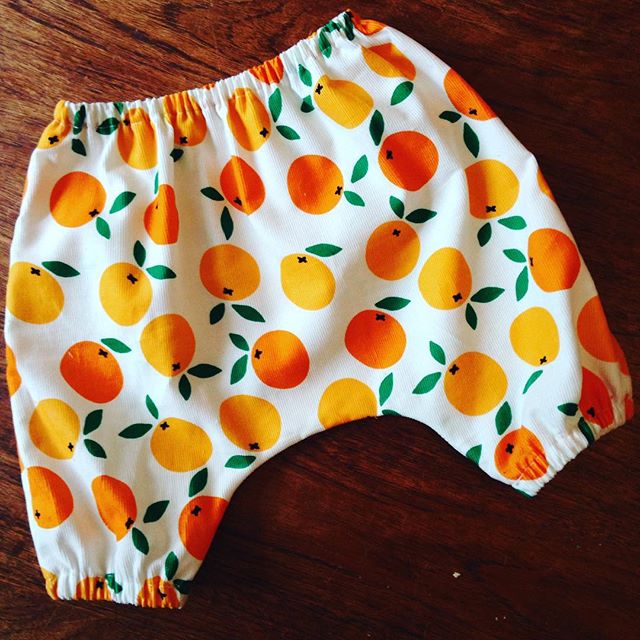
Now that we are firmly into autumn, I made these baby trousers in a delightfully soft needle cord in a fun print. After a couple of laps of the baby section in any department store, the parents will probably be very much over looking at pastel pink or pastel blue stuff, so this project really is your opportunity to pick something fun. The repetition of nappy and outfit changes will be brightened considerably if they are trying to clad that squirming little bottom in something that makes them smile. This needle cord also has the benefit of being made from 100% organic cotton by Cloud9 Fabrics, it’s called ‘Oh My Darlin’Clementine’ (https://www.thevillagehaberdashery.co.uk/small-world-oh-my-darlin-clementine) from the Small World range designed by Rae Hoekstra. The Small World range is comprised of fantastic, colourful, gender-neutral, perfect for this application. If you’d prefer a subtler look, this project would also work really well in these deliciously soft double gauze or striped or solid interlock knits.


The pattern I used was the Modern Baby Set by Green Bee Patterns which includes patterns for both trousers and nappy covers for babies aged 0-3 months. One of the awesome things about this pattern is that the front and back pieces are cut from the same pattern piece. Explain that to the new parents, then it’ll save them a lot of bleary-eyed attempts to figure out which way round the trousers or nappy cover goes during nappy changes. If you use a different trouser or nappy cover pattern that has front and back pieces that are different, then why not stitch a loop of ribbon into the back waistband so the back can be easily identified? Happy new-baby sewing, friends.

Friday, 30 October 2015

Guest Post: Jen's Top 5 Sources for Secondhand Fabric

(image source: Make Do and Mendable)

Hopefully you've already 'met' Jen from Make Do and Mend-able, who is preaching to the choir round these parts with her investigations into living ethically and sustainably with an emphasis on handmade. If you haven't then I thoroughly recommend you visit to her lovely blog, and whilst you're over there, check out her fabulous Ted X talk about the year she and her family pledged to buy nothing new. Everything she is doing is so positive and relevant, and her manifesto makes me want to scream 'YES TO ALL THIS!'. If Dolores wasn't in bed asleep right now, I'd probably scream it out loud for real. Anyways...

Jen posted her Top 5 Sources for Secondhand Fabric back in May, and it was so good to read. I'd been brewing a similar blog post for a while in response to the many questions that I've received in the topic both in blog comments and at the classes I teach, but had failed to get as far as clicking the 'publish' button to date. It's something that I think is incredibly important for limiting the impact of our hobby on the environment, and thankfully Jen has allowed me to repost her original post in the hope that it may inspire more sewers to get hunting.... Thanks Jen! 

Sewing your own might seem the 'greener' option, but fabric production is a pretty resource and labour intensive business. Growing cotton uses vast amounts of water and pesticides, and has a heavy environmental impact. An easy way to still sew your own, but lessen your 'sewing footprint' is to source your fabric secondhand. Here's my Top 5 places to find secondhand fabric:

(image source: The Guardian via this post)

1. Charity Shops 

If you get lucky, charity shops will sometimes have donations of 'acutal' fabric from someone who is having a clear out. Failing that, keep your eyes peeled for old duvets and sheets-there are often fabulous retro prints, and you get TONS of fabric for your money. Also check out the clothes rails for skirts and shirts in larger sizes, as the fabric from these can be salvaged to be made into something else.


2. Vintage Shops and fairs 

No excuses are needed for a rummage around a vintage shop, but while you are, be sure to keep a beady eye out for old curtains, and again, sheets and duvets, or even tablecloths. Sometimes there will be stashes of French linens, and tea towels, which are great for home furnishings.

3. Facebook 

Have a look on the Make Do and Mend-able Pre-loved Craft Stuff group. You can post a wanted if you are looking for something in particular eg. stretch fabric, or red cord etc. There are also lots of other groups like Fabric Addicts Destash and the Vintage Fabric Addict Support Group.


4. Instagram 

Some crafters will periodically have a 'de-stash' and list their unwanted fabric on Instagram. Search using #fabricdestash or #fabricforsale. It's a bit hit and miss, but you might unearth a gem! Also follow sewers whose blogs you admire, and you never know when they might choose to destash...!

(image source: Etsy)

5. E-bay, Pre-loved, Etsy 

These are all good places to find fabric, if you are prepared to do a bit of searching. Keep your search terms as specific as you can. If you just search "fabric" you will get thousands of suggestions! If you search for "red stretch knit fabric", or "yellow polka dot cotton" you are more likely to find what you are looking for more quickly.

One word of caution, there are lots of new fabrics for sale on E-bay now, and lots of people have set up E-bay shops to sell new fabric. If you just want to avoid the new fabrics coming up in your search, be sure to check the 'Used' box under Condition, in the search terms on the left hand side.

Thank you so much, Jen! That was great to read. I have a few more points to add on this topic, so I'll revisit it again soon. So, what about you? Is sewing with secondhand fabric something you think about? Have you scored any fab secondhand fabric recently? Do you have any tips on how/where to find it?

Thursday, 23 April 2015

Guest Post by Tasha: Me-Made-May and Being My Best Self


I LOVE reading all the Me-Made-May pledges that come rolling into my inbox at this time of year. Finding out how people plan to make their lives a bit more difficult for themselves is helping alleviate my panic about my own pledge! Repeat Me-Made-Mayer Tasha from Stale Bread into French Toast (pictured above), who spends half her life (rather excitingly, IMO) travelling round the US, kindly wrote this lovely guest post about her thought process leading up to the challenge....

'This year, I decided to step up my pledge for Me-Made-May, endeavoring to wear only garments I’ve made, altered, or repaired, for the month (excepting only my raincoat). This undertaking turned out to have some unexpected consequences right away, and got me thinking about how challenges like MMM push me to advance my wardrobe and my style, and to present my best self to the world. 


As May drew closer and I started to consider my summer clothes and what I could and couldn’t wear under these new rules, a few unexpected me-made wardrobe gaps came to my attention, including the fact that I lacked any kind of me-made top I’d want to sleep in. At first, I admit I was a little annoyed. I didn’t really feel like reorganizing my list of things to sew and putting a new pajama top next in line, and sewing one didn’t seem that exciting or necessary. After all, the old RTW tank top I was sleeping in was totally fine, even if was kind of ratty, faded, pretty much all recovery worn out of the fabric, and starting to develop a little hole or two … actually, once I considered, it was nothing like what I’d really like to wear or the image of myself I’d like the world (or even my husband) to see. In fact, lately I’d started throwing on something else over it if anyone other than Bryan was likely to see me wearing it.

So, I would make a new sleep top for sure, but what should it be like? I had a little time before we would be home and I could sew, so I let ideas roll around in my head as they appeared, and considered options on and off for several days as I was falling asleep. What would my ideal summer sleep top be like? I would have limited time to make it once we got home, so I needed to match a fabric and pattern from my mental inventory of what was already in my stash with my ideas of what the top should be like. 


After a while I settled on using one of my all-time favorite cami/tank patterns (copied from a RTW top), with some slightly slubby organic cotton knit I got at Bolt Fabrics in Portland a couple of years ago, and had made one top from already. This would be my first time using this pattern with a knit, but I figured I could leave out any closure in the back and worry less about seam finishes, take it in a little if necessary, and it would be extra comfy for sleep. The cups of this design with their little pleats, and the scalloped edges (which the original top had, so that option usually occurs to me when I think about this pattern), combined with the fabric, would give me the look I wanted: feminine and a little romantic, while still fit for public viewing. We’re usually on the road for part of May, and lucky enough to have friends and family to stay with, so pajamas which I don’t mind wearing into someone else’s kitchen to make tea in the morning are a definite plus. 

The actual experience of making this top turned out to be better than I first thought too. Of course there’s the tactile experience of sewing anything, which I love. But this top also gave me a chance to try out a couple of experiments with one of my favorite patterns, and the wheels in my head started turning with ideas about design, shaping, fit and fabric. (In case you’re curious, I ended up pinching out about ½” at the top underarm seam on each side, and leaving the rest as it was). A single layer of knit fabric made for easy finishing with just a row of slightly scalloped decorative stitching, and the pleats kept it from being too revealing in front. 


So now I have a lovely new sleep top, and a new respect for how challenges like Me-Made-May (and wearing a handmade wardrobe in general) give me a helpful push in the direction I’d really like to go in anyway. The biggest difference between the new top and the old one is that I really thought about this one at every stage. Taking the time to consider exactly what I want, rather than just picking up what’s in front of me, and to ponder and develop my individual style, definitely takes more effort. But that effort is more than paid back in the results. By using my brain to come up with a concept for a garment, figure out what materials to use, how to sew them, and carry those ideas through into the real world, I get personal growth and satisfaction, a little expansion of my skills and abilities—not to mention a garment I’m proud to wear into the world as a representation of who I am and what I’d like to say. So far I’m pretty pleased with the results of my challenge to myself this year, and looking forward to what else I’ll find out this May!'

Friday, 1 November 2013

Refashion Friday: Interview with Eddie from Refashion Co-op

(all images sourced from Eddie's Room except where stated)

After the awesome refashionistas I've interviewed so far, you might have been wondering where I was going to go next to find more thought-provoking and inspiring interviewing. Well, I'm very pleased to announce that today's Refashion Friday interview features a heavy-hitter on the refashioning scene: Eddie from Eddie's Room blog and the creator of the influential Refashion Co-op.

Z: What appeals to you about refashioning and can you remember how you begun?

E: Looking back to my very first refashion I can see that I was inspired by Oxfam’s DIY Fashion shops. At least that’s what I said back then, but when I look at my first refashion I seem to remember something else. My first two refashions were of linen trousers which had become worn but I still loved them dearly and the top part with the pockets and zip still fit nicely. I just wasn’t ready to part with them and refashioning them into skirts, thus removing the worn part, brought them back to life.


Z: You are the creator of the popular Refashion Co-op community blog. What inspired you to set it up? What were your aims in doing so?

E: At the time I began refashioning the community blog Wardrobe Refashion was the place to be. I got on there and started blogging, and I loved the community it gave. Then after a month the owner of the blog announced that she was closing the blog and keeping it as an archive. She mentioned that she had for a while been looking for people to help out and that the pressure of running the blog on her own had become too much. Together with a couple of other refashion bloggers I started discussions about setting up a new blog. At that point I was also getting enough of running the Historic Crafts blog on my own. So I had already decided that there was no way I wanted to start up a new refashion blog on my own. Actually I wanted to have a setup that was completely independent from myself and any other editor. That’s when I came up with the idea of having a group of equal editors, none of who had more say than the others. The blog would run on a multi-contributor blog where none of the editors would be hosting it and where none of us could pull the plug either. So in one sentence I guess you could say that the aim was to create a refashioning community blog that wasn’t dependent on one person.  

Z: How has it developed during the two and a half years of its life? How do you feel about it now? Have there been any surprises?

E: I wouldn’t say surprises but more confirmation of that the idea of having a group of editors is a good one. I took a whole year off on maternity leave and then I came back to my editors duties last summer. It worked. The blog kept going even though I wasn’t around. Out of the original 7 editors only a few of us are still around. New editors have joined, and different editors have been primus motor for a period. Because of the structure it also gives different editors the opportunity to take a more leading role when they have the time and when they feel a bit burned out or other things in their life gets in the way then they can step back and just do the minimum of editing or quit altogether. The refashion Co-op survives.

Z: What role does refashioning play in your life?

E: I have never been into shopping. However, since I was a teenager I always loved visiting charity shops. Over the years I discovered refashioning and it gave me the opportunity to rework old clothes from my own wardrobe also and create unique clothing items that suited me. I think it’s the joy of creating something unique that drives my refashions - also when it comes to homewear.


Z: You've made some fabulous refashions for both yourself and your family. How much of what you/they 
wear has been refashioned or made by you?

E: Well thank you :-) The truth is, surprisingly little, really! At least when it comes to my daughter. I made a funny discovery recently when washing her knitwear. Out of 15 or so items only 1 was actually knit by me. Despite the fact that I knit, a lot, and even design my own knitting patterns, it turned out that many of her sweaters and cardigans were either gifts from my amazing knitting friends, Granny knits from her lovely Grandmothers or items I had bought in charity shops. Most of her clothes are sewn by my fabulous sister. I did prep a load of refashioned items for harem pants for her - but in the end it was my mother and sister who sewed 
them together and brought them to Munich, while we lived there.

I guess when it comes to myself around ⅓ of what I wear is pre-used, ⅓ is refashioned and ⅓ is new and preferably organic cotton.

(my favourite of Eddie's refashions: old adult's T-shirts into children's harem pants)

Z: Where do you find your inspiration for refashioning?

E: Well on Refashion Co-op of course :-) and Pinterest. I have set up group boards for sharing refashions on Pinterest recently and am hoping more and more people will join. Sometimes Pinterest can be such a crazy place to find anything. That’s why I’ve decided to create the subsection groups from dresses, etc. And because a few people like myself also rework other items for the home or garden I created a Recycle Co-op as a Pinterest group board, just for that.

But coming back to the Refashion Co-op, one of the things that has been bothering me lately is that it is so difficult to find things on the Refashion Co-op too. Say I want to find great ideas for refashioning dresses - it’s near impossible at the moment and the search function is not great either. So I set out to change this and I am working on it - however slowly. I do this through the edited Pinterest boards such as this one for dresses. There is still a lot of work to be done on dresses alone as I have approx 1500 posts potentially about dresses to go through yet. So the more people engage with and use these boards the more motivated I become to get this work done!

Finally, I also get a lot of inspiration from more established refashionistas such as yourself, Zoe, whose style I absolutely adore.

Z: What would you say is the Danish attitude towards 'DIY' culture and practices? Does your homeland have a history of doing such things?

E: My feeling is that historically we have a similar history to the UK when it comes to DIY and Make Do and Mend but perhaps without the posters and public campaign. I think that many Danes come to DIY naturally and generally speaking Danes are a very creative bunch with a great tradition for DIY. But it’s not something we talk so much about yet and I think that many Danes are not aware that there is a world wide DIY revolution (so to speak) going on through the internet.


Z: What would you say are your three favourite refashions you've completed?

E: Number one is without doubt the men’s shirt to women’s blouse I made last autumn. I have just begun to work on something along the same lines again. My husband used to wear shirts a lot so there is plenty of material to get cracking with, even though I used most of the shirts for a pair of curtains (which if you are interested - I made a tutorial for). This is not technically a refashion in Refashion Co-op terms as I can’t wear them (unless I do a Scarlet O’Hara of course), so I won’t count it as one of my 3. Then there are the harem pants I made for my daughter out of my mother’s old t-shirts from Swaziland. I love the motifs on the t-shirts but we finally came to the realisation that no-one was ever going to wear these t-shirts again. 


Finally, I want to talk about one of my early refashions which is a knitting project. A couple of years ago I was really into thrifting knitted sweaters, unravelling them and reknitting them. For me this is also refashioning and a way of putting my knitting skills to good use. My first ever knitted shawl project was one of these. I still have some of this recycled yarn left which I am using to knit a pair of Rosie’s Firestarter Socks that have come out with a wonderful young adult book by Heather Ordover called Grounded. I am very excited about this knitted sock refashion as well as the book.

Z: Can you share with us three of your favourite refashions by other people?

E: This is why, even though it is hard work and so many posts to go through, I love looking through the Refashion Co-op posts and sorting them for the dress Pinterest board. I found so many amazing dress refashions. Ones I had forgotten about, ones I had never seen before, old ideas and totally new and wacky ideas. I have long been thinking about making a dress out of a pair of trousers and then I spotted that Dairy of a Mad Mama had done just that. It’s a crazy idea but it works.


I love lace and when I saw Jacqui from Birds of a Thread’s dress with lace refashion I was blown away. It’s an easy refashion but I sure can’t wait to try it.

Finally, you probably realised that I love men’s shirts refashions and dindin does did this fab little black skirt out of a men’s shirt. dindin does is also the same person who made the fun social media icons I use on my own blog.

Z: What advice would you give to anyone wanting to try refashioning but aren’t sure where to start?

E: Come visit us on Refashion Co-op - both the blog and the Pinterest boards and have a look around for some inspiration and then just jump in. Try stuff out - it may work, it may not. Try again :-) When you make something you like, share it with us. Share it on our Facebook page, join one of our groups on Pinterest and if you feel up to the challenge of posting a refashion a month, do sign up as a contributor on Refashion Co-op. We would so love to meet you and see your fabulous style.

Thanks so much Eddie for both taking the time to participate in this interview AND for creating awesome resources for inspiring garment refashioning! Good luck with organising those Pinterest boards...

Related Posts Plugin for WordPress, Blogger...