Showing posts with label dribble bib. Show all posts

Sunday, 14 May 2017

The Great Dribble Bib Swap!!! Are You In?


So, right now many of us are currently knee-deep in our Me-Made-May challenges. If you are, I hope you're having a fun and illuminating time. I'm not wishing the month away, but I must admit that each year, when May comes to an end and the challenge is over, I always feel some loss, mostly for the connections and community that are created during May. Well, this year I've decided to try something new-to-me, something that also might fill that Me-Made void when June rolls around: I'm hosting a sewing swap!

This swap is aimed at new or expecting parents, or the friends, siblings, colleagues etc. of new or expecting parents, who are up for sewing and then posting a baby's dribble bib, and to receive one made by someone else in return.

Why dribble bibs? Well, it seems like there are a lot of sewing bloggers and Instagramers around the world who have either recently had a baby (mine is seven months old now but I view anything up to a year as 'recent'!), or have one on the way. I thought this might be a nice way to connect with each other, reaching out in sleepless solidarity by sending each other a low-energy little project. Obviously, new parents or about-to-be-new parents don't have heaps of time to sew, but finding a scrap of time to do so can be really beneficial to mental health (I've found), so this might be a great motivation to find that spec of time! But this sewing swap really is open to anyone, not just parents, who has a baby in their life, or is about to.

If you would like to take part, then please email me (sozoblog at g mail dot com) with your name, address (this is a global swap) and whether you require a bib for a boy, girl or unisex (if your expecting and don't know the gender) by 30th May. I'll then email you the details of who you'll be making a bib for by 1st June. You will have the entire month to create a dribble bib (as opposed to a bib for protecting clothes when eating) and pop it in the post by the end of the month. I'll use a random number generator to assign who will send a bib to whom, so it'll be nice if you include your name when you send the bib so the recipient will know who made it.

Aside from being assigned a gender/gender-neutral, the style or design is totally up to you, but please make it big enough to fit a baby up to year old or thereabouts. If you are stuck for inspiration, then I've collated some ideas on this Pinterest board, which also includes links to some free bib patterns and tutorials (and you can find my dribble bib tutorial here).

Frankie has recently pushed out all four front teeth AT THE SAME TIME, so it's dribble aplenty round these parts. I really hope that some lovely sewers/sewists take me up on this so we can send each other some awesome dribble catchers! Oh, and I'm totally new to hosting a swap like this, so if there's something you think I've missed then please let me know.

Tuesday, 7 June 2016

Five Genuinely Useful New Baby Makes #4: Dribble Bibs


Now that the fun of Me-Made-May is over for another year, it's high time I got back to my mini series of blog posts offering ideas for those wishing to make some cute gifts for a new baba. This post first appeared on the Village Haberdashery blog 'The Daily Stitch'. Thank you to them for allowing me to repost it here. 

My fourth project suggestion is dribble bibs. These natty neck accessories are designed to catch some of the crazy-amount of dribble and small possets that will come from a baby’s mouth. These are not the same as the kind of bibs that babies wear to catch the mess when they start to eat solid foods at around six months of age. Dribble bibs are needed much earlier in the baby’s sartorial life and play a major role in cutting down the number of outfit changes the baby will require throughout the day. 

Why should you make dribble bibs? Because it may feel to the parent that, even if they owned all the bibs in the world, they still might not have enough. My daughter could get through eight a day when at her dribbliest, and in fact still wears one most days now she’s 2 years old. I’m going to show you how to make a cute neckerchief-style dribble bib that is both super-absorbent, and is adjustable in size so it’ll be useful for a long time. And once you get the knack of making them, you can set up a little production line and make a stack in different fun fabrics.

You will need:
Paper and pencil to draft a basic pattern
30cm knit fabric (jersey or interlock), which tends to be more absorbent than woven fabric (this rainbow plush jersey can be found here)
30cm medium weight cotton (brushed cotton/flannel are ideal), for adding body to the bib
30cm soft, fluffy fabric (micro fleece, toweling or velour), as a further barrier and feels nice if the bib touches the baby’s skin
matching thread
2 X press studs/poppers (poppers that attach with a clamp have been used here, but sew-on press studs are fine as long as they are securely stitched on)


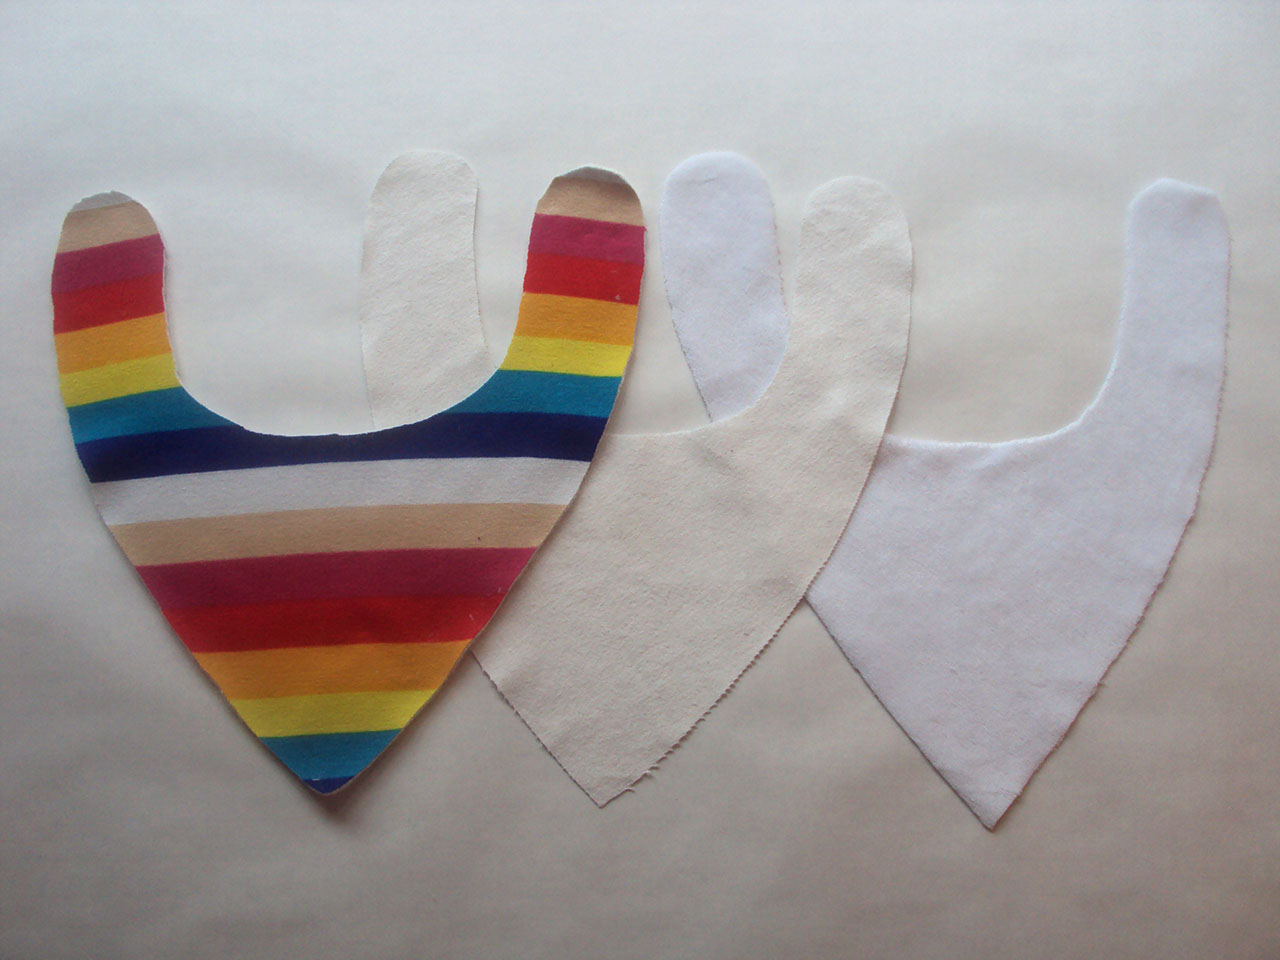
Draft a simple bib pattern shape like the one above. Mine is 28cm long and 12cm wide (which will be doubled when cut on the fold) including 6mm / ¼” seam allowance. (pic3)


Cut out three bib shapes on the fold:
1 X top layer in knit,
1 X middle layer in cotton,
1 X bottom layer in fleece, toweling or velour


Place the middle/cotton layer down on the table. Next, position the top/knit layer on top of it, right side facing up. Finally, position the bottom/soft layer on top of that, right side facing down. Pin the three layers together.


Stitch round the edge, leaving a gap of approx. 4cm / 1½” for turning the bib through. (PLEASE NOTE: I have used a contrasting coloured thread here for clarity, however it is advised that matching thread is used). Check that you have stitched through all three layers all the way round (excluding the gap). Re-stitch over any areas where one or more of the layers didn’t get stitched through initially.


Trim the seam allowance leaving 3mm / ⅛” all the way around, except at the gap. This is particularly necessary around the tight curves. Trim away the seam allowance at the point of the bib close to but not through the stitching. This reduces bulk inside the bib when it is turned through.


Turn the bib through so the knit fabric and the soft fabric are on the outside and the cotton layer is hidden inside. Use a pin to gently tease out the fabric at the point.


Tuck the seam allowances inside the gap and pin it closed.


Top-stitch round 3mm / ⅛” from the edge. Give the bib a press.


Apply two sets of press studs/poppers at the ends, 4cm / 1½” apart.


Ta dahhhh! One jazzy dribble-catcher complete.
Related Posts Plugin for WordPress, Blogger...