Showing posts with label swimwear. Show all posts

Friday, 3 July 2026

Free Pattern Friday: Jace Swimsuit Top / Bikini Top for Adults


Welcome to my monthly 'Free Pattern Friday' feature, where I road test a free sewing pattern or tutorial: sometimes a children's one, sometimes an adult's one. I try to publish these posts every first Friday of the month, timed to provide inspiration for those who plan to get their sew on over the weekend. I firmly believe that, if you pick your projects carefully, sewing doesn't have to be a crazy-expensive way to clothe yourself and your family. Thanks to all the amazing pattern designers who have offered up their hard work for us to enjoy for free.

So I've been doing this Free Pattern Friday series for a longgggg time (like, nine years or something?), but I think an adult swimsuit pattern is a first! How cool that?! After all this time, I can find a pattern type that has a free version that I want to make. Anyways, I'm determined to spend more time at the beach and in the sea this year than last year. Which really won't be hard because I don't think I went in once in 2025, despite living only a twenty minute walk away from the sea. 

I think that mix and match swimswear separates make sense, and if I make any pieces that are too small, I can pass them onto my big kid easily enough. This particular pattern, the Jace Top by Edgewater Ave, has multiple pay-what-you-feel options as well the option to pay nothing. Thanks to Edgewater Ave for making this pattern accessible to sewists with any amount of disposable income. 


(image source: Edgewater Ave)

Pattern type: 

The Jace top is a bralette style bikini top that is potentially-fully reversible, depending on what you use to line it. The pattern comes as a downloadable PDF file that can be printed on a home printer (it is not a layered file). There is no written tutorial, only a video tutorial to show how to construct it. The video includes the basic method, plus a version that includes an under band. I chose to include the under band for a more supportive top. An option to create this  including removable cups is mentioned in the video but not shown explicitly. 


Sizing info: 

This pattern has been graded from XS to XXL, which translates to 30" to 42" bust. My bust measurement sat on the cusp of the S and M sizes. I picked the latter and I'm pleased with my choice. Different swimsuit fabrics might be more or less stretchy, so that might effect your size selection. 


Fabric info:

Swimsuit fabric is the only info given, which is fair enough in this instance! You could use two different swimsuit fabrics to make a reversible version, although I think you're always going to see a bit of the other fabric peaking out around the edges. You could use self fabric for both layers (the same fabric for both), which would probably feel nice and secure, especially if you included the under band. I was using the very last piece of some swimsuit fabric I scored from an old job about thirteen years ago, and I only had enough for one layer. I used some beige coloured swimsuit/lingerie lining that I had in my stash to line it. 

You also need swimwear elastic for the straps, and for the under band if you're choosing to include that. I used 1cm rubber elastic for the straps, and 2cm elastic for the band. 


Findings:

The pattern file itself was easily accessed and professional. I don't entirely understand why you have to print out a whole front and back piece, rather than halves to be cut on the fold, but I get that whole pattern pieces are not uncommon in swimwear making. 

But I'll be honest with you, I really would have appreciated written instructions instead of, or as well as,  the video tutorial. There were lots of parts of the video that weren't really necessary (like watching the maker cut every pattern piece out of their fabric and sew every seam on their overlocker/serger), and skipping forward to the useful bits was tricky because it wasn't clear when something relevant and useful (like the length you're meant to cut the straps) is being said in the voice over. It also would have been really useful if the side seam construction part was shown in real time rather than sped up. I struggled to see what was going on in that section and had to rewind it a bunch of times. I wonder how a beginner sewer would have got on with that. 

I must admit that I was skeptical about how secure this top would feel without any elastic attached to the neckline edge or armholes, but actually it feels fine. I did find the straps to be a bit too long, perhaps 2cm or so too long for my body, and because of the clean construction method, it's likely to create a bit of a mess if I were to alter their length now it's done so I'll probably leave them as is. 

I made two changes to the construction method. Firstly, I added some understitching along the back and the front neckline to prevent the lining from peaking out. And secondly, I didn't like the method suggested for adding the band so I went rogue there. I basted the outer and lining layers together along the bottom edge, then constructed the band and inserted the elastic into it, basting those together. THEN I attached the band to the bottom edge of the top with an overlocker, going through all the layers and securing the elastic in place. 


Customisation ideas:

  • Cut this pattern out in jersey and use it to make a bralette or sports bra style top
  • Apply a ruffle to the neckline or straps
  • Create seam lines and create a colour blocked effect
  • Try applying elastic vertically at the centre front to create ruching and a sweetheart neckline


Would I make it again?

Very likely! It was a quick and pleasing make. I could imagine getting really into swimwear making and Edgewater Ave have a LOT of interesting styles worth trying. 

Monday, 27 June 2022

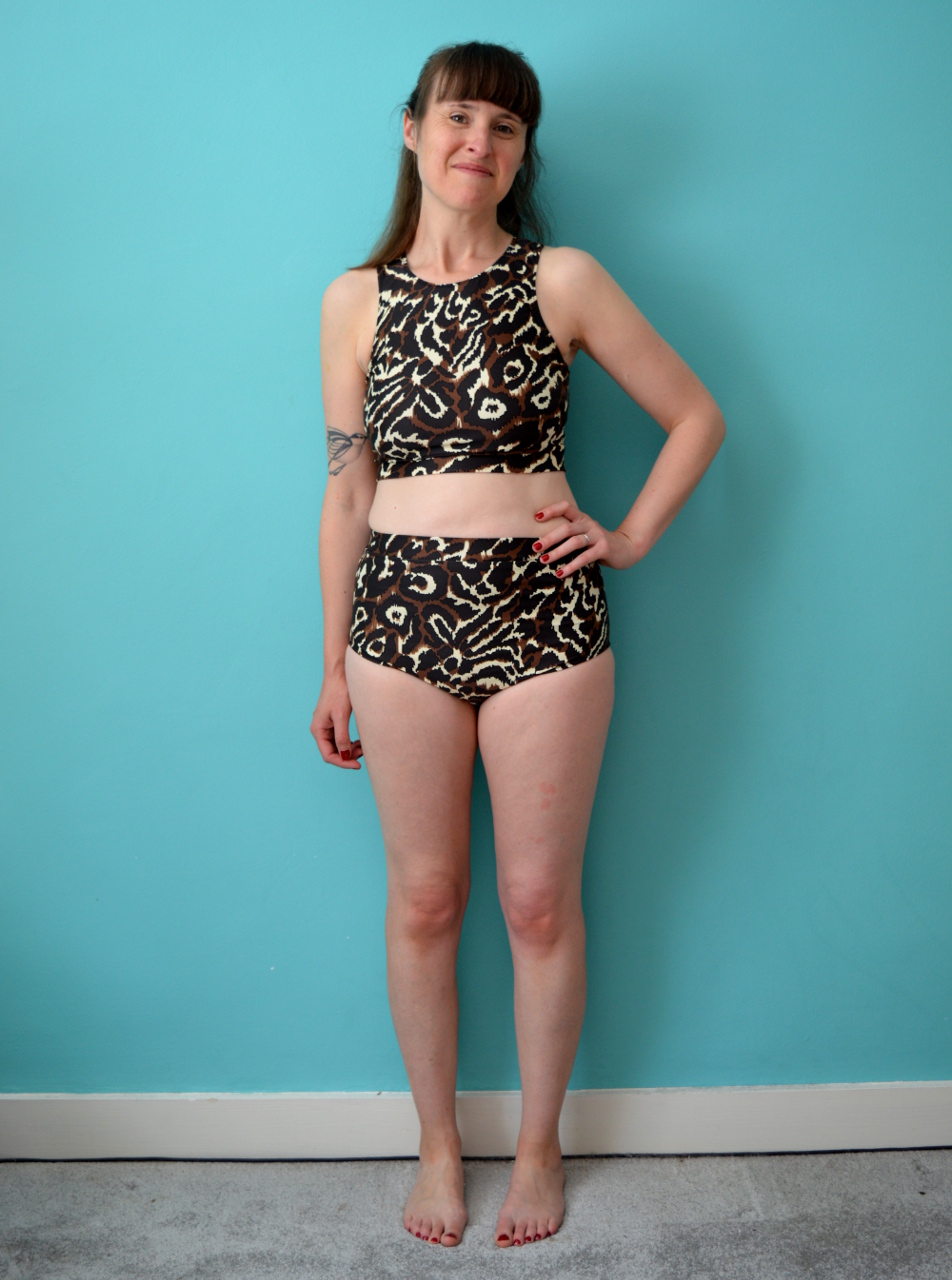
Leopard Print Bikini


I'm going to make this a speedy post but I wanted to share a recent make. I'm lucky enough to have a holiday to Italy booked for later this summer and the accommodation we'll be staying in has access to a swimming pool. I decided to continue my exploration into swimwear making and make this, my second two piece set. It also gave me the opportunity to finally use this piece of leopard print swimwear Lycra that's been in my stash for over ten years! 


Patterns:

A few months ago I made the Vernazza two piece pattern by Friday Pattern Company, proof of which you can see on my Instagram account here. It came out far better than I expected, particularly the bottoms, which I combined sizes to make. I traced the size M for the main part and graded up to the size L for the waistline and the fit is pretty much spot on. Therefore I went straight for the same pattern for this version, the only difference being that I inserted elastic into the waistband to make them feel more secure. 

The top half is made using the Helen's Closet Sandpiper swimsuit pattern. I received this pattern for free sometime ago, and hadn't initially considered it one I'd be likely to make. But the relative simplicity of the style appealed and I felt it would be a good canvas for this fun print. I initially attempted a wearable toile of the pattern using some solid black swimwear Lycra, thinking if it worked I could then make the leopard version and have some mix and match pieces. Sadly that wasn't the case as my first version came out too tight. I guess that there must be a lot of variation in the stretch and recovery of different swimwear fabrics, and although I measured myself carefully, the size my measurements corresponded to was just too small. 

So for this version, I recut the pattern for the next size up AND added some additional length to the elastic that is enclosed in the armholes and neck hole. It worked well and this version looks and feel much better, although I don't feel super secure at the bottom edge to I might insert some elastic into the bottom band at some point. 


Fabric:

As I mentioned above, I've had this length of swimsuit fabric in my stash for an embarrassingly long time. It's survived a number of destashes over the years because I always knew I'd get stuck into making swimwear at some point. Both halves of this bikini are lined with basic, black, swimwear/dancewear lining fabric that I bought on eBay. 


Thoughts:

Unsurprisingly, I'm excited to try this bikini out when I go on holiday! I'm also committed to try swimming in the sea here in the UK this year, which is something I don't remember ever doing, despite living close to the seaside almost my entire life. 

Friday, 6 May 2022

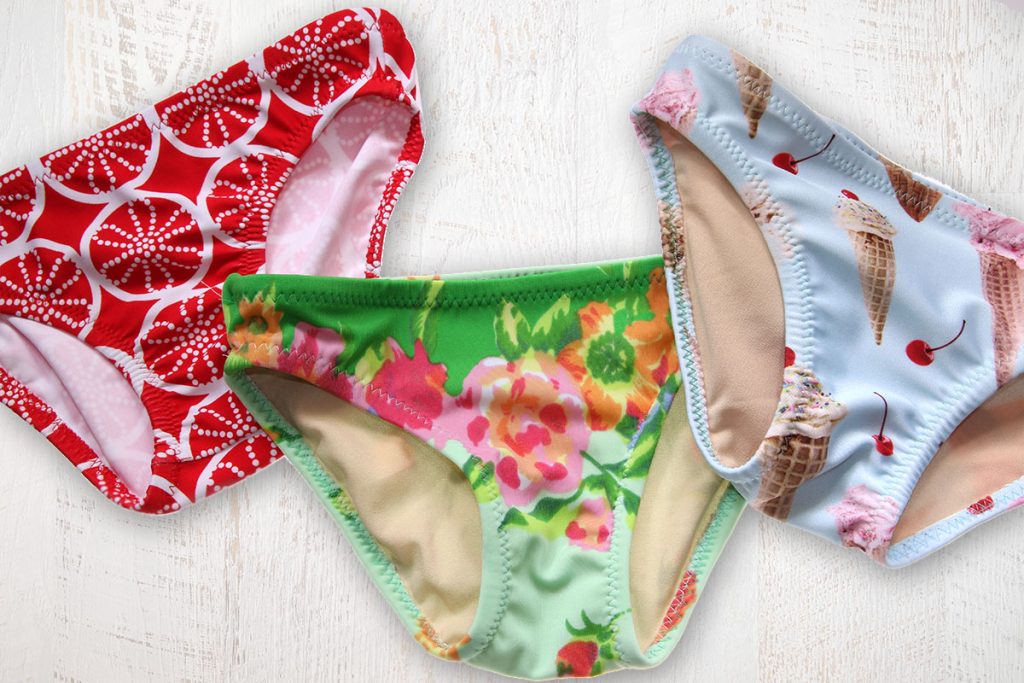
Free Pattern Friday: Kid's Bikini Bottoms


Welcome to my monthly 'Free Pattern Friday' feature, where I road test a free sewing pattern or tutorial: sometimes a children's one, sometimes an adult's one . I publish these posts every first Friday of the month, timed to provide inspiration for those who plan to get their sew on over the weekend. I firmly believe that, if you pick your projects carefully, sewing doesn't have to be a crazy-expensive way to clothe yourself and your family. I also firmly believe that pattern designers deserve to be properly paid for their work, so if you enjoy using a pattern and can afford to do so, make sure you support that designer. Some designers' websites offer the option to make a donation, alternatively you can buy one of their paid-for products. If you can't afford to do so, you can support the designer by sharing your project via social media to help draw more attention to their work. Thanks to all the amazing pattern designers who have offered up their hard work for us to enjoy for free.

When I first found this free sewing patterns years ago, I thought "Who would need a pattern for half a bikini?!". Well, it turns out, me! I recently made my daughter a two piece swimming cossie that consists of a top and cycling shorts-style bottoms. Initially the fit of the original cycling shorts bottoms wasn't great and I didn't have a lot of faith in them working out. Plus my daughter has swimming lessons, we live close to the beach AND we have a summer holiday booked with a pool on site, so I felt that expanding the set would be a useful endeavour. And it meant I could use up some of the leftover scraps of this spotty fabric. Lord knows I have enough scraps. 

Big thanks to Treasurie for making this bikini bottoms sewing pattern available for free. To access the sewing pattern, visit the blog post and you should find the download link buried in the text after the first couple of paragraphs. The blog post itself contains quite a lot of information including additional tips on how to use the elastic and sewing with Lycra. However, I really hate blog posts with heaps of pop-ups and imbedded videos, so I'd advise using the instructions in the PDF file once you've downloaded it. 

(image source: Treasurie)

Pattern type:

This pattern is for simple, basic bikini style bottoms. No bells. No whistles. The options include unlined, half lined (with lining at the front) or fully lined, depending on the thickness/opaqueness of your fabric and personal preferences. The pattern pieces could also be used at the basis for making undies. 

Sizing info:

The pattern is generously graded from two years to fourteen years. A body measurements chart is included to make sure you're selecting the right size for the child in question. 

Fabric info:

Lycra or spandex with at least 75% stretch is recommended for this project. It takes very little, so could be a great way to use up scraps from adult swimwear projects. I used some scraps of fabric probably originally intended for dance wear, and mesh swimwear lining. Swimwear elastic is also required. I used rubber elastic which I feel is less bulky than other types. 

Findings:

Once I'd navigated the annoying pop-ups and downloaded the pattern, it was very plain sailing. The PDF file, which contains both instructions and pattern pieces, is well designed and easy to use. It doesn't include the layers function, however the pattern pages are grouped into two size brackets so you're not wasting too much ink on unnecessary sizes. 

I appreciated the additional tips on handling this tricky fabric, which many sewers might not have worked with before. However, I do think I came up with a better and tidier (albeit more complicated and less beginner-friendly) construction method. I used a kind of burrito method for both the crotch seam (above) AND the side seams (below), which meant the insides were super neat with reduced bulk (*brushes her shoulders off*). 

The elastic I had to hand was narrower (6mm) than the pattern calls for (10mm), so I trimmed away the edge of the leg holes so that the crotch wouldn't end up too wide. After the faff of making the two piece bikini for my daughter, and then a bikini for myself, this project felt like an absolute breeze. The fit is excellent. 

Would I make this again?

Absolutely! Although my daughter prefers the look of the cycling shorts part of this three-piece set, I can definitely see myself reaching for this pattern again to bulk out her swimwear selection in the future. 

Thursday, 19 July 2018

Bombshell Swimming Costume


Two things. Firstly, I must explain, I find it difficult and a bit uncomfortable to refer to a swimming costume as a 'swimsuit', even though I'll be the first to admit that the latter is much quicker to type. Secondly, no, neither do I feel entirely comfortable posing in the aforementioned garment and publishing those pictures on my blog. However, in the spirit of body positivity, I've done it anyway. 

I've been sewing for a long time now, but there are still a few types of garments I have yet to try to make for myself. Swimming costumes are one of those garments because I rarely go swimming, and, therefore, the hand-me-down costume my best friend gave me about ten years ago is still fine. However, earlier this year we had a holiday booked to visit a friend who lives in Madrid, along with other old school friends and their families. During that holiday, we planned a trip for all the laydeez to visit these amazing Hamman Arab baths, and I just didn't fancy going to them in my old, rather sporty-looking costume.  


Pattern:

I decided to opt for the Closet Case Pattern Bombshell Swimsuit pattern because, A) I liked the coverage the retro cut gave around the lower part (including the front 'skirt' section), B) I already owned it, and C) with both thorough-looking instructions AND a series of helpful sewalong blogposts, I knew my hand would be sufficiently held throughout the preparation and construction. I already owned this pattern because it came as part of a Perfect Pattern Parcel I was sent to review years ago, and although I didn't choose this particular pattern to make from the parcel at that time, I'd kept it in mind as a potential future project. 

Truth be told, I made this swimming costume many months ago now, so this isn't going to be the most detailed review I've ever written. However, I do recall being surprised in a number of ways; by how much fabric this pattern required, by how many pattern pieces there were, by how many construction steps were involved, and in the end, by how much the finished thing weighed! I really like how this pattern offers different design options. As you can see, I opted for the gathered bust top and decided to include the option of adding foam cups to (hopefully) give a smooth line over the bust. Instead of buying special swimwear compatible cups, I unpicked a bra that I decommissioned around the same time. 

(image source: Closet Case Patterns)

Size-wise, I attempted to blend between the size 8 for the top part, and the size 10 for the waist and hip area. This was a tricky task because of how the sizes were grouped, and sadly wasn't as simple as blending between sizes at the side seams. I also folded out a bit of length from the front and back lining pieces to account for my short-waistedness. I didn't attempt any kind of toile/muslin to determine this, I just went for it and hoped for the best. 

I found the gathering of the side and centre back seams of the front and back pieces my least favourite part of the construction process. Gathering up all that fabric on both sides was tricky, and then I decided to add rows of basting stitches to keep the gather in place. Then I thought that the basting stitches were messing with the measurements and stretchiness of the side seams, so I attempted to remove them. Then I realised that taking them out had stretched the gathered sections so I needed to redo all the freaking gathering again. In the end, the side and back seams are pretty ridged with no stretch, but thankfully it doesn't seem to be an issue or affect the fit. 

I also recall having trouble inserting and working around the foam cups. The top edge is not very neat because of that and my topstitching is pretty shocking. A fact that I mentioned several times to my friends, none of whom gave a shit, and rightly so.  


Fabric:

After seeing the name 'Funki Fabrics' popping up on blogs as a source of swimwear fabric, I lost many happy hours combing their site. I was sorely tempted by this amazing, solid jade green, semi-eco fabric, but in the end, for my first attempt at making swimwear, I decided to find a cheaper alternative (as you can imagine, the ruching on this swimming costume makes it fairly fabric-hungry). Whilst doing more research into my options, Helen from Helen's Closet's stunning solid black version inspired me to opt for something darker, and I ended up finding some inexpensive solid navy swim/dancewear fabric and matching navy net lining on eBay. 


Thoughts:

When I first put this swimming costume on, I felt sexy and sophisicated. I LOVE the coverage and how held-in I feel around my lower half. I also love its structure in general that's created from all that ruching (my version is more ruched than most, probably because I shortened the lining pieces but didn't alter the outer pattern pieces, resulting in more gathering of the outer fabric to match up with the lining). However, the top half doesn't feel so secure. The bra cups have been added in (thankfully) roughly the correct position for my boobs, but without the back band that holds a bra in place, the cups are not supportive and the top edge doesn't always remain against my skin when I'm splashing about in the water. I considered removing the cups altogther, but I can't face that faff, nor am I sure my droopy ol' post-breastfeeding bust look very nice without them. 

If we're nit-picking here, I may as well also highlight the side seam's weird wibble. I've figured out that that's been created by the tension of the leg hole elastic where it joins the side seams. I've noticed this wibble on some other people's bombshells, and general I'm able to overlook it on my own. 

Even though my feelings about this particular swimming costume are mixed, it was a fun and engaging (read: lengthy) process and a great introduction to making swimwear: to the needles, fabric and elastic that's involved. Eventually, I'd love to have another whirl at making a swimming costume, although most likely one that's a far simpler style and corresponding construction, and with a bust area that definitely won't flap about!

What about you? Have you made swimwear? What do you like about it? Or what has put you off from trying?
Related Posts Plugin for WordPress, Blogger...